|
|
 Mike Howe Mike Howe |
| November 12, 2007, 5:08pm |
|
 MiniMax, Hawk, GA (Tipacer), another Max to finish Ace Posts: 375
Time Online: 7 days 7 hours 30 minutes
|
Alright! Congratulations! A man, his wife and his plane. Now, just add in some little airplane building helpers and a dog to keep your feet warm and you'll have the complete picture! I'm sure you two will have a wonderful journey ahead of you.
God bless.
Mike Howe |
|
Mike Howe
howetyr@yahoo.com
|
|
|
|
|
|
| Larry |
| November 12, 2007, 6:07pm |
|
 Ace AcePosts: 1,139
Time Online: 6 days 18 hours 49 minutes
|
Congrates on the new wife. I haven't been following this thread, but should. Understand that with a wood airframe most problems can be fixed without drastic measures. At one point you mentioned the crossmembers in the cockpit area popping loose. They will when you pul the front together unless you leave that area clamped together. We used some blocks and bar clamps this way we could slide the bottom sheeting in place after the front was pulled together without removing the clamps.
Keep it light, don't over build, and don't deviate from the plans. It will perform and fly like it should. Best of luck and have fun.
Larry |
| a mile of road will take you a mile, a mile of runway can take you anywhere. |
|
|
|
|
|
| Cy V |
| November 12, 2007, 6:34pm |
|
 Ace AcePosts: 640
Time Online: 14 days 16 hours 39 minutes
|
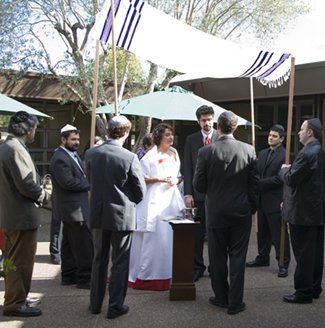
But in the background...I can se a man carrying a spar...!! Ari...you don't bring with you your MiniMax-project to the church....do you..???
Knut A
LOL!! It DOES look like a guy carrying a spar, doesn't it? |
| Bad spellers of the world untie! |
|
|
|
|
|
| Bob Hoskins |
| November 12, 2007, 10:22pm |
|
 Fly Safe AcePosts: 1,208
Time Online: 38 days 16 hours 39 minutes
|
Hi Ari and Irene;
Congratulations to the both of you. May your life together be full of wonderful things, and some little things, LOL.
My wife and I have been married for 44 years, we met in first grade. I would not trade a minute of it.
I wish you both all the happiness and good health in the world.
Sincerely, Bob |
| Fly safe and have fun. |
|
|
|
|
|
| Ricardo |
| November 13, 2007, 12:36am |
|
 Videos in UTube: ral1951 AcePosts: 2,772
Time Online: 75 days 23 hours 15 minutes
|
Ari and Irene:
Thanks for sharing those happy moments.
Congratulations to both of you, I wish you the best and I hope you'll have a beautiful and happy family in the future.
Ricardo |
|
|
|
|
|
| iter |
| November 14, 2007, 7:47am |
|
 Ace AcePosts: 512
Time Online: 309 days 1 hours 7 minutes
|
Guys, thank you so much for your wishes! I feel like I've known you forever, and being able to share this very special moment with such wonderful friends makes it even more special. Re man carrying a spar. He is holding one pole of the Chuppah. I briefly considered making them out of RS wood, but decided against it. Some chuppahs are very elaborate, but we made ours simple and modest. This works for me in spiritual life as well as in airplane building, so in that sense I did bring the airplane with me :=) Ari.
|
|
|
|
|
|
| Ed Gil |
| November 26, 2007, 12:56pm |
|
Flight Leader  Posts: 173
Time Online: 18 days 3 hours 58 minutes
|
Has anyone heard from Iter? Hopefully he is just away on his honeymoon, just hope all is well with him. |
| Ed Gil.... Max owner -Hays, KS |
|
|
|
|
|
| Knut A |
| November 26, 2007, 6:02pm |
|
 LN-YJE AcePosts: 779
Time Online: 21 days 16 hours 8 minutes
|
Shhhhhh... Don't disturb them yet ....let Irene have him for herself for a while. Don't remind them about T88, spars, ribs, CAD and so on yet. He may be stressed, and we all knew what can happen then....!  Knut A |
|
|
|
|
|
| skyblazer |
|
Ace
Posts: 213
Time Online: 29 days 11 hours 48 minutes
|
Update please Ari, this post has 7,825 hits. thats got to be a record.  |
|
|
|
|
|
| Gene |
|
Ace
Posts: 283
Time Online: 9 days 1 hours 4 minutes
|
Hi,
Re the "Photo of the Moment" which is on right now, I would swear that this is a picture of Jim Chuk's runway....!
Gene |
|
|
|
|
|
| himaxflyer |
|
Ace
Posts: 487
Time Online: 19 days 10 hours 38 minutes
|
I don't kinow Gene, I see a red Airbike with a nosewheel........ You should see the runway right now in real life. It got 13" on snow on it last night. I put the skis on the plane and hope to use them tomorrow. Actually the photo of the moment is kind of neat, it's supriseing how often I see one of my pics there. Jim Chuk |
|
|
|
|
|
| Pilotpeat |
|
 Ace AcePosts: 498
Time Online: 13 days 4 hours 21 minutes
|
That must be some honny moon they went on... |
|
|
|
|
|
| iter |
| December 6, 2007, 12:18am |
|
Ace
Posts: 512
Time Online: 309 days 1 hours 7 minutes
|
Hi everyone, sorry to keep the suspence up like that. We are stranded on the Pacific island of Maui and don't expect to get rescued until next week. As long as I'm writing here, I want to thank Dennis. I received your metal part just before we left and it looked great! I'll post photos of it when we get back. Thank yo so much!
People have asked me for my DXF files. I'll come up with an orderly way to distribute them when I get back. If you have a /burning/ need for them, let me know.
Also, I don't think anyone from HI is on this board, but if you are, it would be cool to meet in real life.
Ari. |
|
|
|
|
|
| iter |
|
Ace
Posts: 512
Time Online: 309 days 1 hours 7 minutes
|
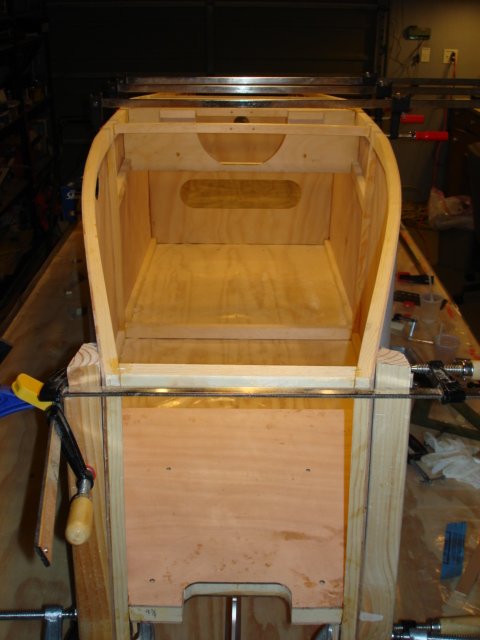
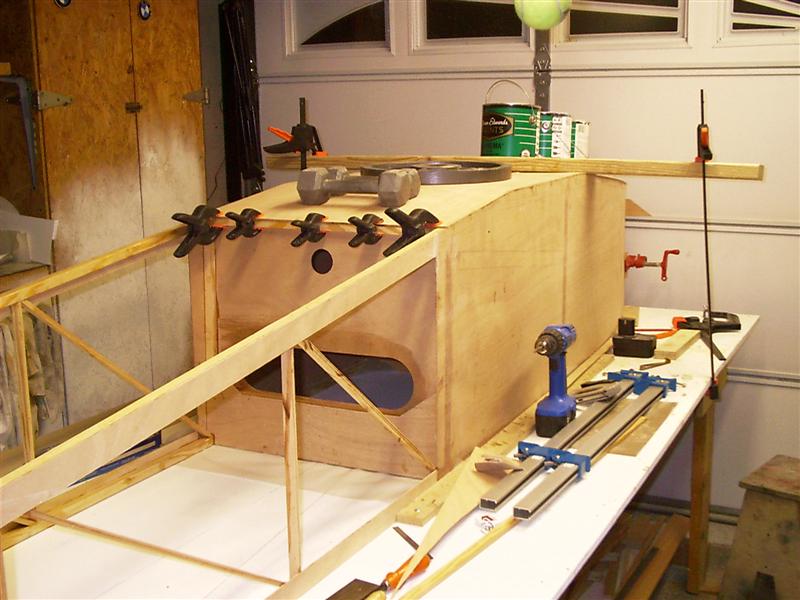
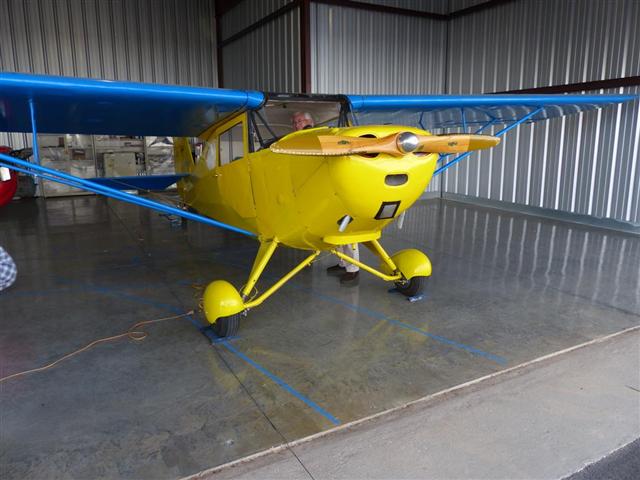
Hours today: 4 Running total: 236 Back to square 218I haven't touched the project in 2.5 months, in large part because I was stuck with the motor mount at an odd angle to fuselage sides. I finally decided to bite the bullet and redo the front end. I am grateful to all who gave encouragement and advice in this thread-- http://www.lonesomebuzzards.com/cgi-bin/forum/Blah.pl?m-1199673789/s-0/. Using a heat gun, I pulled the joints, cleaned up the epoxy left on surfaces and glued back the joints that delaminated (I posted photos of the damage in the other thread). When the glue dries tomorrow, I'll be back to where I was in early November, but wiser hopefully. Ari.
|
|
|
|
|
|
| Charlie Harris |
|
 Ace AcePosts: 922
Time Online: 23 days 31 minutes
|
Iter: I see You Have repaired the delaminations on the mount. If you ever need to you can use a litttle low pressure air from a compressor to blow the glue up in the crack if you can't put it in with a blade. Works well. Charlie |
|
|
|
|
|
| iter |
| January 19, 2008, 12:39am |
|
Ace
Posts: 512
Time Online: 309 days 1 hours 7 minutes
|
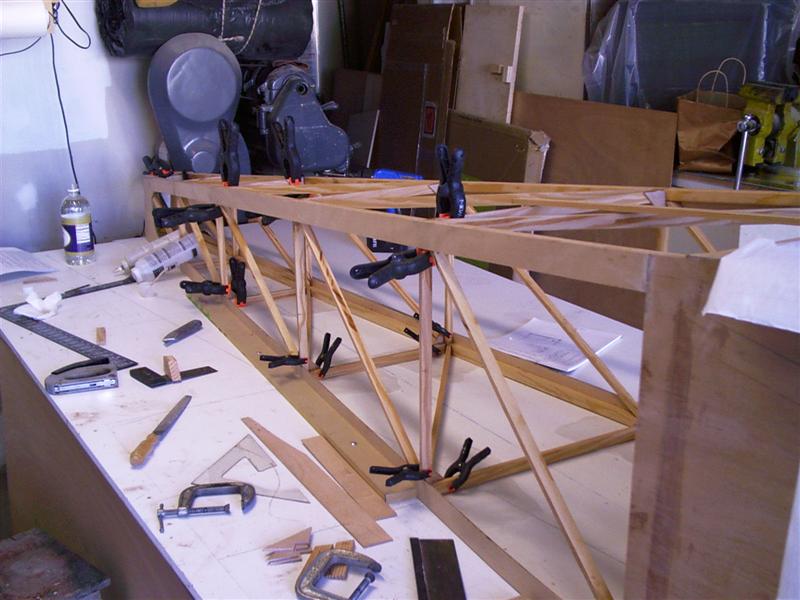
Hours today: 4
Running total: 240
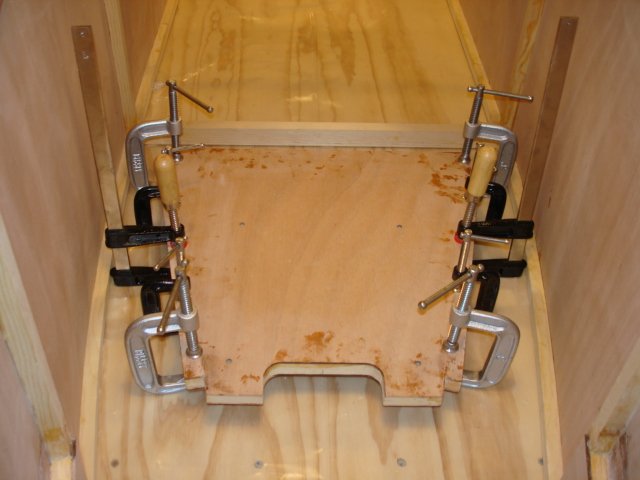
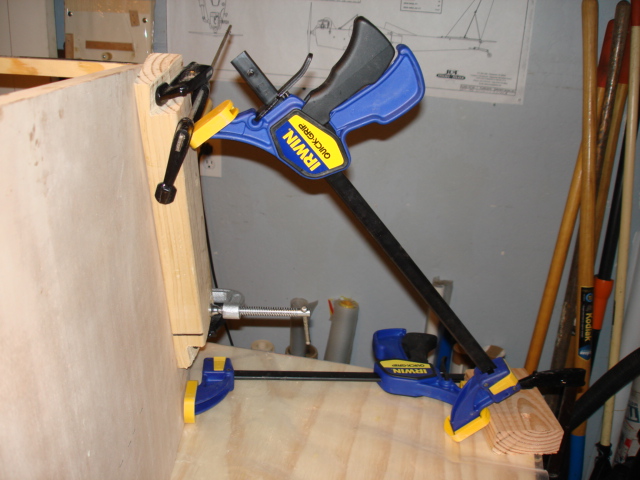
2.5 months and over $100 worth of bar clamps later, I think I have a square nose drying in the shop. The manual says, "A couple of crank-up bar clamps will hold sides together while the glue cures." For sure. There are 11 clamps in this picture, including 3, 36" ones that hold the middle section together--I had two more cross-member pop out again before I broke down and bought the long clamps. I'm going to follow Randy's advice and keep the clamps there until I'm done gluing in the bottom plywood.
Ari.
|
|
|
|
|
|
| Randy lewis |
| January 19, 2008, 12:52am |
|
 Ace AcePosts: 965
Time Online: 21 days 18 hours 20 minutes
|
Ari, there is truth to the saying 'one never has enough clamps'. |
|
|
|
|
|
| iter |
| January 20, 2008, 12:12am |
|
Ace
Posts: 512
Time Online: 309 days 1 hours 7 minutes
|
Hours today: 1.5
Running total: 241.5
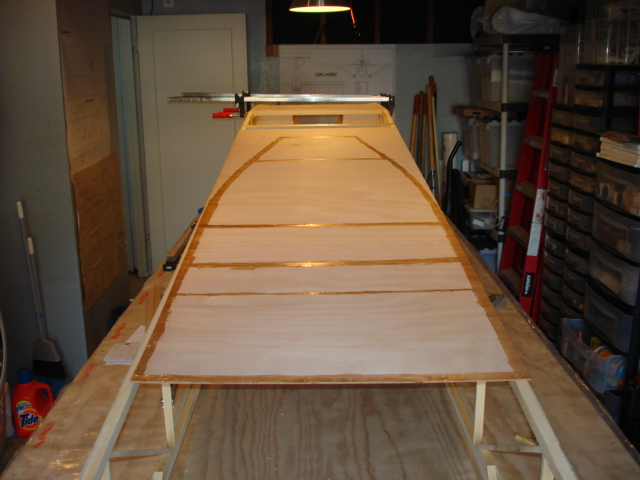
It looks like the frame cured straight this time and I'm ready to glue in the bottom plywood. When I was gluing up the sides, I could not believe how much epoxy the mahogany plywood soaked up. So this time I traced the frame's outline on plywood and painted it with epoxy. I'll let it sit for a couple of hours and then glue the sheet in place.
I also followed George's advice and rounded sharp edges in the bottom longeron. Thanks George!
Ari.
|
|
|
|
|
|
| Richard Wessel |
|
Guest User |
I'm at this stage in my rebuild myself. I guess I don't understand why you would want to paint the area and then let it set a few hours before gluing the sheet in place. My plan is to paint both the sheet and the frame with a liberal amount of epoxy and staple in place after letting the two parts sit for a short time. This way if the sheet soaks up to much I can add more epoxy if need be before I join the two.
BTW, Good Job! Nice and square! |
|
 Logged Logged |
|
|
|
|
| iter |
|
Ace
Posts: 512
Time Online: 309 days 1 hours 7 minutes
|
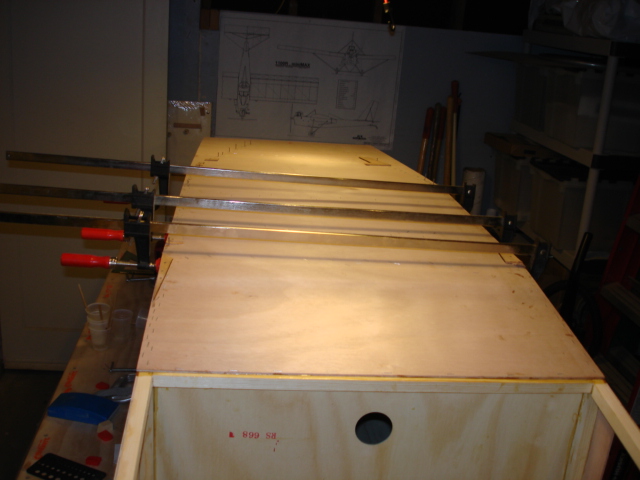
Hours tonight: 1.5 Running total: 243 Glued & stapled the bottom sheet in place. This turned out to be harder than I expected, and I'm worried about the seam's quality. The plywood wanted to stay away from the frame in a great many places, and where it wanted to separate, staples didn't hold it. I ended up using small nails in a few places. I had my wife shine a flashlight inside the fuselage which made gaps in the seam visible. I guess I'll know tomorrow if I closed them well enough.
Quoted Text
I guess I don't understand why you would want to paint the area and then let it set a few hours
My idea was that by then epoxy would gel enough to stop soaking into plywood, but not enough to make bonding with fresh epoxy difficult. Ari.
|
|
|
|
|
|
| Randy lewis |
|
Ace
Posts: 965
Time Online: 21 days 18 hours 20 minutes
|
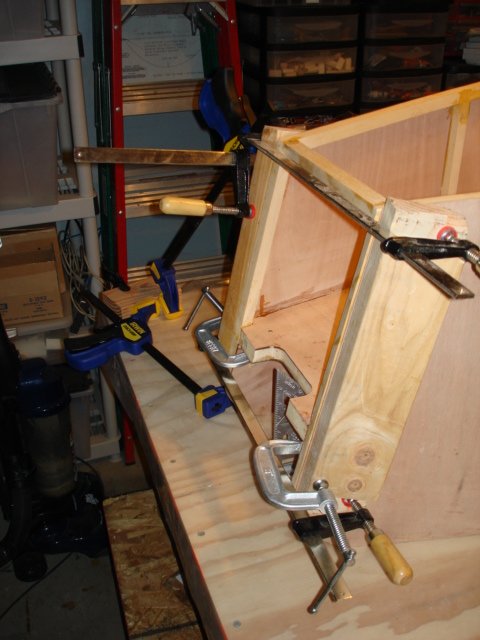
Ari,
Found a picture of how I held mine.
|
|
|
|
|
|
| iter |
|
Ace
Posts: 512
Time Online: 309 days 1 hours 7 minutes
|
Randy, your photos are great! Now if you could post them one step ahead of where I'm currently at instead of one step behind... :=)
Ari. |
|
|
|
|
|
| Randy lewis |
|
Ace
Posts: 965
Time Online: 21 days 18 hours 20 minutes
|
Let me know what your doing next |
|
|
|
|
|
| iter |
|
Ace
Posts: 512
Time Online: 309 days 1 hours 7 minutes
|
I'm waiting for epoxy to cure on the bottom skin (it's fairly cold here at the moment so I'm giving it extra time). Assuming that the bottom skin stuck, or after I fix whatever deficiencies in the glueline , I'll close the tail end and start putting in diagonals and cross-braces.
Ari. |
|
|
|
|
|
| Charlie Harris |
|
Ace
Posts: 922
Time Online: 23 days 31 minutes
|
First 5hrs. need to be at least 50 degrees for a proper cure. That came from Larry Isreal. probably works better. Charlie |
|
|
|
|
|
| Charlie Harris |
|
Ace
Posts: 922
Time Online: 23 days 31 minutes
|
Also on 1/8th sheeting staples should be at least 3/8th to 7/16th. some folks try to use 1/4. just not enough IMO! Charlie |
|
|
|
|
|
| Randy lewis |
|
Ace
Posts: 965
Time Online: 21 days 18 hours 20 minutes
|
No special tricks here just make sure things are straight and square. The book ends used for the front will help with this. I used a lot of T-88 building this section.
|
|
|
|
|
|
| iter |
|
Ace
Posts: 512
Time Online: 309 days 1 hours 7 minutes
|
Randy, did you have and problems bending the longerons to create the straight sections aft of station 5? I was surprised by how much force it took to bend the front, I hope the back will be easier.
Ari. |
|
|
|
|
|
| Charlie Harris |
|
Ace
Posts: 922
Time Online: 23 days 31 minutes
|
Iter: He has a straight edge screwed to the table holding it straight. that's what I did or it would have been crooked. I guess one side was easier to bend than the other. wood properties I guess. charlie |
|
|
|
|
|
| Randy lewis |
|
Ace
Posts: 965
Time Online: 21 days 18 hours 20 minutes
|
There is a strait edge screwed to the table on both sides ( can't see the one on the far side). The back, as I remember, bends a lot easier than the front, but make sure the top(bottom) longerons follow at the same bend. Somehow I wound up with them not the same when looking down on the fuse, so I had to cut the top (bottom) loose and re-glue. This step will be a lot easier if you have a second set of hands, one to bend and measure and one set to screw and clamp. (By that I mean screw blocks to the table, newlyweds) |
|
|
|
|
|
|