|
|
 Pilotpeat Pilotpeat |
|
 Ace Ace Posts: 498
Time Online: 13 days 4 hours 21 minutes
|
So when you cut these splices was your blade horrizontal or vertical? (was it going through both pieces or one piece at a time?) I am getting ready to cut the splices on my capstrips for the spars and am planning to do it the same way, only using a coping saw.
Pete |
|
|
|
|
|
| iter |
|
 Ace AcePosts: 512
Time Online: 309 days 1 hours 7 minutes
|
The blade was vertical, but I don't think it matters. It was just the way I clamped the pieces to my bench.
Good luck with your capstrips!
Ari. |
|
|
|
|
|
| Tom |
|
Ace
Posts: 744
Time Online: 16 days 10 hours 21 minutes
|
Do you sleep occasionally?  |
|
|
|
|
|
| iter |
|
Ace
Posts: 512
Time Online: 309 days 1 hours 7 minutes
|
I'm trying to get this project finished so I can get some sleep :=)
Ari. |
|
|
|
|
|
| iter |
|
Ace
Posts: 512
Time Online: 309 days 1 hours 7 minutes
|
Hours today: 2.5
Running total: 194.5
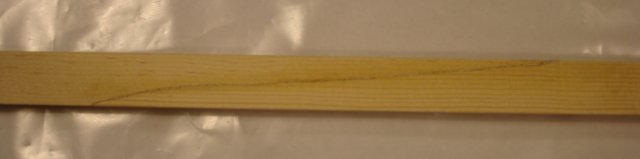
Cut most of the components for the second fuselage half. Here's what the splice looks like dry and sanded.
Ari.
|
|
|
|
|
|
| iter |
|
Ace
Posts: 512
Time Online: 309 days 1 hours 7 minutes
|
Erm, honey, why is there an airplane-looking-thing in our living room?
|
|
|
|
|
|
| Pilotpeat |
|
Ace
Posts: 498
Time Online: 13 days 4 hours 21 minutes
|
How close are those fires to you? I have relatives in San Deago and they had to evacuate.
Pete |
|
|
|
|
|
| iter |
|
Ace
Posts: 512
Time Online: 309 days 1 hours 7 minutes
|
I appreciate your concern. Silicone Valley is located on the San Francisco Bay, some 420 miles from the closest fire I've heard of. I've had people from all over the place express their concern and it's nice, but I'm nowhere near the fires.
Ari. |
|
|
|
|
|
| iter |
|
Ace
Posts: 512
Time Online: 309 days 1 hours 7 minutes
|
Hours today: 6
Running total: 200.5
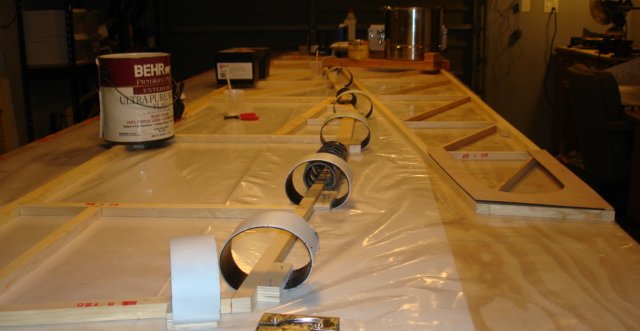
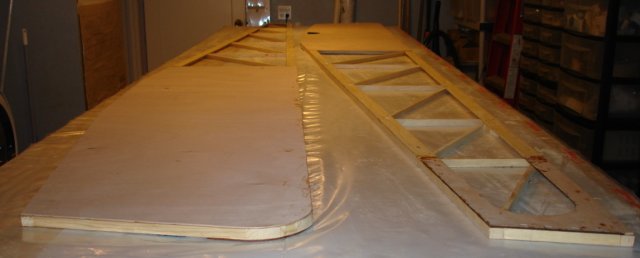
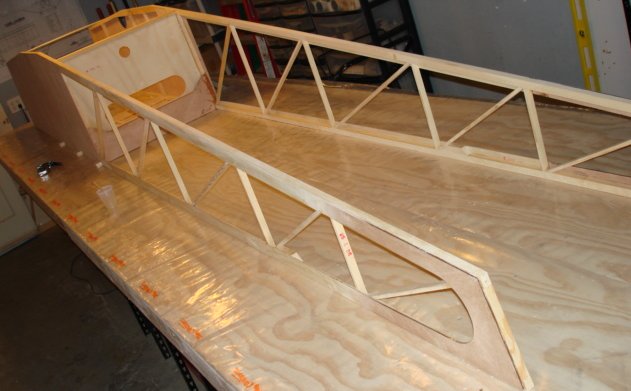
Cut plywood fuselage sides and other plywood reinforcements, laid up left fuselage half, glued plywood side to right fuselage half.
I spent mode time than I expected with the CNC mill today because it has a 48"x48" worktable, and the fuselage sides are 72" long. I had to make sure I reposition them after I cut one side, and when I do, the new cuts will line up with the initial ones. I think I more or less got it straight. I got a special kick out of cutting small things like the step, aileron cable exit holes etc.
I didn't fancy stapling these large plywood pieces to the frame like the plans suggest. Instead, I laid the plywood flat on my table and dropped the frame (with glue on it) on top. The photo doesn't look like much because pretty much the only things you can see are the wights on top. Better photos when it's dry tomorrow.
Ari.
|
|
|
|
|
|
| iter |
|
Ace
Posts: 512
Time Online: 309 days 1 hours 7 minutes
|
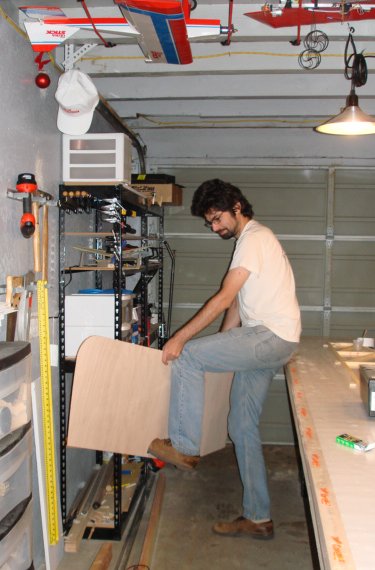
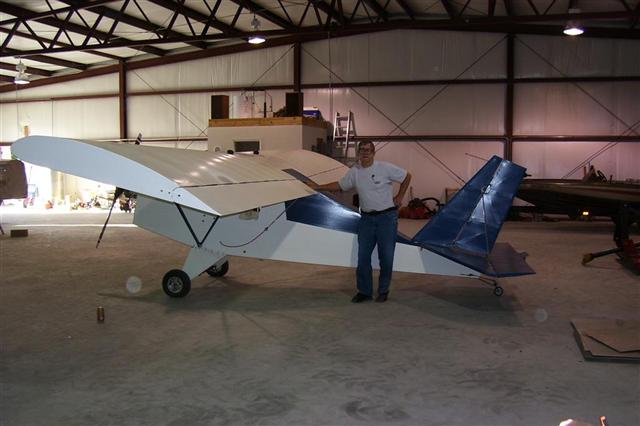
Here I am, trying my fuselage on for size.
Ari.
|
|
|
|
|
|
| iter |
|
Ace
Posts: 512
Time Online: 309 days 1 hours 7 minutes
|
Hours today: 7
Running total: 207.5
I cut some more CNC pieces today, and glued some of them up. Top to bottom, station 4 bulkhead, engine compartment walls, motor mount top and bottom; three of these components stapled to relevant wood pieces. Note the markings on laser-cut plywood--they help align RS pieces on top of them and came in especially handy on the motor mount. I figured, if I'm doing laser work anyway, I might as well avoid having to draw pencil lines on my pieces.
Ari.
|
|
|
|
|
|
| iter |
|
Ace
Posts: 512
Time Online: 309 days 1 hours 7 minutes
|
Hours today: 8.5
Running total: 216
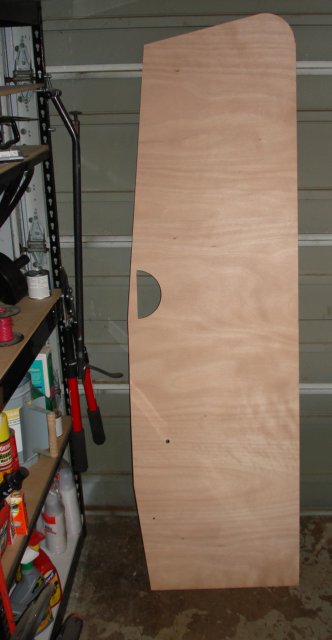
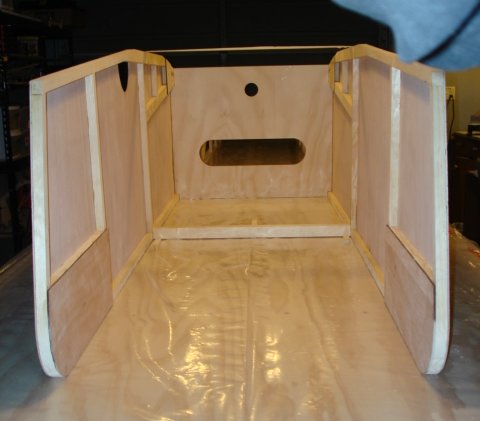
Finished both fuselage sides, including all plywood on them, and the rear spar carry-through.
Ari.
|
|
|
|
|
|
| Tom |
| October 29, 2007, 11:22am |
|
Ace
Posts: 744
Time Online: 16 days 10 hours 21 minutes
|
I can't help but wonder, wood and building in general can have so many variables, +/- a 1/4" here and there, I'll be very interested how all the parts line up after you've programed the parts right off the prints. Might be a good side job for you after you're finished to provide CNC parts for the kit industry! |
|
|
|
|
|
| djohn |
|
 Ace AcePosts: 648
Time Online: 24 days 19 hours 31 minutes
|
I have been wondering the same thing myself. As Levi Self so aptly pointed out to me, a prudent choice might be to bond a sheet to the fuse and hand router the openings for fit and finish. What Ari might be able to do is school us on properly bonding all the structure under the plywood so that standard "per plans" plywood shapes will work.
My $0.02
Dennis |
|
|
|
|
|
| Randy lewis |
| October 30, 2007, 12:15am |
|
 Ace AcePosts: 965
Time Online: 21 days 18 hours 20 minutes
|
The true test may be when he starts building 3 dimensionaly. |
|
|
|
|
|
| iter |
|
Ace
Posts: 512
Time Online: 309 days 1 hours 7 minutes
|
I can't help but wonder, wood and building in general can have so many variables, +/- a 1/4" here and there, I'll be very interested how all the parts line up after you've programed the parts right off the prints.
Glad you asked, I wasn't sure anyone was reading this thread anymore. Overall, the fit has been good. Apart from a couple of mistakes I made (more on that later), the two problems I've had have been oversize RS stock in JDT kit and cut-almost-but-not-quite-to-size plywood in the kit. The RSs are cut to reasonable tolerances, and I haven't seen one undersize yet, but the tolerances very. I've seen stock 1/16" oversize. This isn't a problem most of the time, except that you can't build it into the CAD files because you don't know if a particular RS will be its nominal size or not. The other problem is that most of the plywood is cut to outline dimensions. This means if you position a piece 1/8" off-center on the cutter, or at an angle, you'll ruin the piece because the part won't fit on it. With the 48"x48" CNC router, finding the exact center, and aligning the piece exactly on the axes, can get tricky. It would have been much easier to work with full sheets of plywood. Both problems would have been non-issues if I'd have bought raw wood and plywood instead of a full kit. I'll post a few photos of the fit so far for you to decide if it;s acceptable.
Might be a good side job for you after you're finished to provide CNC parts for the kit industry!
I'll sell you the DXFs if you think there's a business opportunity here :=) Ari. |
|
|
|
|
|
| iter |
|
Ace
Posts: 512
Time Online: 309 days 1 hours 7 minutes
|
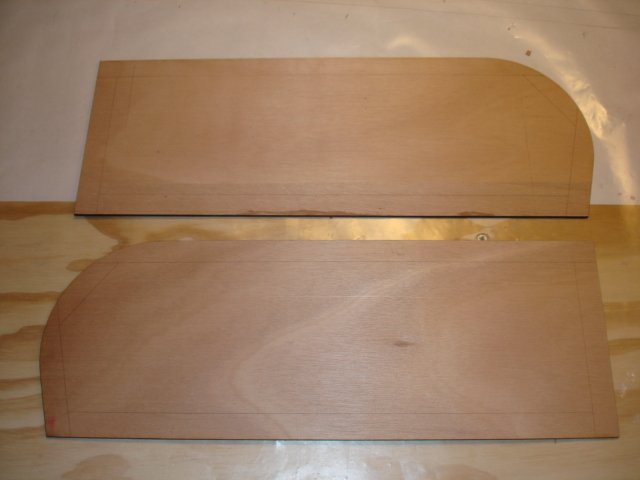
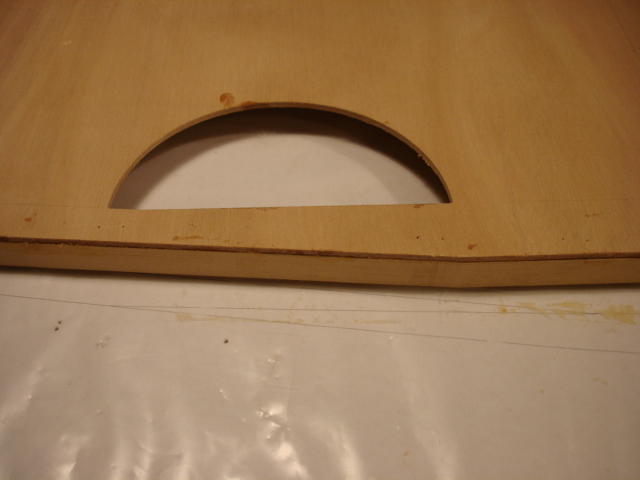
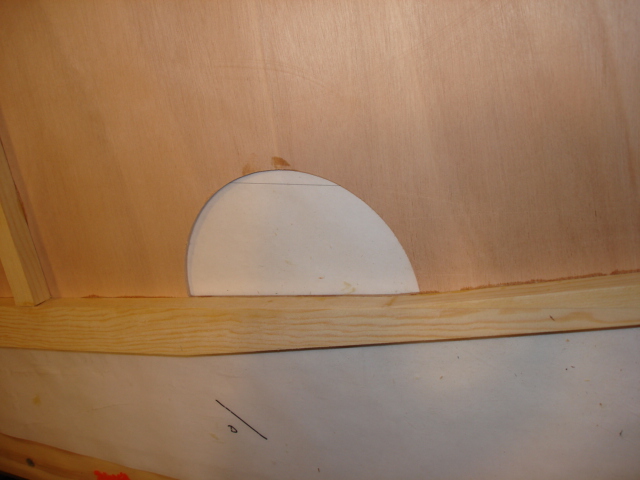
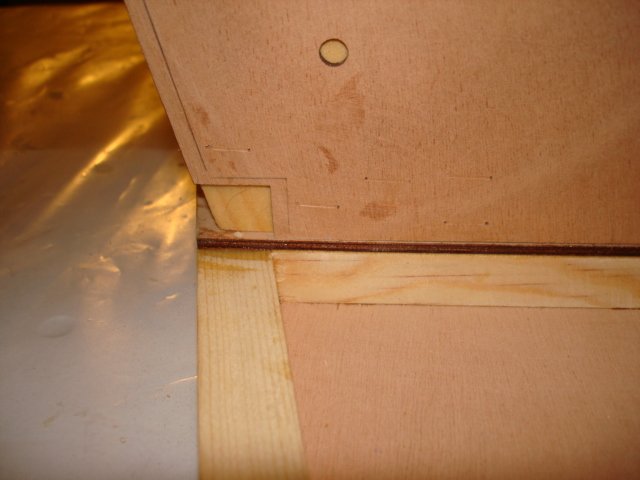
Step cutout.
Many different angles involved. I was worried about this one, but it fit within 1/64"
|
|
|
|
|
|
| iter |
|
Ace
Posts: 512
Time Online: 309 days 1 hours 7 minutes
|
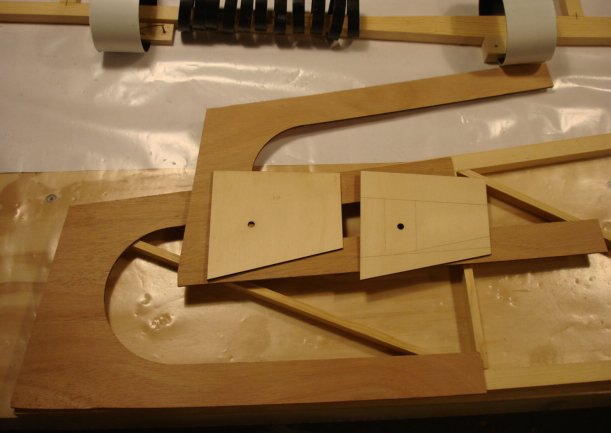
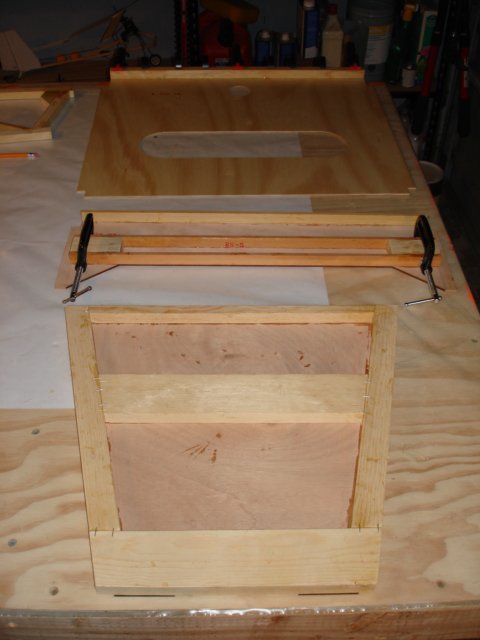
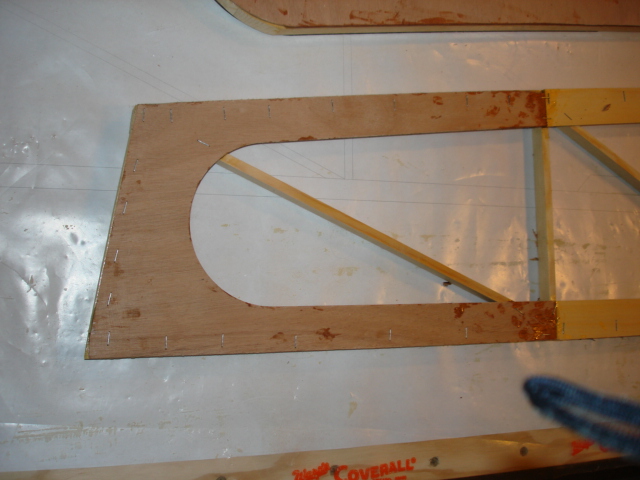
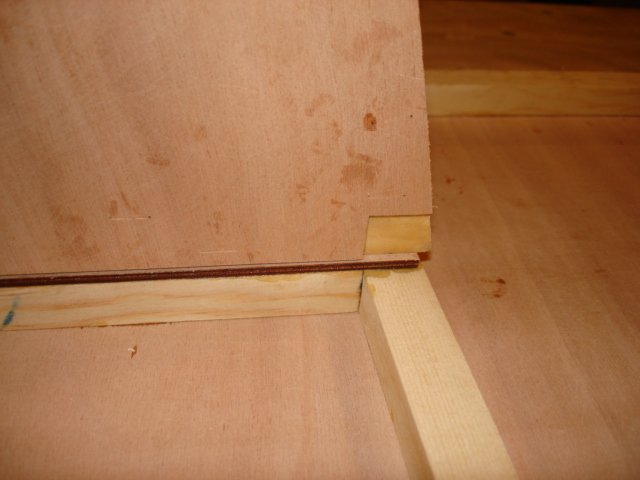
Motor mount reinforcement and fuselage-end gusset (pay no attention to glue spots)
The fit on both parts is good but note that the tail gussets is missing two corners--lower left and upper right in this photo. This is the result of "position error" in setting plywood on the cutter.
|
|
|
|
|
|
| iter |
|
Ace
Posts: 512
Time Online: 309 days 1 hours 7 minutes
|
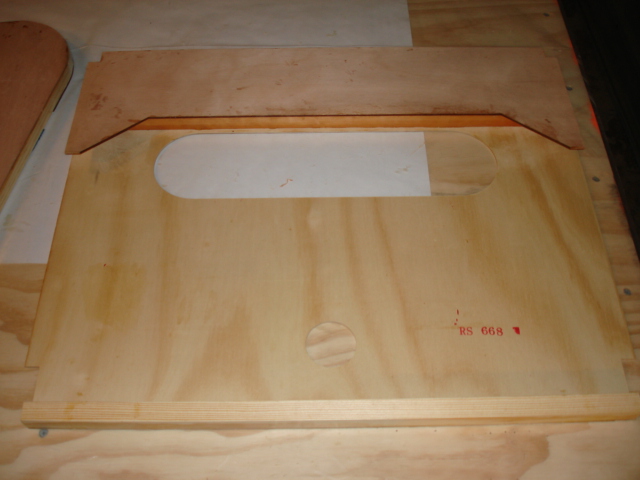
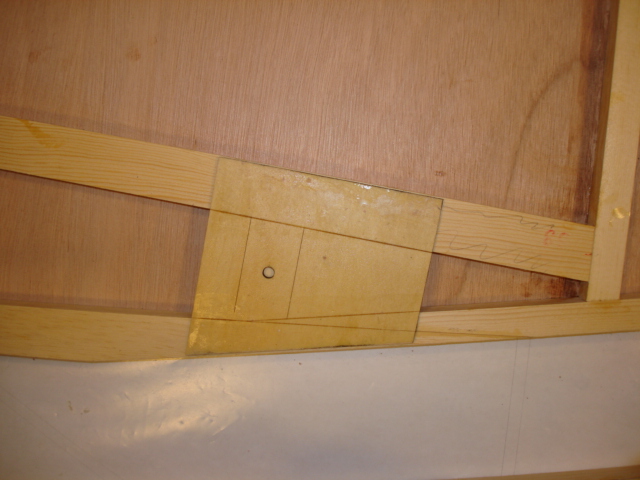
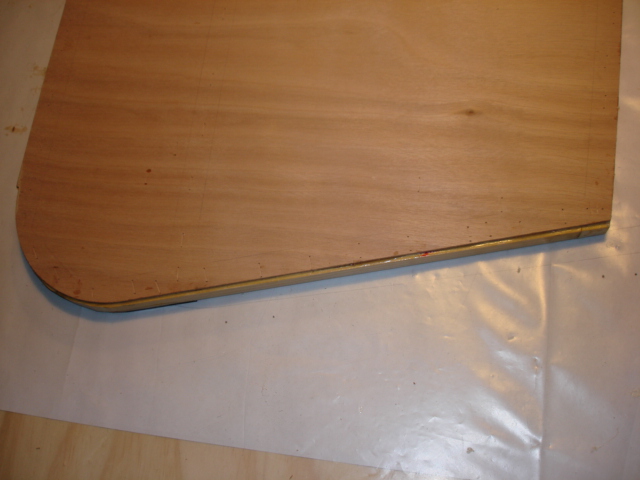
Seatbelt reinforcement gusset (matching hole on the other side in fuselage side panel).
I etched the gusset thinking it would ease assembly (and because I could). Since I glued the mahogany side panel first, the etching could not help me align anything because I could not see it. So I glued these gussets with the etching on their visible side just to show off.
|
|
|
|
|
|
| iter |
|
Ace
Posts: 512
Time Online: 309 days 1 hours 7 minutes
|
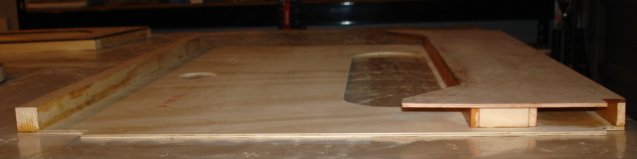
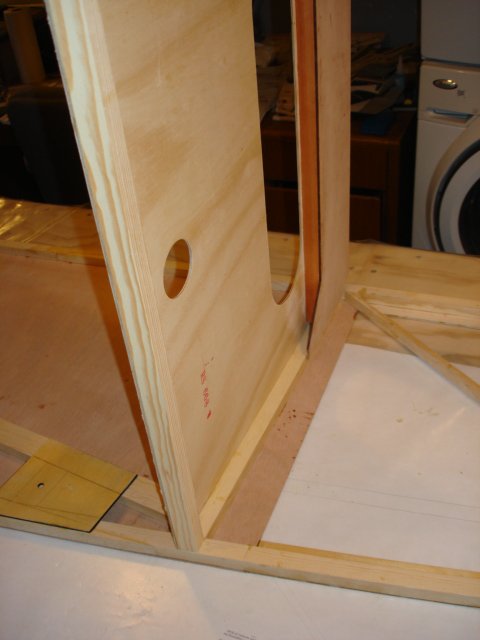
Motor mount base.
Here I made an honest mistake reading the plans. I sized the base to straddle a horizontal member, but where it's actually supposed to go is under it. The fuselage front is slanted, so pushing a member down requires shortening it. The end result is that the mount's bottom skin is exactly the right size to be its top skin. Before I closed up the structure, bot skins of the mount fit very well where I /thought/ they need to fit. As it is, I'll have to manually trim the mount to fit where it /needs/ to (you can see pencil marks that show ho much I need to trim)
|
|
|
|
|
|
| iter |
|
Ace
Posts: 512
Time Online: 309 days 1 hours 7 minutes
|
Here's a real flop, and I'm not sure what exactly went wrong. Both fuselage sides ended up about 3/32" too short. It stumps me, because I built both sides over the same drawing that I printed from the same DXF that I used to cut the plywood, and all other angles line up.
|
|
|
|
|
|
| iter |
|
Ace
Posts: 512
Time Online: 309 days 1 hours 7 minutes
|
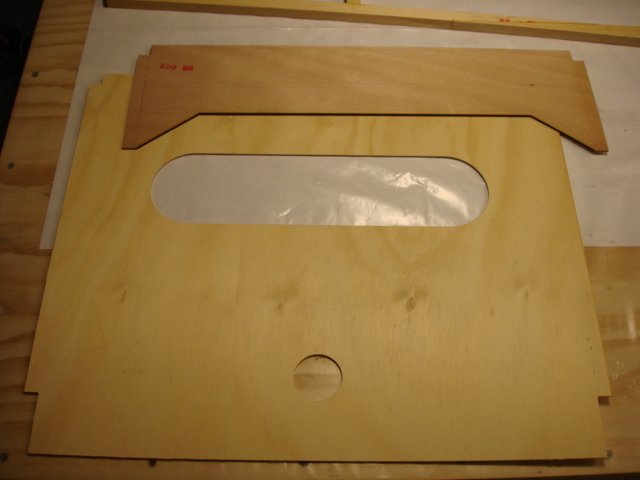
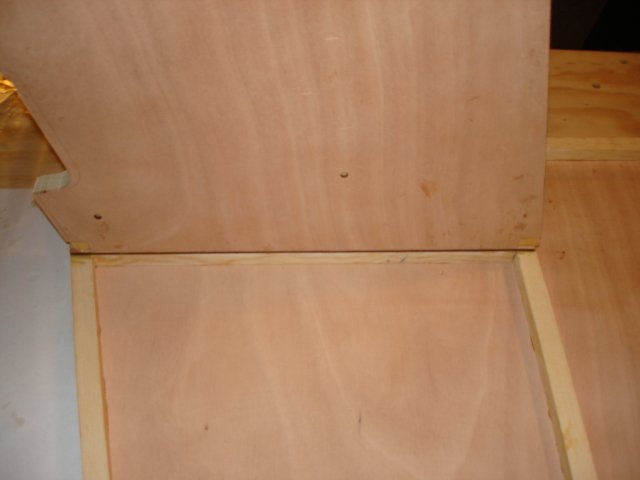
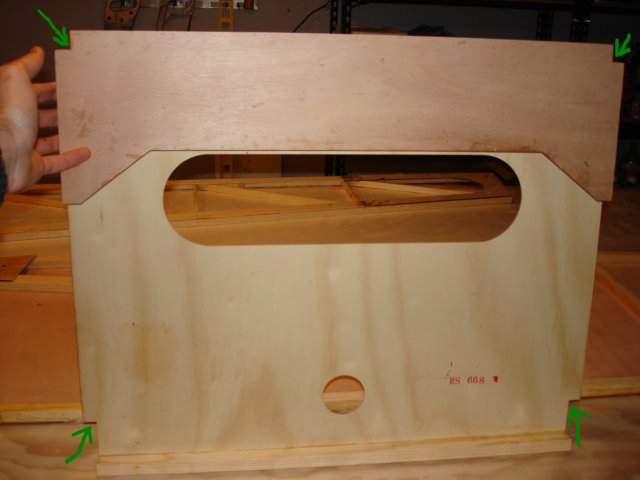
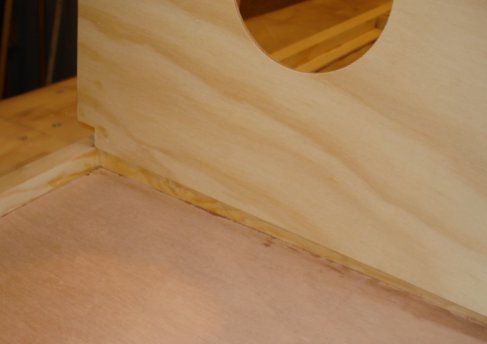
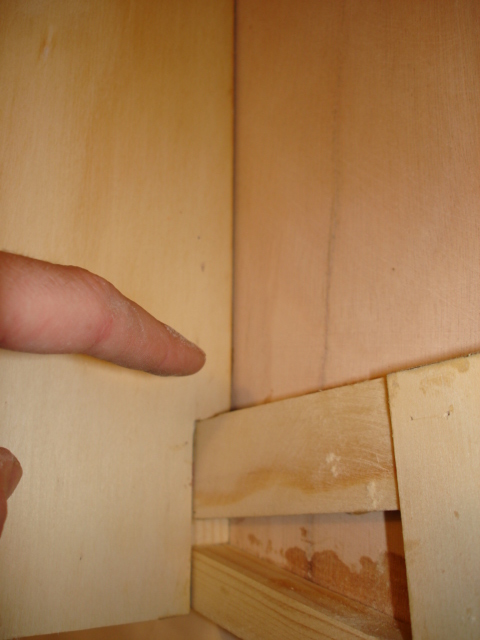
Here's an example of oversize RS showing. The rear spar carry-through ("station 4" bulkhead) straddles a vertical member, touches the fuselage sides from the inside and should be flush with the top and bottom of the fuselage.
The part that I made comes very close, though it will need sanding in areas marked by green arrows. Its outside dimensions are correct (the top and bottom are flush with longerons), but it won't fit between top and bottom longerons, because the longerons are oversize and the cutouts are therefore too small. Also, for the same reason, the bulkhead doesn't touch the fuselage sides--there's about a 3/64" gap there, see last photo.
I expect that it will take very little work to fit this bulkhead in. I also think this is the worst "3D" problem I'm going to encounter with this fuselage.
Ari.
|
|
|
|
|
|
| iter |
|
Ace
Posts: 512
Time Online: 309 days 1 hours 7 minutes
|
As Levi Self so aptly pointed out to me, a prudent choice might be to bond a sheet to the fuse and hand router the openings for fit and finish. What Ari might be able to do is school us on properly bonding all the structure under the plywood so that standard "per plans" plywood shapes will work.
Not sure I follow you here. I don't like schooling people :=) Ari. |
|
|
|
|
|
| iter |
|
Ace
Posts: 512
Time Online: 309 days 1 hours 7 minutes
|
Hours today: 1
Running total: 217
Except for taking and posting a whole bunch of photos, I didn't do much today. I beveled the bottom of rear spar carry-through at 9 degrees on a table saw (first time I used one--pretty cool tool!) and pulled staples out of the fuselage sides.
Ari. |
|
|
|
|
|
| djohn |
|
Ace
Posts: 648
Time Online: 24 days 19 hours 31 minutes
|
Schooling is not derogatory at all. I was just commenting on the fact (maybe theory) that an assembly that has no hard reference points to place the many parts that may affect the dimensions of the final assembly, will probably come out a slightly different shape and size from one builder to another. Some builders choose to make the fuse sides larger than the final shape-size or even as I said blank, then cut the final shape using a hand router. Alternatively one could probably use superfil to make up the difference.
Dennis |
|
|
|
|
|
| Charlie Harris |
|
 Ace AcePosts: 922
Time Online: 23 days 31 minutes
|
ARI: I think you are doing a great job. I'll bet that on most of the planes we built and cut each part to size as needed, they did not fit any better than yours do. Keep up the good work, I am sure you will be pleased in the end. Also I'll bet that there are not many here that were this far along in only about 63 days. I wonder how fast it would go if you built a second one? Charlie |
|
|
|
|
|
| iter |
|
Ace
Posts: 512
Time Online: 309 days 1 hours 7 minutes
|
Dennis, I see what you mean now. I think the big difference is in using full-size plans. I didn't like any of that snap-a-chalk-line business that's in the manual. Sure it took time and effort to draw them, but I believe I've saved time overall. I can see the value of blank plywood, and I may have to do some minor trimming myself. But having the length of every piece and the angle of every cut printed on a plan makes it easier to produce shapes that match.
Charlie, thanks for your encouragement. I've never seen another MiniMAX built, so you're really putting my mind at ease about average tolerances. I think you missed a month in your calculation though. I started over 3 months ago.
Ari. |
|
|
|
|
|
| iter |
|
Ace
Posts: 512
Time Online: 309 days 1 hours 7 minutes
|
Hours today: 4
Running total: 221
|
|
|
|
|
|
| Knut A |
|
 LN-YJE AcePosts: 779
Time Online: 21 days 16 hours 8 minutes
|
Iter...
I have followed your work....and I'm impressed. Of course you will have some minor problems when putting the parts together, but I'm sure everybody else had that too. You will probably end up with a very nice and wellbuild plane.
But at this stage in the prosess I wonder.... do you intend to strengthen the fuselage, like in the Eros, for the future possiblity to choose a heavyer engine, like HKS, R503, full VW or similar?
Keep on, we follow you with great interest.
Knut A |
|
|
|
|
|
| Charlie Harris |
|
Ace
Posts: 922
Time Online: 23 days 31 minutes
|
Knut: If he does not take a break long enough to eat he won't need a bigger engine. Charlie |
|
|
|
|
|
|


 Logged