|
|
 iter iter |
| September 4, 2008, 7:42am |
|
 Ace Ace Posts: 512
Time Online: 309 days 1 hours 7 minutes
|
Hours today: 2
Running total: 313
After not touching the project for 4 months, I decided to get back and to get serious. I have very good reason to try to finish the apirplane by February. If I don't, it is likely I will have to take a much longer break from building it.
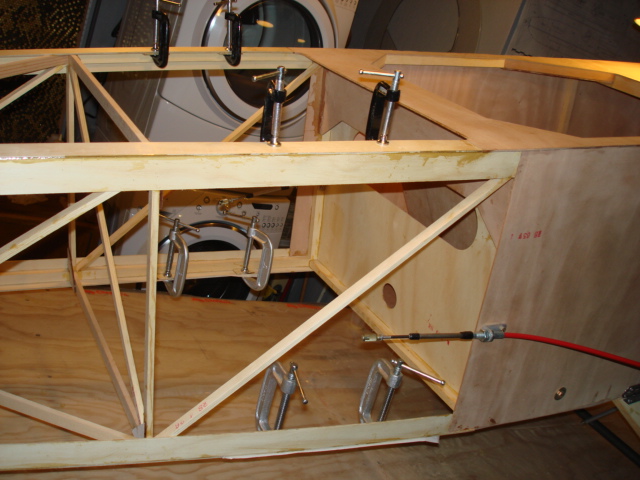
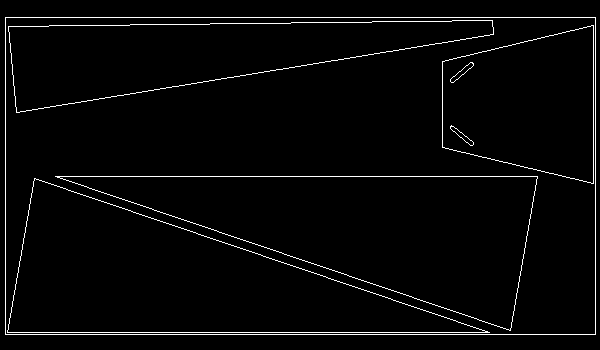
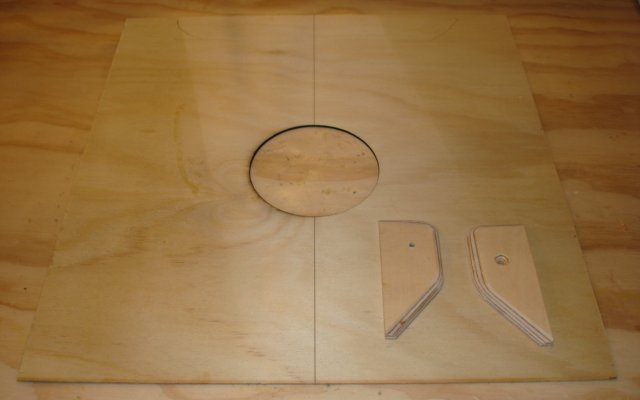
So with this in mind, I glued 1/16" doublers on top of slots in 1/16" strips on top and bottom of fuselage and made drawings to cut plywodd for headrest.
Ari.
|
|
|
|
|
|
| Randy lewis |
| September 4, 2008, 4:42pm |
|
 Ace AcePosts: 965
Time Online: 21 days 18 hours 20 minutes
|
Great to have you back Ari! Sounds like a full court press to get it done by February. |
|
|
|
|
|
| iter |
| September 4, 2008, 5:16pm |
|
Ace
Posts: 512
Time Online: 309 days 1 hours 7 minutes
|
Sounds like a full court press to get it done by February.
I had to look this up :=) Basically... We're not telling anyone yet... But we've got big changes coming come April or thereabouts... And if I don't fly the thing until then, I don't know when will be the next time I'll get to it. It's an aggressive schedule, but it's either that, or give up on it now. Ari. |
|
|
|
|
|
| Richard Wessel |
| September 5, 2008, 3:58am |
|
Guest User |
Ari,
Let me second Randy and welcome you back! It is indeed good to hear that you have started working once again on your max with an eye towards finishing it soon. Funny thing I was just thinking of you yesterday and had almost posted a message on your where abouts. It is good to see that your back and running.
I look forward to your posts and keeping up with your build.
Rich |
|
 Logged Logged |
|
|
|
|
| iter |
| September 5, 2008, 6:51am |
|
Ace
Posts: 512
Time Online: 309 days 1 hours 7 minutes
|
Thank you Rich! It's good to be back. I missed working on the plane and I missed talking to you guys. Now I just need to make sure I stay on track and finish it in time!
Hours today: 2.5
Running total: 315.5
Cut headrest parts and glued RS-18 frame pieces on them.
Ari.
|
|
|
|
|
|
| Charlie Harris |
| September 5, 2008, 3:21pm |
|
 Ace AcePosts: 922
Time Online: 23 days 31 minutes
|
ITER: I hope You meant to say 1/8th strips, And 1/8th doublers. (Missed typed).. Charlie |
|
|
|
|
|
| iter |
| September 5, 2008, 5:09pm |
|
Ace
Posts: 512
Time Online: 309 days 1 hours 7 minutes
|
Charlie you are right of course. I can't count at 1 am :=)
Ari. |
|
|
|
|
|
| iter |
| September 6, 2008, 8:23am |
|
Ace
Posts: 512
Time Online: 309 days 1 hours 7 minutes
|
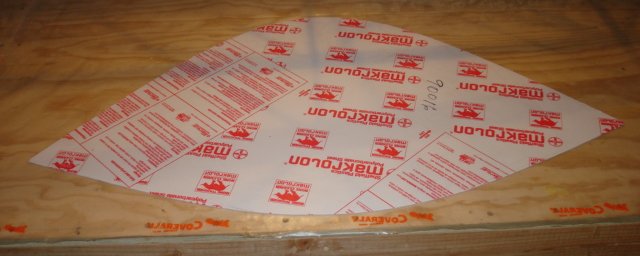
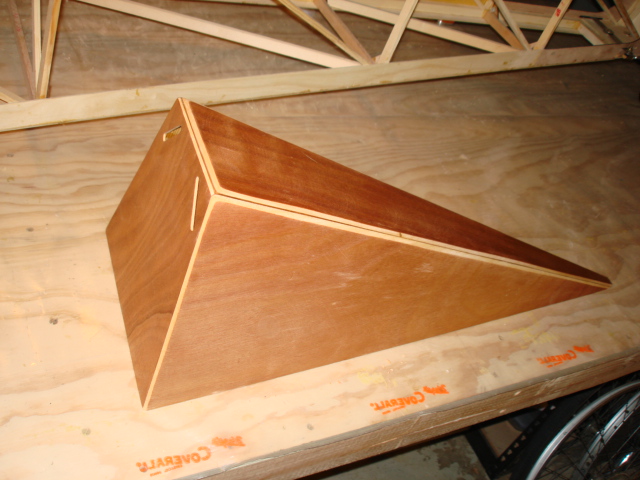
Hours today: 3 Running total: 318.5 Beveled, glued headrest parts; cut out windshield plastic. Table saws are fun! I'm still learning how to use them efficiently. I had to bevel 8 sides on 3 headrest parts tonight. Only took me 2 hours :=) But gluing them together was easier than I anticipated. The bevels just locked in place and I was able to use masking tape instead of my usual staples to hold the pieces together. I will add top piece tomorrow after these pieces are dry. I wonder if with my height (6'4") I should have made the headrest taller. I'll have to try it on for size when it's dry, but I worry that it will be useless in its main function of raising shulder harneses above shoulders. I also cut out plastic for the windshield on a scroll saw. I'm curious about how scratch-prone is this polycarbonate--can I remove protective sheeting before I rivet it onto windshield frame, or should I leave it on until I'm ready to fly?
Quoted from the manual
5. A section is cut out of the windshield at top center so that the top frame tube can be used for a handhold when entering and exiting the cockpit
Polycarbonate sheet that came with my kit had an outline drawn on it that showed no such cutout. Is this something that turned out to be not useful and was dropped in production, or is the outline incomplete? Ari.
|
|
 |
|
|
|
|
|
|
| Richard Wessel |
| September 6, 2008, 12:49pm |
|
Guest User |
Ari, Nice work on your headrest! I wish I had that machine you used to cut your wood with. Talk about accurate! My 1500 plans show no hand hold cutout at the top of the windshield. Nor is there any mention of such in the text. I had thought about adding one as you'll be grabbing it anyway to steady yourself as you clime in. My idea was to add a simple hand strap that I could rivet on top the windshield bow through the plastic. I had thought of cutting the plastic for the hand hold but I wondered if that would cause the windshield to be somewhat distorted in this area. I would leave the protective sheeting on till your about ready to go. Just cut a strip around the outside away where you'll be riveting it to the bow and attaching it to the fuselage. The polycarbonate will scratch! When you do remove it just before your ready to go you'll see how much by the differences between the protected area and the area you removed the protective sheeting from in order to rivet. My new windshield has a kind of brown paper protective sheeting which I understand can be a real b#&%^ to get off if they have sat around a while (which mine has). Your looks like the same thing I had on my T-bird and it peeled right off after years of being on there. You wont have any problem. You build fast! With that in mind, is there any chance I could send mine down to ya??  It just might be the only way it ever gets done! LOL Keep up the work my friend, its looking great! Happy Landings, Rich |
|
| Logged |
|
|
|
|
| iter |
| September 6, 2008, 6:32pm |
|
Ace
Posts: 512
Time Online: 309 days 1 hours 7 minutes
|
I guess I'll make a cutout then. It seemed like a good idea, I was just surprized it wasn't in the outline JDT drew on my part. Perhaps this idea was lost in transition from 3-piece windhsield to curved. Thanks for confirming my suspicion about scratches. I wanted to make airplane noises sitting in my cockpit behind a clear windshiled, but I guess I'll have to hold off until I'm done.
Quoted from 199
You build fast! With that in mind, is there any chance I could send mine down to ya??
Thanks Rich. I don't know about sending the whole projec to me, but I'd be more than happy to cut any parts for you on the machine. Ari. |
|
|
|
|
|
| iter |
| September 7, 2008, 8:09am |
|
Ace
Posts: 512
Time Online: 309 days 1 hours 7 minutes
|
Hours today: 5
Running total: 323.5
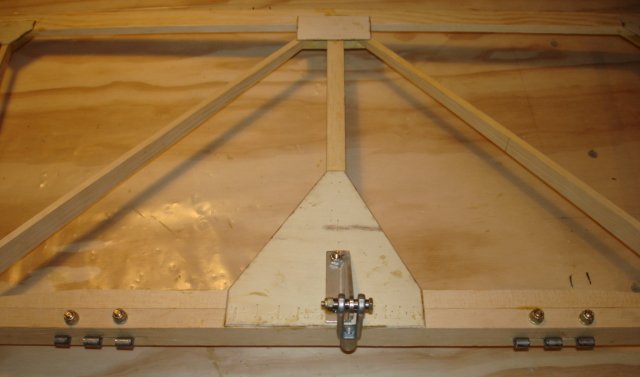
Glued top of headrest; added missing parts to rear fuselage.
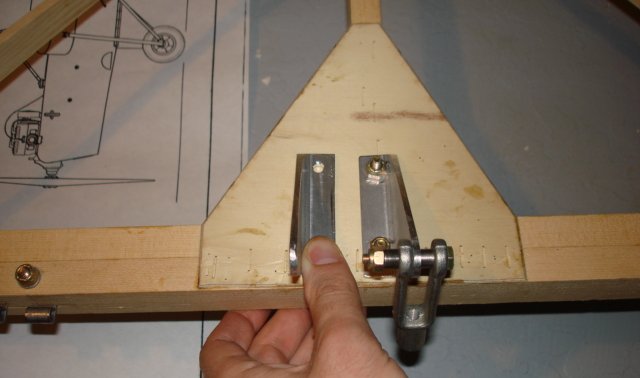
There were a few things missing in rear fuselage, most of them from DWG 11. The bracket that holds elevator cable and shoulder harness wire, the RS- 9 blocks that go next to it to hold it from sliding forward, the little brackets that route rudder cables and their associated RS-9 blocks, the bearing for elevator horn, the missing RS-6 diagonal that never got glued in, that jazz.
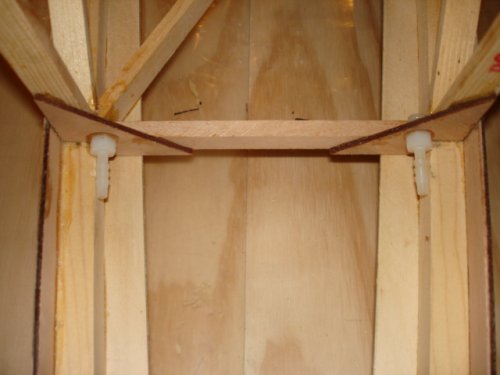
Speaking of rudder cables, the plans call for plastic guides for them. My kit had 2, 1/8" nylon barbs from what looked like the plumbing section of HD. These got installed in lower rear of fuse for the benefit of tailwheel cables. I went looking for another pair to use on top of fuse, but the smallest I could find were 1/4" items. Where can I get the 1/8" ones my plans call for?
I found out that I made a mirror image of the elevator horn, and instead of sitting on the centerline of an offset rib, it sits 3/4" to the right of centerline. Fortunately, I /think/ I have just enough RS-201 left over to make a new one.
Ari.
|
|
 |
|
|
|
|
|
|
| Pilotpeat |
| September 8, 2008, 5:31pm |
|
 Ace AcePosts: 498
Time Online: 13 days 4 hours 21 minutes
|
If you want to keep the edges of the windshield nice as the middle par, just peal the edge back as far as you need to rivet it, then once it is assembled put masking tape over the exposed areas of the window. You could cover the rivets and everything. That will keep the exposure down to a minimum and you'll have maximum protection!
Pete |
|
|
|
|
|
| George Sychrovsky |
| September 8, 2008, 5:44pm |
|
Guest User |
This thread has become so big it is affecting functionality of the board, every time somebody adds to it the “Recent posts” page gets screwed up , the recent posts don’t show and bunch of old posts appear instead.
George |
|
| Logged |
|
|
|
|
| Ricardo |
| September 8, 2008, 11:28pm |
|
 Videos in UTube: ral1951 AcePosts: 2,772
Time Online: 75 days 23 hours 15 minutes
|
George:
I think this happens because you have the Page option open for all pages. If you select just the last page to be open then the entire thread will be hidden.
I haven't had that problem, but another way to speed up the thread having all pages open would be:
To let the threads be up to 3 or 4 pages. Name it i.e. "Iter's Project - Section 1"
Once those pages are completed, a new thread is open and named "Iter's project section 2" with a link to section 1 on the very first post, so if you want to read the prior post just hit the link. Same thing can be done for jumping forwards. And so on..
Iter's project would be on Section 4 or 5 by now.
That way the entire project gets united by name and link connection.
|
|
|
|
|
|
| iter |
| September 9, 2008, 7:28am |
|
Ace
Posts: 512
Time Online: 309 days 1 hours 7 minutes
|
Hours today: 2.5
Running total: 326
Varnished inside fuselage nose.
I lost my epoxy varnish virginity today, so to speak. Man, this stuff stinks! What do you guys use for respirators? I was using one of those paper masks and clearly I'll need to buy something better.
George: How about this--I'll finish up my fuse and I'll start another thread, build log part II so we won't have so very long threads.
Ari. |
|
|
|
|
|
| Hailin |
| September 9, 2008, 3:19pm |
|
Fledgling Member  Posts: 0
|
Ari,
In the picture dsc01109_9877.jpg, what is seen in the inside corners under the nylon barbs on each side running the length of the fuselage? I can't tell whether that is an epoxy fillet or a tube?
Thanks! |
|
|
|
|
|
| iter |
| September 9, 2008, 4:37pm |
|
Ace
Posts: 512
Time Online: 309 days 1 hours 7 minutes
|
Bill, it's just the inside side of fuselage longerons. It just looks funny in that light.
Ari. |
|
|
|
|
|
| skyblazer |
| September 9, 2008, 6:51pm |
|
Ace
Posts: 213
Time Online: 29 days 11 hours 48 minutes
|
This thread currently has 16,346 views and (one complaint). No trouble here...
And on the 2 degree on spar carry through Ari you got me to thinking, I don't think I put that in mine, i'll check next chance I get, but I haven't had any trouble, not even when attaching wings. |
|
|
|
|
|
| Bob Hoskins |
| September 9, 2008, 7:16pm |
|
 Fly Safe AcePosts: 1,208
Time Online: 38 days 16 hours 39 minutes
|
Hey iter;
I agree with skyblazer. This is the only time a MiniMax has been done this way. The entire buid is on the Buzzards. What a great thing for new people coming on board. They will have a complete record to look at. Thanks to you. You have done a wonderful job here iter. I would not change a thing. All a person has to do is click on the current page and there is no problem. If it was a problen Alan would have done something by now. I vote to keep it just the way it is. How about the rest of you? Just look at how many views there are. If people were not interested, why that number, LOL.
Enjoy your work iter. I hope you can get it done in time so you can enjoy the other half, flying.
Keep on truckin bud.
Bob |
| Fly safe and have fun. |
|
|
|
|
|
| djohn |
| September 9, 2008, 7:29pm |
|
 Ace AcePosts: 648
Time Online: 24 days 19 hours 31 minutes
|
+1 I have to agree with skyblazer and Bob. If this thread can stay intact it may be of benefit to a new builder. About the issue with the "unread posts" button, I also had it start from day one and inundated me with about 15000 posts to read. It took me about a month and a half to cover all of the posts it was throwing at me. I thought I was posting too often and it was Alan's way of slowing me down a bit,  but I learned a heck of a lot about these planes and personalities on this board, to say the least it has been somewhat of a growth period. It still throws a post I have already read at me once in a while but I don't care. Without a doubt this is the finest forum I have been a part of-KEEP UP THE GOOD WORK ALAN AND THANKS!!! Dennis (I have also been working out the details of my differential disc brake setup in the mean, time and almost have all of the bugs worked out and will share pics of it when I complete my taxi testing, on another thread) |
|
|
|
|
|
| George Sychrovsky |
| September 9, 2008, 8:16pm |
|
Guest User |
I wasn’t complaining the thread is too long, I agree having it all in one is good thing , I was simply pointing out the fact there is a bug in the forum script, fixing the bug would be the way to go but may be impossible. If you use Recent posts page to see new posts at least be aware you are missing o bunch of posts that don’t show up because of this
George |
|
| Logged |
|
|
|
|
| Cy V |
| September 9, 2008, 9:00pm |
|
 Ace AcePosts: 640
Time Online: 14 days 16 hours 39 minutes
|
This would be a good thread to make into a "sticky."
|
| Bad spellers of the world untie! |
|
|
|
|
|
| iter |
| September 10, 2008, 6:56am |
|
Ace
Posts: 512
Time Online: 309 days 1 hours 7 minutes
|
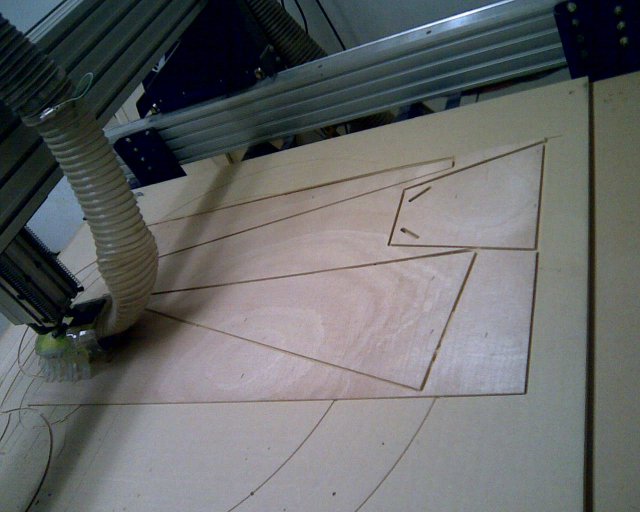
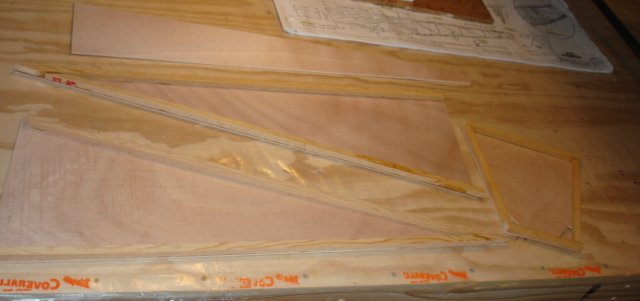
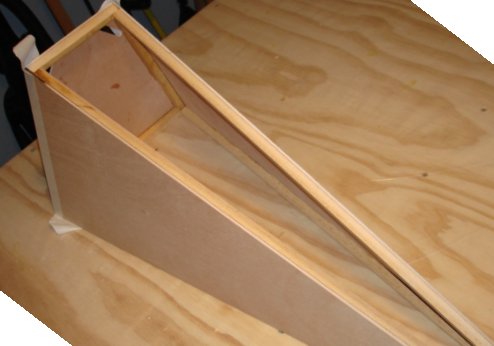
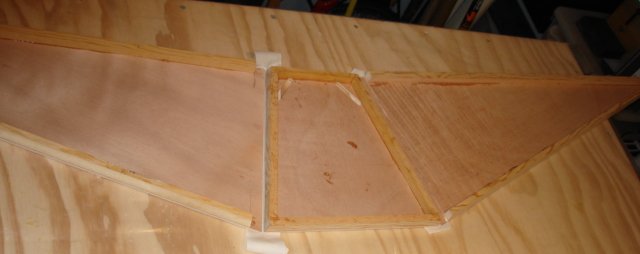
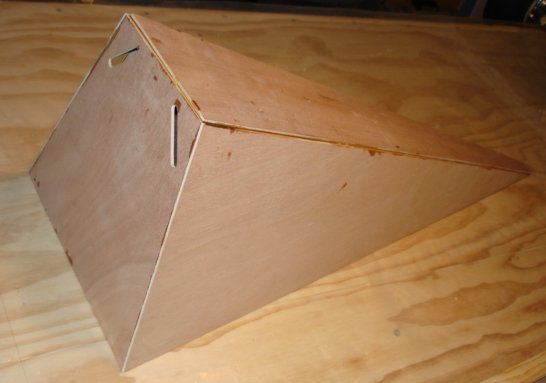
No useful work today (we had our EAA chpater meeting tonight and that ate my airplane budget for the day), but I wanted to post a photo of the varnished headrest--the varnish cured as advertized, and it looks good. I wonder if I should sand it before I put second coat on, and if so, what sandpaper to use? The photo is mostly for completeness--this page has the headrest progerssing from a CAD drawing to a finished thing. Varnish on the inside of the fuselage worked out as well but it looks too boring to photograph.
Ari.
|
|
|
|
|
|
| iter |
| September 11, 2008, 7:03am |
|
Ace
Posts: 512
Time Online: 309 days 1 hours 7 minutes
|
Hours today: 1
Running total: 324.5
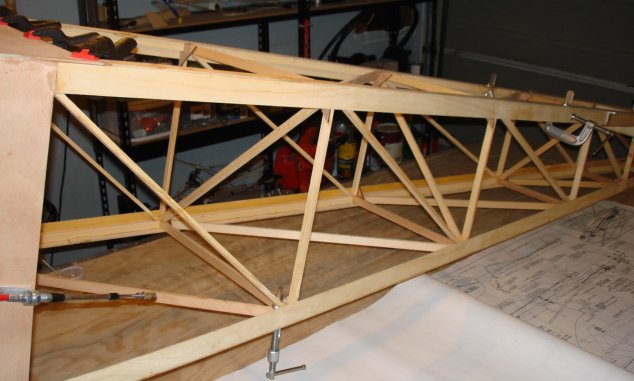
Spot the difference.
Ari
|
|
|
|
|
|
| iter |
| September 12, 2008, 7:03am |
|
Ace
Posts: 512
Time Online: 309 days 1 hours 7 minutes
|
Hours today: .5
Running total: 325
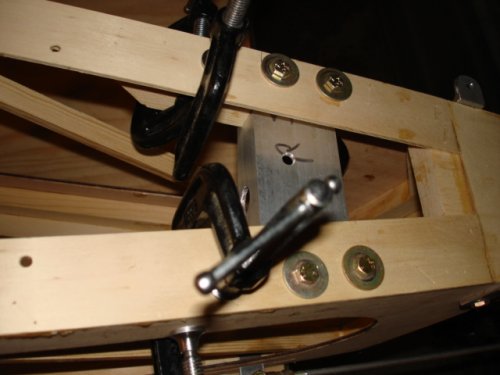
Drilled and tapped brackets for rubber cable guides.
Ari.
|
|
|
|
|
|
| flybob13 |
| September 13, 2008, 1:28am |
|
 Ace AcePosts: 222
Time Online: 5 days 20 hours 43 minutes
|
Ari, a 3-M 6000 series half mask respirator should do the trick, you will have to ask the people at 3-M which filter you will need. They have a # for technical support, sorry I don't have if available, it's in my stuff at work, but if you give them some info off the can of stuff you'er using, they can suggest the correct filter.
Oh, and I also like the thread, and George, I like your site also.
Flybob |
|
|
|
|
|
| iter |
| September 13, 2008, 1:42am |
|
Ace
Posts: 512
Time Online: 309 days 1 hours 7 minutes
|
You mean this isn't something I can pick up at a hardware store?
Ari. |
|
|
|
|
|
| BlueMax |
| September 13, 2008, 5:40am |
|
 1550 Vmax w/ Eros canopy mod AcePosts: 1,244
Time Online: 35 days 15 hours 47 minutes
|
Iter, just go to lowes or home depot, they will more than likely have the respirator that you need.
Chris |
| Remember, in aviation death sentences are administered by the laws of physics, not the FAA. |
|
|
|
|
|
| iter |
| September 16, 2008, 7:11am |
|
Ace
Posts: 512
Time Online: 309 days 1 hours 7 minutes
|
Hours today: 2.5
Running total: 327.5
Made front fuselage cover and landing gear support pads.
The front has a centerline marking on the inside to make it easier to fit to fuse. It laso has a 3 1/2" round hole for access to engine bolts (should fit standard inspection hole cover)
LG pads have hole in them from hold-down screws. One looks bigger than the other because one was cut upside down and is countersunk on the other side.
This forum tells me I've been online for over 700 hours. This means I spent 2 hours figuring things out here for every hour I spent in the workshop. Even if I spent half of that time talking about unrelated stuff, it still doubles the amount of time I've invested in this project. And I was wondering why I can't seem to get the hours/day ratio up!
Ari.
|
|
|
|
|
|
| iter |
| September 17, 2008, 7:11am |
|
Ace
Posts: 512
Time Online: 309 days 1 hours 7 minutes
|
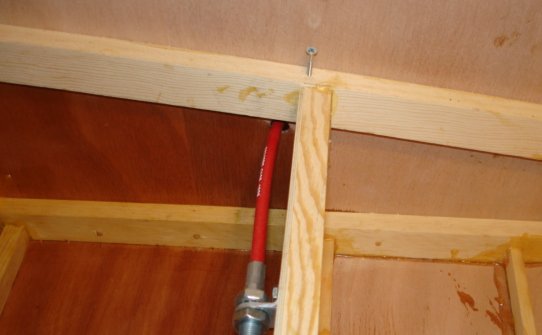
Hours today: 2.5 Running total: 330 Plugged holes in fuselage, varnished second coat inside fuselage. When I drilled fuselage for landing gear piano hinges, some of my holes went right into fuselage crossmembers (see http://www.lonesomebuzzards.com/cgi-bin/forum/Blah.pl?m-1185574047/s-360/#num374 for photo). I decided to plug theese holes and re-drill them 1/4" forward. So I cut a bunch of 3/16" dowel pieces and epoxied them in. Dowels are visible in lower longeron. Also visible is difference in color between coated and uncoated wood. I also put in a second coat of varnish on inside front fuselage. I had a bunch of varnish left over last time, so I mixed a smaller batch tonight, and ended up short. I'll need to go back and finish this second coat before I'll close up the fuselage. Ari.
|
|
|
|
|
|
|