|
|
 Greg S Greg S |
|
Ace
Posts: 255
Time Online: 14 days 9 hours
|
Ari,
Didn't mean to demean your abilities in any way regarding the ply maybe being 1/4" rather than 1/8". Just was an observation. After looking at the picture awhile, I thought that just going by the look ot the plywood edge, one could draw a wrong conclusion. But having made a few mistakes myself while building, I know how easy it is to study the prints for what seems like forever, build a part and then see I made what was an obvious boo-boo. Sometimes like they say, you can't see the forest for the trees, that's why the more eyes on something, the better. I'm glad you finally found the probable cause to your grief. They say building is a learning experience. If that's the case, we're all certified geniuses! |
|
|
|
|
|
| iter |
| January 27, 2008, 11:54pm |
|
 Ace AcePosts: 512
Time Online: 309 days 1 hours 7 minutes
|
Hours yesterday: 3.5
Running total: 260.5
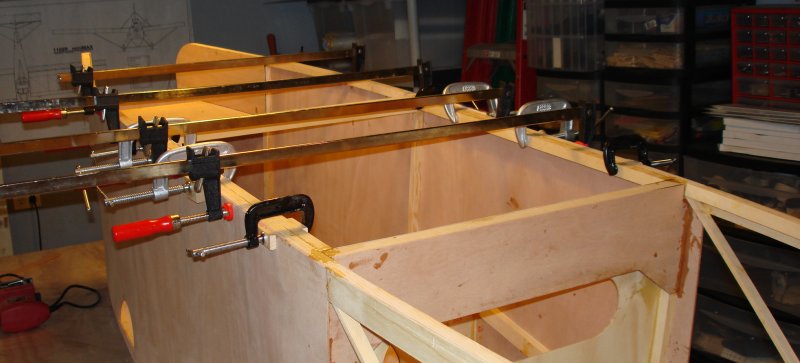
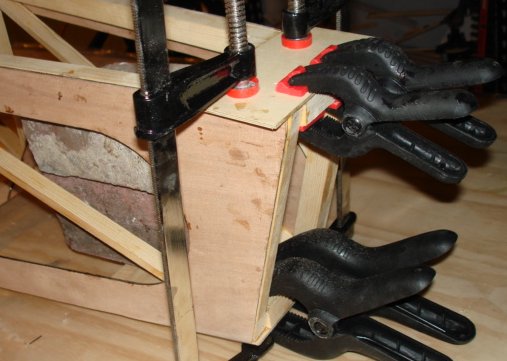
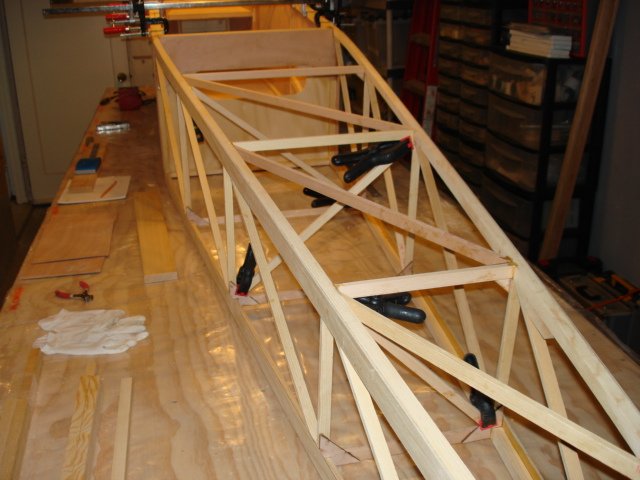
Glued in the 3 RS-4 diagonals that go from top longeron to bottom; glued in cockpit side reinforcement pieces and 2 top-side cross-members.
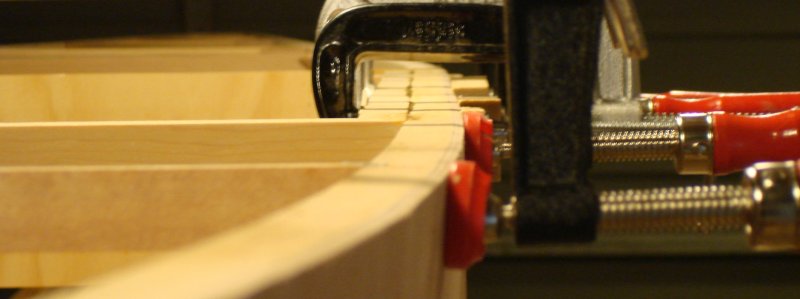
The plans show curved fuselage sides from front to cockpit and behind the cockpit, but in the cockpit area the side are shown straight and parallel. Mine were curved in one continuous line from the front up to the straight line behind the cockpit. I wish I'd have taken a picture to illustrate. I used lots of clamps to straighten cockpit sides. I hope they will stay straight after I remove the clamps (I will glue in corner reinforcements before I remove the clamps though)
Greg--Didn't mean to single you out. I appreciate the thoughtful feedback this group has been providing. I could never get to this stage in my learning process if it were not for your input.
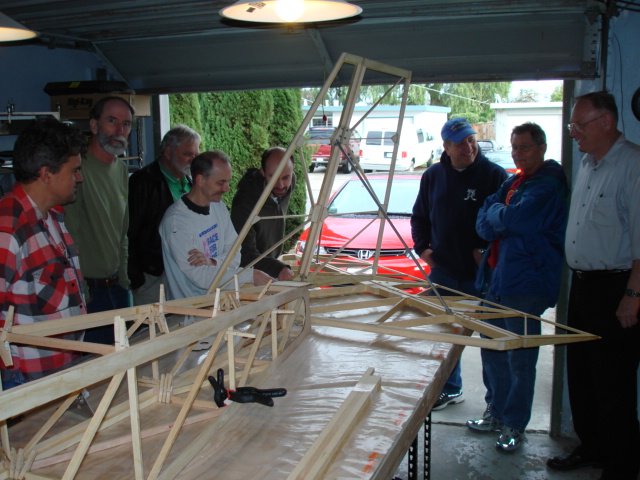
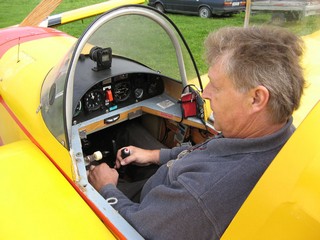
Also yesterday my local EAA chapter (338) came by for a "project visit." Here are some of our members critiquing my progress. I had the tail assembled for their inspection which normally lives disassembled in the guest bedroom.
Ari.
|
|
 |
|
|
|
|
|
|
| iter |
| January 28, 2008, 12:05am |
|
Ace
Posts: 512
Time Online: 309 days 1 hours 7 minutes
|
Ari: You asked one time about building times. I just checked my logs and when I was at about the same point as you are, close as I can tell I had about 4oo hrs. But at about 3 1/2 years. I compleately scratch built and milled all the wood from boards and full plywood sheets. and I finished at about 650rs. . this included a lot of pondering how,untill I found this group. But I have never had so much fun. Charlie
Charlie, thank you for sharing your figures. If they mean what I think they mean, I'm 1/2 to 2/3 done! That's encouraging. Does your total include covering, installing the engine, etc., or is it just the assembly? I wish I'd done what you have and built from scratch. I now have the confidence to do it, but I didn't have anywhere near that when I started. Ripping the wood would have taken time to be sure, but with plywood it would have actually saved me time. I would have been able to CNC-cut many parts in one sitting from a big piece of plywood with less waste faster than swapping small pre-cut pieces in and out of the machine. Ari. |
|
|
|
|
|
| iter |
|
Ace
Posts: 512
Time Online: 309 days 1 hours 7 minutes
|
Hours today: 2
Running total: 262.5
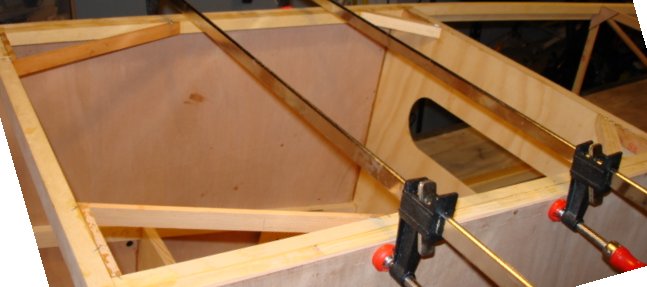
Fitted and glued in cockpit corner reinforcements & 2 remaining tail block plywood reinforcement plates.
If I had to do the cockpit framing again, I would do it while the fuselage was still upside down on the table when I was just gluing the halves together, while the sides were still flat and parallel, before I pulled the noses and the tails together. I wouldn't have had to deal with bowed sides; the fuselage would have been stronger with fewer cross members popping out; and fixating the parts while the glue cures would have been easier when they were at table level, not suspended as they are now.
Ari.
|
|
|
|
|
|
| Charlie Harris |
|
 Ace AcePosts: 922
Time Online: 23 days 31 minutes
|
Yes You ar probable about 1/2 done and 3/4 to go. Charlie |
|
|
|
|
|
| iter |
|
Ace
Posts: 512
Time Online: 309 days 1 hours 7 minutes
|
First 90% of a job take 90% of the time. The remaining 10% take 90%.
Ari. |
|
|
|
|
|
| iter |
|
Ace
Posts: 512
Time Online: 309 days 1 hours 7 minutes
|
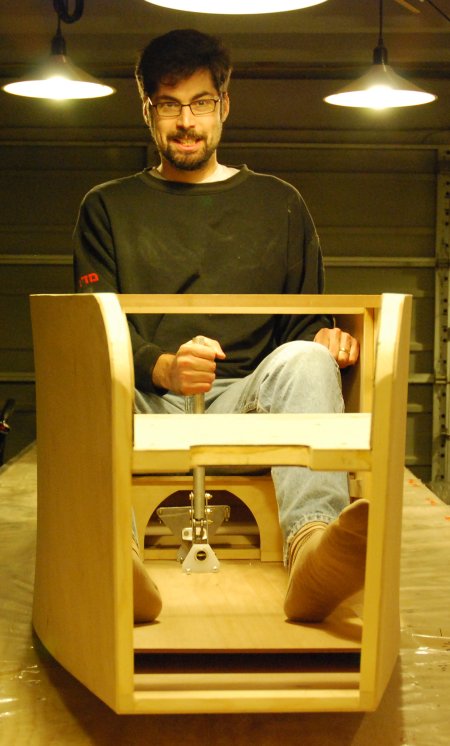
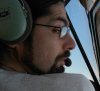
Hours today: 4 Running total: 266.5 Glued in a few small pieces; made CAD sketches of cockpit opening in top plywood; spent 3 hours planning next steps. I am limited in space, in particular I may have to move the fuse to off-site storage. I want to do as much as possible (short of varnishing) without removing the fuse from bench. This means making some parts out of sequence as it's described in the manual. Next steps according to this plan: fuel tank installation, top decking, windshield, empenage installation, elevator, rudder & tailwheel linkages. I may or may not have enough room to build the landing gear while I still have the fuse here. I appreciate feedback on this plan. Irene took this photo today. Wasn't long ago I was sitting on paper drawing of an airplane making noises. ( http://www.lonesomebuzzards.com/cgi-bin/forum/Blah.pl?m-1185574047/s-60/#num60) I have large wood resonators now (fuselage sides) to help amplify these noises! Ari.
|
|
|
|
|
|
| Charlie Harris |
|
Ace
Posts: 922
Time Online: 23 days 31 minutes
|
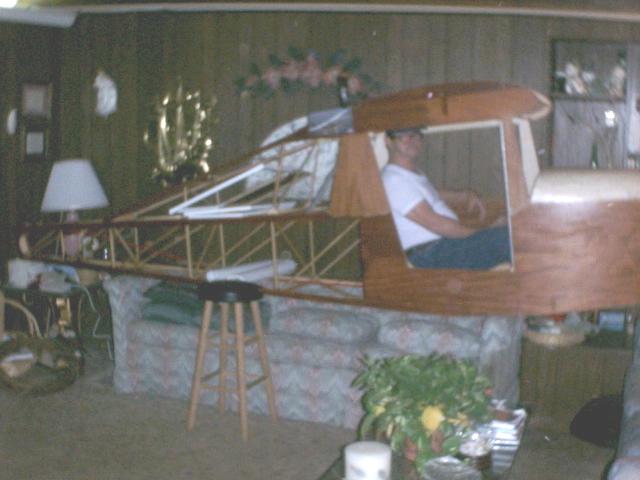
Off site storage for fus. In the Den on one of the couch's. worked for Me, But my wife was not pleased. Charlie
|
|
|
|
|
|
| iter |
|
Ace
Posts: 512
Time Online: 309 days 1 hours 7 minutes
|
Hours today: 1.5
Running total: 268
Glued in 3 diagonals and bottom 1.5" plywood strips.
I received 4 sticks of RS-6 from JDT yesterday--remarkable, given that I only called to request them Friday afternoon. Thanks John! I glued them in today, along with the long plywood strips that cover them.
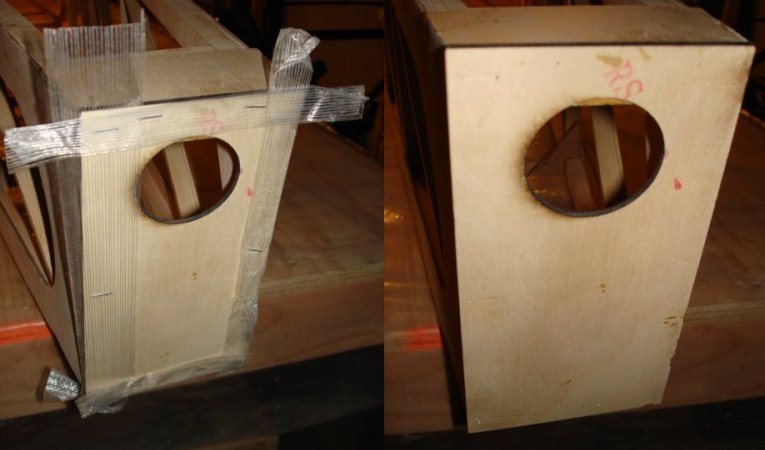
Yesterday, I experimented with fiberglass-reinforced packing tape under my staples. The results are encouraging. Most of the staples came right out when I pulled the tape today, and the staples left much smaller marks on plywood--basically only two holes, no depression between them.
Charlie, my wife is very supportive of my airplane project, but I don't think she'd approve of this type of storage. It would however make a good conversation piece for guests :=)
Ari.
|
|
|
|
|
|
| iter |
|
Ace
Posts: 512
Time Online: 309 days 1 hours 7 minutes
|
Hours today: 1.5
Running total: 269.5
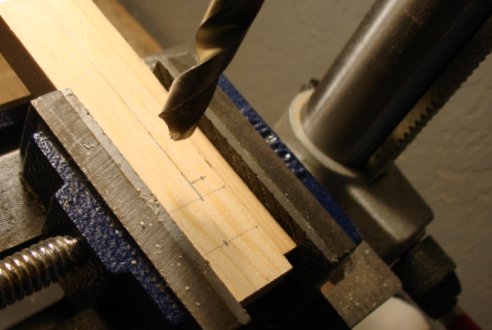
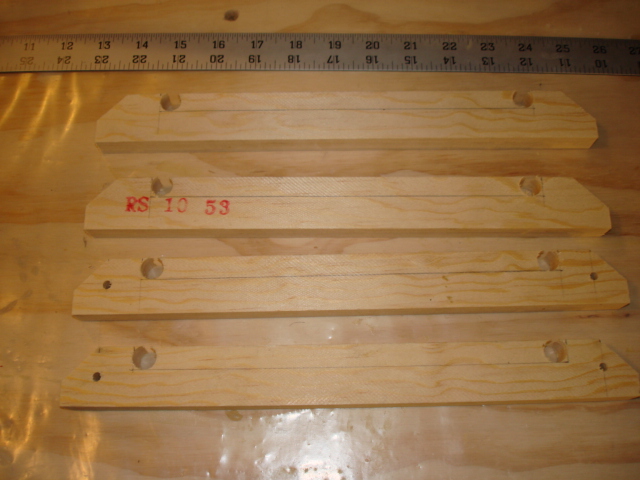
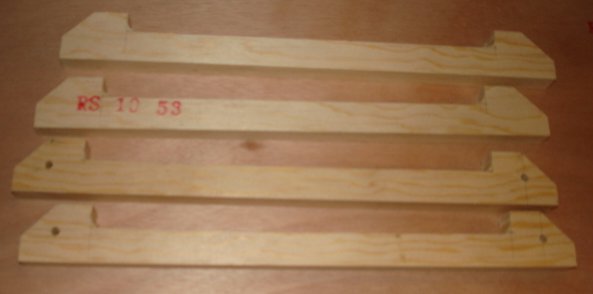
Worked on gas tank holding brackets. I'm almost done with them, but not quite. Tomorrow I'll take them to the workshop and cut the middle parts out on a bandsaw. I drilled 1/2" holes to get the saw blade into position to cut a long parallel line. The holes will also mean that I have nice round edges to match the tank's round corners. To drill so close to the edge, I shimmied the stock with a scrap piece of wood the same height as the RS-10 I was drilling.
Ari.
|
|
|
|
|
|
| Charlie Harris |
|
Ace
Posts: 922
Time Online: 23 days 31 minutes
|
Ari: You will get to use the tape idea a lot on the wings also. Try and run the Cross way the staple, you will get more threads to pull with. But then you probably have thought of that. You know I like the way you are managing this thread, it will cover most of the tipps needed for a new builder. Charlie |
|
|
|
|
|
| iter |
|
Ace
Posts: 512
Time Online: 309 days 1 hours 7 minutes
|
Charlie, you're right about the fiber direction. I had a DUH moment when I tied to pull a tape that ran in the wrong direction and it just tore lengthwise. It also help to double up the tape--one layer of fibers is sometimes weak enough to break.
Ari. |
|
|
|
|
|
| Randy lewis |
|
 Ace AcePosts: 965
Time Online: 21 days 18 hours 20 minutes
|
Ari, to one of your earlier questions about scheduling and off site storage. There is a lot of work to do on the fuse that takes a lot of time. Everything gets fitted to it and all the stuff that's not in the plans happens there; fuel system, wiring, controls, pito and static lines, gages, et. It is nice to have it on the gear so you can roll it in and out of the shop. The wings can be built and put away, either off site or attached to the ceiling, but are very fragile and hard to handle. The main gear does not take up much space so I would suggest building and attaching them befor storage. Then maybe move on to the wings, and later come back to the fuse assembly. I wont bring up covering and paint yet, that takes lots of space. |
|
|
|
|
|
| Charlie Harris |
|
Ace
Posts: 922
Time Online: 23 days 31 minutes
|
Ari: yes that 650 was comlete and painted. and first engine start and complete break-in and a little taxi with no wing at about 10.5hrs then to the airport for final install of the wings. Charlie |
|
|
|
|
|
| Charlie Harris |
|
Ace
Posts: 922
Time Online: 23 days 31 minutes
|
ari: cut up some 1inx2in strips of 2lt coke bottle. it's tough and works great. Charlie |
|
|
|
|
|
| iter |
|
Ace
Posts: 512
Time Online: 309 days 1 hours 7 minutes
|
Yeah I don't think I can paint in my garage. Cover maybe, but not paint. There's just not enough room to put up a paint booth--there's barely room to walk around the table, and that only if I wheel the lawnmower out. On the other hand, I may be able to secure the hangar (and help) of an experienced builder at my airport for the covering & painting. It's still a long time away though.
Ari. |
|
|
|
|
|
| Charlie Harris |
|
Ace
Posts: 922
Time Online: 23 days 31 minutes
|
Ari: More convenient at home if neighbors will allow. About 6 weeks. Charlie
|
|
|
|
|
|
| iter |
|
Ace
Posts: 512
Time Online: 309 days 1 hours 7 minutes
|
How much did you pay for this setup--frame and plastic and all?
Ari. |
|
|
|
|
|
| Charlie Harris |
|
Ace
Posts: 922
Time Online: 23 days 31 minutes
|
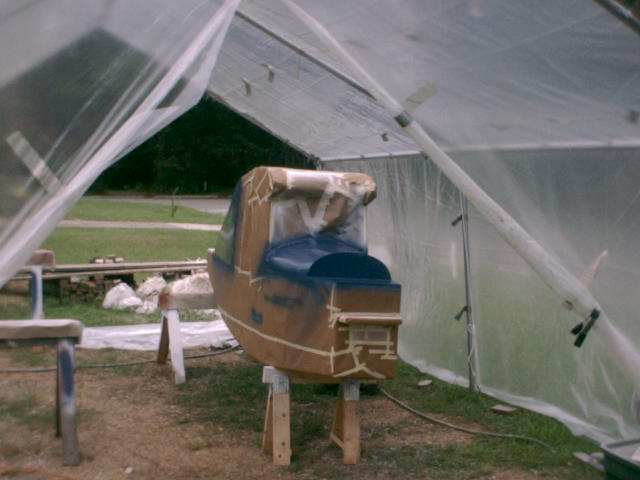
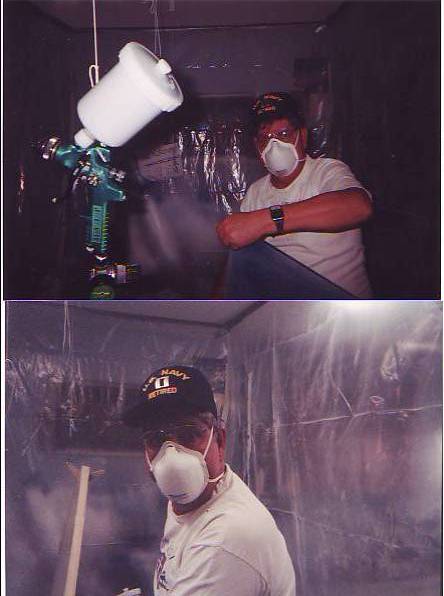
Ari: Lowes has the tent 18x20. But my brother-in-law had one that was damaged by wind and he gave it to me. we spent about $40.00 for bent replacements. and an exterminating co. sold us some (several) butt end rolls of plastic for about $30.00. We lucked up but I'm guessing about $200.00 would do it. And two good box fans for about $18.00 each will vent it. Now we used latex and it dried real fast so back inside double garage at night for the parts. we lucked up and only had some wind damage to the plastic twice in 6 weeks. but no rips just tape came loose. worked real well. Painted April and may so no bugs. Charlie |
|
|
|
|
|
| flybob13 |
|
 Ace AcePosts: 222
Time Online: 5 days 20 hours 43 minutes
|
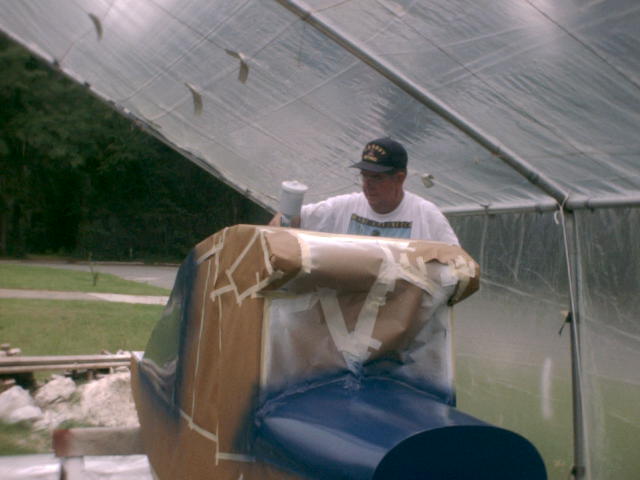
Charlie, I didn't see a respirator in that picture  Bob |
|
|
|
|
|
| Larry |
| February 1, 2008, 10:24pm |
|
 Ace AcePosts: 1,139
Time Online: 6 days 18 hours 49 minutes
|
Ari,
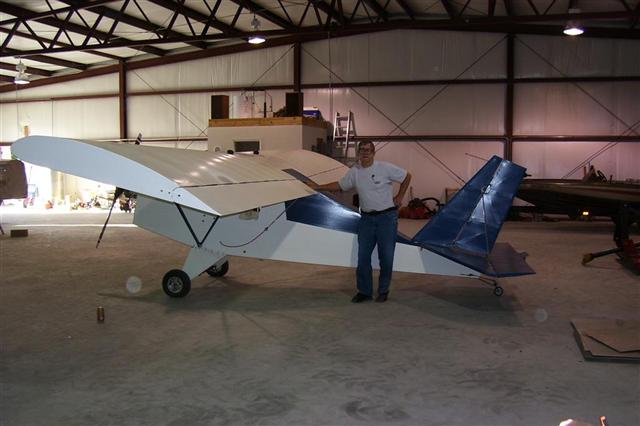
From the pictures you have posted I'd say your doing a great job on your miniMAX. Keep up the good work it will all be worth it the first time you take to the air in an airplane you built.
Larry |
| a mile of road will take you a mile, a mile of runway can take you anywhere. |
|
|
|
|
|
| Charlie Harris |
| February 1, 2008, 11:46pm |
|
Ace
Posts: 922
Time Online: 23 days 31 minutes
|
Ari Sorry, not hijacking the thread, this is to explain. It's latex and two fans running one input one exhaust. and here Mike and my rudder charlie
|
|
|
|
|
|
| iter |
|
Ace
Posts: 512
Time Online: 309 days 1 hours 7 minutes
|
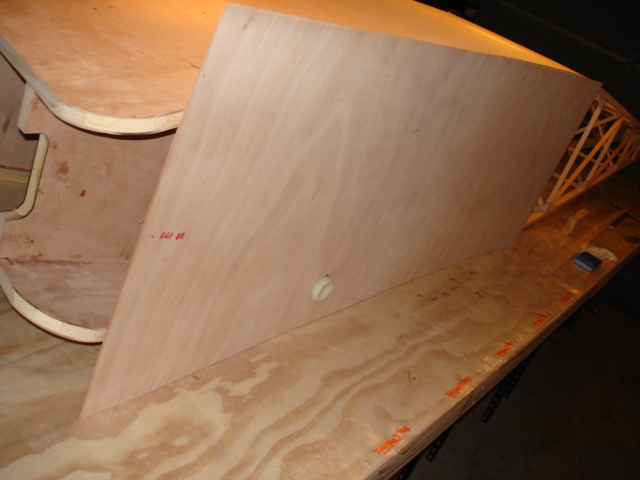
Hours today: 1.5
Running total: 271
Finished cutting the fuel tank brackets; found fuel tank position in fuselage and tank neck position on top deck; cut hole in deck to accommodate tank neck.
Ari.
|
|
|
|
|
|
| Charlie Harris |
|
Ace
Posts: 922
Time Online: 23 days 31 minutes
|
By the way guys all painting was do with a cheap Harbor Freight syphon gun. and setup with a drier air filter and a second small regulator in the air line. If I remember about 25 to 35lbs. of pressure and it worked great. A guy in our EAA chapter that runs a body shop said you do not have the best to get great LPHV results. and at less that $50.00 bucks 5yrs ago we figured why not try it. Also used it on some expensive paint a boat. Worked good on that too, but hard to cleanup. Charlie |
|
|
|
|
|
| iter |
|
Ace
Posts: 512
Time Online: 309 days 1 hours 7 minutes
|
Hours today: .5
Running total: 271.5
Glued top tank brackets to top plywood deck.
I slowed down again in the last week or so. The sad reason behind this is that after a year on "sabbatical," I'm interviewing for jobs again. The interviews take a toll, and soon I may actually be working full-time. Don't you hate how work gets in the way of building?
Ari.
|
|
|
|
|
|
| Knut A |
| February 6, 2008, 10:41am |
|
 LN-YJE AcePosts: 779
Time Online: 21 days 16 hours 8 minutes
|
Iter
Put a reference to this thread in your CV, and you will have a job in no time. May be a planebuilderjob as well!!
Seriously, be glad your health admit you to take a job..... suppose you need the exstra income now when you got your own family.
Wish you the best with the family, future jobs and the MiniMax......apropos, will we see a MiniIter soon?
Knut A |
|
|
|
|
|
| iter |
|
Ace
Posts: 512
Time Online: 309 days 1 hours 7 minutes
|
Knut, I have been telling employers about my project as you suggest, and the interest has been overwhelming. It has nothing to do with my trade (software engineering) but people are fascinated with this project.
Future plans for extra passengers is one of the reasons I need to go back to work.
Ari. |
|
|
|
|
|
| iter |
|
Ace
Posts: 512
Time Online: 309 days 1 hours 7 minutes
|
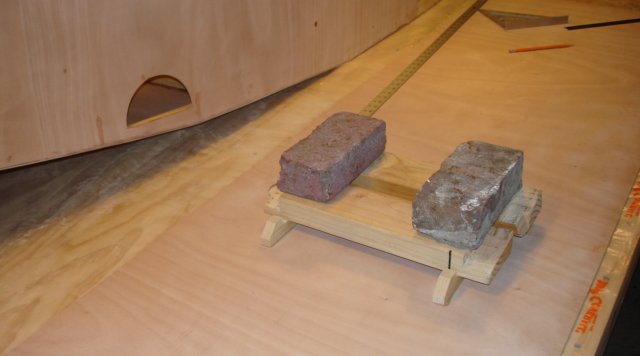
Hours today: 2.5
Running total: 274
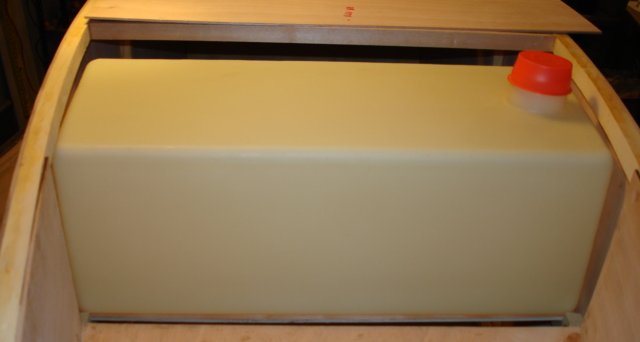
Installed lower gas tank brackets.
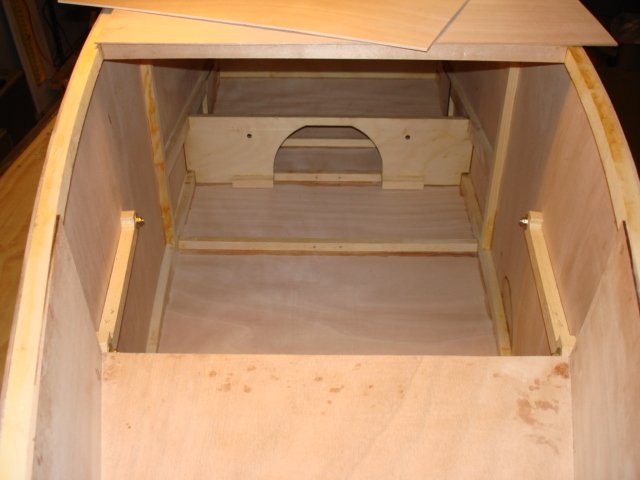
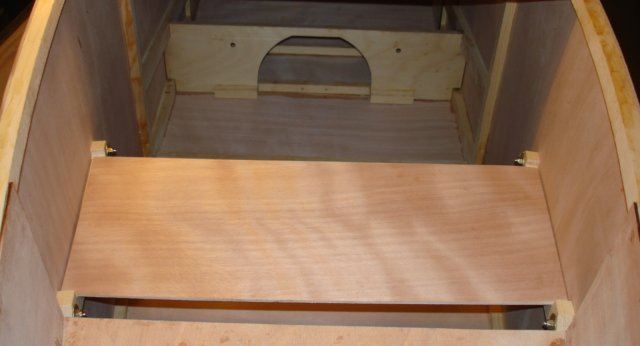
This was trickier than I expected. The manual says "Temporarily mount the top deck on the fuselage. Locate the tank and hold in place with braces, tape, or whatever is handy." I tried a number of "whatevers" before I was able to get the tank to stay on long enough for me to mark the inside of the fuse. I think bubblegum was what did the trick eventually :=)
Now I'm confused slightly about the plywood "shelf" that goes under the tank. Am I supposed to glue it to the brackets, or is it supposed to just lay on top of them? I'm reluctant to glue it because the brackets mount to fuselage skin with bolts, and movement of the skin will cause stresses on the bolts as well as the glueline, for no apparent structural benefit.
Ari.
|
|
|
|
|
|
| Richard Wessel |
| February 8, 2008, 11:34am |
|
Guest User |
Ari,
The shelf just sits on top of the brackets....do not glue.
Rich |
|
 Logged Logged |
|
|
|
|
| Cy V |
|
 Ace AcePosts: 640
Time Online: 14 days 16 hours 39 minutes
|
Ari, Just out of curiosity, are you doing work on the project to build a nuclear fusion reactor with the same name as your handle? http://www.iter.org/ |
| Bad spellers of the world untie! |
|
|
|
|
|
|