|
|
 PUFF PUFF |
|
 Ace Ace Posts: 1,518
Time Online: 34 days 6 hours 18 minutes
|
my fuse is hanging in my den..... |
|
|
|
|
|
| iter |
|
 Ace AcePosts: 512
Time Online: 309 days 1 hours 7 minutes
|
Hours today: 2
Running total: 343.5
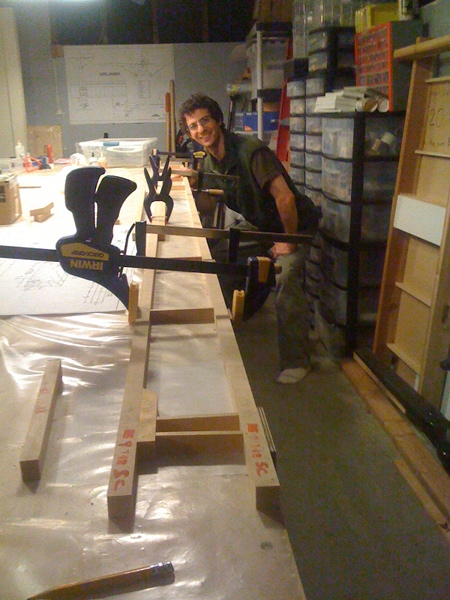
Now that I have the house back and have access to my garage again I am resuming the build.
My friend Nato volunteers to help with the project. He comes up with the hoisting mechanism last week. Tonight he comes over and helps with physical cutting. More importantly, I notice tremendous support that comes from a genuine interest in the project. Nato is a student pilot and holds a degree in aeronautical engineering. Our commitment is to make Thursday nights airplane-building nights.
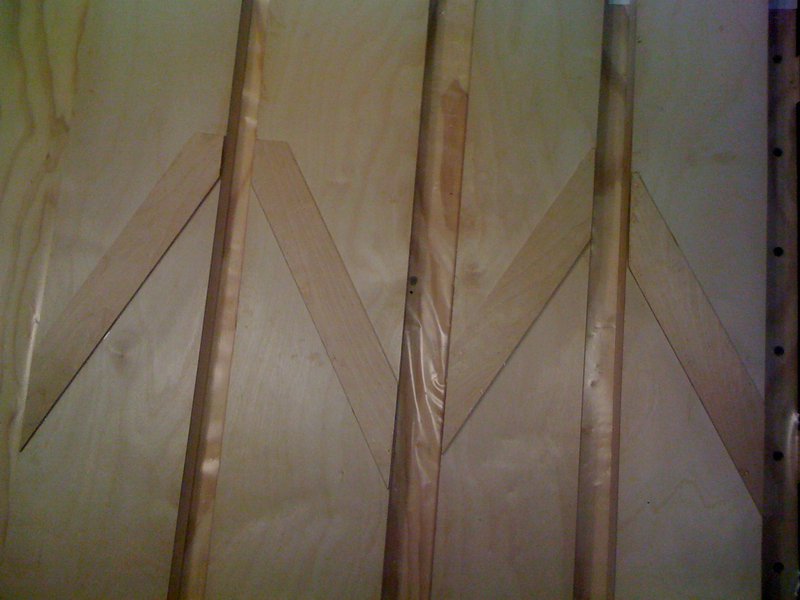
Tonight we cut and fit verticals and diagonals for the two rear spars.
Ari.
|
|
|
|
|
|
| iter |
|
Ace
Posts: 512
Time Online: 309 days 1 hours 7 minutes
|
Hours today: 1.5
Running total: 345
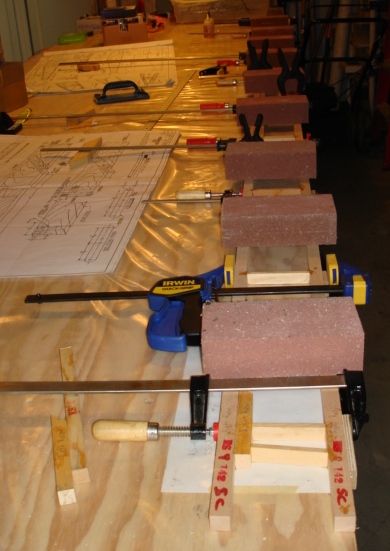
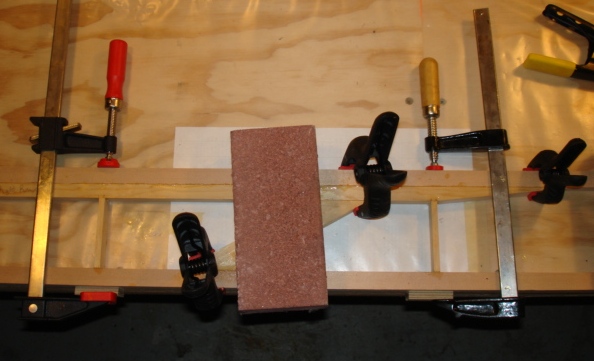
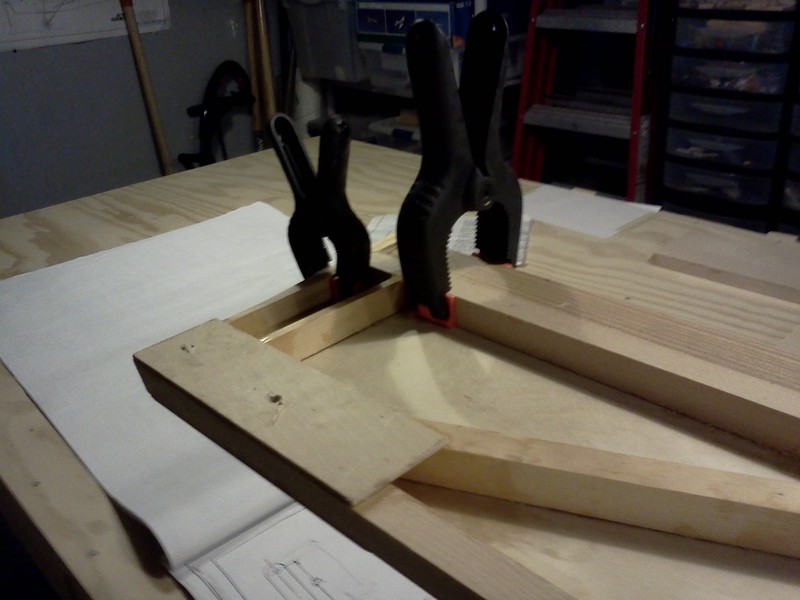
The rear right spar frame is curing.
It's hard for me to believe it takes an hour and a half just to glue the spar together after all the prep work on Thursday--but that's what the clock says.
Although the right and left spars are identical at this stage (before webs and beveling) I decide to mark the sides now. The RS pieces are slightly different dimensions, and I try to align them so that they are all flush on the side where the webbing goes. On the right, it means pushing the verticals up until they are flush with the top of the spar caps; on the let it means pushing them down until they touch the table.
The second photo shows my method of clamping the diagonal--this is the most useful way I can come up with for holding it without using nails.
Ari.
|
|
|
|
|
|
| iter |
|
Ace
Posts: 512
Time Online: 309 days 1 hours 7 minutes
|
Hours today: 1
Running total: 346
The second spar goes faster. No picture today--looks exactly like the right one. Except that I now use plastic bags under the bricks. The one in the last photo sticks to the squeeze-out epoxy from the RS-8 doubler on the top spar cap. Takes a bit to get it off.
Ari. |
|
|
|
|
|
| iter |
|
Ace
Posts: 512
Time Online: 309 days 1 hours 7 minutes
|
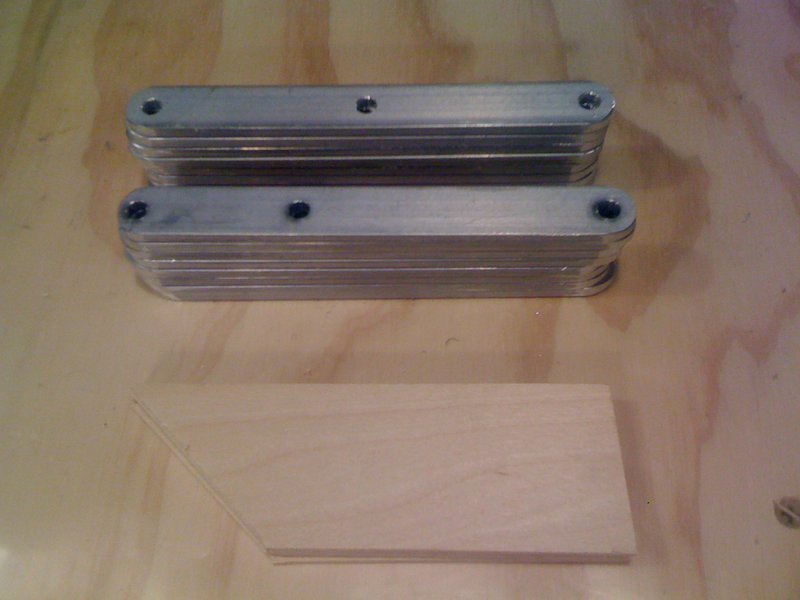
Hours today: 3 Running total: 349 Nato and I sand the spars to remove squeezeout epoxy so that they can accept plywood webs. The two rear spars now have webs on them. The picture of the four spars reminds me of The Four KingsThis is where the distinction between the right and the left spar becomes final. I mark the side where the plywood goes with an arrow on the butt of my spar caps, and also the direction of the bevel I need to cut into them. I want to avoid ending up with two left spars. Ari.
|
|
|
|
|
|
| iter |
|
Ace
Posts: 512
Time Online: 309 days 1 hours 7 minutes
|
Hours today: 2
Running total: 351
All 4 spars now have webs on them. A third friend shows up tonight and we set up a virtual assembly line with mixing epoxy, spreading it on wood and tacking on the plywood. These airplane nights are turning into real social events! I like it so much better than building alone.
Ari. |
|
|
|
|
|
| Bob Hoskins |
|
 Fly Safe AcePosts: 1,208
Time Online: 38 days 16 hours 39 minutes
|
Hi Ari;
Skyblazer and I built our planes together in my shop. He a 1300Z and me a 1400Z. We worked nights and week ends. When ever family and schedule would permit. We had a ball. Time passes quick and 2 heads are better than one when either had a problem. Besides, it should be fun to start with. Wait till you fly your little bird. You will see right away your time spent was worth it.
ENJOY.
Bob |
| Fly safe and have fun. |
|
|
|
|
|
| iter |
|
Ace
Posts: 512
Time Online: 309 days 1 hours 7 minutes
|
Hours today: 2
Running total: 353
We cut the bevels into all 4 spars and cut the excess off the ends.
I notice that on one of the rear spars the webbing delaminates. I am not sure how bad this is. On the one hand, this is in the area with a doubler and a diagonal, there is a lot of surface area, and the delamination is not deep (the plywood separates only from the very top of the spar cap, but holds tight to the doubler and the diagonal). On the other hand, this is a high-stress area where the wing strut attaches.
If I decide to fix this joint, I am not sure I can remove the plywood without taking the whole spar completely apart.
Ari.
|
|
|
|
|
|
| Bob Daly |
|
Ace
Posts: 888
Time Online: 45 days 22 hours 25 minutes
|
That's not a problem. Squirt some epoxy in there to ease your mind and move on. As you pointed out the spar cap doubler greatly increases the web glue joint area. The high stress point is in bending inboard of the strut attachment (hence the doubler), not outboard where you're pointing. This is the rear spar, right? The web is simply too narrow there to worry about buckling. |
|
 Logged Logged |
|
|
|
|
| Tom Mathes |
|
Guest User |
As Bob pointed out just put some epoxy on the top and work it in with your finger till it is full then clamp lightly. |
|
| Logged |
|
|
|
|
| iter |
|
Ace
Posts: 512
Time Online: 309 days 1 hours 7 minutes
|
Thank you for your reassurances guys. This is indeed the rear spar.
Ari. |
|
|
|
|
|
| Charlie Harris |
|
 Ace AcePosts: 922
Time Online: 23 days 31 minutes
|
Also spread the epoxy then heat with heat gun it will run right in. |
|
|
|
|
|
| iter |
|
Ace
Posts: 512
Time Online: 309 days 1 hours 7 minutes
|
Ah! That makes so much sense. Thank you Charlie.
Ari. |
|
|
|
|
|
| iter |
|
Ace
Posts: 512
Time Online: 309 days 1 hours 7 minutes
|
Hours recently: 4
Running total: 357
The spars have plywood doublers on one side, and doublers for the other side are ready to go when the epoxy cures and I can turn the spars over (wing root doublers for rear spar are waiting for rib installation). I have half the aluminum wing root and strut fittings. I cut one RS-100 aluminum bar into pieces that are 1/2" too short--embarrassing. So I only have half the fittings, and John form JDT is mailing me new RS-100. He says it's cheaper to mail them if he cuts them to length (no oversize shipping charges). I wonder if he's trying to save me from repeating the embarrassment.
Ari.
|
|
|
|
|
|
| iter |
|
Ace
Posts: 512
Time Online: 309 days 1 hours 7 minutes
|
Hours recently: 3
Running total: 360
Plywood doublers are in place on both sides of the spars. All 16 aluminum wing-mounting fixtures are complete.
It continues to amaze me how long these little things take, even after I think that there is nothing to do. It takes me an hour to install the 6 doublers--that after thinking on Thursday that they are complete. They need sanding, measuring and cutting to size before I can glue them on. While I'm fiddling with plywood, Nato drills and files the metal fittings. The more I work with him on the max, the more I like it. Thank you Nato!
Also, thank you Charlie for your heat gun suggestion. The epoxy runs very very thin with the heat gun and seeps right into the seam.
It looks like I'm ready to install ribs next. It's going to look like a real wing soon!
Ari.
|
|
|
|
|
|
| iter |
|
Ace
Posts: 512
Time Online: 309 days 1 hours 7 minutes
|
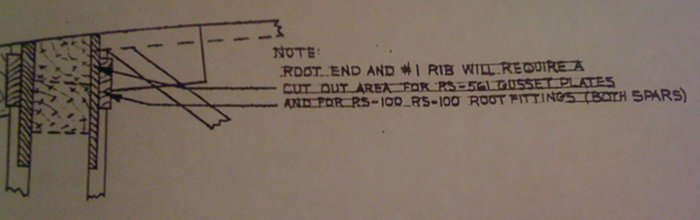
I am confused about the two inboard ribs and how they connect to spars. The plywood reinforcements are 3/16" thick and the aluminum fittings are 1/8" thick. Together this is more than the 1/4" thickness of the front vertical on the rib. If I cut away the area as the drawing says, the front of the rib is going to completely open. I might as well remove the entire front vertical. It gets even stranger on the back spar where I have to remove two verticals to get the plywood and the aluminum to fit.
I wonder if anyone has pictures of their installation.
Ari.
|
|
|
|
|
|
| Bob Daly |
|
Ace
Posts: 888
Time Online: 45 days 22 hours 25 minutes
|
Yes, you need to remove the vertical material but remember, the end rib has 1/8" ply skin on the outside and the two ribs are wrapped top and bottom with 1/16" ply. The 'boxed' end ribs are then plenty strong. |
|
| Logged |
|
|
|
|
| Ricardo |
|
 Videos in UTube: ral1951 AcePosts: 2,772
Time Online: 75 days 23 hours 15 minutes
|
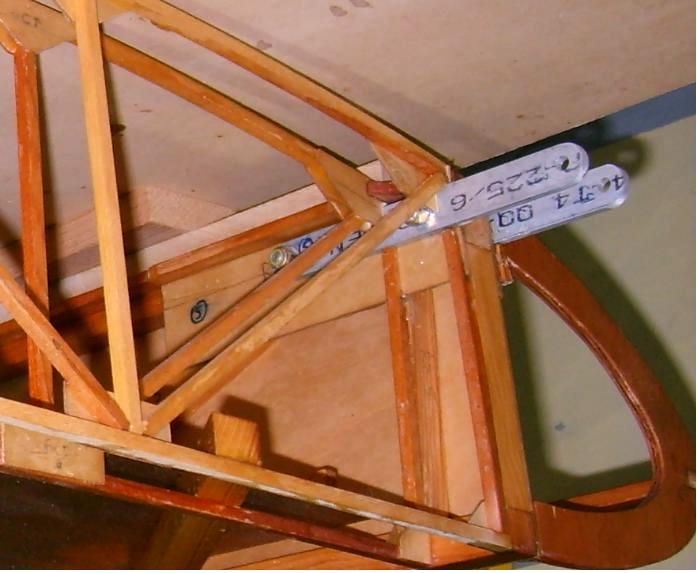
Iter: Here´s a couple of pictures that might help. The wing was upsidedown on the table when I took the picture, I rotated for an easier look (I hope)
|
|
|
|
|
|
| iter |
|
Ace
Posts: 512
Time Online: 309 days 1 hours 7 minutes
|
Thank you for the photos Ricardo. I wonder if the vertical has any meaning after you cut a piece out of it, and if removing it entirely would make sense.
I also wonder how you keep the top of the rib from straightening out when you cut the vertical.
Ari. |
|
|
|
|
|
| Ricardo |
|
Videos in UTube: ral1951 AcePosts: 2,772
Time Online: 75 days 23 hours 15 minutes
|
Thank you for the photos Ricardo. I wonder if the vertical has any meaning after you cut a piece out of it, and if removing it entirely would make sense.
I also wonder how you keep the top of the rib from straightening out when you cut the vertical.
Ari.
Although I didn't cut the entire vertical, the top of the rib is glued to the spar and the diagonal also exerts some movement restriction through the plywood. Is not going to move. |
|
|
|
|
|
| iter |
|
Ace
Posts: 512
Time Online: 309 days 1 hours 7 minutes
|
Thank you for sharing your process Ricardo.
Ari. |
|
|
|
|
|
| iter |
|
Ace
Posts: 512
Time Online: 309 days 1 hours 7 minutes
|
Hours on Thursday: 4
Running total: 364
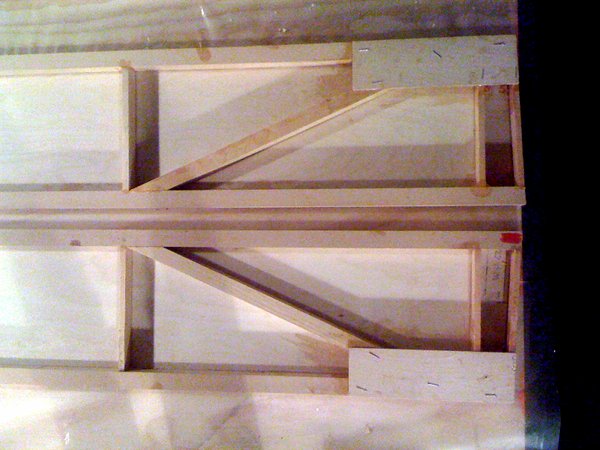
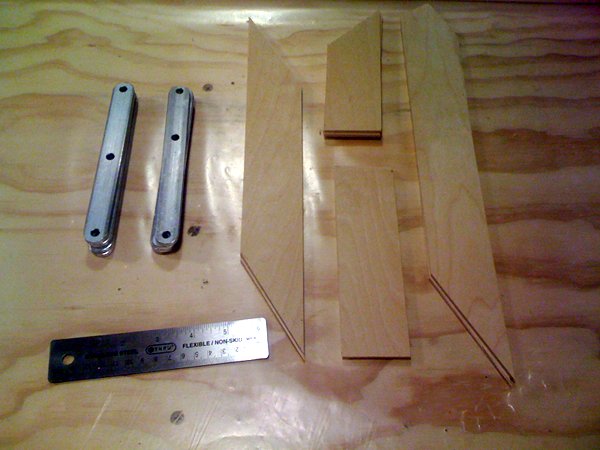
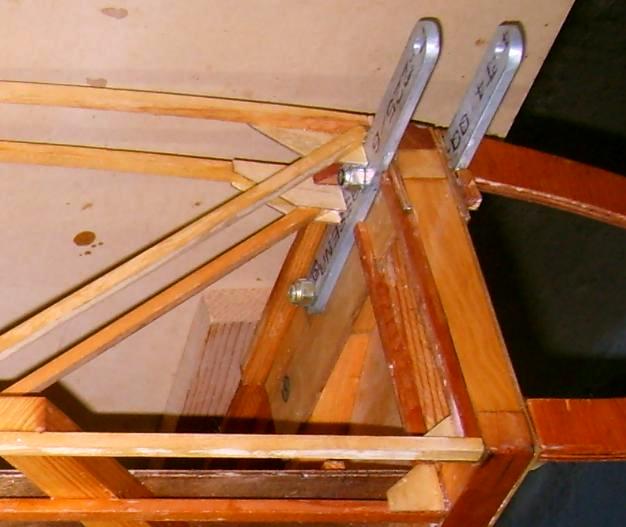
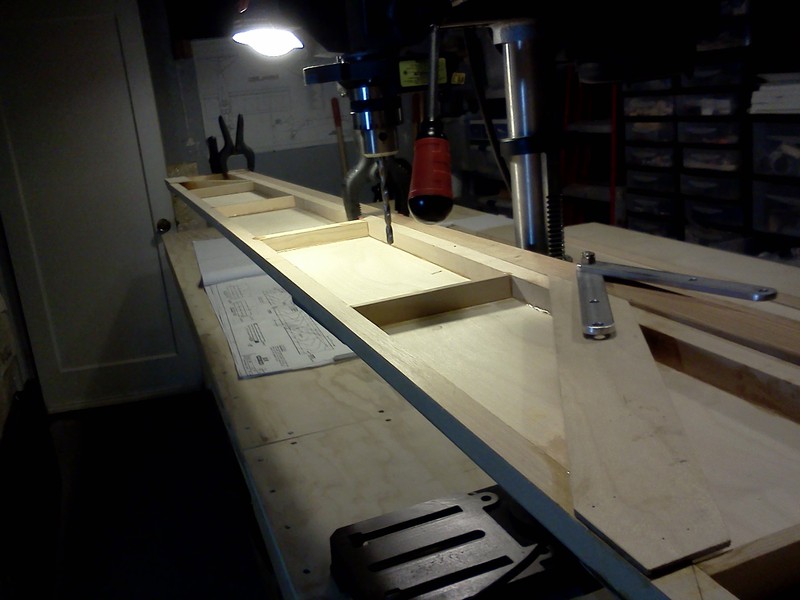
Nato and I make a jig for drilling out spar fittings and drill the roots of all 4 spars. We than try to figure out how ribs clear these fittings (thanks Ricardo!) and decide that we need to ask here.
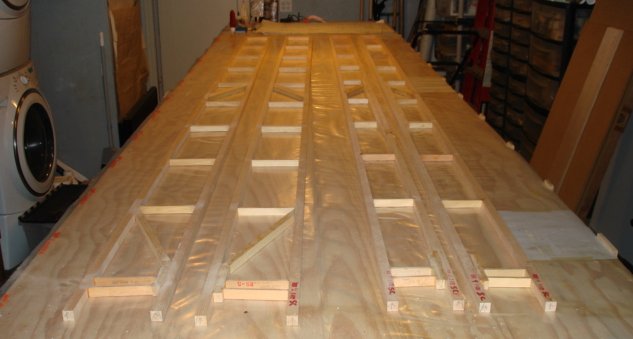
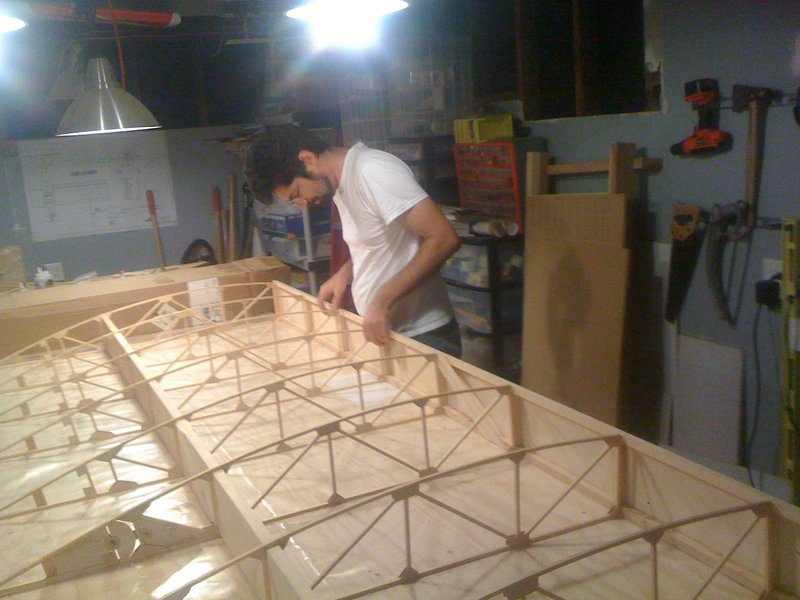
These ribs are 4 years old now. Even though we can't quite start gluing them in place yet (still need to drill spars for strut attachments), we decide to do a "preview." OMG this is starting to look like a wing!
Ari.
|
|
|
|
|
|
| thunder669 |
|
 Ace AcePosts: 700
Time Online: 20 days 22 hours 9 minutes
|
i remember that exact feeling, it really makes it seem more real that you are actually building something that will fly. congrats and enjoy!!!!!!!!! |
| Once you have tasted flight, you will forever walk the earth with your eyes turned skyward, for there you have been, and there you will always long to return |
|
|
|
|
|
| natosaichek |
|
Guest User |
Hours on Wednesday: 3 (but 2 people... so is that 6 person-hours? how do we calculate this?) Running total: 367 ish. Not sure how everyone else attaches so many images - my first attempt went over the max data limit (256 k? isn't that a relic of DOS or something?) Anyway, I didn't want to be constrained by data limits, so here's an imgur gallery with what we did: Gallery here: http://imgur.com/a/L96HDIn short, we built a jig to properly position the aluminum fittings so we could drill holes in the spars for them. We also got tacks set in the ribs so that on our next meeting we can glue them in place and immediately secure them. A productive meeting! |
|
| Logged |
|
|
|
|
| Charlie Harris |
|
Ace
Posts: 922
Time Online: 23 days 31 minutes
|
Iri sure glad to have You back. Been so long now but I think I put a rs1 doubler behind that front vertical an cut a slot. I have moved twice and can't find a picture right now but if I find one I will send. only about 20 more inchs of rs1. Charlie |
|
|
|
|
|
| Charlie Harris |
|
Ace
Posts: 922
Time Online: 23 days 31 minutes
|
Nice pictures. I wish I could do that I have all my pics' on the computer and have had guys want to see them, just don't know how to get it together. Useing Picasa now I may can work it out. see ya. Charlie |
|
|
|
|
|
| Charlie Harris |
|
Ace
Posts: 922
Time Online: 23 days 31 minutes
|
found pic. can't send ID 10T operator error. Charlie |
|
|
|
|
|
| Larry |
|
 Ace AcePosts: 1,139
Time Online: 6 days 18 hours 49 minutes
|
We added two extra vertical RS-1s to the root and second rib that way when you cut out for the plywood and root fittings you still have some vertical wood left both front and rear spar locations
Larry |
| a mile of road will take you a mile, a mile of runway can take you anywhere. |
|
|
|
|
|
| iter |
|
Ace
Posts: 512
Time Online: 309 days 1 hours 7 minutes
|
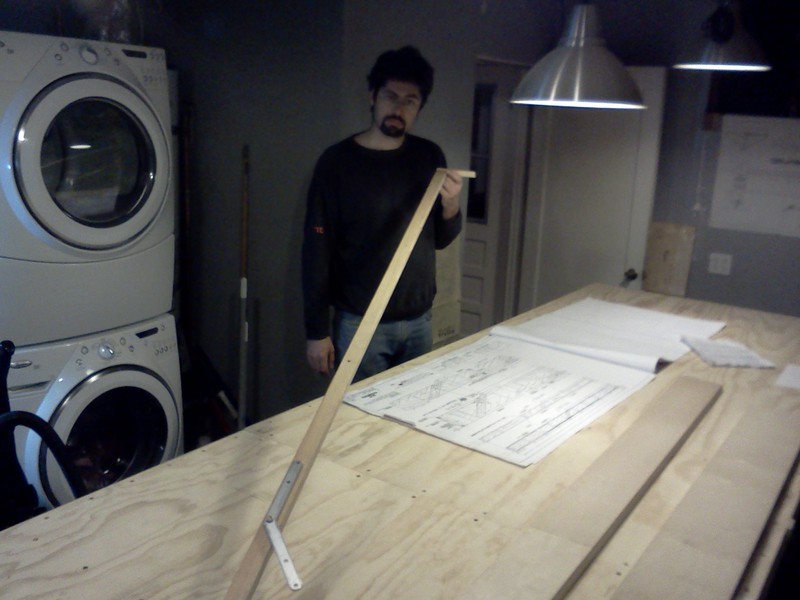
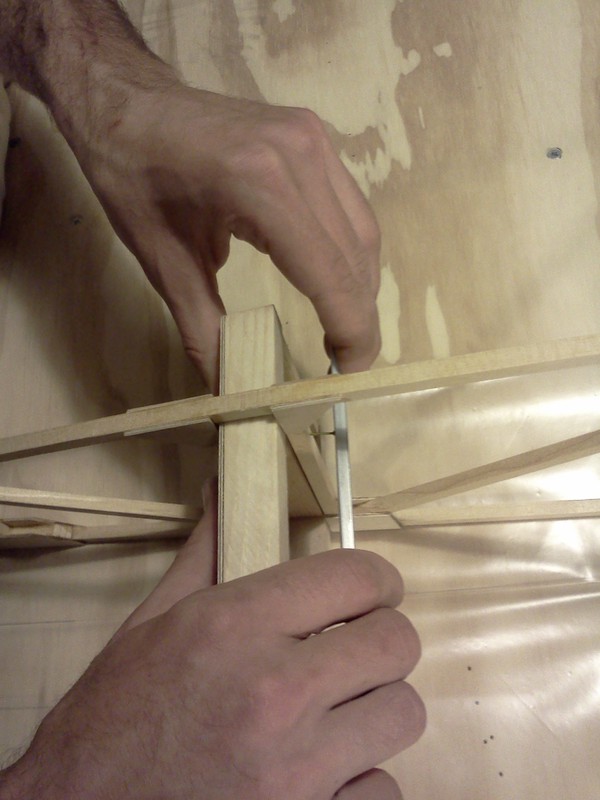
I am posting Nato's photos here--I like to keep all of these together.
Nato's original cations are:
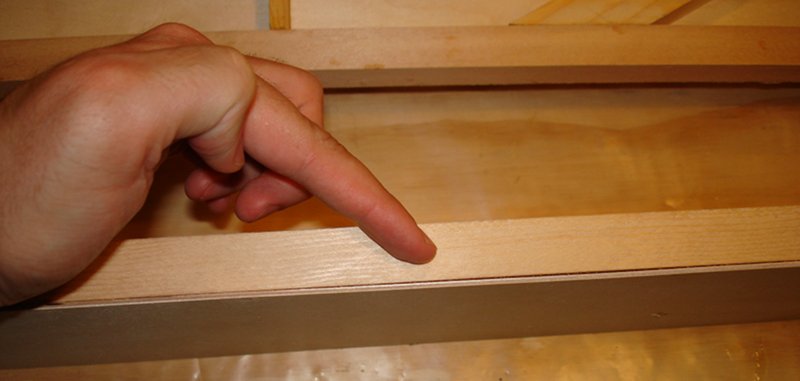
"Ari built a jig to properly position the aluminum bits so we could drill the holes for the mid-wing struts. Here you can see Ari showing off his masterpiece."
"The jig is clamped to the end of the spar."
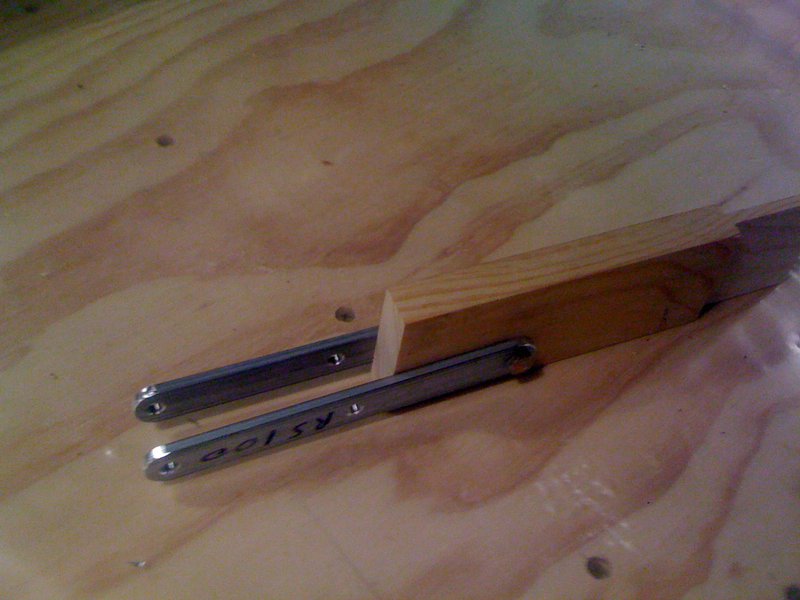
"With the jig clamped to the spar, the aluminum fittings are properly positioned for drilling."
|
|
|
|
|
|
| iter |
|
Ace
Posts: 512
Time Online: 309 days 1 hours 7 minutes
|
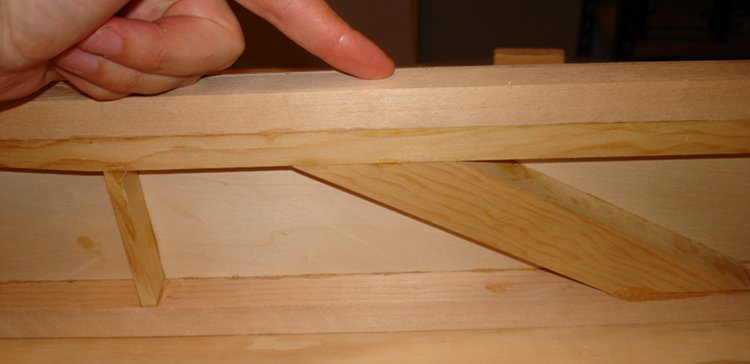
Nato's captions, cont:
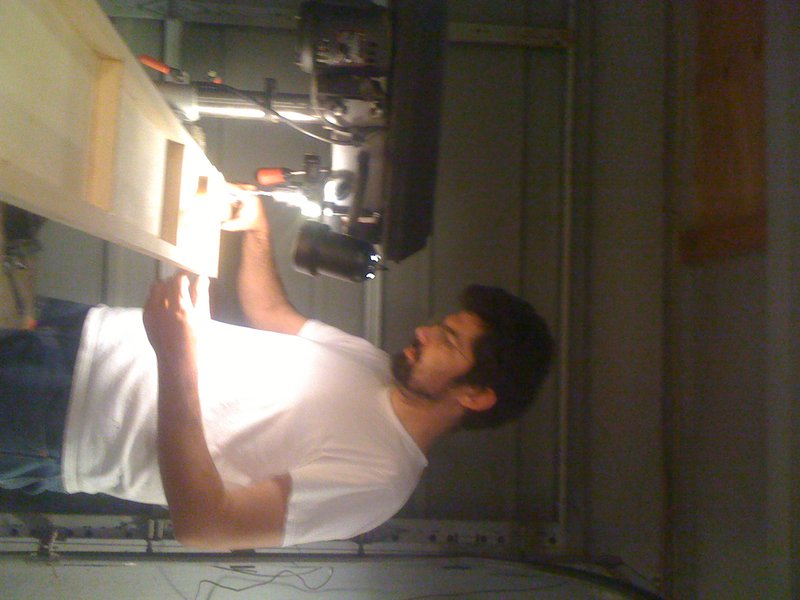
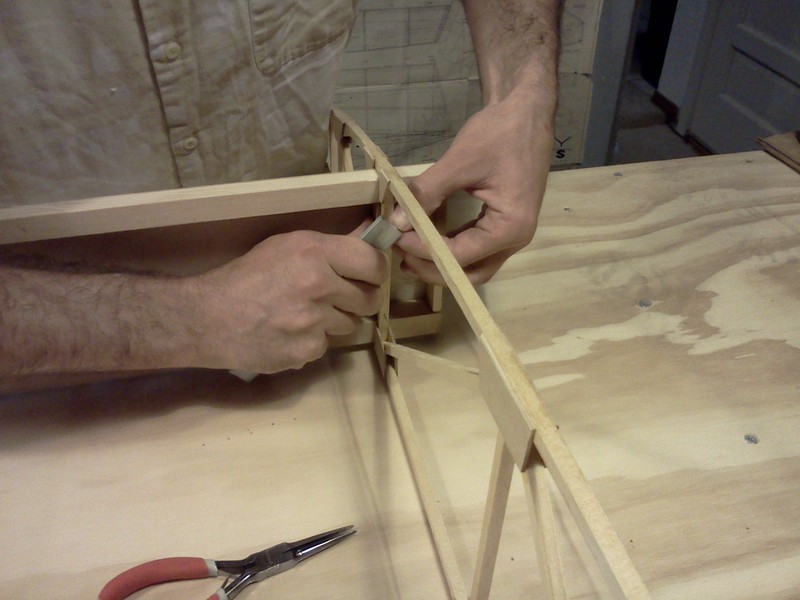
"Rather than using a tack hammer, Nato just used a scrap of aluminum as a thimble to get the tacks set in the wood prior to gluing."
"once the tack has been started, it's pretty easy to just clamp down and squeeze it into place where a tack hammer wouldn't fit."
Thank you Nato for the help and the photos!
Ari.
|
|
|
|
|
|
|


