|
|
 Pilotpeat Pilotpeat |
| September 10, 2009, 8:05am |
|
 Ace Ace Posts: 498
Time Online: 13 days 4 hours 21 minutes
|
I used a box plane, only took about 30 minutes on my first spar, 20 minutes on the others and worked great. |
|
|
|
|
|
| Phil |
| September 10, 2009, 9:09am |
|
 Ace AcePosts: 1,071
Time Online: 15 days 4 hours 18 minutes
|
Hi Ari,
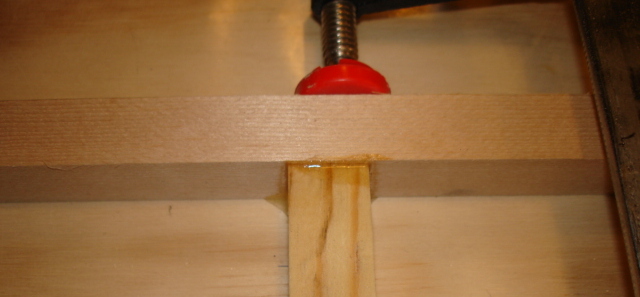
Your spar cap photos shows the quarter sawn annual rings oriented almost perpendicular to the intended lift load..It would be safer I supposed if grains be set parallel with the force.
I have 60+ hours of fun building my second miniMAX since last 6th of Aug. Taking a break! 9 ribs assembled up to this moment...have fun!
Phil
|
|
|
|
|
|
| Bob Daly |
| September 10, 2009, 1:09pm |
|
Ace
Posts: 888
Time Online: 45 days 22 hours 25 minutes
|
Ari, you building your plane in a hospital?  |
|
 Logged Logged |
|
|
|
|
| iter |
| September 10, 2009, 3:09pm |
|
 Ace AcePosts: 512
Time Online: 309 days 1 hours 7 minutes
|
Pete--I wonder how uniform the surface is on your spars. I am afraid of taking too much or too little off with a plane. Phil--Thank you for sharing your concern. Perhaps you can elaborate on the course of action you recommend. Bob--The photo in my last post is a promotional photo for http://www.sawdustshop.com. I am building the plane in my garage. I go to Sawdust Shop when I need tools I don't have in my garage. It's a real neat place, but I must say I've never seen it quite as clean as in these photos. Ari. |
|
|
|
|
|
| Charlie Harris |
| September 10, 2009, 3:37pm |
|
 Ace AcePosts: 922
Time Online: 23 days 31 minutes
|
I just knew it was a setup!!! |
|
|
|
|
|
| Randy lewis |
| September 10, 2009, 3:58pm |
|
 Ace AcePosts: 965
Time Online: 21 days 18 hours 20 minutes
|
Ari, do you have access to a jointer in that shop? You can also cut the angle with a hand plane. |
|
|
|
|
|
| iter |
| September 10, 2009, 4:35pm |
|
Ace
Posts: 512
Time Online: 309 days 1 hours 7 minutes
|
There is a jointer at the shop. It sits behind the second table saw, in the same orientation and the same insufficient space between it and the wall. Maybe if I bring in 4 complete spars, I can sufficiently impress the owner to convince him to rotate one of the saws.
Ari. |
|
|
|
|
|
| Pilotpeat |
| September 11, 2009, 12:23am |
|
Ace
Posts: 498
Time Online: 13 days 4 hours 21 minutes
|
I just made a line on the side of the spar where it needed to be trimmed down to, the whole length of the spar. Then planed to the line, and test fit a rib over it. It needed a little more in a couple of areas for the rib to slip on, but when they were all done, it looked like a machine had done it. And all it cost was a 12.00 hand plane! It helps a lot to have the spar clamped to the bench so it doesn't move around when you are trying to plane on it.
Pete |
|
|
|
|
|
| Phil |
| September 11, 2009, 4:15am |
|
Ace
Posts: 1,071
Time Online: 15 days 4 hours 18 minutes
|
Phil--Thank you for sharing your concern. Perhaps you can elaborate on the course of action you recommend.
Ari.
Before glueing spar members. See to it, looking in the spar caps end, wood grain should be set in vertical position (front and rear C-channel spars standing upright) this will maximized wood bearing strenght. Phil |
|
|
|
|
|
| iter |
| September 11, 2009, 4:52am |
|
Ace
Posts: 512
Time Online: 309 days 1 hours 7 minutes
|
Hours today: 1
Running total: 338
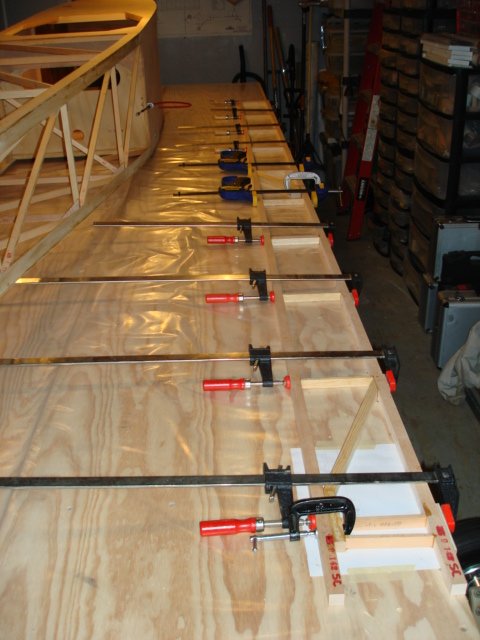
Front right wing spar drying on my table.
I find it strange that it took me so long to simply glue up the sticks that I cut the night before. I worry about the integrity of my spars and check everything several times. Butt joins suck in glue, and I end up putting glue two or three times on the ends of verticals before I clamp them into place.
I notice that the spar cap stock in the kit is slightly oversize. I notice that the verticals aren't. I wonder if this can be a problem when I come to attach the plywood. The webbing goes on one side only so I can line up the verticals to have that side flush with the caps. I worry about plywood reinforcements for metal fittings on the root and strut attachment point.
Pete--Thank you for sharing your experience. I am happy to know I have a fallback if I can't use a big saw.
Phil--Thank you for your recommendation. My RS-9SC seem to have the grain at almost 45 degrees. For the ones that aren't, I see the value of lining them up as you suggest.
Ari.
|
|
 |
|
|
|
|
|
|
| Charlie Harris |
| September 11, 2009, 3:35pm |
|
Ace
Posts: 922
Time Online: 23 days 31 minutes
|
Ari: Will the front vert. RS-1 on the ribs nail up correct if You do that??? I don't have a set of plans with me right now so Just think everything through. Charlie |
|
|
|
|
|
| iter |
| September 11, 2009, 4:43pm |
|
Ace
Posts: 512
Time Online: 309 days 1 hours 7 minutes
|
Thank you for pointing this out Charlie. They won't.
I can run the spar through a belt sander (that one has clearance around it) to remove oversize thickness. I wonder if the spar as it is now, without any plywood, is strong enough to go through a sander without breaking.
Ari. |
|
|
|
|
|
| Mike Howe |
| September 11, 2009, 11:25pm |
|
 MiniMax, Hawk, GA (Tipacer), another Max to finish AcePosts: 375
Time Online: 7 days 7 hours 30 minutes
|
Tell your wife "of course they remember me. I'm one of the guys!" Anyway, I would not worry too much about all the dimensions. Just build square and straight. When you get to the point of mounting the wings to the fuse, you level the fuse to the top longerons, attach the wing at the front carry through, pivot the wing down to get the right "angle of attack" and pin the rear carry through. Then with the wing held in the correct attitude (attack, dihedral, no washout) you pin the struts. The struts will telescope some to allow for a lot of measurement error. Great to see you back at it. Mike Howe  |
|
Mike Howe
howetyr@yahoo.com
|
|
|
|
|
|
| Phil |
| September 12, 2009, 1:56am |
|
Ace
Posts: 1,071
Time Online: 15 days 4 hours 18 minutes
|
Ari,
Sanded surfaces to be glued on aircraft wood works not advisable. It should be block plane when reducing thickness on this kind of job.
Phil |
|
|
|
|
|
| iter |
| September 12, 2009, 3:34am |
|
Ace
Posts: 512
Time Online: 309 days 1 hours 7 minutes
|
Mike, thank you for your encouragement.
Phil, thank you for sharing this rule of thumb. I wonder if you can elaborate on the dangers of sanding aircraft wood.
Ari. |
|
|
|
|
|
| iter |
| September 12, 2009, 5:36am |
|
Ace
Posts: 512
Time Online: 309 days 1 hours 7 minutes
|
Hours today: 0.5
Running total: 338.5
Left front spar is drying on the table. No picture tonight--it looks exactly like last night's.
Ari. |
|
|
|
|
|
| Charlie Harris |
| September 13, 2009, 10:53pm |
|
Ace
Posts: 922
Time Online: 23 days 31 minutes
|
"Exactly" just jokeing, But it better not be!!! |
|
|
|
|
|
| Bob Daly |
| September 14, 2009, 1:12pm |
|
Ace
Posts: 888
Time Online: 45 days 22 hours 25 minutes
|
Should be "exactly". You'll determine which will be the left spar and which will be the right when you glue on the ply web. |
|
| Logged |
|
|
|
|
| Phil |
| September 18, 2009, 2:12am |
|
Ace
Posts: 1,071
Time Online: 15 days 4 hours 18 minutes
|
Mike, thank you for your encouragement.
Phil, thank you for sharing this rule of thumb. I wonder if you can elaborate on the dangers of sanding aircraft wood.
Ari.
Sanded wood fibers can be crushed, burned and accummolate dust enable glue penetration. |
|
|
|
|
|
| Bob Daly |
| September 18, 2009, 1:34pm |
|
Ace
Posts: 888
Time Online: 45 days 22 hours 25 minutes
|
Regarding Phil's comments about planing vs. sanding and glue joints: He is absolutely correct. But I suggest this is one of those cases where one can deviate from a best practice without compromising the stucture. The glue area is huge in this case. The web would tear long before separation from the spar caps even with poor glue joints. To mitigate the issue in question I'd simply use a filler to thicken the glue joint between the verticals and the web/rib. It looks like the we're talking about less than 1/16". The beauty of the built-up spar is minor discrepancies in technique do not prevent us from building a perfectly serviceable spar. |
|
| Logged |
|
|
|
|
| iter |
| September 19, 2009, 7:35pm |
|
Ace
Posts: 512
Time Online: 309 days 1 hours 7 minutes
|
Bob--re: identical spars, this is my interpretation of the plans. All th ewhile they have no plywood on them, the right and left spars are identical.
Phil--thank you for your explanation. I understand your concern better now.
The shop has a thickness planer. I have the same concern about feeding my spar though it as I have about the jointer--I worry that the glue may not hold under the stress.
Ari. |
|
|
|
|
|
| jody miller |
| September 19, 2009, 10:18pm |
|
 Ace AcePosts: 435
Time Online: 28 days 19 hours 32 minutes
|
ari,if the wood shop has a wide belt drum sander use it.use a 80grit belt and shop vac the wood after.feed the spars at a slight angle (use all of the feeding belt area)It will not put stress on the glue joint like a planer will.If all u have is a planer apply the ply to one side then run it through the planer.that way the all the glue joints will be supported and locked in place.also build up a few test pcs and try them first,it is better to have kill a test first than have the planer set to low on the first pass of your spars! |
|
|
|
|
|
| Phil |
| September 19, 2009, 11:32pm |
|
Ace
Posts: 1,071
Time Online: 15 days 4 hours 18 minutes
|
Ari,
Bare plywood surfaces from factory should be scrap to remove possible wax substance applied during manufacturing process this is to insure positive glue bonding within plywoods into other components.
Phil
|
|
|
|
|
|
| iter |
| November 13, 2009, 8:25am |
|
Ace
Posts: 512
Time Online: 309 days 1 hours 7 minutes
|
Hours on Sunday: 3
Running total: 341.5
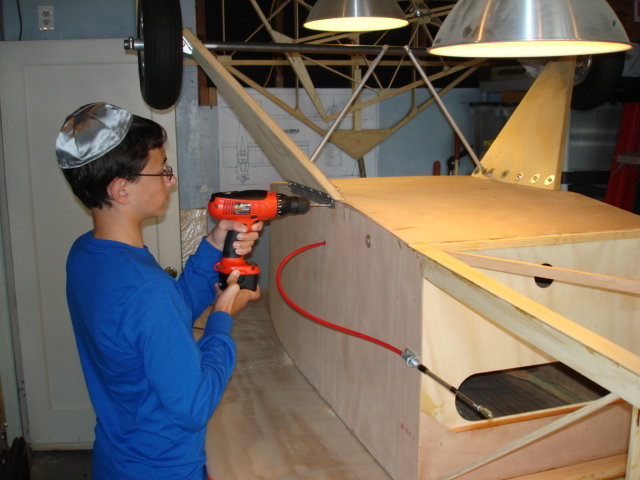
Josh, on of my Young Eagles, is helping me with the project. Last Sunday he and I put finishing touches on the fuselage so we can put the complete article away and use the table to build wings. When I put the landing gear on the fuse the first time, the holes I drill go through some cross members. I plug the original holes with dowels and epoxy. On Sunday, Josh helps me drill new holes 1/4" forward of the old ones. We have to flip the fuselage up and down a number of times as we dry-fit the landing gear. I am grateful to have Josh's help--it's all but impossible to flip the fuse alone. While we have the fuselage on gear, Josh gets to try it on for size. We also add the 1/4" plywood pads that hold LG legs from sliding in.
Ari.
|
|
|
|
|
|
| carrycorrie |
| September 1, 2010, 4:57am |
|
Guest User |
"Josh, on of my Young Eagles, is helping me with the project. Last Sunday he and I put finishing touches on the fuselage so we can put the complete article away and use the table to build wings." Wow, great team, working together to make the works more beautiful. Good work. -------------- free beat maker downloads software |
|
| Logged |
|
|
|
|
| erkki67 |
|
 Ace AcePosts: 311
Time Online: 55 days 20 hours 55 minutes
|
And what did happend to the building here?
Erkki |
|
|
|
|
|
| iter |
|
Ace
Posts: 512
Time Online: 309 days 1 hours 7 minutes
|
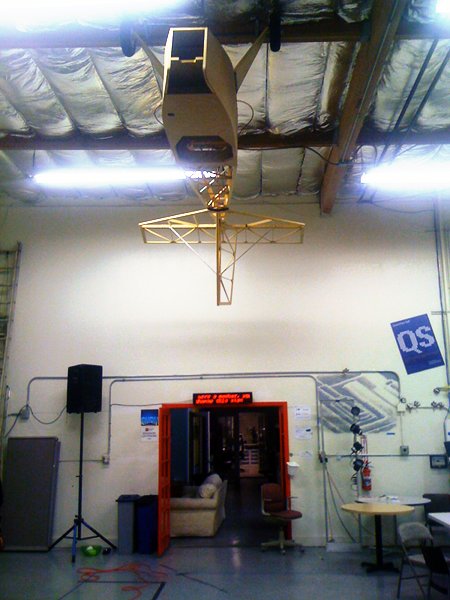
Well funny you should ask Erkki.
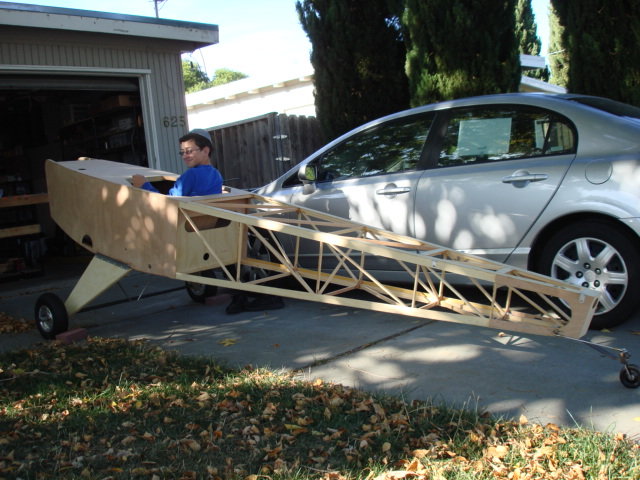
After 3 years of not building, and after a marital separation, I am back in business--today! I am moving the fuselage (it's complete) out of my garage so I can have room to build wings. I have the coolest place to store the fuse--tomorrow I am hanging it from the ceiling in my office.
Ari.
|
|
|
|
|
|
| thunder669 |
|
 Ace AcePosts: 700
Time Online: 20 days 22 hours 9 minutes
|
sorry to hear about the seperation and project on hold for so long but glad to hear you are going to get back at it, i actually read you entire thread before starting mine and it really helped motivate me and make me decide this was the project for me |
| Once you have tasted flight, you will forever walk the earth with your eyes turned skyward, for there you have been, and there you will always long to return |
|
|
|
|
|
| iter |
|
Ace
Posts: 512
Time Online: 309 days 1 hours 7 minutes
|
Thank you for your support Thunder.
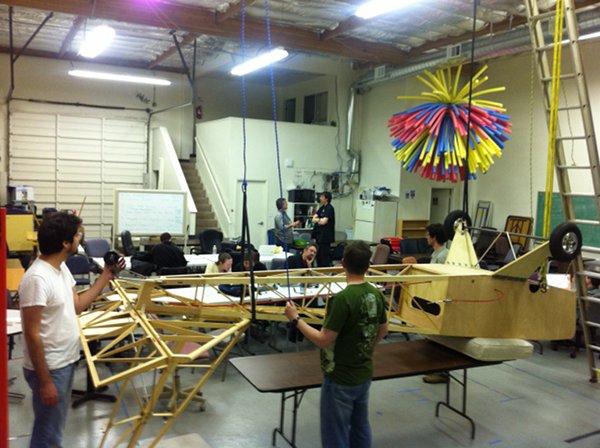
Well, the airplane is up, with a little help from my friends. I notice with pleasure that I have many more friends now who are willing to help with the airplane than previously.
It's kind of scary, actually, looking at it from below.
Ari.
|
|
|
|
|
|
| iter |
|
Ace
Posts: 512
Time Online: 309 days 1 hours 7 minutes
|
|
|
|
|
|
|