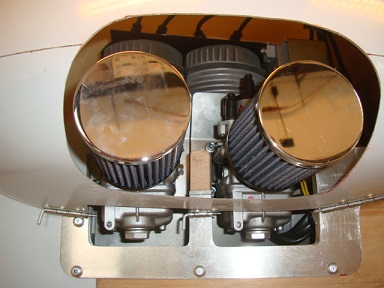
Reto, I have not taken the time to look at the whole thread, But along with wishing your health issues can be overcome, And glad to see you back at the build.... Remember that you need to safety tie the carbs. and/or the carb. boots to make sure they don't vibrate and fall off while in flight. Don't know if the engine or air filters you have include this information as part of their (set up instructions). Just something I thought I would post/pass on, encase you didn't know about it. TTT
Hi Tom, thank you for your kind message. The carb. issue is of concern to me and your suggestion will make them safely attached during operation. The manufacturer doesn't mention it. Cheers, Reto
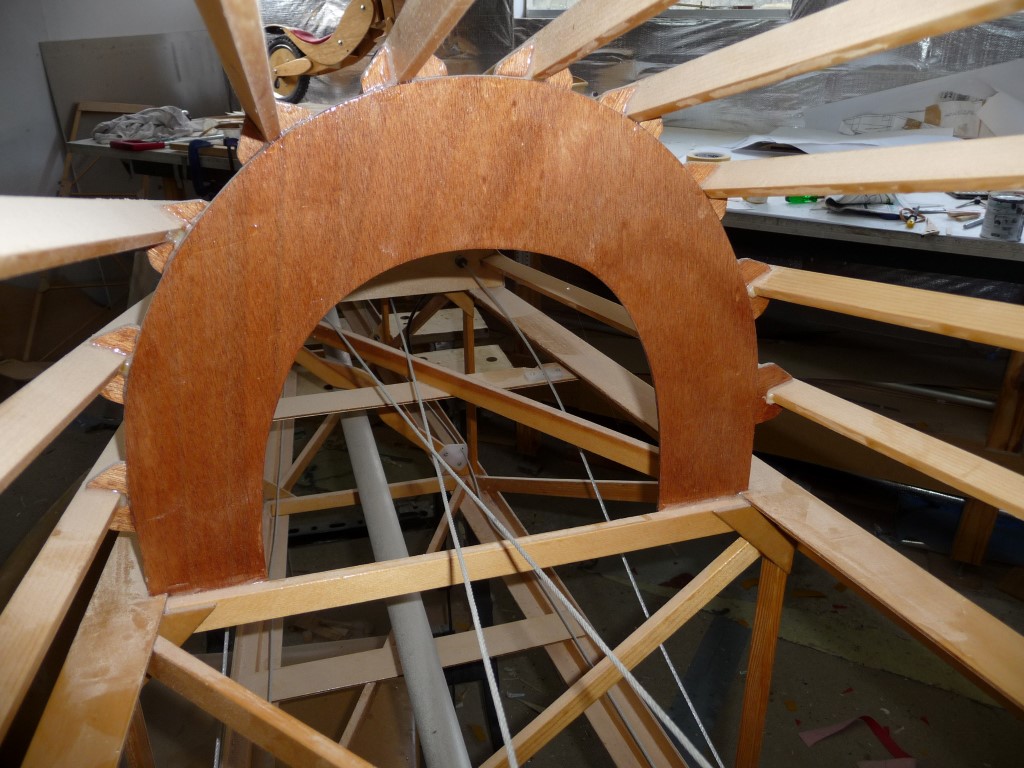
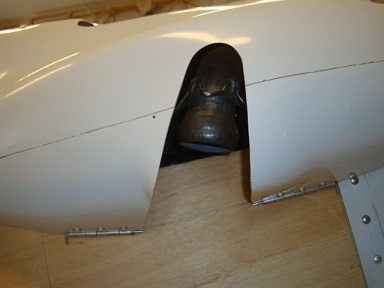
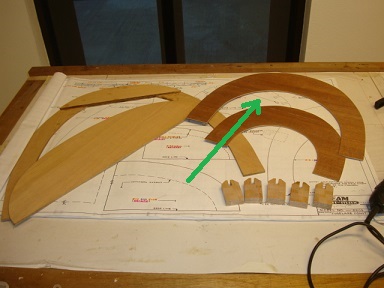
F4 & F5 should be installed forward of station 5 respectively 6 (picture 2).. . . . . Could it be glued behind the cross member so the full width will be available for glueing?
Hi Reto. Beautiful build - good you're back making sawdust and I hope you stay well.
To answer your question, I glued those frames behind the station for the reason you mention.
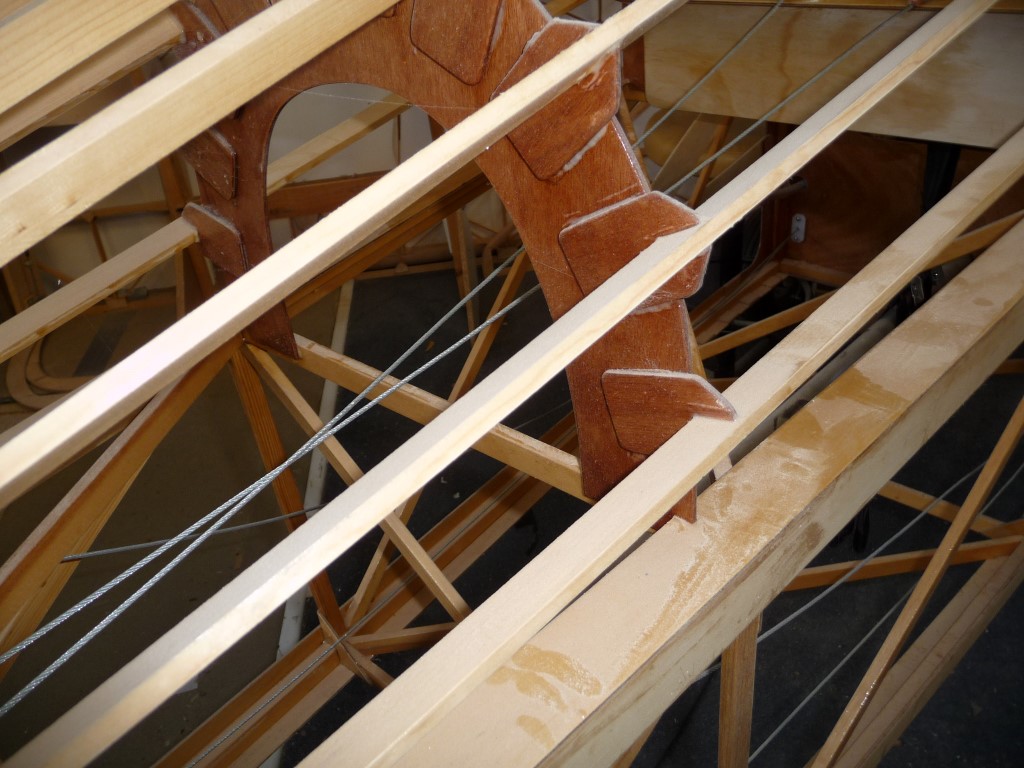
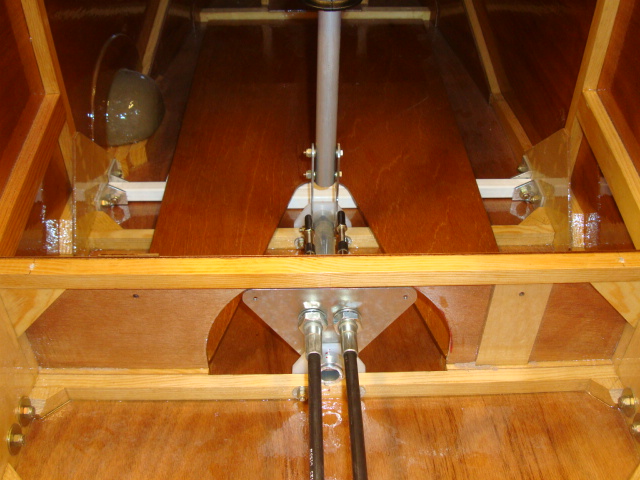
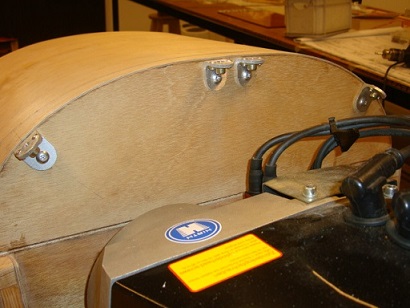
I also glued the brackets that support the stringers to the aft face of the frame, just because when you look down the inside of the fuselage from the cockpit, it looks neater - see attached pics.
Where did you buy your Hirth engine from? I may go this way if my old 503 looks a bit iffy when I come to inspect it.
Hi Reto. Beautiful build - good you're back making sawdust and I hope you stay well.
To answer your question, I glued those frames behind the station for the reason you mention.
I also glued the brackets that support the stringers to the aft face of the frame, just because when you look down the inside of the fuselage from the cockpit, it looks neater - see attached pics.
Where did you buy your Hirth engine from? I may go this way if my old 503 looks a bit iffy when I come to inspect it.
Good luck with your build
Bruce
Hi Bruce
Thank you very much for your pictures and comment.
You have installed the F4/F5 bulkheads in the way I was intending to install them. Your set up looks very neat indeed (speaking of beautiful build...)
Question: Did you enlarge the bulkheads F4/F5 slightly, in order to install them sitting on the fuselage longeron ply? Further more, I see the stringer attach plates are moved in, in order to have the stringers sitting on the bulkheads. Certainly your arrangement adds maximum additional strength. Might order some ply and go the same route...
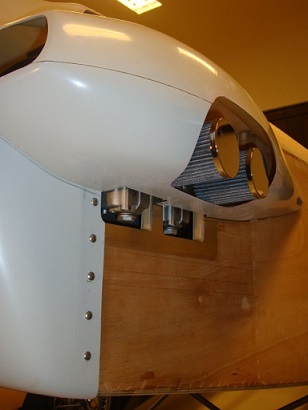
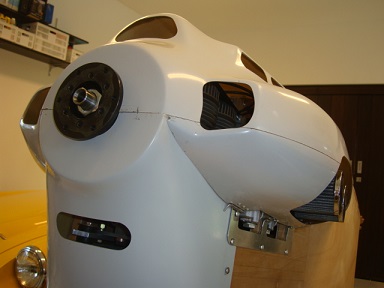
Regarding the Hirth conversion. The 3202 engine was ordered directly in the German factory (with factory support and test run). The conversion requires some adjustment being made to the engine mounting plate, position of the plate and nose section of the Eros (my pictures-reply in this forum #104/113/123).
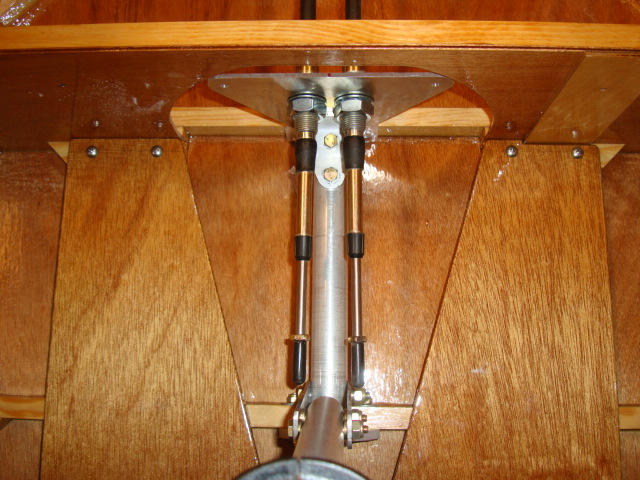
On your picture it seems your elevator control system is realized via push/pull rod. Contemplating since a long time about that... I will incorporate all the MM91 UK modifications. One of the improvements is a dual cable elevator control system, but the push/pull rod would be so much easier and less fiddle. Where did you get the parts if I way ask?
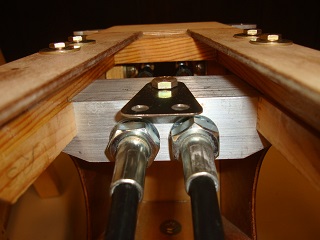
No. I didn't enlarge the frames - that's how they were on my plans. And the stringer brackets finish in different positions relative to the outside curve of the frame depending on which frame you are looking at. The stringers are a straight line, the brackets are adjusted positionally to support them. Photo shows how my brackets are positioned on that particular frame.
As regards my pushrod control system, I made that system myself. I prefer pushrod & torque tube to cables, and the weight & cost penalty is very small, if any. You can see my thread on the pushrod controls here: http://www.lonesomebuzzards.com/cgi-bin/forum/Blah.pl?m-1430015479/
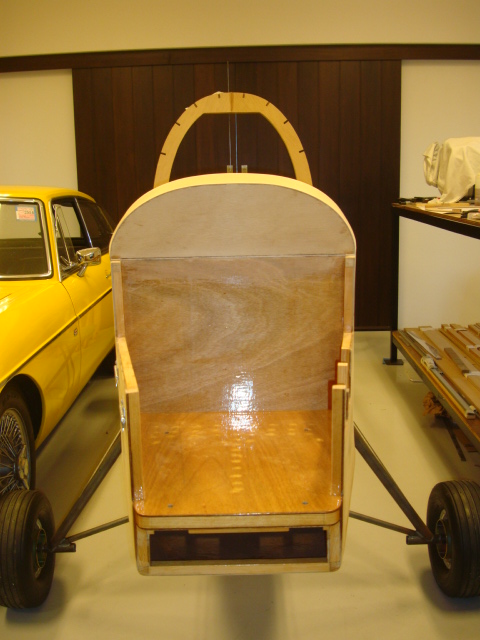
By the way, that looks a nice MGBGT you have next to your plane. I've had a couple of those, and loved them. The last was an MGBGT-V8, with the 3.5litre V8 engine. That was lots of fun!
Reto, forgot to thank you for your reply to my engine question . I will need to buy from Germany also as there are no Hirth dealers in Australia. Do you have contact details? I guess I can find them on the web easily.
Can you tell me why you went for the 3202 instead of the F23? I would be interested to hear how you get on with this engine: your installation looks very good. Although my engine bay is set up for the 503 I think I would accept the 1.5" raise to the thrust line, and tilt the nose fairings up slightly to accommodate the higher prop hub. My trim tab will handle the slight nose down effect of the thrust line change, and I'll have to see how the fairings look if I do go with this engine.
To answer you question on where I got the materials from for the pushrod system, they are all from Aircraft Spruce in America, with the exception of the pushrod tube & aileron pushrod tubing, which I bought locally (delivery costs to Australia for long lengths of tube are very high).
No. I didn't enlarge the frames - that's how they were on my plans. And the stringer brackets finish in different positions relative to the outside curve of the frame depending on which frame you are looking at. The stringers are a straight line, the brackets are adjusted positionally to support them. Photo shows how my brackets are positioned on that particular frame.
As regards my pushrod control system, I made that system myself. I prefer pushrod & torque tube to cables, and the weight & cost penalty is very small, if any. You can see my thread on the pushrod controls here: http://www.lonesomebuzzards.com/cgi-bin/forum/Blah.pl?m-1430015479/
By the way, that looks a nice MGBGT you have next to your plane. I've had a couple of those, and loved them. The last was an MGBGT-V8, with the 3.5litre V8 engine. That was lots of fun!
Bruce
Good eve Bruce
I was browsing through your threads. I am humbled by your work. Incredible indeed. No other words.
Today I made dummy F4/F5 bulkheads. You are absolutely right with your comment. The stringers sit "naturally" close to the bulkhead edges and my "final" relative stringer position is identical to yours.
Seeing the complexity of your beautiful push rod system, I will follow the dual teleflex route (UK mod.). Wished though, I would have got your skill level and patience to do the rods too...
I am planning to install the drooped wingtips. Unfortunately they are quite heavy. Your Heorner tips look beautiful and light weight. Worth considering...
The yellow car is a MGC GT, straight 6, 3ltr. Was a complete wreck, but got it back to live and just passed Thai MOT. Still lots of work to do, but the grand old lady is smiling again after 15 years of total neglectance... My problem is: I can't do both at the same time (limited time/energy)...
Reto, forgot to thank you for your reply to my engine question . I will need to buy from Germany also as there are no Hirth dealers in Australia. Do you have contact details? I guess I can find them on the web easily.
Can you tell me why you went for the 3202 instead of the F23? I would be interested to hear how you get on with this engine: your installation looks very good. Although my engine bay is set up for the 503 I think I would accept the 1.5" raise to the thrust line, and tilt the nose fairings up slightly to accommodate the higher prop hub. My trim tab will handle the slight nose down effect of the thrust line change, and I'll have to see how the fairings look if I do go with this engine.
To answer you question on where I got the materials from for the pushrod system, they are all from Aircraft Spruce in America, with the exception of the pushrod tube & aileron pushrod tubing, which I bought locally (delivery costs to Australia for long lengths of tube are very high).
Cheers
Bruce
Bruce
The reason I went for the 3202 is several fold. It is the direct Hirth replacement for the Rotax 503 and has a very high TBO (1000hrs/75% power). The sleek cowling of the Eros could most probably not accommodate the F23. On other reason I went for the 3202 is the fact that it is actually a down rated version of the 3203 and therefore (hopefully) very robust. On top of that it has an option for an electric starter motor, which the F23 doesn't offer.
Otherwise I can't comment as I haven't got any experience with either type (Rotax/Hirth). Hirth contact details will follow via PM.
I am very glad to know there is someone building an Eros at almost the same time... Are you incorporating the UK modifications too (saw your seatbelt attachment...)?
Seeing the complexity of your push rod system, I will follow the dual teleflex route (UK mod.)
It's not really complex, or particularly difficult to make. I have no metal working machinery (lathe or mill) so everything is just made by hand, using drill press, hacksaw and hand files.
If the aileron bellcrank part seems too tricky, the elevator pushrod is very easy to make, though you will have to re-work the standard aileron quadrant to allow the pushrod to pass through it. I made a dummy plywood one to check my drawings of the cutout in the middle were correct.
And you can make an elevator pushrod system for less than the price of a second Teleflex cable (particularly if you can find some used hanglider tubing).
Wow, an MGCGT. I never drove one of those. Looks a beautiful restoration job. I guess you've had to inject the sills & other chassis items with Waxoyl or similar to guard against rust in your humid months? Most British Leyland cars in UK died of rust. I know because I was always the guy at the end of the chain who bought them last, just before they fell apart. But I loved the MG's. I had an MG Midget Mk 2 for 14 years; also an MGA. Best one was the BGT with the V8 though.
I went for the 3202 (because) it is actually a down rated version of the 3203 and therefore (hopefully) very robust
Sounds good to me - rather a big lazy engine than a small buzzy one! I understand from those with experience in this area that the boxer format of an F23 is likely to vibrate a lot more than an inline layout. Although ISTR Bob Daly (I think it was him, sorry if I'm wrong) made his own mount for an F23 and said it ran very smoothly. But I'm guessing you'd need a more sophisticated setup than the standard 503/447 arrangement to achieve this.
Yes, I'm incorporating the UK mods. Seems sensible to take advantage of other peoples' experience.
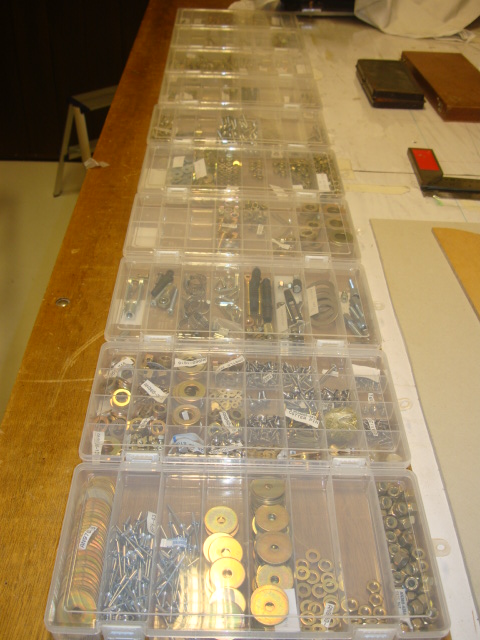
We made a complete inventory. Now waiting for missing parts from Spruce and MM to continue.
In the mean time finished the flight controls. Decided to use double elevator control cables arrangement (according UK mod.). I am surprised how smooth the teleflex cables move.
Sat in the cockpit and made some aircraft noise... Nobody saw me...
Really good plywood can be essentially a work of art in itself. We see so much horrible stuff it's hard to believe how perfect the really good stuff can be. The top quality stuff is much stronger than the mediocre stuff too. It never really costs that much more.
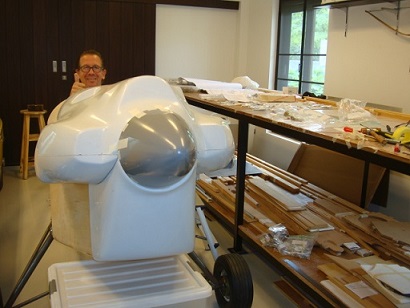
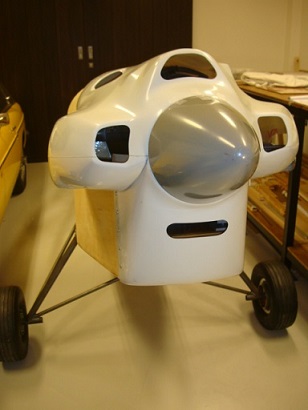
Great job on the cowlings, Reto. Especially considering all the relocating work you had to do for a non standard engine. I'm looking at how much I'll have to do on the cowlings to fit a different engine, and it's a lot of work.
Have you looked into which propellor you will use for the Hirth?


 Logged