Mine are what I would call "highly modified" muktuk's I've reengineered them significantly. I have a much better (larger) float design for my next plane. Let me know if I can help you in any way, I build primarily for seaplanes now but my prior boatbuilder skills come in handy. Incidentally we have looked at moving out your way at some point, it's on the list after Alaska.
There were different sizes available when I ordered and mine are the slightly larger ones. But first things first: MM completion, reactivation of my license, flying... The floats are really a future project.
You are sharing the boat builder background with Bruce. Think twice if you want to live in the heat over here, it's quite unbearable this year, a few days ago we got 125F!!! I think I would prefer Alaska any time...
That's a difficult question... I am focusing on building first and there is still a lot of work to do. My hours go up and up... How many hours did it take you?
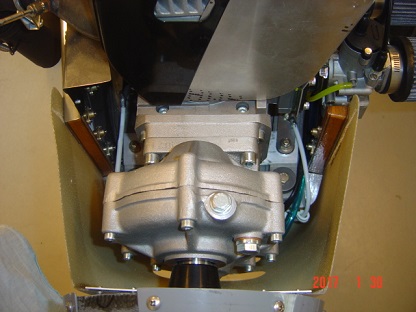
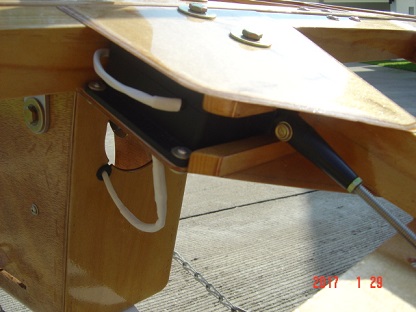
WOW you and Bruce are real artists with this stuff. My guy is structurally sound. But you have a piece of art there! Keep up the great work! Thanks for the pics of your differential braking system!
WOW you and Bruce are real artists with this stuff. My Vmax is structurally sound. But you have a piece of art there! Keep up the great work! Thanks for the pics of your differential braking system!
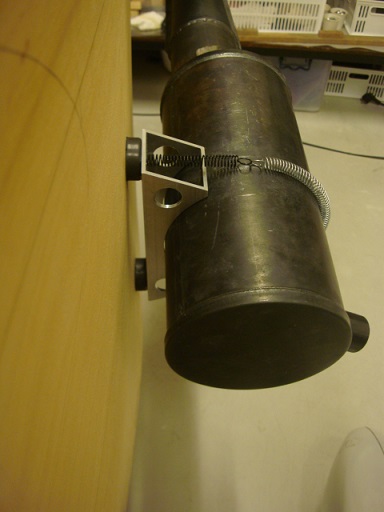
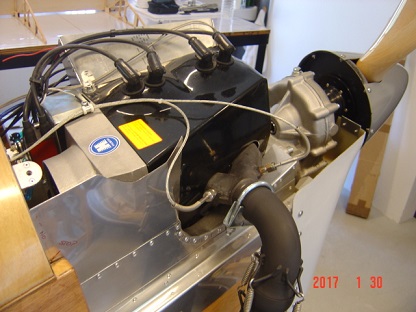
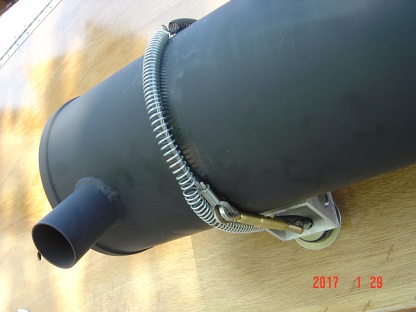
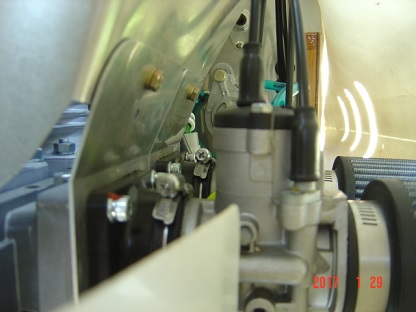
Neat job on the exhaust, Reto. And you have more of it aligned with the airflow than mine.
I have not done any extended runs with the cowl on, so can't report on how this affects temperatures. I would expect them to be a bit high on a static run without the ram effect from passage through the air.
Maybe one day I'll find out.
It will be fun if you can get your plane on floats. Next year's project?
That's a difficult question... I am focusing on building first and there is still a lot of work to do. My hours go up and up... How many hours did it take you?
Too many hours Reto, around 1200! Mainly because I did many short term sessions, it was a waste of time, reviewing the plans, bringing tools to the working table, measuring again, etc, there's no continuity that way. I built only late at night after work just three times a week, it took me close to seven years to finish the plane. At the end I didn't bothered to do a fancy paint job, I just wanted to fly the plane. But I like her color, It looks more like a serious plane, less like a toy. Anyhow I enjoyed the entire process with the only help from the fellows of this great site.
Neat job on the exhaust, Reto. And you have more of it aligned with the airflow than mine.
I have not done any extended runs with the cowl on, so can't report on how this affects temperatures. I would expect them to be a bit high on a static run without the ram effect from passage through the air.
Maybe one day I'll find out.
It will be fun if you can get your plane on floats. Next year's project?
I am very happy with the guy who did it. 10 USD is a fair price too.
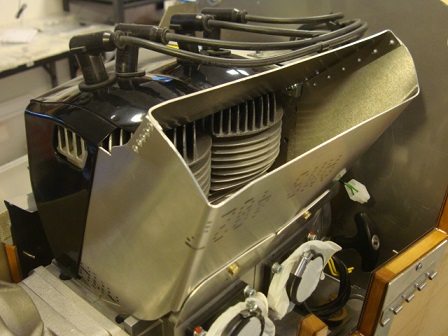
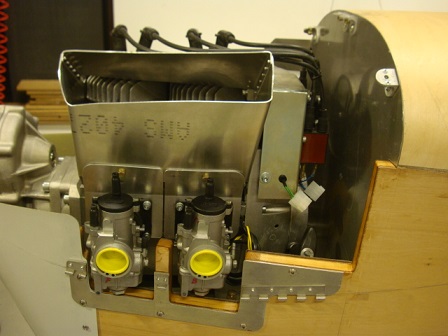
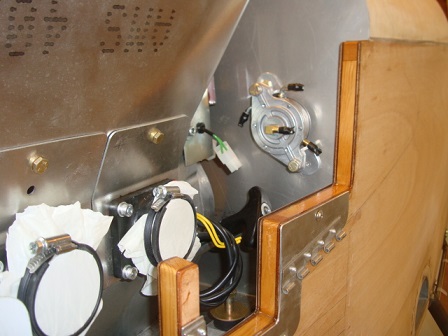
Bruce, your MZ engine seems less critical regarding air flow. Had to fabricate all kinds of air guides to satisfy factory requirements.
Too many hours Reto, around 1200! Mainly because I did many short term sessions, it was a waste of time, reviewing the plans, bringing tools to the working table, measuring again, etc, there's no continuity that way. I built only late at night after work just three times a week, it took me close to seven years to finish the plane. At the end I didn't bothered to do a fancy paint job, I just wanted to fly the plane. But I like her color, It looks more like a serious plane, less like a toy. Anyhow I enjoyed the entire process with the only help from the fellows of this great site.
I envy you Ricardo. How did you find the energy to do the building next to your work? And 1200 hours is not bad at all! I have seen your videos, your plane looks great! Yup, the forum members are very motivating and helpful, I am always learning new stuff... How many flying hours did you accumulate?
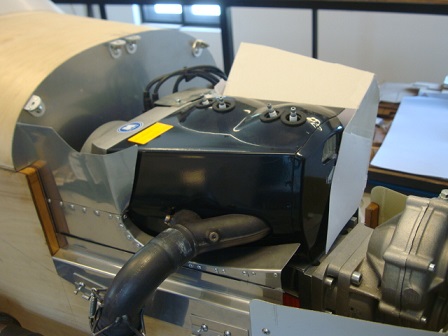
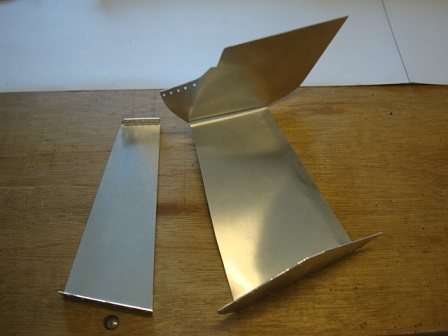
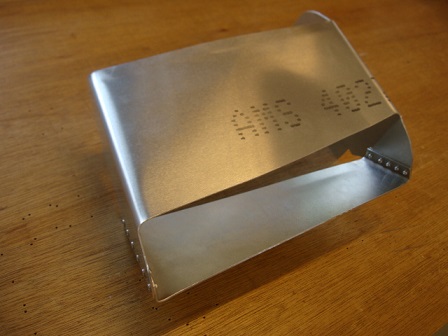
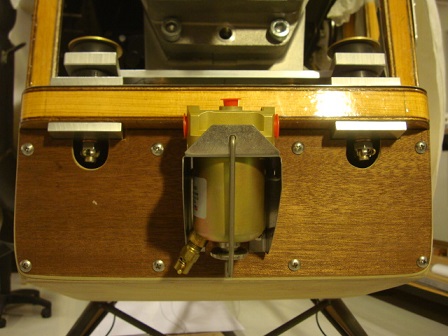
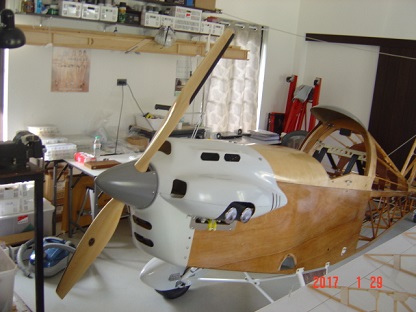
The ss heat shield is done all around the engine bay.
According Hirth technical department, the Hirth engine (covered with cowling) needs careful design of internal airflow. I spend a few days making all the necessaries guides and ducts. I am very curious if it will work and engine temps will be in limits.
Found lot's of info in the "gascolate or not" thread...
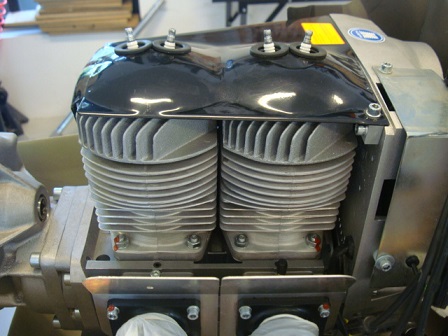
Great work on the cooling shrouds, Reto. My engine is a little different in its cooling air arrangement. I have posted some pix on my thread re cowl mods for cooling that may (or may not!) be of interest regarding cooling air through the Eros cowl.
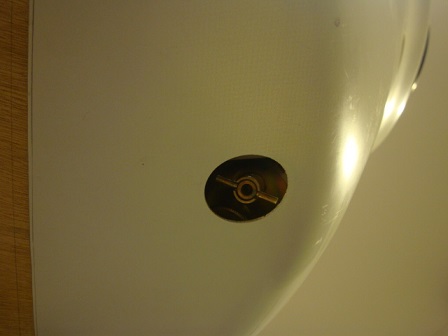
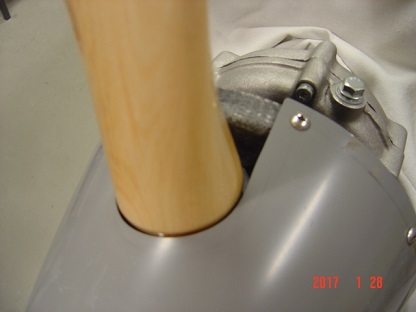
Neat placement for the gascolator. I guess being very humid where you are that condensation is likely to be a problem.
It can't be long before engine trials: looking forward to hearing how they go.
Great work on the cooling shrouds, Reto. My engine is a little different in its cooling air arrangement. I have posted some pix on my thread re cowl mods for cooling that may (or may not!) be of interest regarding cooling air through the Eros cowl.
Neat placement for the gascolator. I guess being very humid where you are that condensation is likely to be a problem.
It can't be long before engine trials: looking forward to hearing how they go.
Hirth went all the way to copy and replace the 503, but with the cooling system design they really did only half of their job. Most Hirth users opt for water cooling.
Yes it can be very humid over here, but it's more the daily range which troubles me. Like now, 15-80% rel. humidity.
Decided today not to run the engine before covering, it was done extensively in the factory. It only took me an hour or so to completely "dismantle" the fuselage.
The landing-gear-side-panel-attachment-clamps seem to work (without drilling into the landing gear). But then the gear fell off... It's easier to work inside the fuselage on the bench (not to lean into the foot well hole and brake the back)...
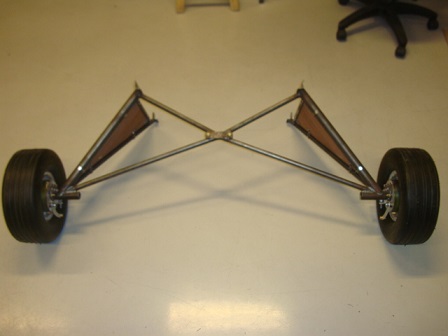
Do you have toe-in on your landing gear Reto? Just wondering how typical my gear is, given that the stub axles are 1" too short, & they have distinct toe in. I hope the suppliers have corrected these mistakes, as they are quite glaring errors.
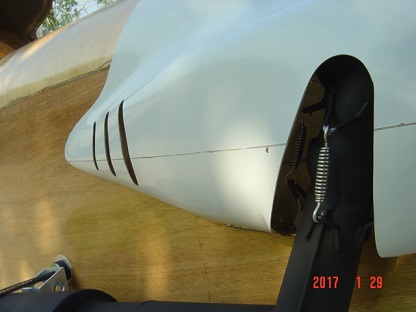
Your wooden fairings look to be to your usual standards. I just covered mine with cloth on both sides. But I made an aluminium trim piece for both upper & lower sides to fair the legs into the fuselage. Just my obsession with reducing drag!
Do you have toe-in on your landing gear Reto? Just wondering how typical my gear is, given that the stub axles are 1" too short, & they have distinct toe in. I hope the suppliers have corrected these mistakes, as they are quite glaring errors.
Your wooden fairings look to be to your usual standards. I just covered mine with cloth on both sides. But I made an aluminium trim piece for both upper & lower sides to fair the legs into the fuselage. Just my obsession with reducing drag!
As far as I remember, left side 0 toe, right side slight toe out (with the second landing gear...). I checked quite a while ago though, can re-check in 2 days, because lady "C" sneaked in the workshop for brake-spa treatment... And the previously installed two new kingpin assemblies from MOSS have excessive play, can't believe my luck!
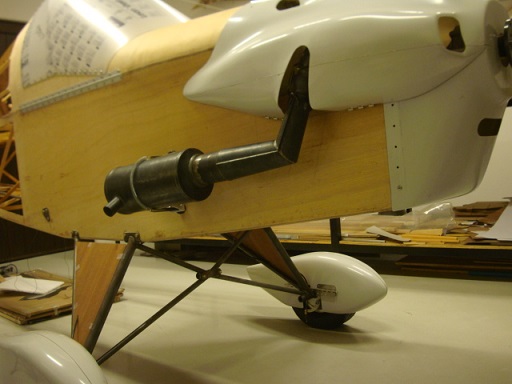
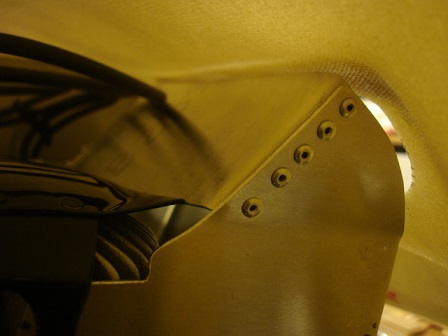
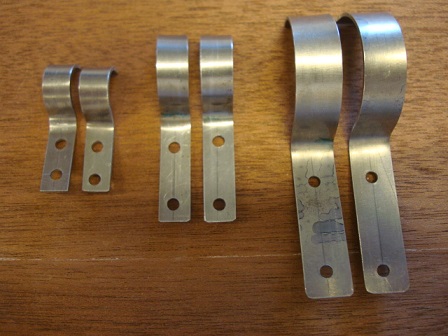
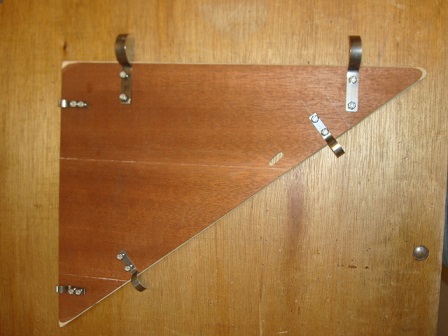
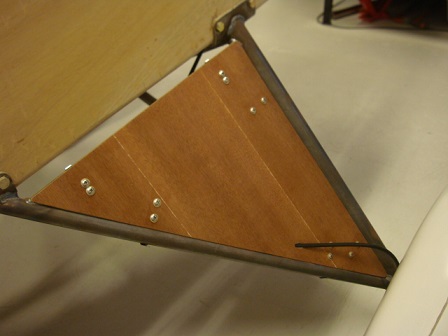
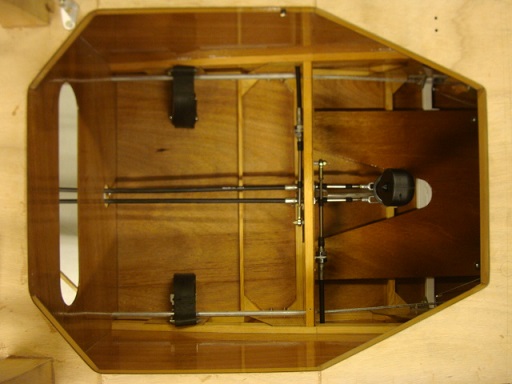
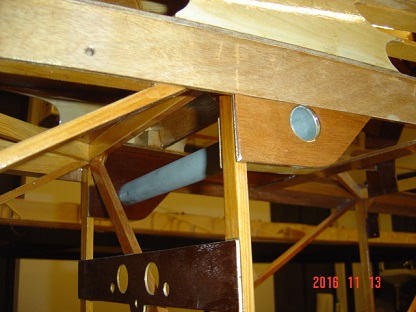
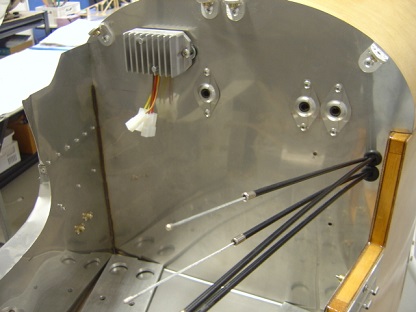
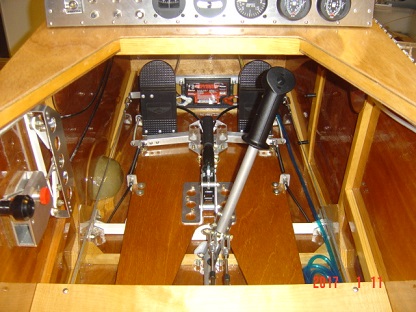
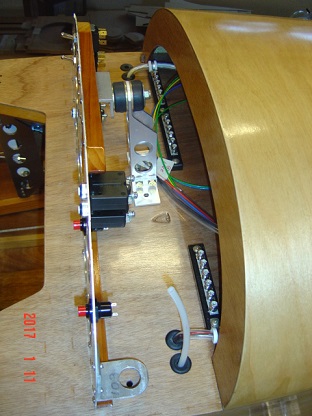
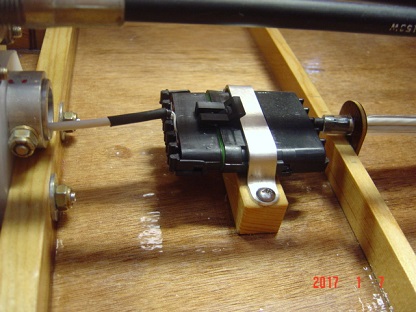
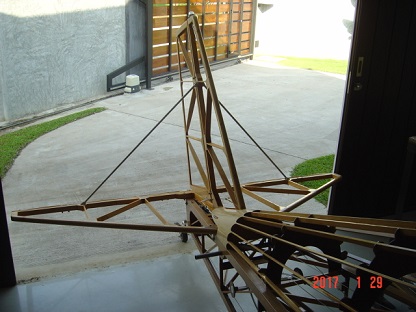
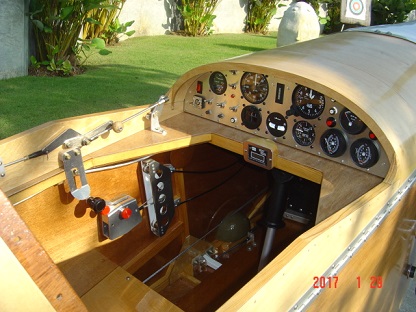
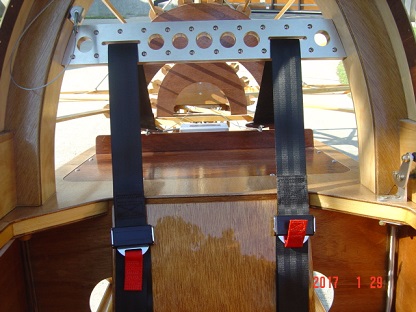
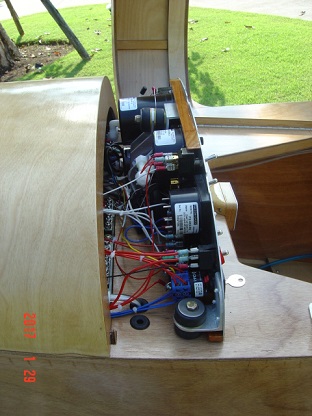
Flight controls are connected and rudder/tail wheel cables routed under the seat, inside aluminium tubes (not interfering with seatbelt attachment). Pictures #2 shows 4 additional cable guides required to clear all "obstacles"...
It has been a while since my last post. Some health issues slowed down progress (again), but inside my workshop-sanctuary there was sanding dust still accumulating almost on a daily basis (rather progressing in baby steps though…).
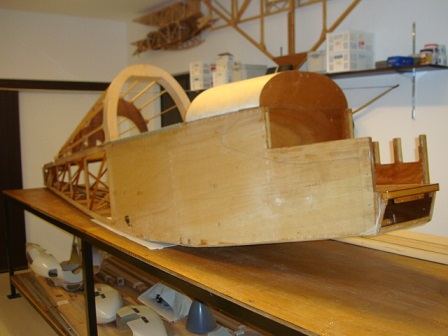
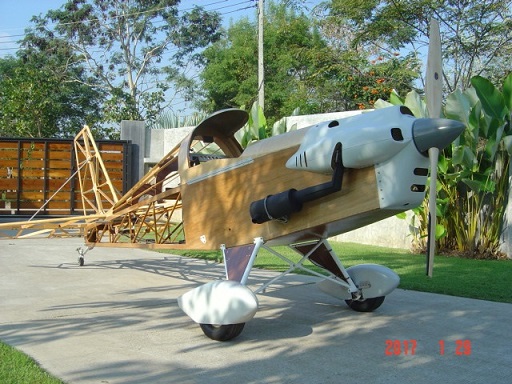
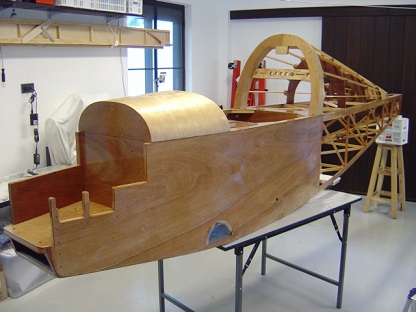
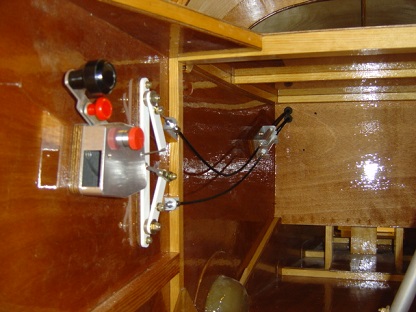
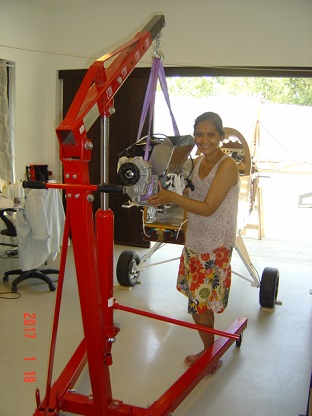
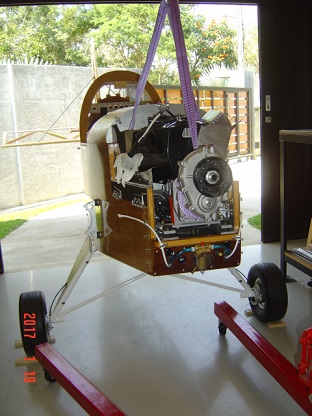
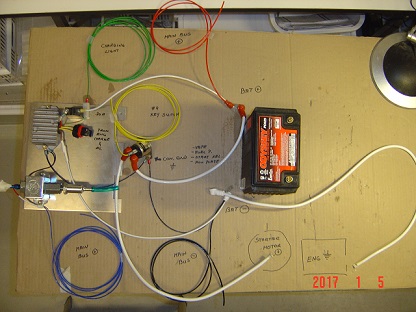
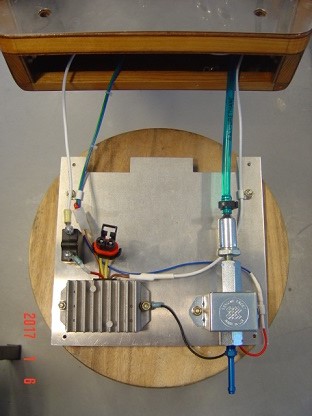
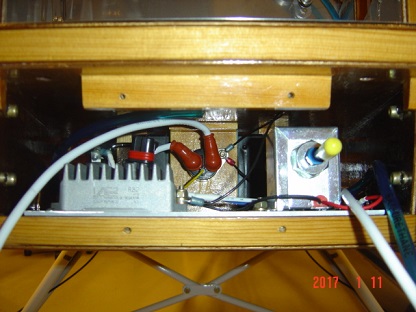
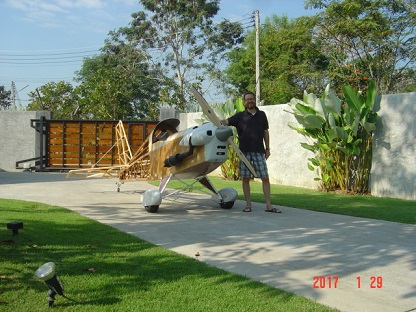
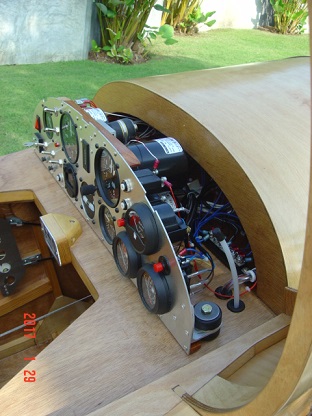
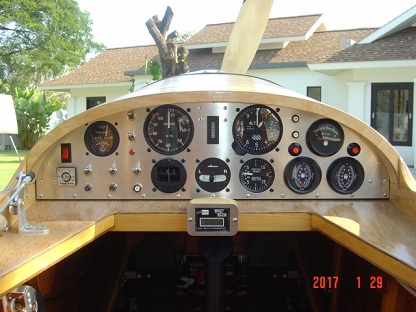
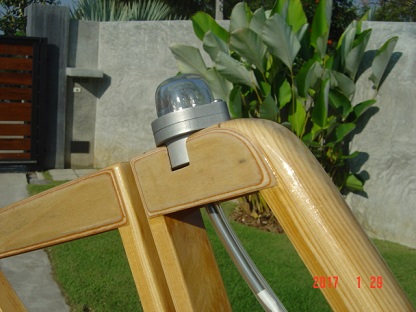
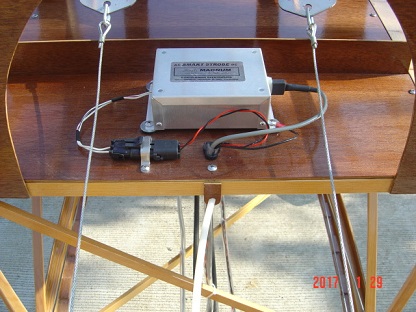
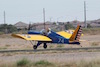
We had a few cooler, beautiful mornings over here and I am glad to share with you the roll-out of the fully functioning fuselage & empennage. Electrical system checks are done (starter turns, strobe works, Facet fuel pump connected in parallel) and pictures are taken...
Since my las post in May 2016 the following progress has been made:
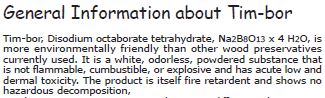
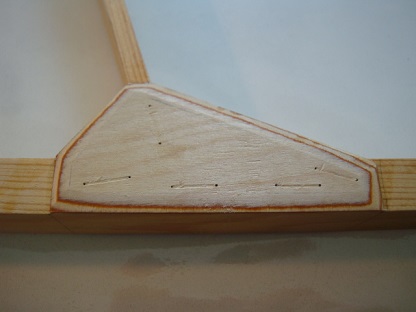
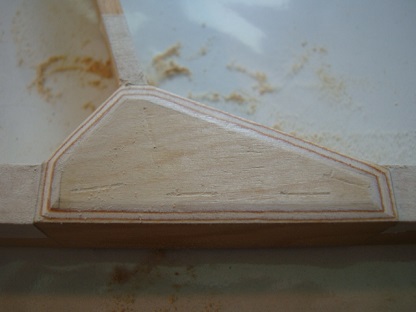
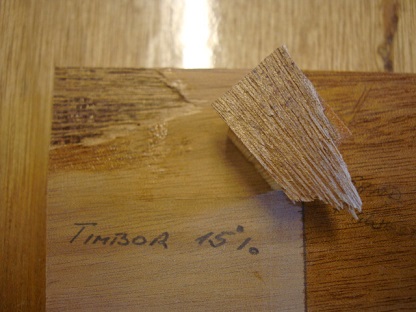
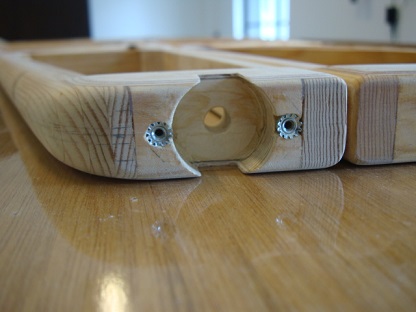
- Sourcing would treatment suitable for Tropics and compatible with West system wood coating - Installing a hard point at the tail section for lifting purpose and possible float attachment - Sanding complete fuselage and tail into shape (gussets are finally presentable) - Application of Tim-bor and West System coating - Commence with right wing - Installing a park brake system - Assembly and completion of fuselage to final functional/running stage - Growing a beard
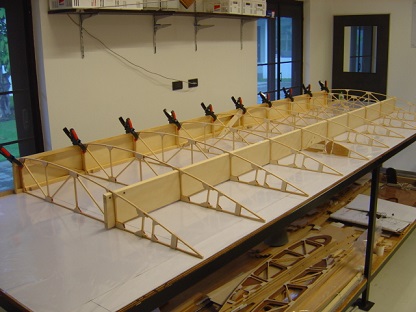
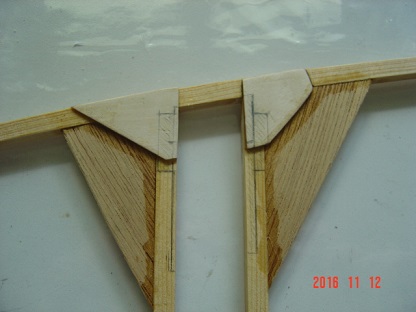
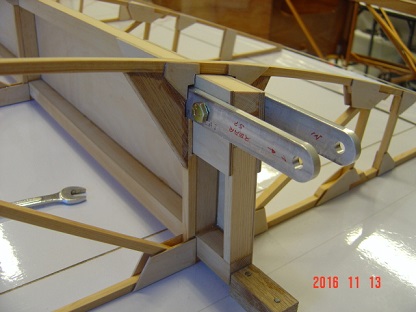
The below pictures are taken during the past 8 month and documenting the progress made. It’s certainly worth mentioning that the joy of having reached this stage in the project is kinda overwhelming…
Home phone 602-999-3715/Mini-max with Hirth 2704 Ace
Posts: 755
Time Online: 40 days 13 hours 26 minutes
Reto, Your workmanship is outstanding. Once you get the airplane complete and fully assembled the vibration and shaking you have now will be reduced because of the extra mass of the wings. Looking forward to seeing the finished airplane. Dick


 Logged