|
|
 Reto S Reto S |
|
Ace
Posts: 320
Time Online: 13 days 19 hours 26 minutes
|
Gents
Lot's of distraction (mainly health related)... But finally got back in the workshop... Didn't realize how much I actually missed building... Router action was a mess, but all went fine... Tomorrow I will turn the fuselage and continue with the upper part...
Cheers
Reto
|
|
|
|
|
|
| aeronut |
|
 blue sky and tail winds to everyone AcePosts: 1,560
Time Online: 28 days 22 hours 31 minutes
|
Looking good. I hope the health thing is getting better. |
| never surrender; never give-up |
|
|
|
|
|
| Reto S |
|
Ace
Posts: 320
Time Online: 13 days 19 hours 26 minutes
|
Looking good. I hope the health thing is getting better.
Hi aeronut The build is a great motivation... Thank you for your encouragement. Cheers Reto |
|
|
|
|
|
| Reto S |
|
Ace
Posts: 320
Time Online: 13 days 19 hours 26 minutes
|
Progressing, slowly but steadily...  The whole Hirth conversion was quite a fiddle... Now engine fits well... Cheers
|
|
|
|
|
|
| Tom |
|
Ace
Posts: 744
Time Online: 16 days 10 hours 21 minutes
|
Reto,
Do keep posting pictures. She's looking really great. You can tell she's being built with care.
Tom |
|
|
|
|
|
| JonF |
|
 Ace AcePosts: 357
Time Online: 7 days 16 hours 10 minutes
|
Excellent!!! Keep up the great work. |
| |
|
|
|
|
|
| lake_harley |
|
Ace
Posts: 1,090
Time Online: 25 days 1 hours 54 minutes
|
Workmanship looks top shelf. Speaking of shelf, I find it interesting how you lowered the engine "shelf" to allow the "up" oriented gearbox while (I suppose?) keeping the thrust line in the proper vertical plane as intended. Doing something like that to accomodate my 277 Rotax that had the "up" gearbox would have saved me many hours of stress and tinkering to get a belt reduction unit sorted. That's providing I have it sorted as well as I hope I do.
Keep up the beautiful work, and get/stay healthy!
Lynn |
|
|
|
|
|
| pkoszegi |
|
 Ace AcePosts: 1,363
Time Online: 41 days 7 hours 42 minutes
|
Great ! That will be an awesome plane ! |
|
|
|
|
|
| Reto S |
|
Ace
Posts: 320
Time Online: 13 days 19 hours 26 minutes
|
Reto,
Do keep posting pictures. She's looking really great. You can tell she's being built with care.
Tom
Dear Tom Thank you for the kind words. Trying... Cheers Reto |
|
|
|
|
|
| Reto S |
|
Ace
Posts: 320
Time Online: 13 days 19 hours 26 minutes
|
Excellent!!! Keep up the great work.
Hi Jon Thank you for your encouragement! Building her is very rewarding... Cheers Reto |
|
|
|
|
|
| Reto S |
|
Ace
Posts: 320
Time Online: 13 days 19 hours 26 minutes
|
Workmanship looks top shelf. Speaking of shelf, I find it interesting how you lowered the engine "shelf" to allow the "up" oriented gearbox while (I suppose?) keeping the thrust line in the proper vertical plane as intended. Doing something like that to accomodate my 277 Rotax that had the "up" gearbox would have saved me many hours of stress and tinkering to get a belt reduction unit sorted. That's providing I have it sorted as well as I hope I do.
Keep up the beautiful work, and get/stay healthy!
Lynn
Dear Lynn Thank you for your kind words. Frustratingly, I can't put as much time and energy into the building as I wished... The wooden engine mount had to be extended by about 1 inch and lowered by about 1 1/2 inch. As you mentioned the trust line is exactly where originally designed. Furthermore the engine mount is strengthen within and from below. Because of weight and balance, I moved the battery pack location as far back as possible. I am sure your arrangement will work beautifully, because you must have put lots of thinking into it too... Cheers Reto
|
|
 |
|
|
|
|
|
|
| Reto S |
|
Ace
Posts: 320
Time Online: 13 days 19 hours 26 minutes
|
Great ! That will be an awesome plane !
Still a long way, but the journey is rewarding already... Cheers Reto |
|
|
|
|
|
| aeronut |
|
blue sky and tail winds to everyone AcePosts: 1,560
Time Online: 28 days 22 hours 31 minutes
|
It looks like you are coming along fantastic; I can not wait to see the grin on your face after the first flight. Best wishes. |
| never surrender; never give-up |
|
|
|
|
|
| Reto S |
|
Ace
Posts: 320
Time Online: 13 days 19 hours 26 minutes
|
It looks like you are coming along fantastic; I can not wait to see the grin on your face after the first flight. Best wishes.
Dear aeronut Thank you for your kind and reassuring words! Appreciated! Cheers Reto |
|
|
|
|
|
| theecoop |
|
 Flying AcePosts: 1,330
Time Online: 19 days 5 hours 17 minutes
|
Awesome Work Reto !!, Thanks for the Coffee, wife liked the flowers to ! |
| Perfect Practice makes perfect! |
|
|
|
|
|
| Reto S |
|
Ace
Posts: 320
Time Online: 13 days 19 hours 26 minutes
|
Awesome Work Reto !!, Thanks for the Coffee, wife liked the flowers to !
Trying...  Thank you David! Regular consumption will catapult you to new heights of activities and success, the aroma will be stronger if you grind the beans quite fine... Cheers Reto |
|
|
|
|
|
| Reto S |
|
Ace
Posts: 320
Time Online: 13 days 19 hours 26 minutes
|
Horizontal stabilizer attachment points:
Dear forum members
During installation, I realized that the actual situation is quite different compared to the drawing on MM plan page 13.
I re-measured dimensions of the existing structure. All Ok...
Luckily I made the corner blocks 1 inch longer, therefore the forward bracket holes will be well within the wood of the blocks.
Question
I am still wondering, if "my arrangement" might be statically weaker and why the plans are quite off...
Picture 1
Actual situation
Picture 2
Plan reference, MM page 13
Picture 3
Ricardo's MM (comparison)
Thank you for comments/inputs...
Cheers
Reto
|
|
|
|
|
|
| Bob Daly |
|
Ace
Posts: 888
Time Online: 45 days 22 hours 25 minutes
|
The loads on the horizontal tail spar are much greater than the loads applied at the horizontal tail leading edge. The struts from the fin transfer the vertical tail loads to the spar and the spar is sized to take those loads plus the tail-down load and also an asymmetric tail load of 100% of the 4g load on one side and 50% on the other. We can tell this not only by inspecting the tail strut geometry but also by looking at the bearing blocks glued to the longerons at the attachment points. Notice that the rear blocks have their grain oriented running vertically so that they bear the stress from the bolts parallel to their grain which is about ten times stronger that bearing perpendicular to the grain like in the forward blocks. Long story short, your fine. I think this is one of those spots on the plans where the drawing is not precise because the critical part is the rear spar attachment location. And adding the extra wood was good forethought. |
|
 Logged Logged |
|
|
|
|
| Reto S |
|
Ace
Posts: 320
Time Online: 13 days 19 hours 26 minutes
|
The loads on the horizontal tail spar are much greater than the loads applied at the horizontal tail leading edge. The struts from the fin transfer the vertical tail loads to the spar and the spar is sized to take those loads plus the tail-down load and also an asymmetric tail load of 100% of the 4g load on one side and 50% on the other. We can tell this not only by inspecting the tail strut geometry but also by looking at the bearing blocks glued to the longerons at the attachment points. Notice that the rear blocks have their grain oriented running vertically so that they bear the stress from the bolts parallel to their grain which is about ten times stronger that bearing perpendicular to the grain like in the forward blocks. Long story short, your fine. I think this is one of those spots on the plans where the drawing is not precise because the critical part is the rear spar attachment location. And adding the extra wood was good forethought.
Dear Bob Thank you for the excellent summary/analysis of the stabilizer load distribution. It puts my mind at ease. It's great to see the MM safely growing piece by piece... Cheers Bob and thank you again! Reto |
|
|
|
|
|
| Reto S |
|
Ace
Posts: 320
Time Online: 13 days 19 hours 26 minutes
|
Forward turtle deck on Engine cowling/spinner plate fitted, Hirth engine fits... Support brackets in place, horiz. stabilizer seems to be level and square... Wished I could dedicate more time and energy for the MM 
|
|
|
|
|
|
| aeronut |
|
blue sky and tail winds to everyone AcePosts: 1,560
Time Online: 28 days 22 hours 31 minutes
|
You look like you are making great progress. Thanks for sharing your build with us. |
| never surrender; never give-up |
|
|
|
|
|
| aeronut |
|
blue sky and tail winds to everyone AcePosts: 1,560
Time Online: 28 days 22 hours 31 minutes
|
You look like you are making great progress. Thanks for sharing your build with us. |
| never surrender; never give-up |
|
|
|
|
|
| aeronut |
|
blue sky and tail winds to everyone AcePosts: 1,560
Time Online: 28 days 22 hours 31 minutes
|
You look like you are making great progress. Thanks for sharing your build with us. |
| never surrender; never give-up |
|
|
|
|
|
| aeronut |
|
blue sky and tail winds to everyone AcePosts: 1,560
Time Online: 28 days 22 hours 31 minutes
|
Wow I did something wrong on that post. I tried to delete the second copy and only made a third copy. Hope you all will forgive my computer fumbling. |
| never surrender; never give-up |
|
|
|
|
|
| Reto S |
|
Ace
Posts: 320
Time Online: 13 days 19 hours 26 minutes
|
Lol.. Not a problem at all.. Have a great day! Reto |
|
|
|
|
|
| Reto S |
|
Ace
Posts: 320
Time Online: 13 days 19 hours 26 minutes
|
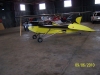
Project re-started after a 10 month brake. New work shop. Replacement landing gear fits. Happy.
|
|
|
|
|
|
| aeronut |
|
blue sky and tail winds to everyone AcePosts: 1,560
Time Online: 28 days 22 hours 31 minutes
|
Looking good. Having the gear on is a no turning back point. I am looking forward to seeing you in the covering phase of the project. Best wishes. |
| never surrender; never give-up |
|
|
|
|
|
| Steve Paschke |
|
Fledgling Member  Posts: 28
Time Online: 14 hours 46 minutes
|
Hi Reto,
Looks good. almost as complete as mine is. I am planning to move to Nong Khai in a few years. Was in Chiang Mai in January for a weekend.
How are you planning to register your plane? or are you going as an ultralight? I am planning on bringing over a US registered plane so I don't have to deal with the restrictive ownership rules.
Do you have to file a flight plan for every flight there? I've read something that suggests you do, but it didn't explicitly say that.
Steve |
|
|
|
|
|
| Reto S |
|
Ace
Posts: 320
Time Online: 13 days 19 hours 26 minutes
|
Hi Reto,
Looks good. almost as complete as mine is. I am planning to move to Nong Khai in a few years. Was in Chiang Mai in January for a weekend.
How are you planning to register your plane? or are you going as an ultralight? I am planning on bringing over a US registered plane so I don't have to deal with the restrictive ownership rules.
Do you have to file a flight plan for every flight there? I've read something that suggests you do, but it didn't explicitly say that.
Steve
Hi Steve The ownership rule is a headache, but got a Thai (pilot) friend who will do it. Regarding registration still not decided yet. Flight plans are mandatory for each flight (U/L & G/A)... We could do a formation flight... Cheers, Reto |
|
|
|
|
|
| Reto S |
|
Ace
Posts: 320
Time Online: 13 days 19 hours 26 minutes
|
Dear forum members
I ve'got a question regarding the rear turtle deck:
F4 & F5 (picture 1) should be installed forward of station 5 respectively 6 (picture 2).
Forward of this stations are ply wood gussets installed (picture 3).
The gussets interfere with the overlapping installation of F4 & F5 on the cross member.
Could it be glued behind the cross member so the full width will be available for glueing?
Thank you for inputs.
Cheers
Reto
|
|
|
|
|
|
|


