So it’s Sunday & I’m taking a day off from my build to do some other stuff. I think my wife thought I’d left the country a month ago One of our sheep has just had twins, the fire season is starting soon & I have some training to do, and my little Suzuki DRZ needs a workout (don’t forget here in Australia tomorrow is the first day of Spring). And I keep meaning to post on my build.
In the posts which follow, I’d like to make it very clear that none of what I say is intended to be any sort of “how to” advice (as if!!). The way I’m building is what works for me: it’s not the only way or even the right way – it’s just a record of what I’m doing (complete with mistakes). In my early days of looking around for which plane to build I found this board incredibly helpful. I spent many long & enjoyable hours going through every single page of the current forum, and some of the old one. Loved it! So much useful info from so many people. So this is my contribution for the interest of others. For what it's worth.
I downloaded the plans and looked through them all for days until I got a feel for how it all went together. They are a bit daunting at first, but everything is there if you look long & hard enough.
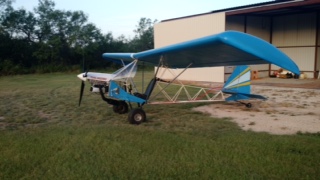
So I decided the MiniMax was for me. I went for the shoulder wing, just because I prefer its looks to the high wing. Originally I was going to go as light as possible, with the smallest engine. But then I thought it through and decided that I’d prefer a bit of margin on power, and that with a bit more effort I could build a more ‘finished’ looking plane. So eventually I went for the Eros, & having started with the 1100R I finished at the other end of the scale. I think all the Max family look great, but I felt that with all the time, effort & money it was going to cost me I’d build the one I most liked.
I was going to scratch build. But it’s very much harder to do that in this country, as there are so few people homebuilding. Almost everything would have to come from the US, with attendant shipping costs. Although we have hoop pine here, which is pretty much the equal of spruce, I would have to order it blind and pay the huge shipping costs we learn to live with in a small market with little competition. So in the end I decided to pay the extra and buy the complete kit. If I lived in the UK or the States, I think I’d scratch build.
Anyway, I’m posting my build story so others can take from it what they will. But bear in mind that as builders we all make our own decisions, and as manufacturer, you are responsible for your own product. I've no doubt that some here will not approve of some of my decisions, or the way I do some stuff, and that’s fine. I hope they’ll post & we can discuss the alternatives.
My posts will be irregular, but I hope to go all the way through to first flight (if I live that long).
When the great day arrived, and I’d unpacked, checked, & stored all my bits of wood, aluminium, fasteners, and all the rest that go to make up this ‘simple’ aeroplane, I got to work on the RS1 rib members. I cut them all carefully to size, and assembled them in my jig. I cut the first batch of gussets, and dry assembled them onto the jig.
Disaster. . . I found I just couldn’t get the jig to do its job. When I tried to clamp the gussets each side of a joint, using a large spring clamp, the weight of the clamp meant that the gussets didn’t stay flat on the surface of the RS1. I fiddled around, but just could not get an even mating of gusset to rib member – and it was hassle to keep flipping the jig over to align both gussets.
Now I’m sure Peter’s Rib O Matic works very well, but after spending half a day trying unsuccessfully to get my poor imitation to work, I gave up and made a jig exactly according to the plans. It works very well. An omen?
I dry assembled everything into the jig to check, then glued and stapled. I carefully eased out the assembly, and glued & stapled on the remaining gussets. Easy, if a bit fiddly & time consuming. And no matter how close to the edge of ply or spruce I put the staples, neither ever showed any tendency to split.
So I made a rib member cutting jig to ensure all my ribs would be identical. They might be wrong, but at least they’d all be uniformly wrong. It's worth noting here that the airfoil section as printed on the plans takes a bit of artistic licence to reproduce.
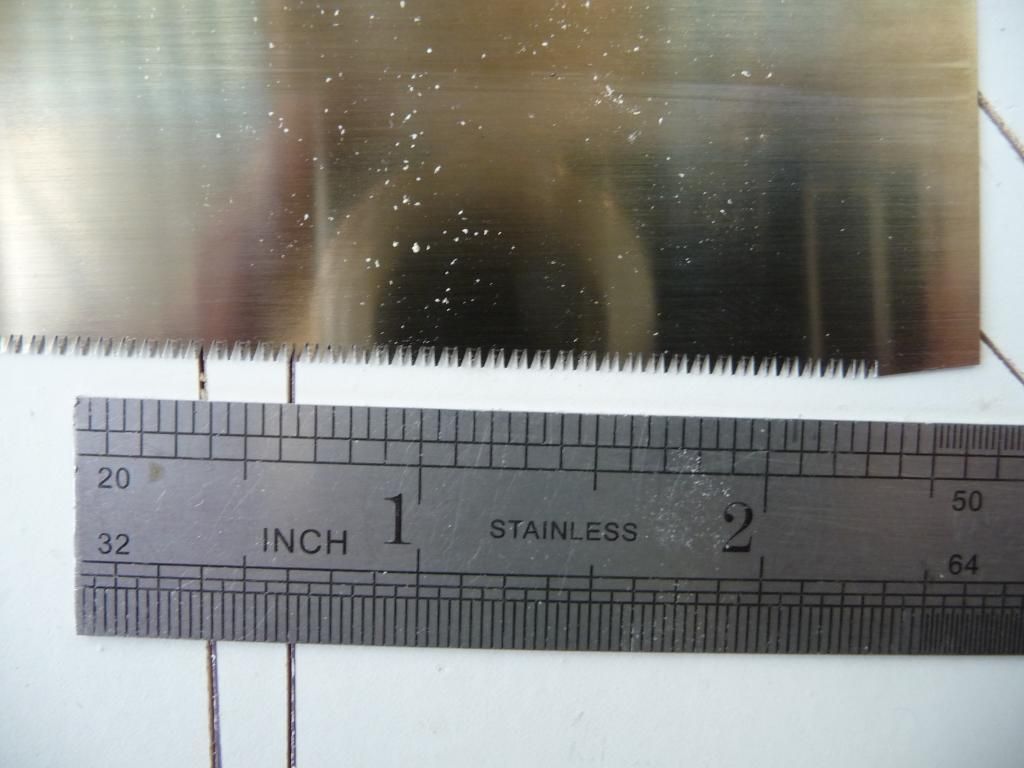
I used a Japanese pull saw to cut the RS1 & the jig saw guides. I’d never seen these before, but someone on this board recommended them, & I took a chance. They’re absolutely brilliant for very fine cuts on small cross section wood, and cut the RS1 beautifully. The blade is more like a knife, with about a million teeth per inch, and the slot it makes split the lines I’d marked on the cutting jig with an ultrafine ball pen. The blade is 0.2mm thick and the kerf (cut width) is 0.28mm wide (that’s 0.008” & 0.011”)! Clever chaps, these Japanese.
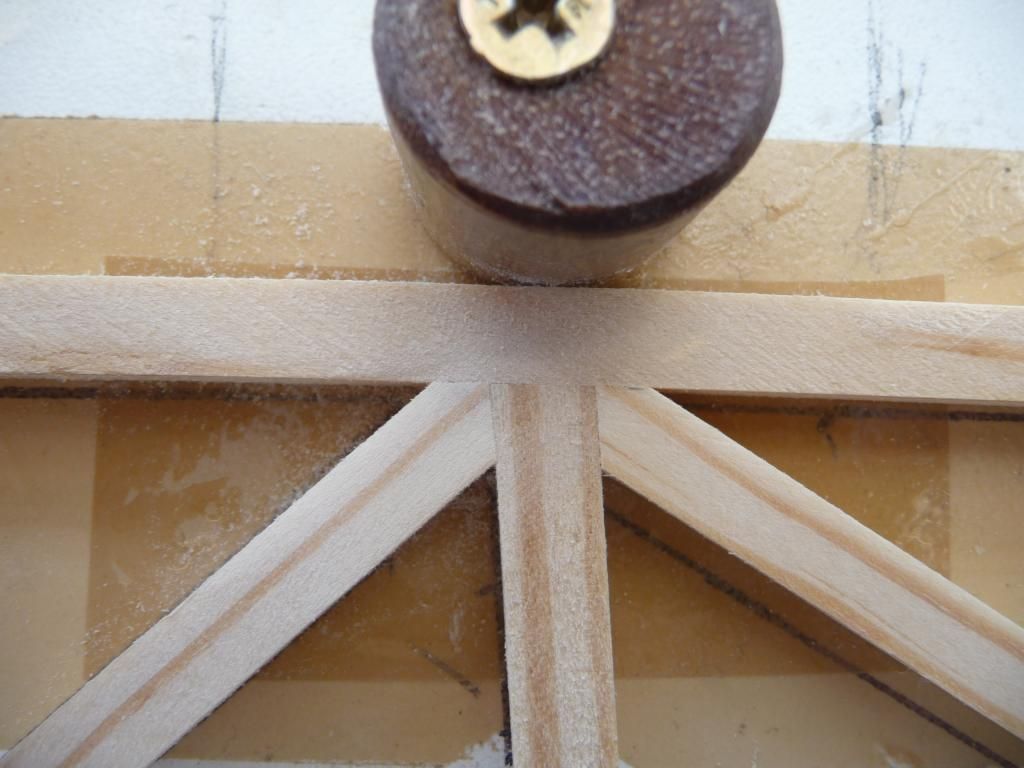
I soon found that each rib member has to be fitted individually, owing to the variation in RS1 dimensions. Since I wanted the outside profile to be constant, any variation in the width of the top & bottom members means the internal lengths will vary. This could be avoided to a great extent if the inside members were just cut with square ends, letting the gusset take all the shear loads, but I’d rather take a bit longer & fit the parts together accurately. Just gives a bit of redundancy & guards against a poor glue job.
Note that I use thin brown parcel tape as a release agent under the joints, to stop the epoxy sticking to the jig. It's cheap, easy, and semi transparent.
So I built each rib individually, cutting the RS1 in my jig & dressing the ends on my little 5” disc sander. This is quite quick once you’ve done a few hundred ribs. . . I found 120 grit to be good for this, as it leaves a slightly rough surface which should improve glue bonding. I use a small flat (needle) file to 'de-whisker' the wood afterwards.
Great to hear you've started construction. I have the feeling your posts are going to be interesting and probably very helpful for others just getting started too.
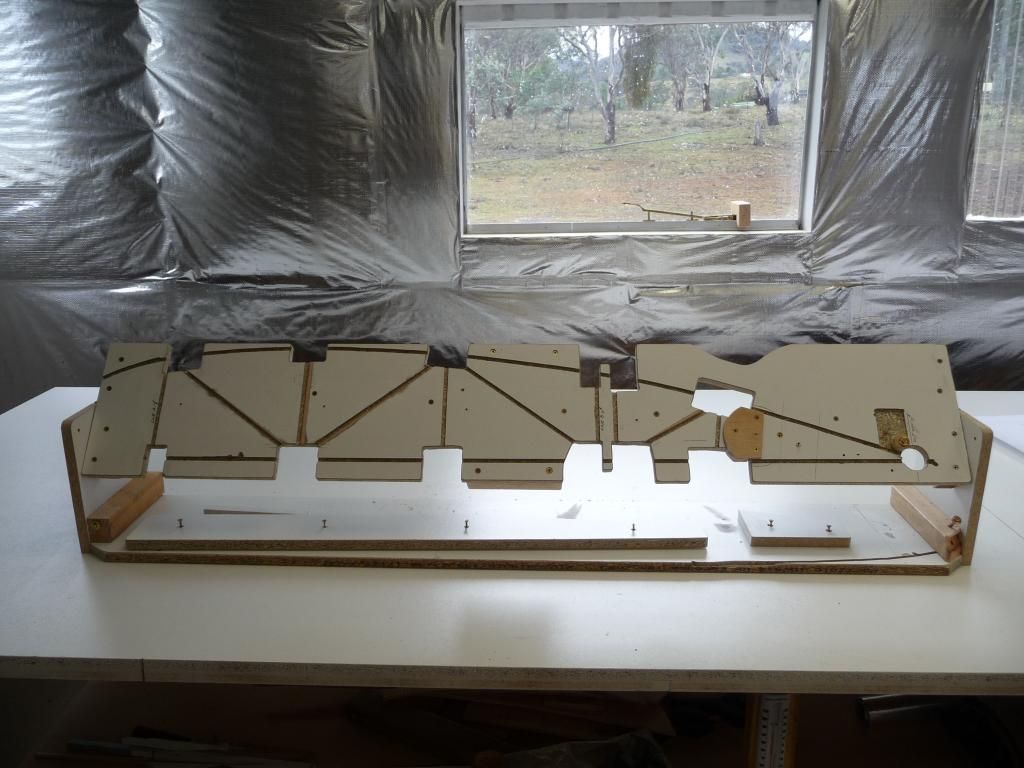
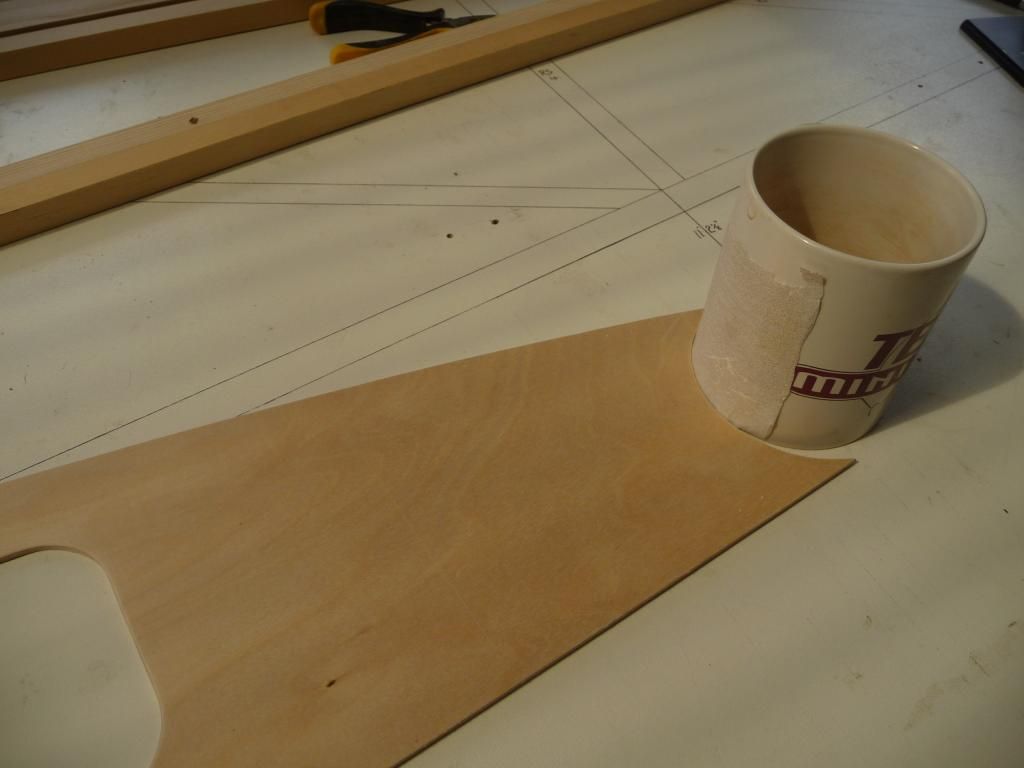
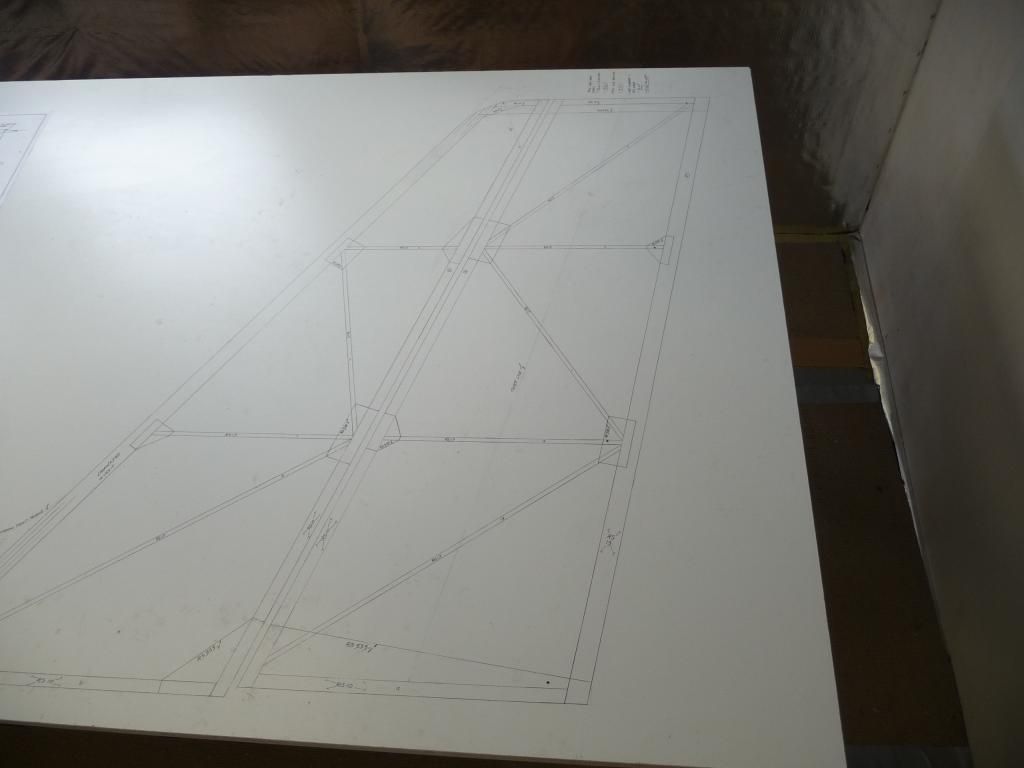
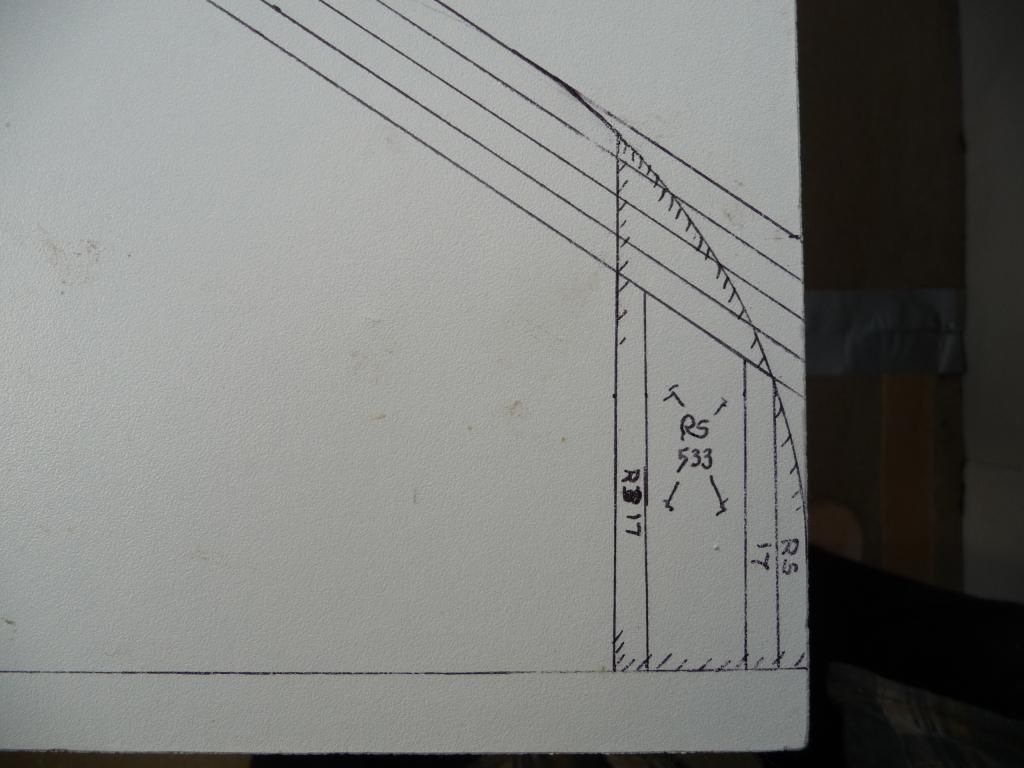
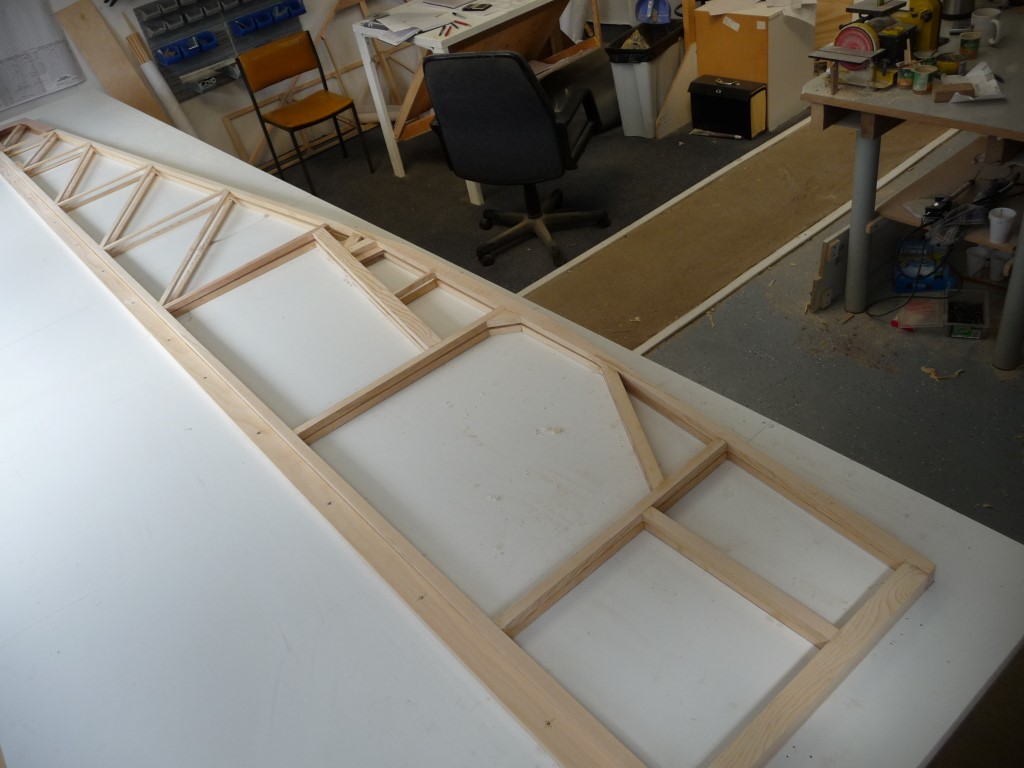
I do have one question though....that white board with all the lines.....is that actually a "jig" for cutting your rib parts? If it is I'm sure you understand what you have going there, but I'm baffled.....not that being baffled and confused is new to me or anything
I like the way you fitted the joints on the rib. I didn't fit mine nearly that perfectly, but I couldn't stand the idea of just cutting them square either.
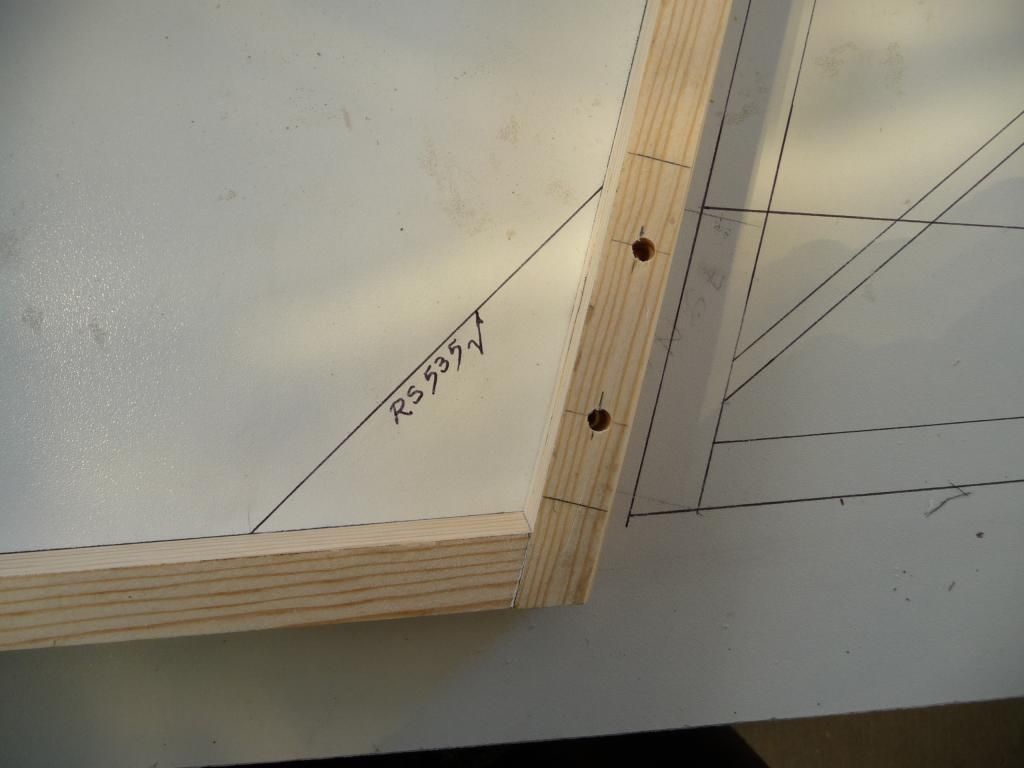
Yes, that's a cutting jig. I routed a channel just under 1/4" deep along the length - that's a piece of RS1 located in the groove in the photo.
The lines are actually grooves cut 1/4" deep across the full width of the jig. If you look carefully at the third photo you can see the groove is thinner than the black line. The pull saw locates in these guide grooves so that the RS1 stock is cut at the correct length & angle for its place in the rib.
I numbered all the elements of the rib (1 is top member, 2 the bottom, then 3-13 for the uprights & diagonals) so I could cut each part the correct length.
The cutting jig took a little time to make, but it saved measuring & marking each little bit of rib over & over again.
Hello! Well, I can see already that I'm going to follow, and enjoy, the updates on your "build." There's an abundance of experience and help on this Board if you need it. Glad you're here, good luck....And get busy!!
Thanks for the explaination of the jig. That made the photo make more sense. I'd bet that did take some time to develop! Considering the hours I recall spending, cutting and then fitting rib parts, I can imagine it would save time overall.
It is probable that the rotating Rib-O-Matic type jig gave deflection problems simply because the clamps were too heavy. I've done a lot of finicky gluing over the years and I think the "clamps" for this type of jig would probably best be spring wooden clothes pins. The ones I use open about 12 mm which is enough to hold both gussets in place. For gluing thin plywood to thicker member you can cut one side of the jaw off and glue the pin to a block of wood with a "jaw" cut on the lower edge. These are very light. Small plastic hobbiest clamps also work great. A huge number of folks on this site probably know this, but I thought I'd mention it.
Thanks, Tom. I like the idea of the modified wooden peg. The clamps I used on my first jig were the same as the ones in Peter's pic of his jig, they're black plastic with orange softjaws. I don't really like these very much, and a couple have broken on me - just snapped.
I have various designs of clothespegs to try out, and I may go for the plastic pipe clamp idea if I run out. I'd actually prefer lots of various sizes of G or C clamps, but of course they are much more expensive than spring clamps.
I've found it only takes about 15g grams of T66 to glue a whole rib. I wanted to be accurate in mixing parts A & B, so decided to do my mixing by weight rather than volume. So I bought a small digital scale from ebay, similar to this: http://www.ebay.com.au/itm/0-1.....a3a56979d&_uhb=1
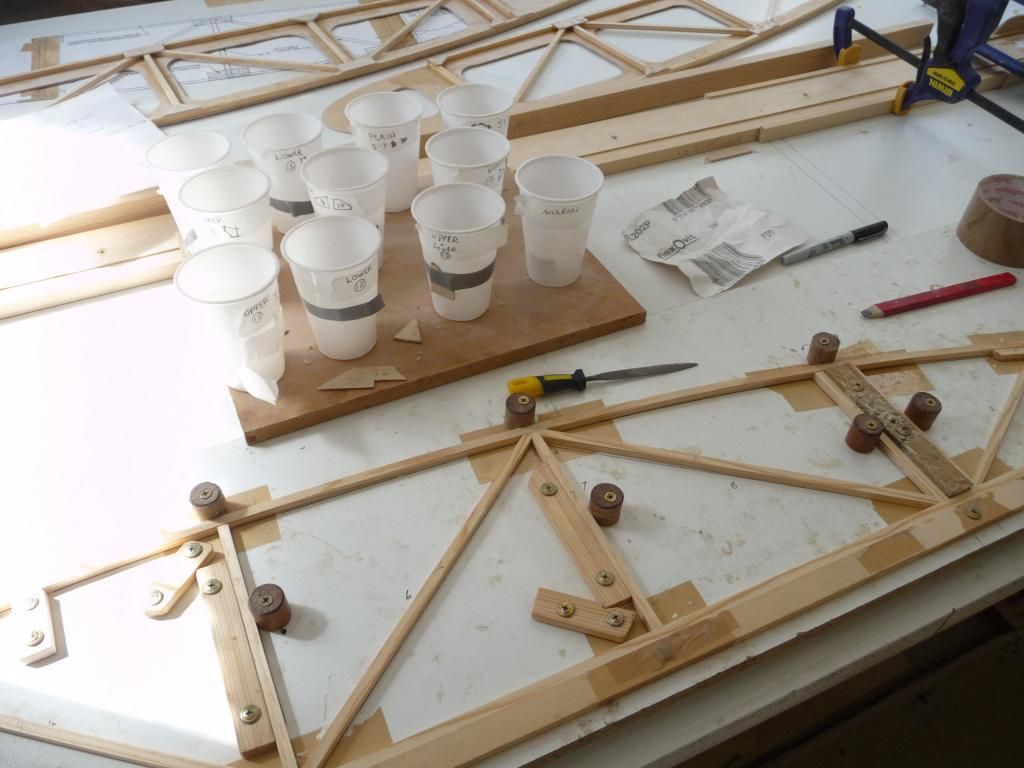
I use small yoghurt pots for mixing, and wooden coffee stirring sticks for spreading. I taper them a bit first on my disc sander.
For a rib, I weigh out 8g of part A. It usually goes over a bit, say 8.2g. Then I note whatever amount went in the pot, and multiply it by 0.83, since of course the ratio of A to B is 100:83. I do the calcs with my calculator & jot down the numbers before I add the part B, so I don't forget & have to dump that batch.
So for a mixing pot weighing 4.4g, and 8.2g part A, my calcs would look like this: 4.4 + 8.2 =12.6 For part B, 8.2 x 0.83 = 6.8 Total weight = 19.4g It sounds more complicated than it is in practice, and this method means I can be sure the epoxy is properly proportioned. I don't want to worry about the glue when I'm flying!
Cutting gussets got pretty tedious. I made a master for each position on the rib, then traced round it to make 4 or 5 on a strip of gusset ply. Then cut 4 lengths the same, and stacked these together. I cut out following the top pattern using my bandsaw, and finish on the disc sander. Then I put 2 together, and bevel the edges each side on the sander, so I know I have one of each hand. Then I put them in a plastic coffee cup marked with the correct position. This way I finish up with lots of plastic containers with lots of gussets, all sorted so I don't have to stop to make some more just after mixing up a batch of epoxy.
For the area behind the rear spar that will be cut away to form the aileron, I wanted to make sure no glue found it's way to cause problems later. So I taped the no glue area on the upper & lower RS1 members with brown parcel tape, which is quite good as release tape.
It was great to finish the last plain rib and start the tip & root ribs.
And I found a new use for the sanding former Dave sent me - you can drink coffee out of it when you're done sanding
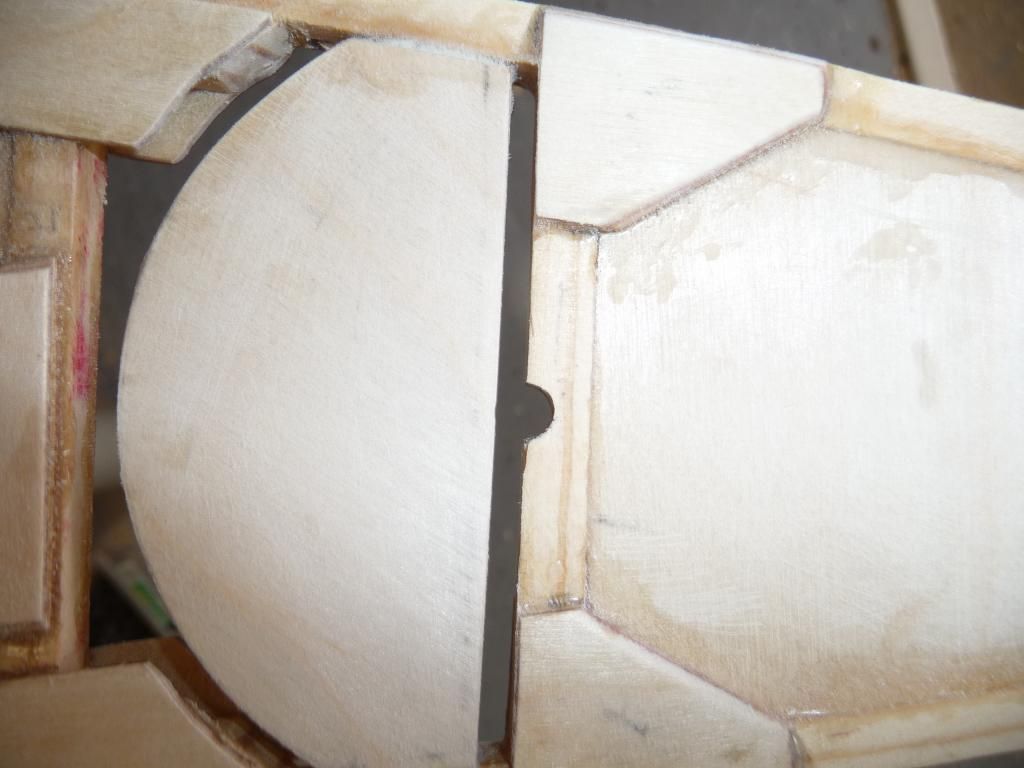
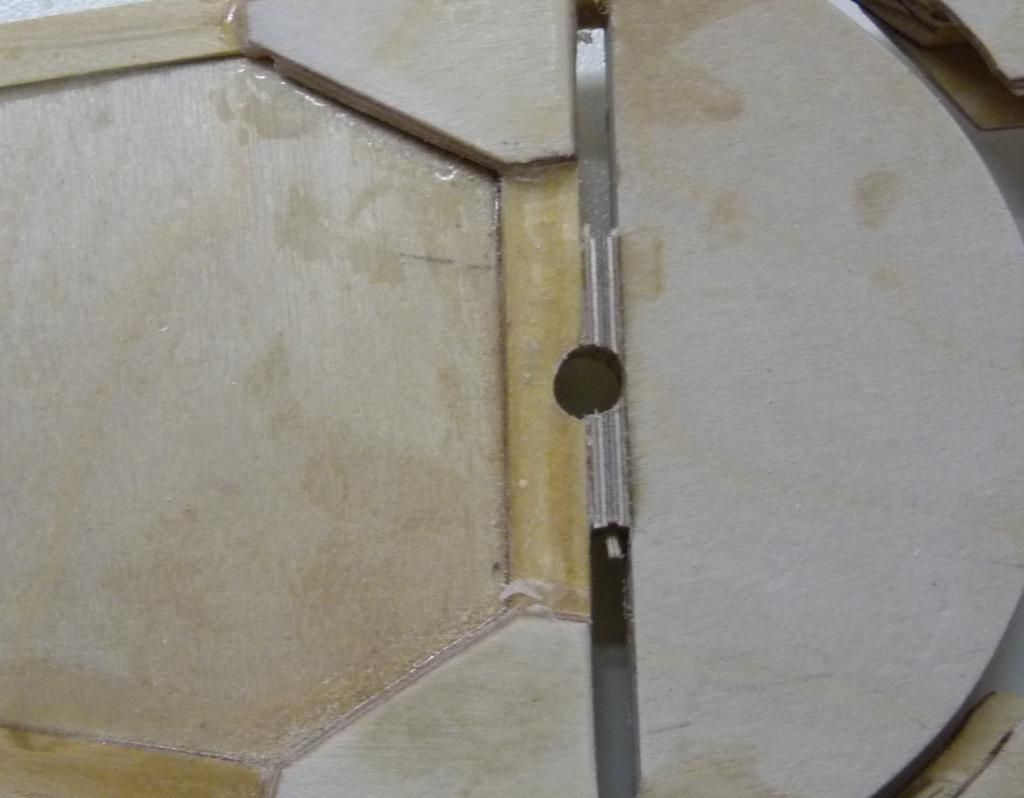
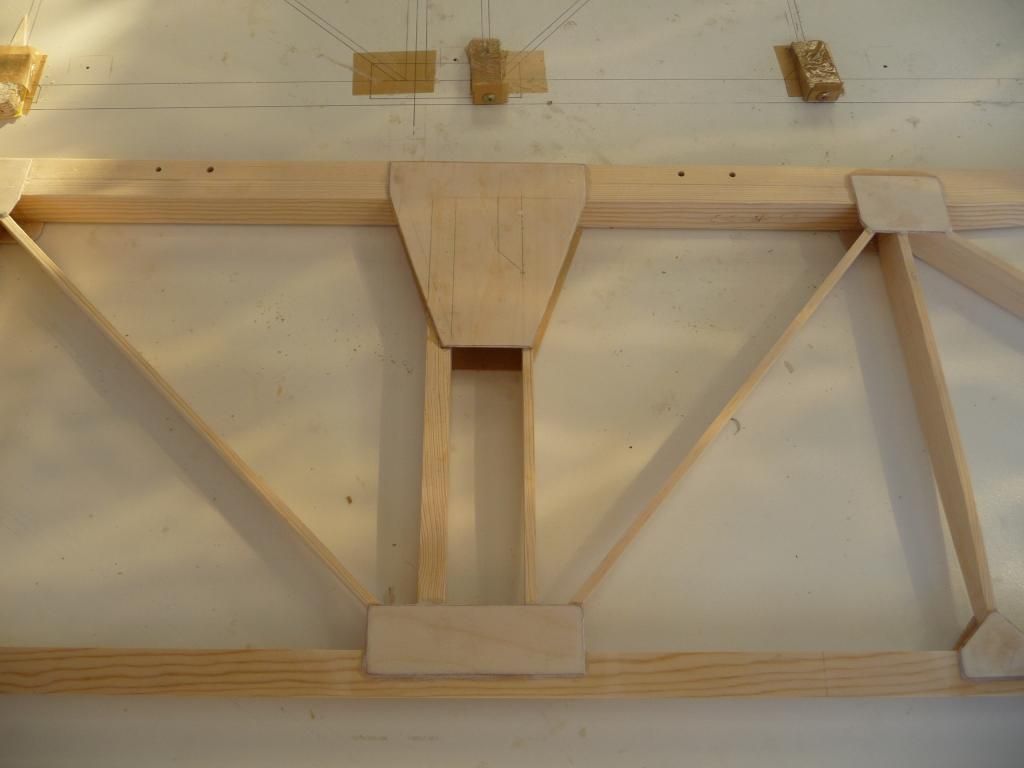
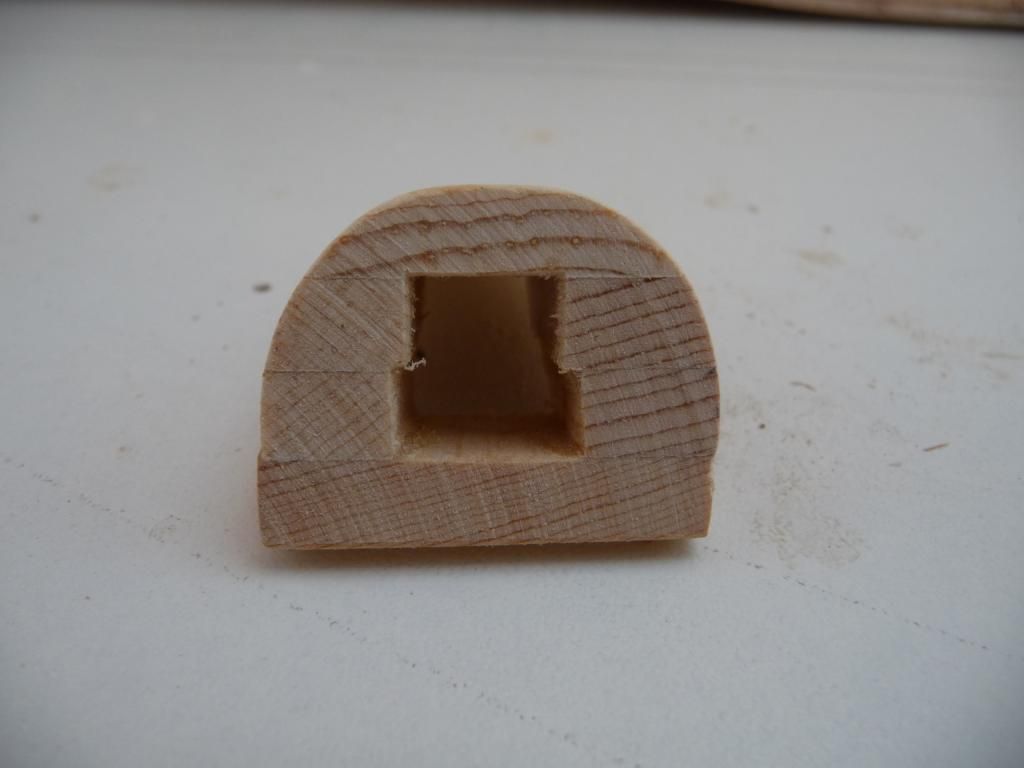
For the aileron central support at rib #5, I didn't feel comfortable with just half a hole providing the central bearing.
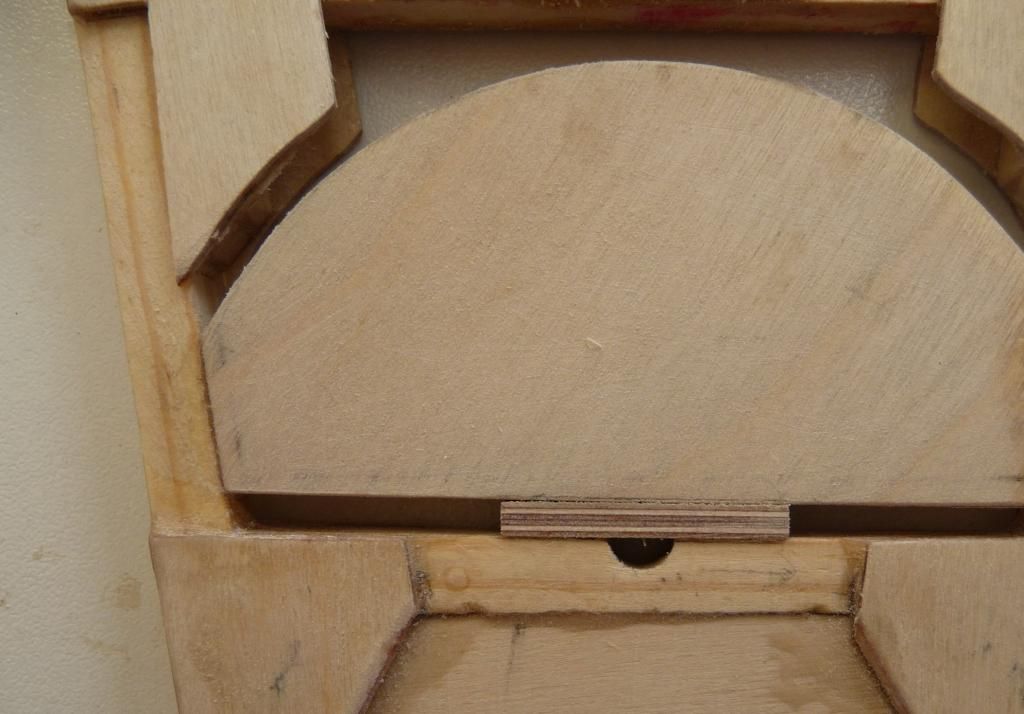
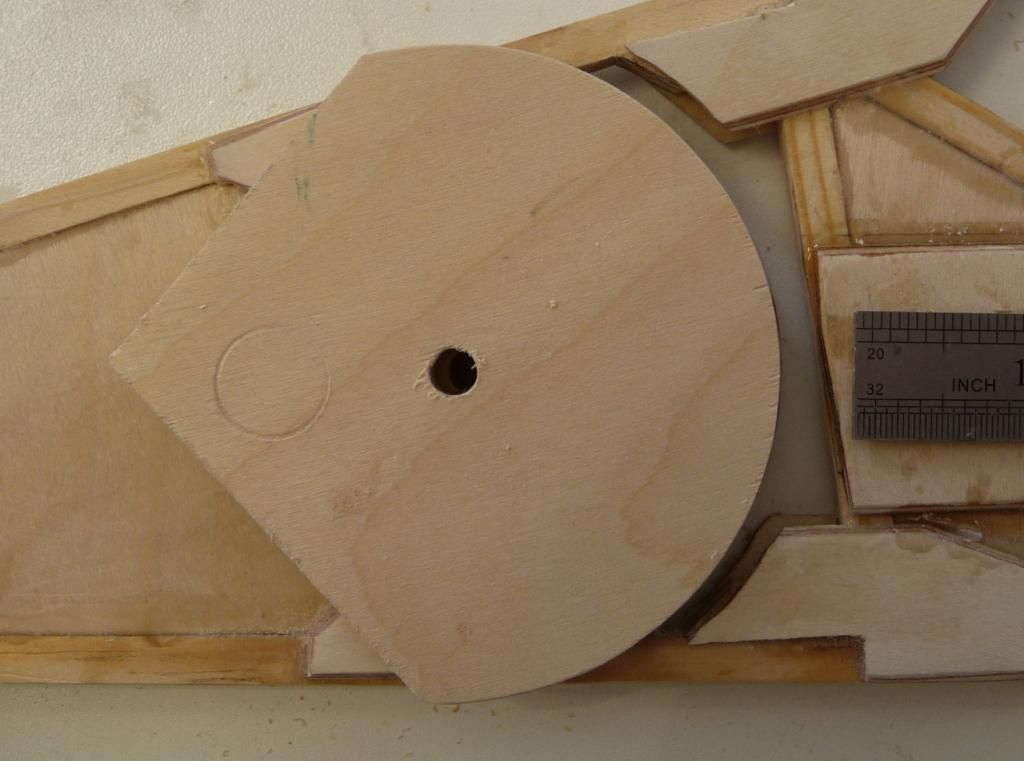
So I added a block of 3mm ply to the area of the hole, & glued it in place.
Then made a template/drill guide out of 1/4" ply, and re-drilled the 1/4" dia pivot hole.
I feel there's a bit more support now around that bearing.
It's great to have finished all the ribs, and to start on the next bit. Incidentally, the lumpy bit on the end of the root & tip ribs is protection for the very delicate sharp end of the trailing edge. I taped a coffee stirrer stick to the rib to guard the corner.
Entirely accidental - but thanks anyway! On looking at my other pics, the photos are really brutal. They seem to pick out all the glue smears and less-than-perfect details. I thought my ribs looked alright until I saw them on this post. Oh well, I'm pretty sure they're good structurally.
..I believe in the KISS principle....so you lost ME with all that MATHS...I have to ask myself ...WHY...?
Just head down to the local chemist....buy 4 of the 50ML syringes....about a $1 each....and then mix by volume......so easy and it works....and focus on the build not the ....other stuff.....just my opinion I do know you have lots of experience....I just love the KISS principles
Yes, I know it looks like hassle, but it's very easy if you have a calculator on the bench.
I've tried using syringes with epoxy in the past, & it doesn't work for me. The poxy is so gloopy it gets everywhere. And if you use scales, you can accurately mix any quantity, down to a couple of grams, even.
And it was great to finish both bottles of epoxy at exactly the same time, so I know it works.
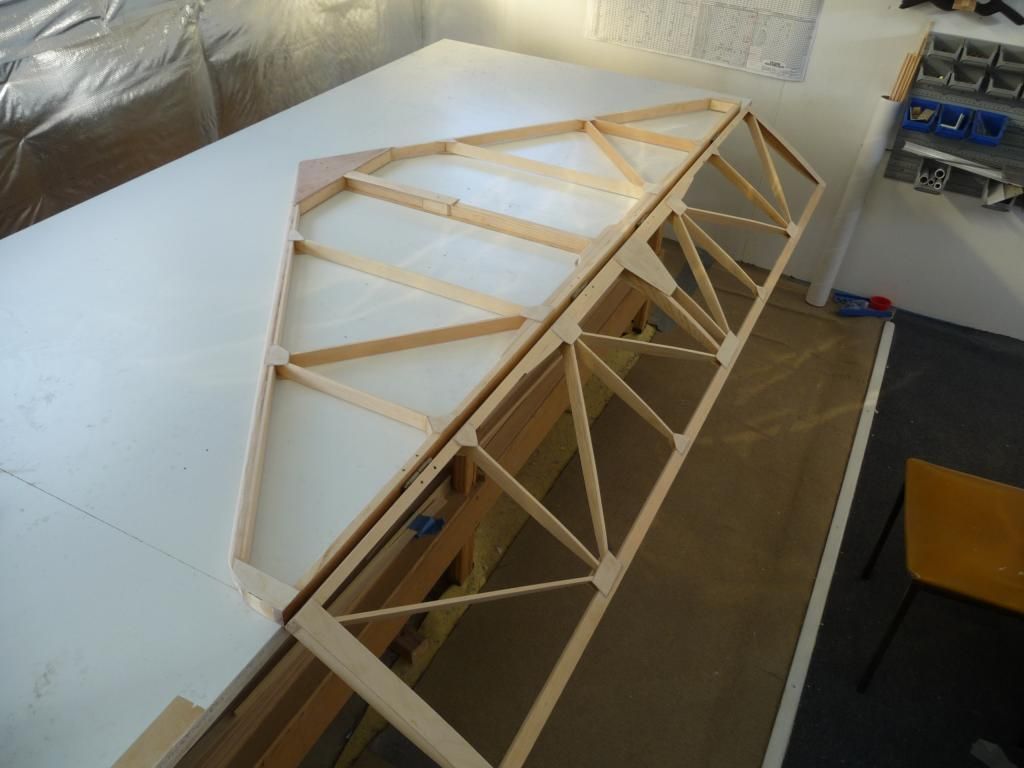
After all those ribs it was great to start on something different, so I made the fin, rudder and tailplane next.
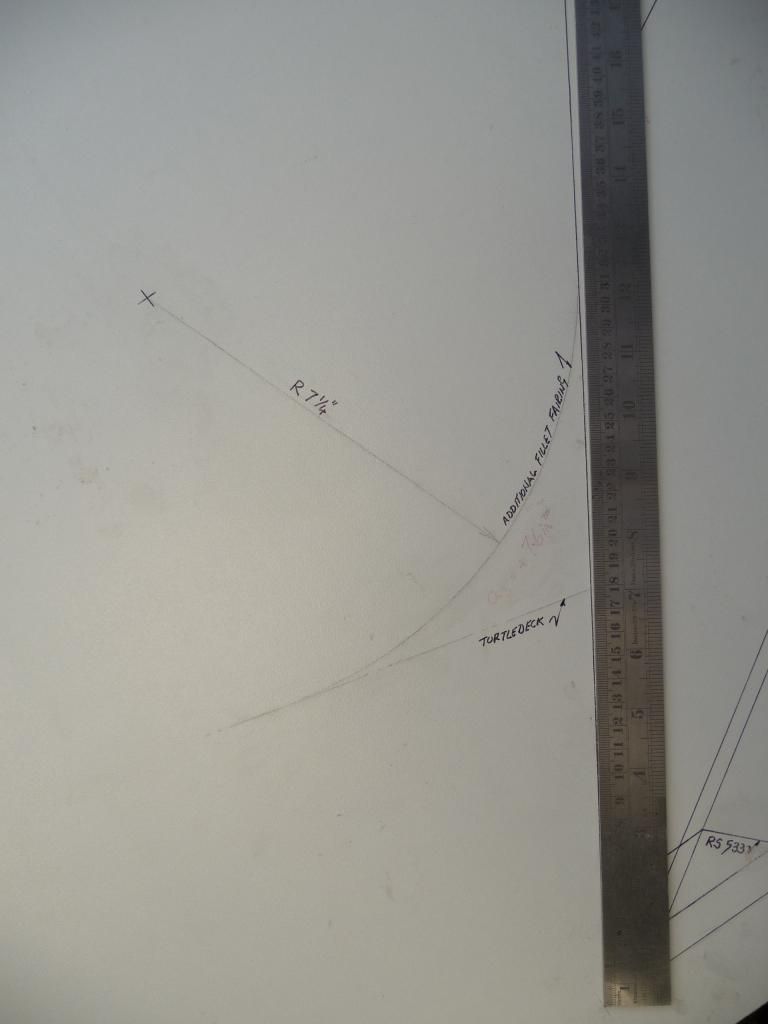
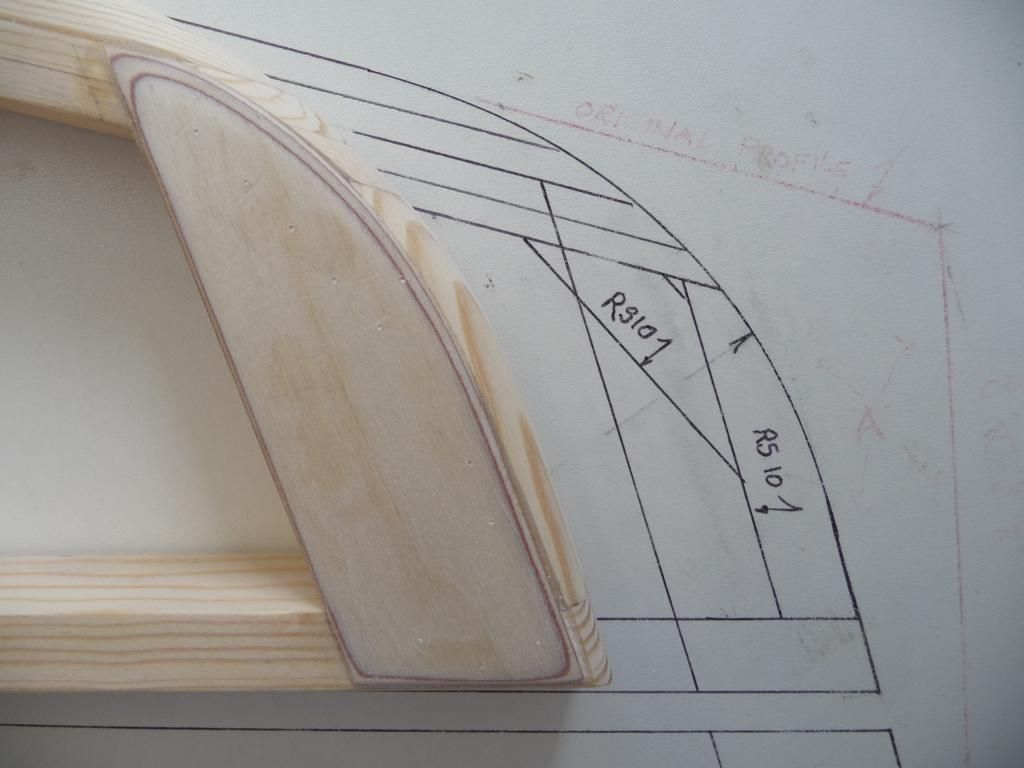
I drew the plan on my white melamine worktable with a fine tip marker pen. I prefer the softer lines of some large radius corners to the fin & tailplane. I also plan to fit a dorsal fillet where the fin joins the turtledeck. And I made the top edge of the fin & rudder parallel to the base of the fin. This is just aesthetics, but it’s interesting to see that the proposed new 2 seater has a radiussed top to the fin.
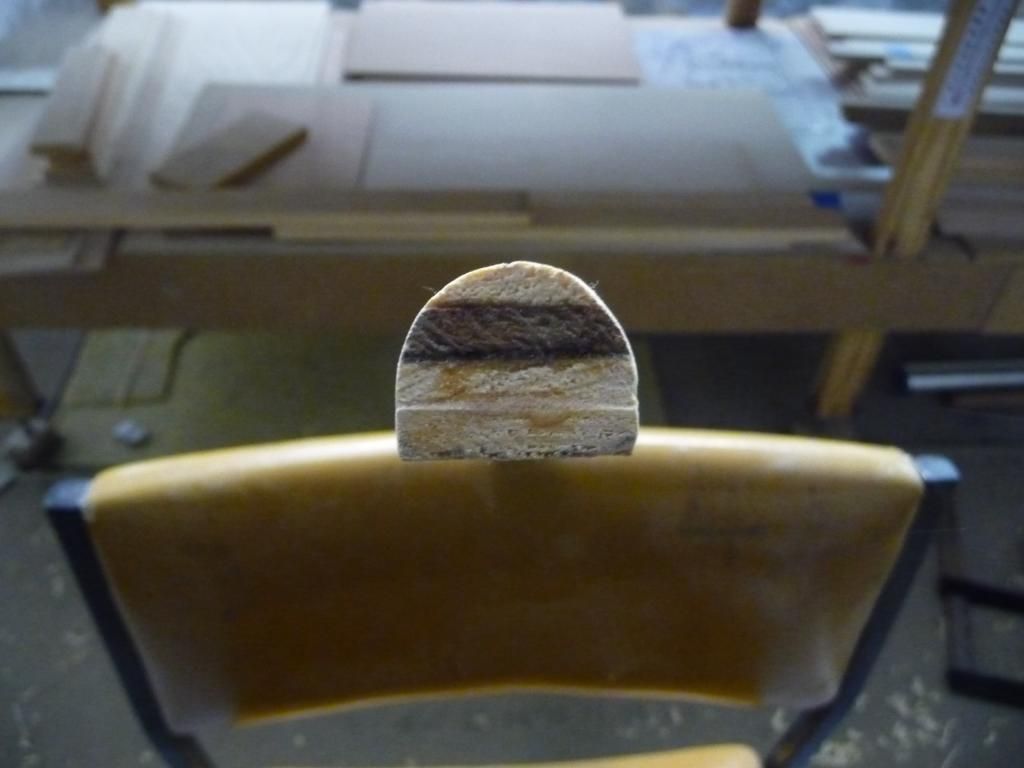
I laminated the fin leading edge, and planed it to a semi-circular shape.
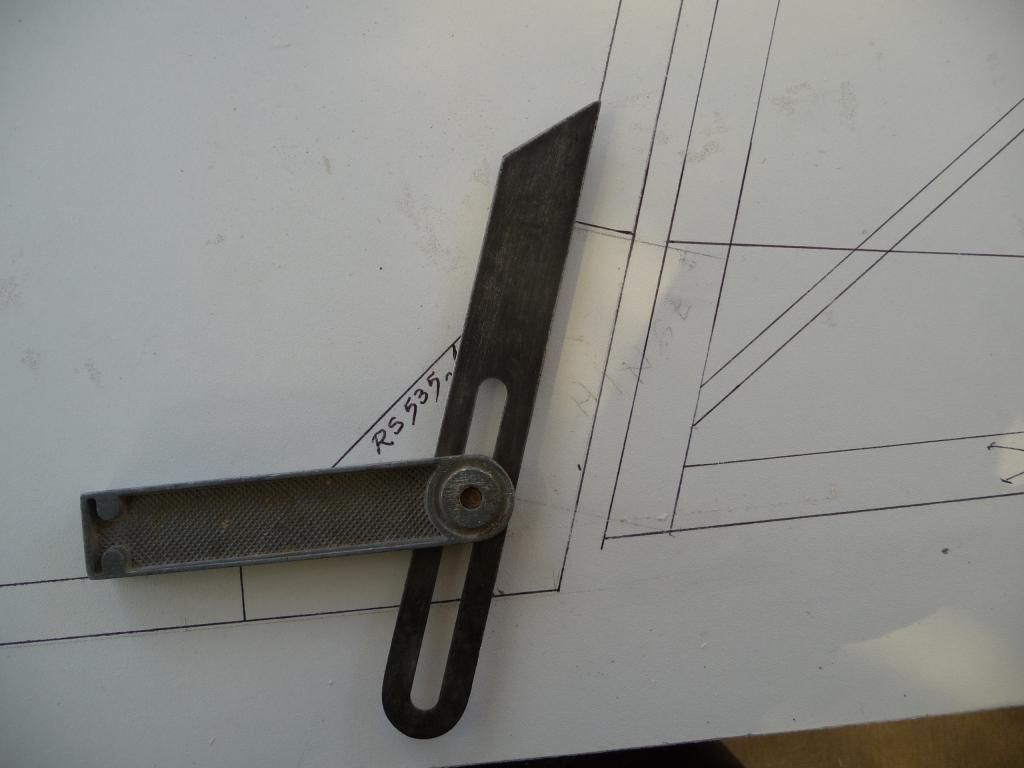
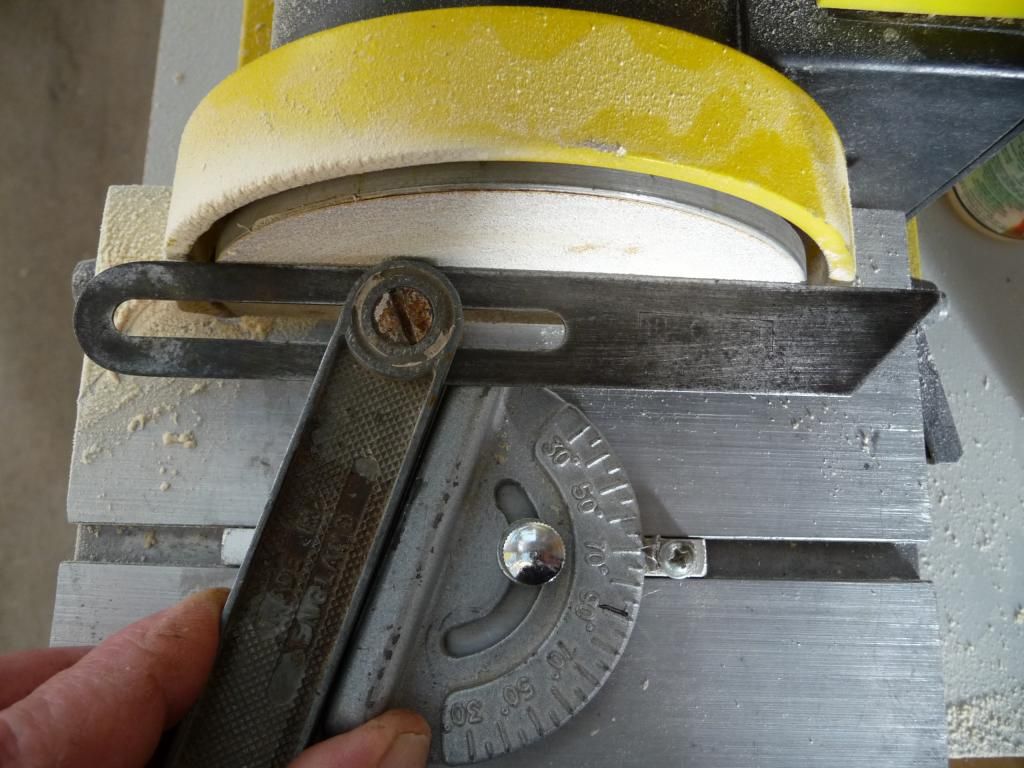
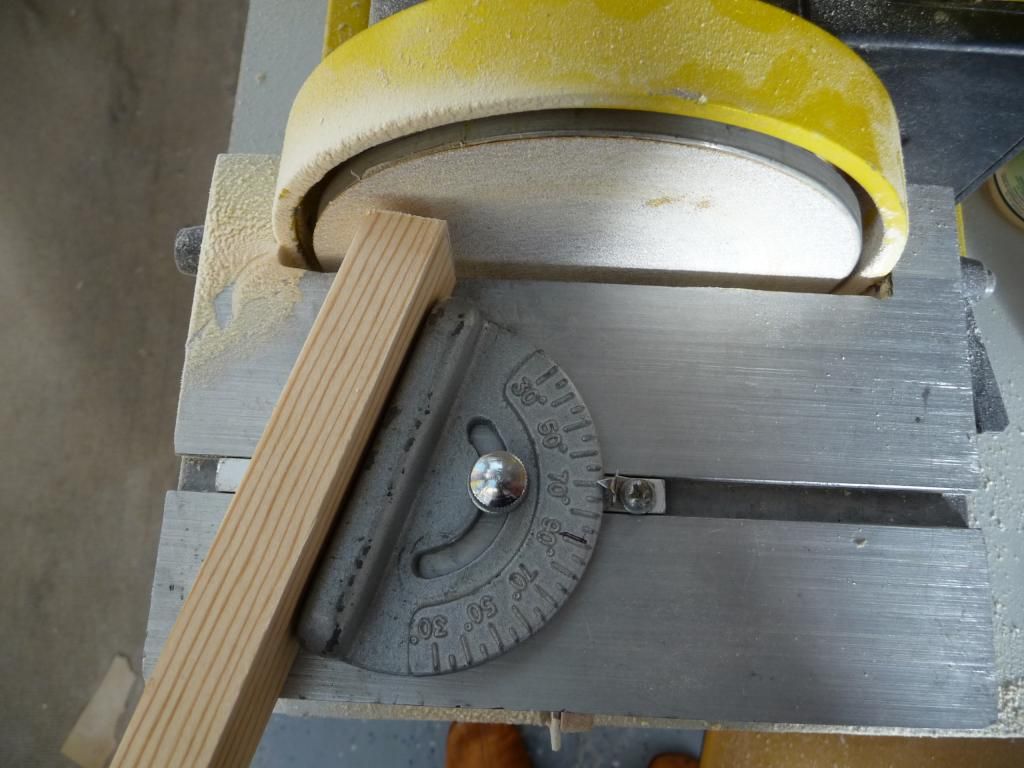
I copied the angles off the plan, and marked the relevant members. Then cut them with a fine tooth tenon saw, and finished on the disc sander. I found I can get close fits this way.
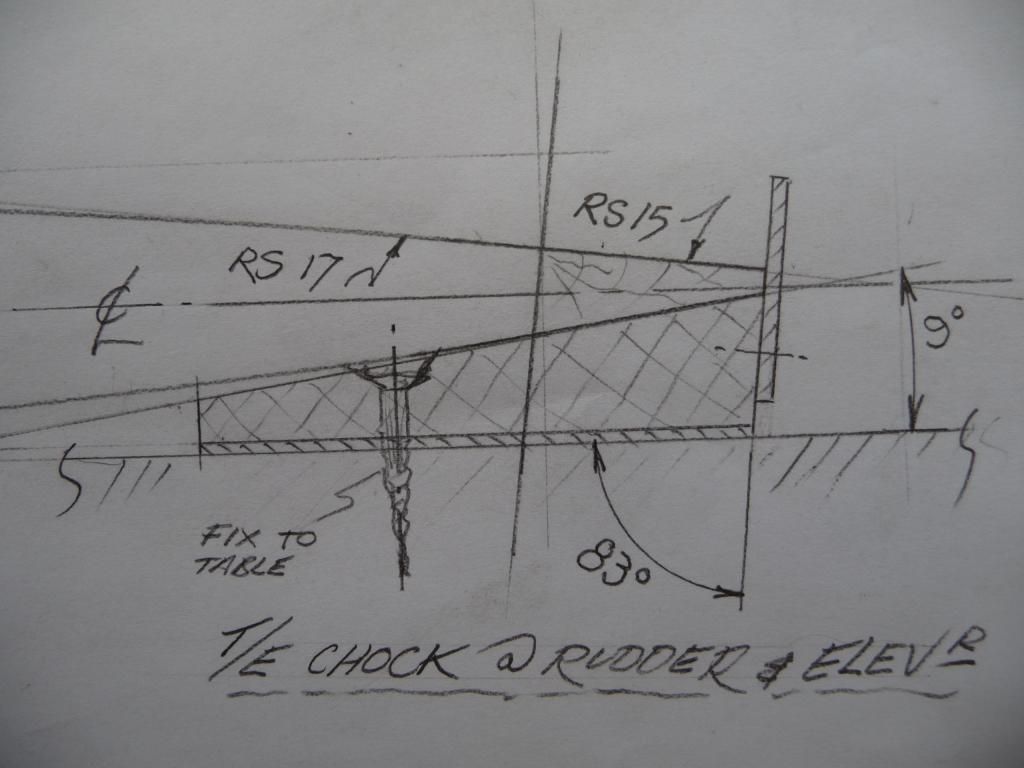
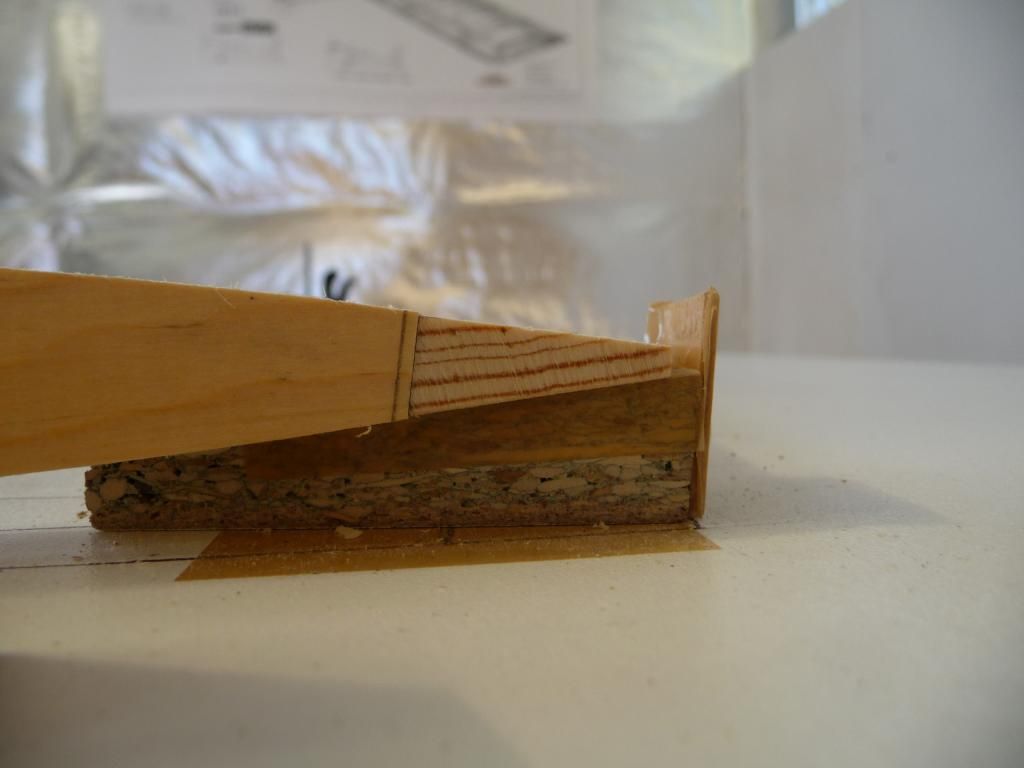
I needed some way of supporting the trailing edge of the rudder, and later the elevator, while I glued the ribs. So I measured the angle of the trailing edge section, and made up a number of blocks cut to that angle, and at the correct height. I also fixed a locating tab to the back. I covered it all in brown ‘release tape’ so I wouldn’t have to fly with blobby bits on the back edge of my rudder. . .
I added an extra small block of RS10 to ensure adequate strength at the top of the fin where I had made it radiussed.
Then glued it all, and finished it with some hand sanding. I do like working with wood – it always looks so much more soulful than metal when it’s done.
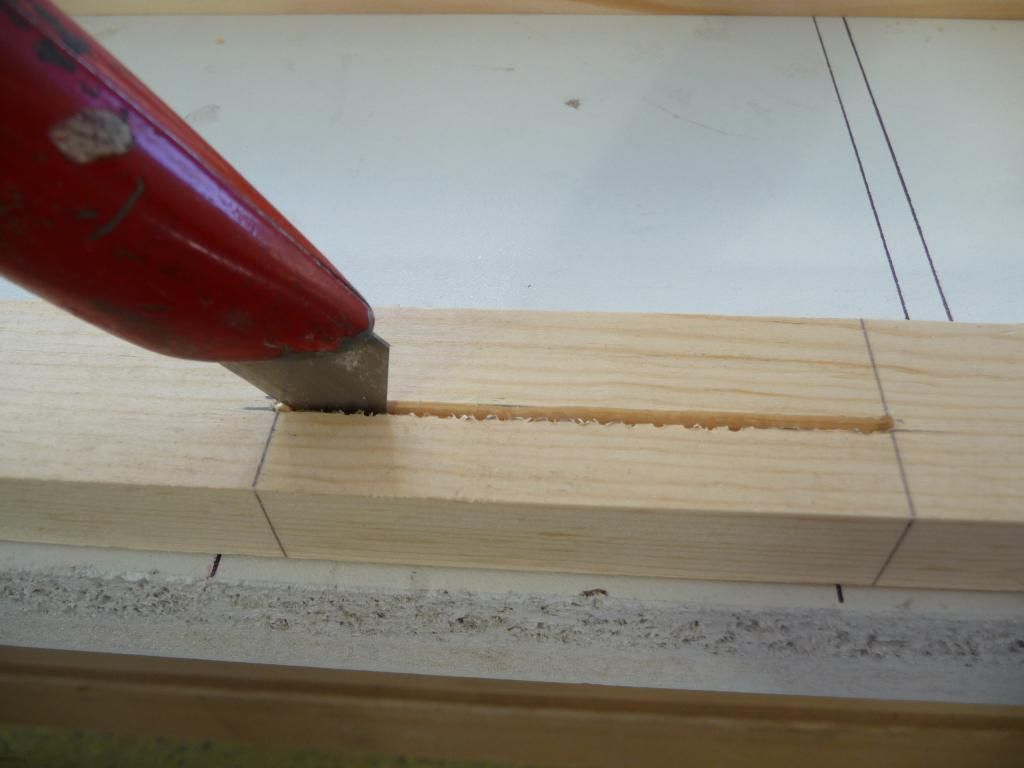
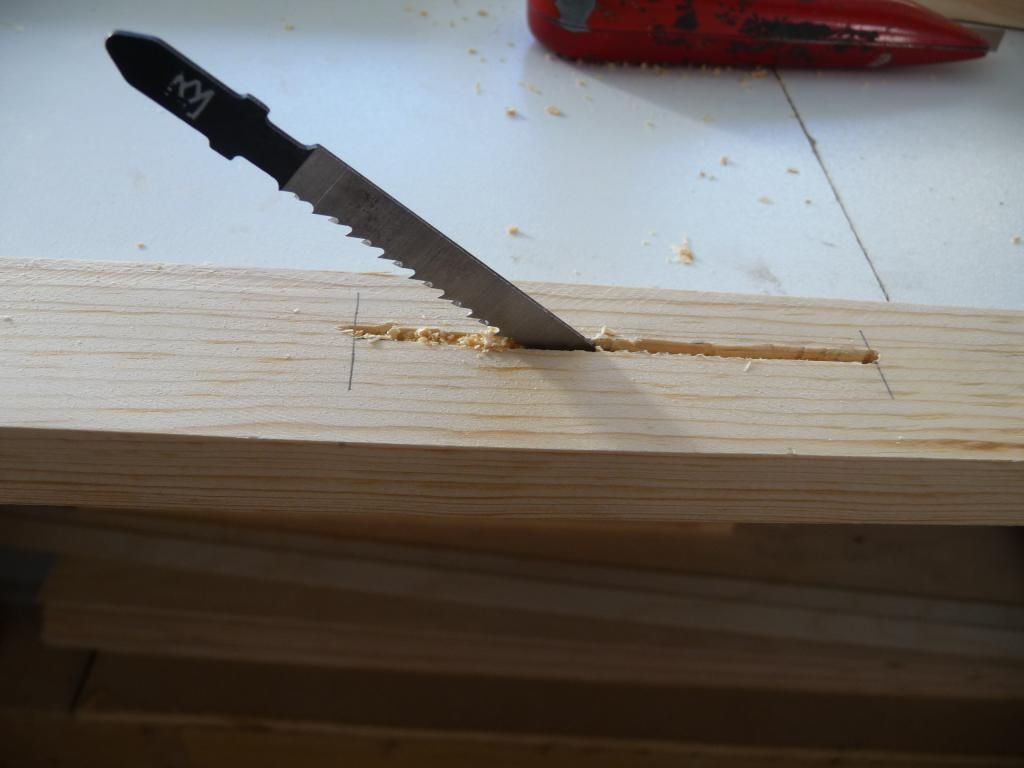
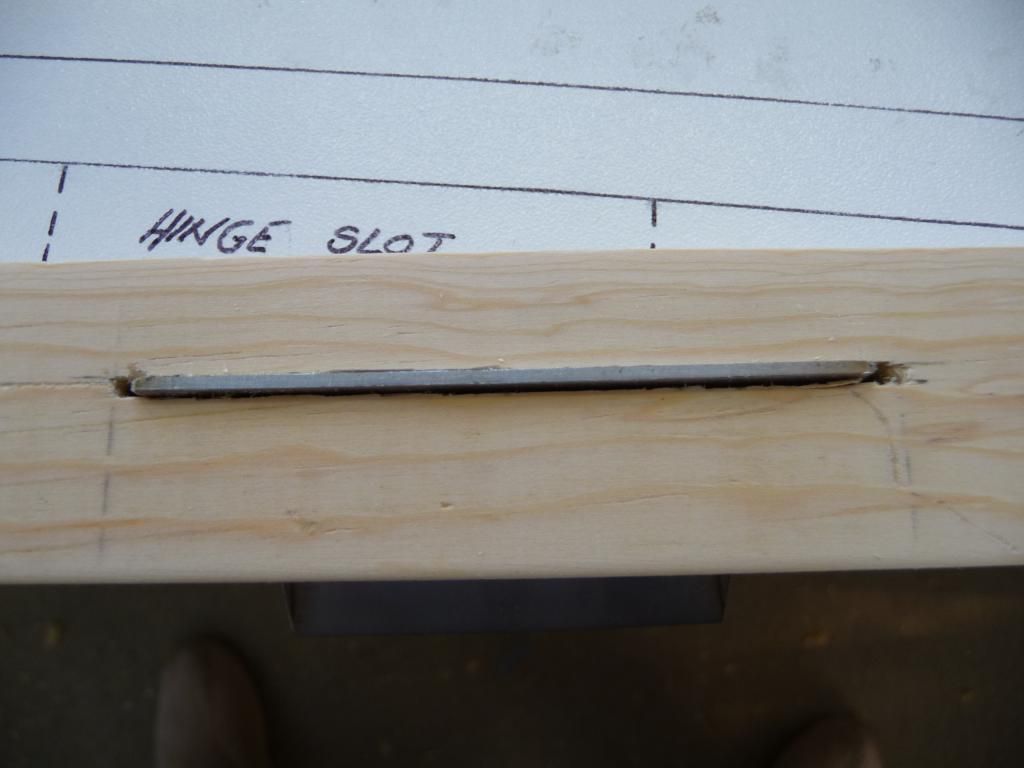
I cut the slots for the rudder (& elevator) hinges by first chain drilling, then cutting with a Stanley knife, and finally with a jigsaw blade. I used the blade by hand, as I didn’t want to risk wrecking the wood. I finished with a coarse flat needle file. The slots are quite a tight fit on the hinges.
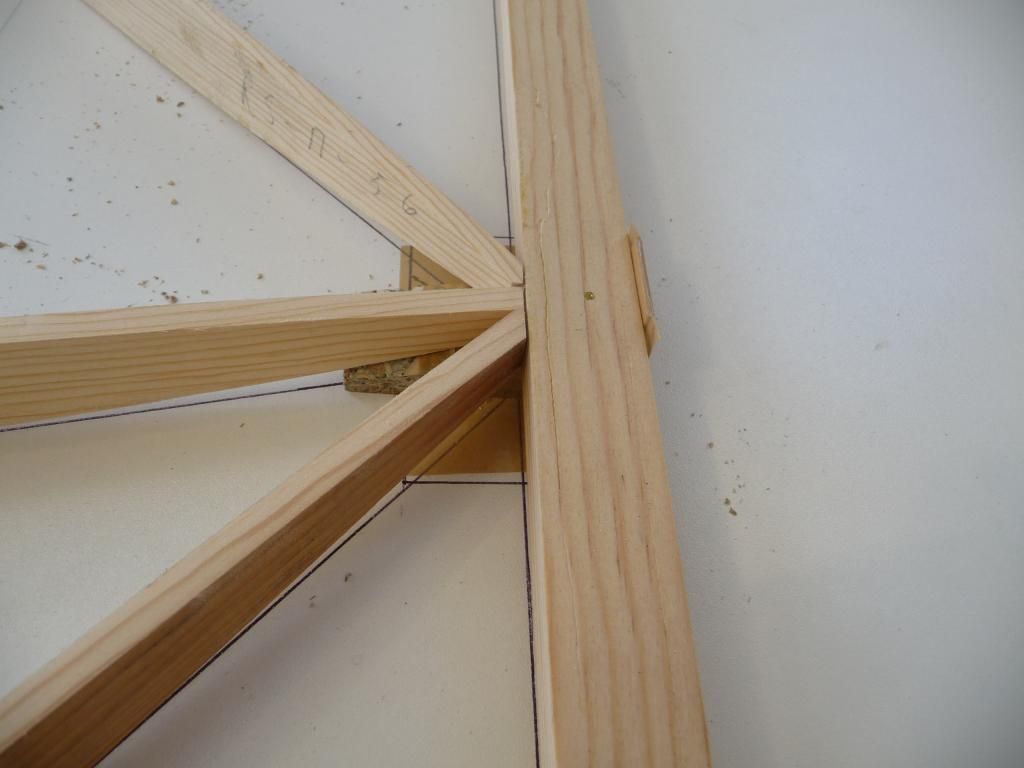
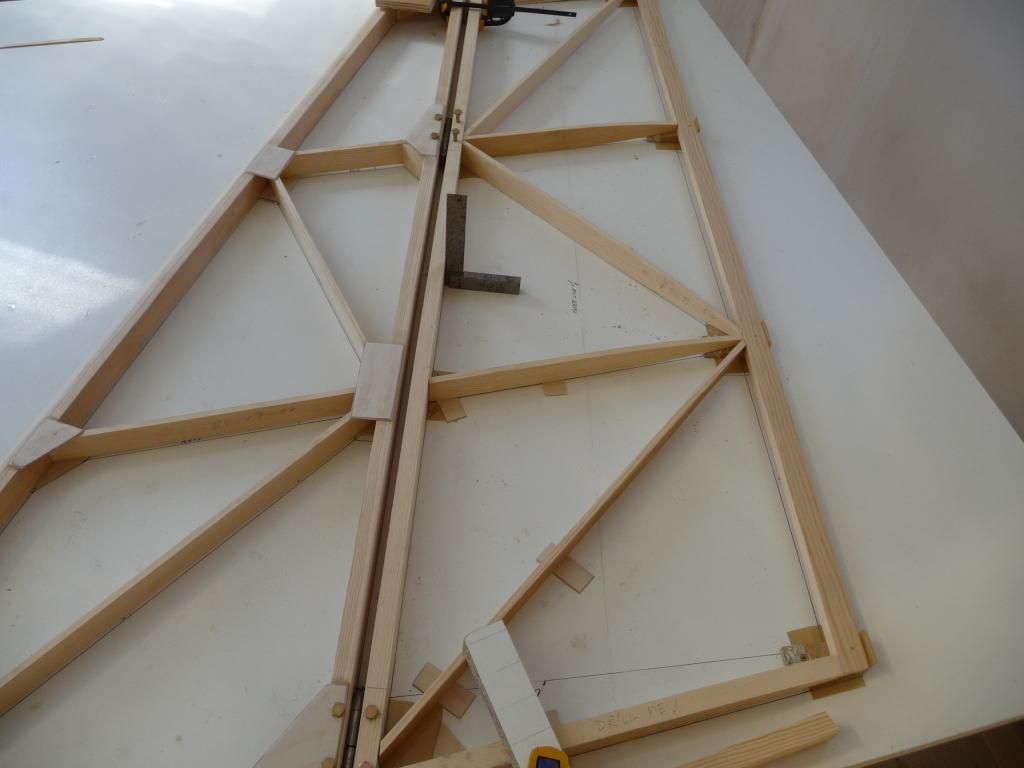
I glued on the gussets, and assembled the rudder to the fin. To achieve the required 3/8" gap between the t/e of the fin & the l/e of the rudder, I clamped the short length of 3/8" dia bushing tube between the two members before drilling the 3/16" bolt holes.
I wanted to drill the hinge holes on my drill press, rather than by hand. So I drilled the RS10 spars with the hinges in place, on the drill press, then glued the undrilled gussets on one side. When the glue had set, I backdrilled through the spars to the gussets. Then I glued the gussets on the other side, and when they were set, drilled through the whole assembly.
I made the tailplane and elevator in the same way. Again, I wanted to radius the l/e corners of the tailplane, to match the fin.
I also added an extra rib near the centreline of the elevator, and a short length of RS10. These are because my elevator will be operated by a 1" dia pushrod, which will connect to the elevator with 2 horns, one each side of the pushrod. The extra material is to mount the additional elevator horn.
I used the t/e chocks again when gluing the elevator assembly, and was pleased with how straight the t/e was after the glue had set.
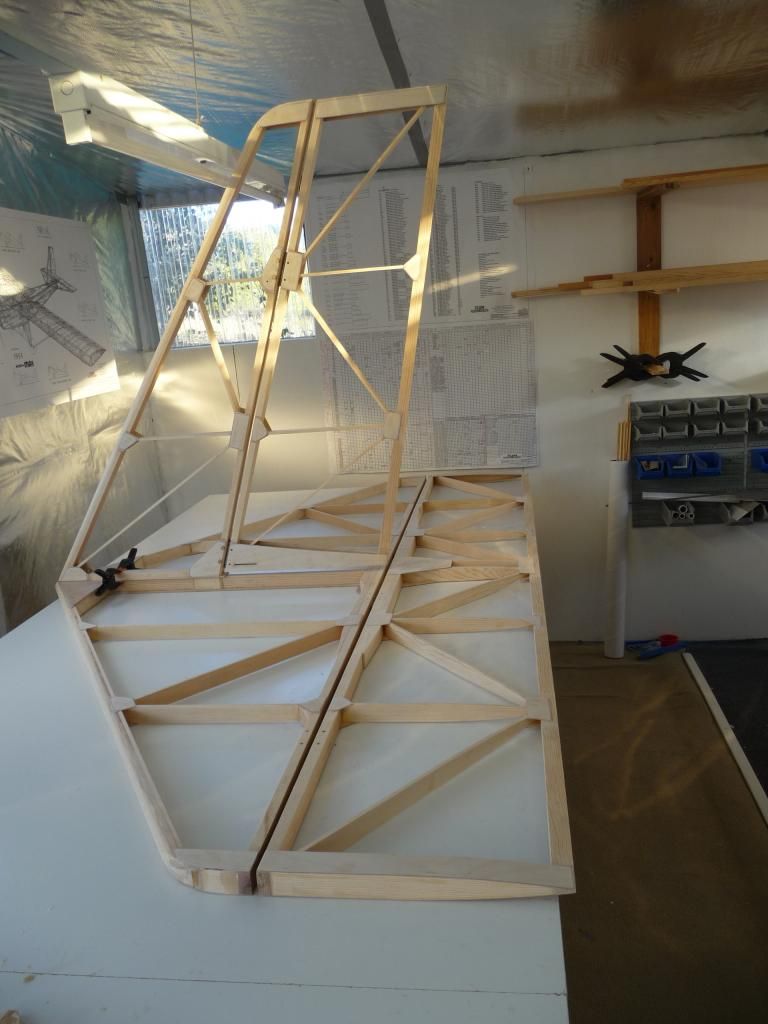
Here's the assembly before final shaping & sanding
And here's the whole empannage (still with unfinished tailplane).
Fuselage next.
I suppose now I've modified the original design, both in the empennage profile, and with the pushrod control system I've drawn up, I can't call my plane an Eros any more. But I can't edit the thread title: I was trying for "Noteros build in Oz"
It is always great when a plan comes together. The workmanship looks to be finist kind. If you keep on you will be flying soon. Thanks for you post, the pictures are great.
Thanks for the compliment Bruce. I believe my build is strong and straight! But you, my friend Are an Artist with wood. You inspire me to be better! Keep up the great work!
With my profile modifications maybe adding a bit of weight I decided to save a bit where I could.
The laminated leading edges of the tailplane & fin are carrying a lot of wood/weight that isn't contributing very much to strength or stiffness, so I cut the middle two laminates down to approx half width and glued them.
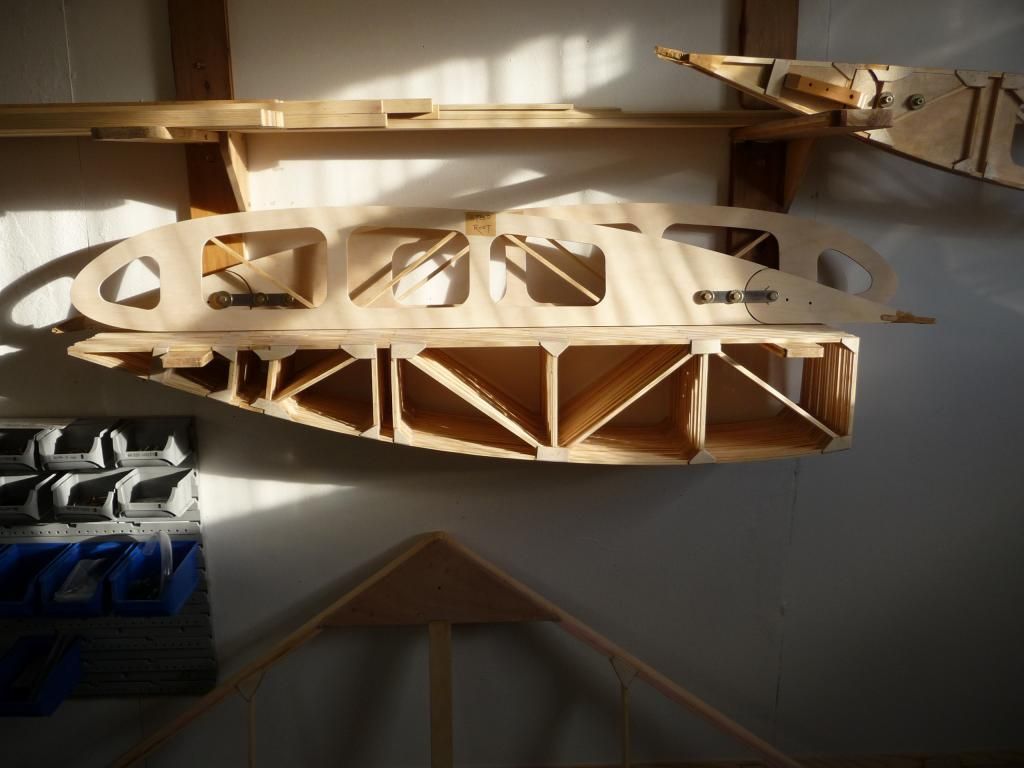
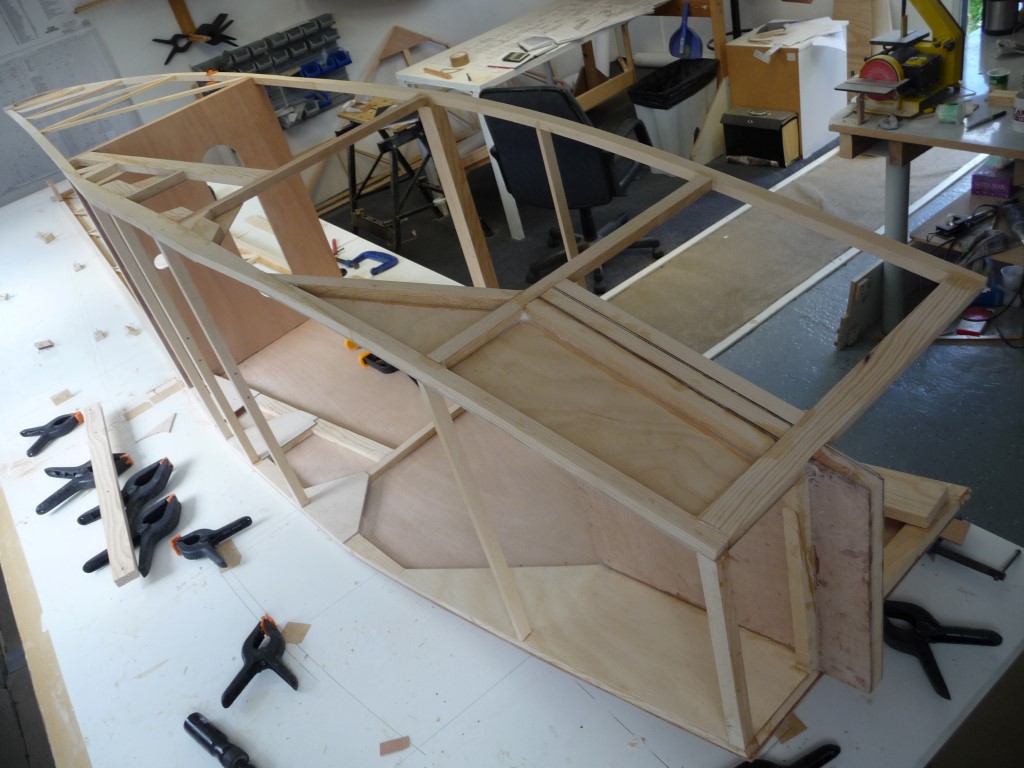
I assembled the two side frames before gluing on the outside skins, to make it easier to bend. Sorry, didn't take any pix before I'd got to this stage, where I turned it over on its side after the glue was dry.
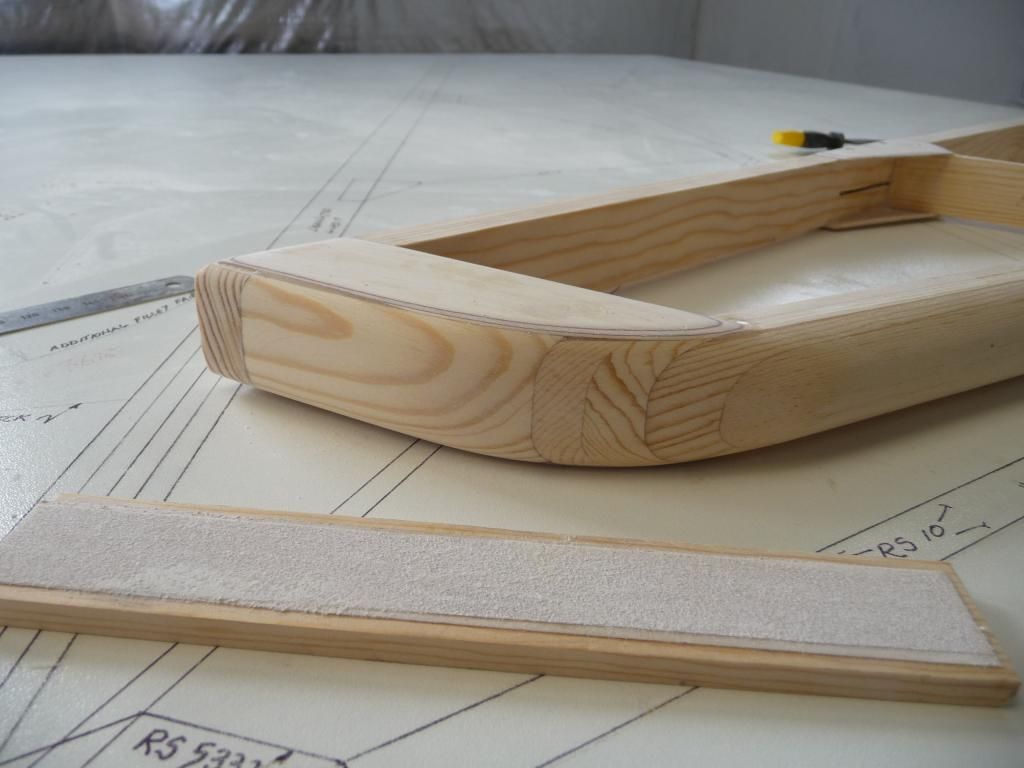
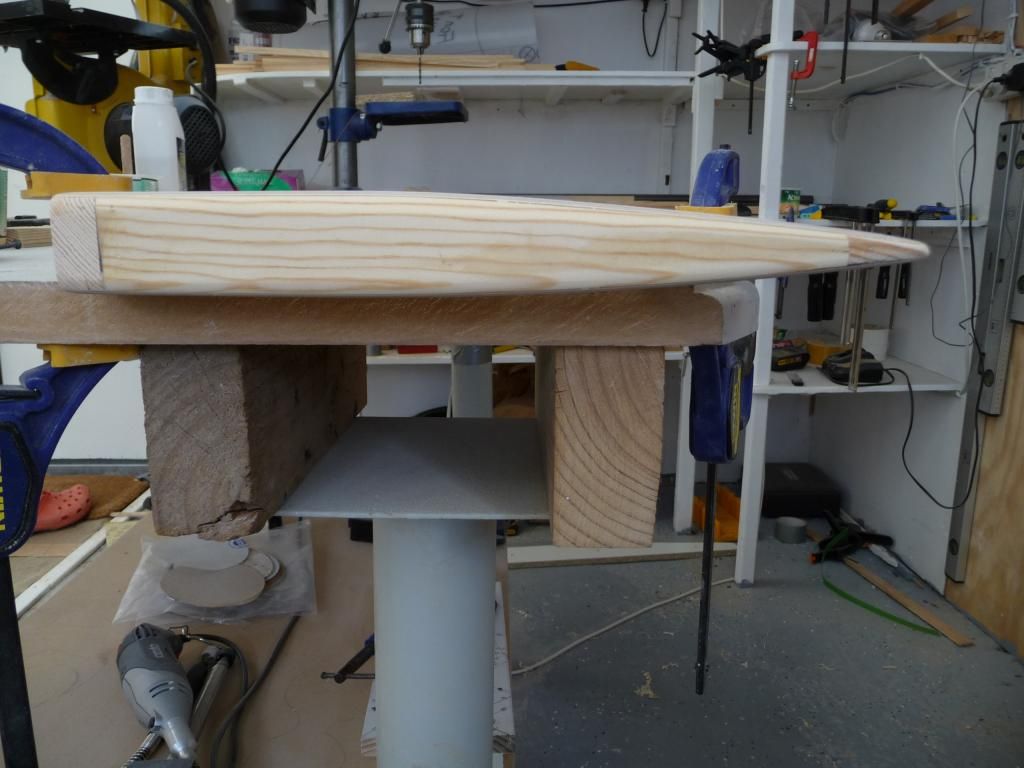
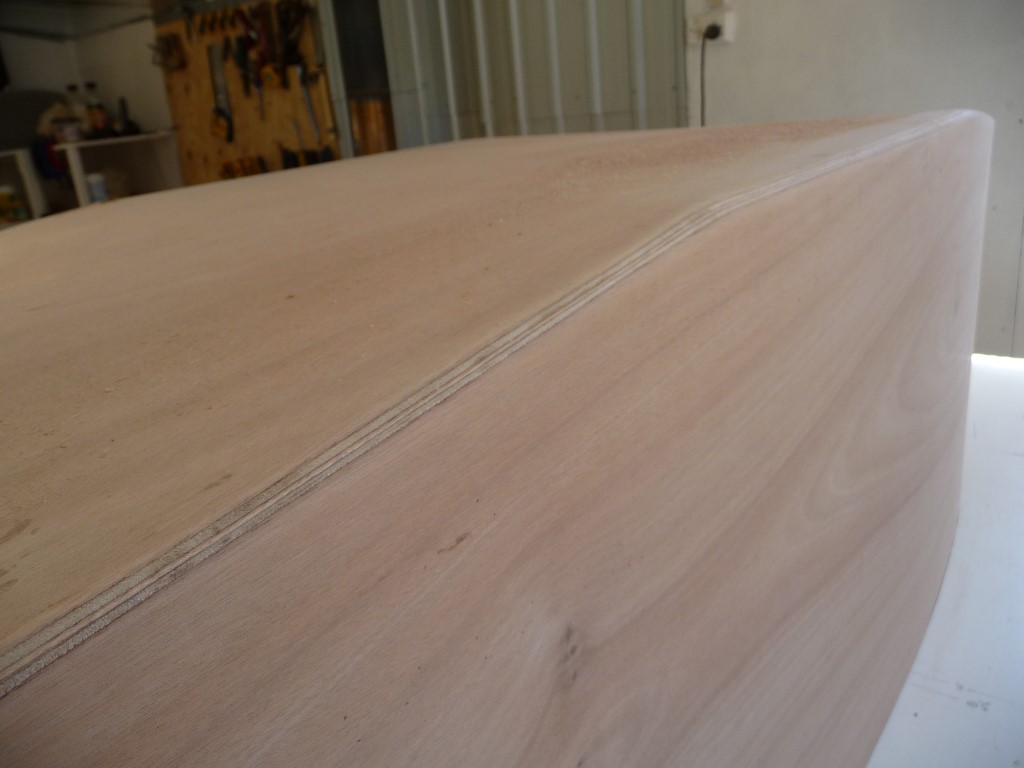
The outside skins went on quite easily. For the floor, I made a large radius on the RS10 base longeron member (bottom of cockpit area). This was to allow the 3mm ply to wrap around the bend better, and it seemed to follow the contour well & not show any tendency to unstick. I'd read in earlier posts here that the floor can be hard to glue round the bend, & I reckon the radius makes it easier.
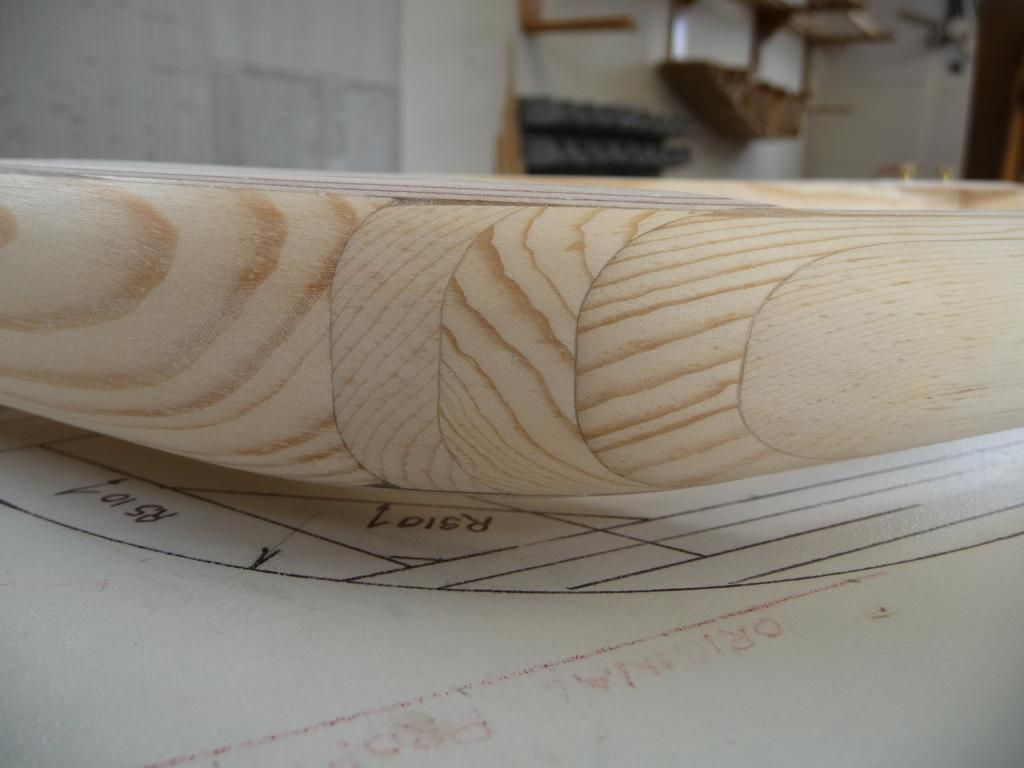
This pic is after I routed the 1/2" radius along the corner.


 One of our sheep has just had twins, the fire season is starting soon & I have some training to do, and my little Suzuki DRZ needs a workout (don’t forget here in Australia tomorrow is the first day of Spring). And I keep meaning to post on my build.
 Logged