|
|
 Reto S Reto S |
|
Ace
Posts: 320
Time Online: 13 days 19 hours 26 minutes
|
Those are nice rudder pedals. Glad your back!
Brian When I saw your and Bruce's project progress I couldn't help but jumping in again...  Cheers Reto |
|
|
|
|
|
| Reto S |
| February 11, 2016, 2:01pm |
|
Ace
Posts: 320
Time Online: 13 days 19 hours 26 minutes
|
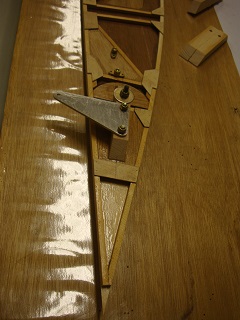
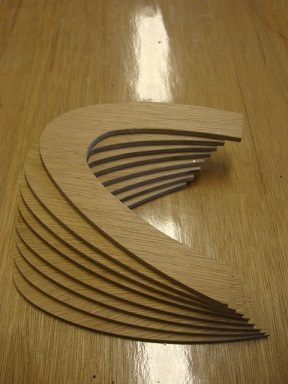
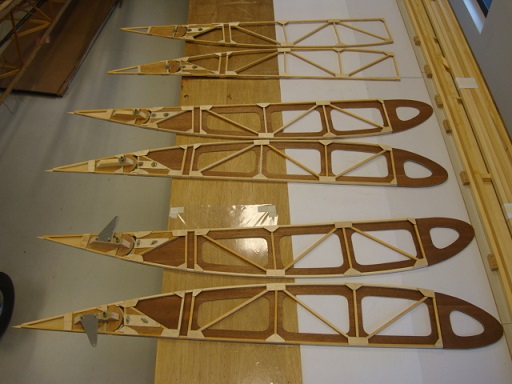
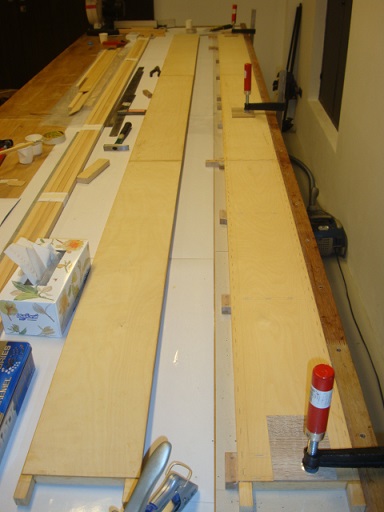
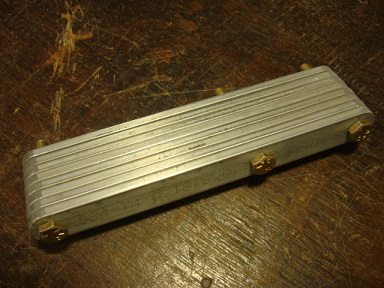
I am busy fabricating the parts for the wings. The 4 end ribs (rot & tip) are taking quite a while, but at least the 20 "normal" ribs are done already. I like Bruce's wing closure at his aileron section (additional web). It's beautifully done and very well documented. I am lucky to be slow for once...  Thank you Bruce! There is quite some planning required regarding the tolerances/fabrication of the aileron section. My final measurements are identical with Bruce's. Pictures of the first finished root rib are below. The top and bottom cap/ply has got a +/-3 deg. angle "sanded-in" already.
|
|
|
|
|
|
| Reto S |
| February 27, 2016, 2:37pm |
|
Ace
Posts: 320
Time Online: 13 days 19 hours 26 minutes
|
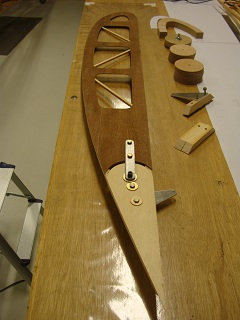
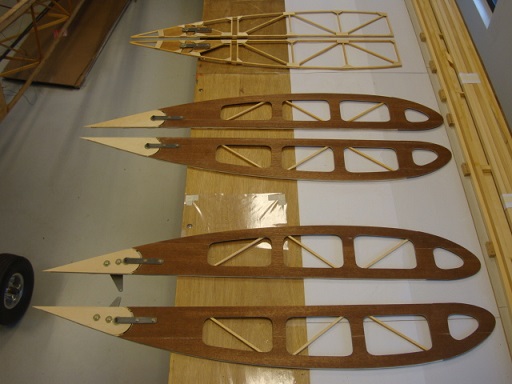
Root ribs, tip ribs & ribs #5 build from scratch.
Covered with lovely aircraft grade ply (Mahogany).
Working on more parts for the wings...
|
|
|
|
|
|
| aeronut |
| February 27, 2016, 2:48pm |
|
 blue sky and tail winds to everyone AcePosts: 1,560
Time Online: 28 days 22 hours 31 minutes
|
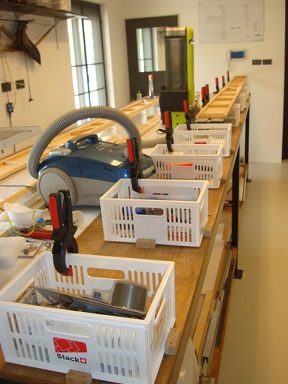
Looking good. Wish my work shop looked that neat and clean. |
| never surrender; never give-up |
|
|
|
|
|
| Ricardo |
| February 27, 2016, 5:24pm |
|
 Videos in UTube: ral1951 AcePosts: 2,772
Time Online: 75 days 23 hours 15 minutes
|
Looking good. Wish my work shop looked that neat and clean.
Retto and Bruce are such outstanding craftsmen, I'm happy I built my plane long time ago. Never built anything on wood before in my life, not even a chair  . That´s why it is such a great design, anybody can put their work up in the air....and land safely  |
|
|
|
|
|
| beragoobruce |
| February 27, 2016, 8:29pm |
|
Built an Eros - now I'm flying it! AcePosts: 1,065
Time Online: 19 days 10 hours 41 minutes
|
Beautiful work, Reto - those ribs are works of art! Where did you get the aircraft grade ply? Ricardo, if you were to make a chair now, I bet it would look pretty good. Having developed your skills on making an aeroplane! Yours was one of the builds that inspired me to make a Max: it was very well documented with lots of photos showing your excellent workmanship. Bruce |
|
|
|
|
|
| Ricardo |
| February 27, 2016, 11:40pm |
|
Videos in UTube: ral1951 AcePosts: 2,772
Time Online: 75 days 23 hours 15 minutes
|
Thanks for your kind words Bruce. Coming from you, makes my work much more valuable than I thought. |
|
|
|
|
|
| Reto S |
| February 28, 2016, 1:10pm |
|
Ace
Posts: 320
Time Online: 13 days 19 hours 26 minutes
|
Looking good. Wish my work shop looked that neat and clean.
Hi aeronut Every evening I tend to use my vacuum cleaner, with the disturbing side effect that everything in its nozzle-way tends to disappear... And rest assured, at times there is a lot of dust and chaos... Cheers Reto |
|
|
|
|
|
| Reto S |
| February 28, 2016, 1:19pm |
|
Ace
Posts: 320
Time Online: 13 days 19 hours 26 minutes
|
Retto and Bruce are such outstanding craftsmen, I'm happy I built my plane long time ago. Never built anything on wood before in my life, not even a chair . That´s why it is such a great design, anybody can put their work up in the air....and land safely
Ricardo As Bruce said, your work was/is a great inspiration to me too and the pictures of your uncovered Max are actually in front of my Building Binder... Btw, I could use some high chairs in my workshop (just in case you decide to use your talent again)... Cheers Reto |
|
|
|
|
|
| Reto S |
| February 28, 2016, 1:28pm |
|
Ace
Posts: 320
Time Online: 13 days 19 hours 26 minutes
|
Beautiful work, Reto - those ribs are works of art! Where did you get the aircraft grade ply? Ricardo, if you were to make a chair now, I bet it would look pretty good. Having developed your skills on making an aeroplane! Yours was one of the builds that inspired me to make a Max: it was very well documented with lots of photos showing your excellent workmanship. Bruce
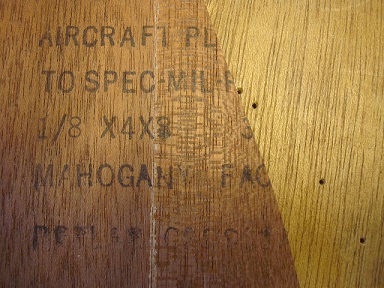
Bruce Thank you for your kind words. The ply is from Spruce as the "kit" ply was unfortunately cut a bit too narrow. It is fantastic to work with... http://www.aircraftspruce.com/catalog/wppages/domplywood.phpDid you already decide how your colour scheme will look? Cheers Reto |
|
|
|
|
|
| bigbrixx1 |
| February 28, 2016, 4:56pm |
|
 Ace AcePosts: 822
Time Online: 20 days 16 hours
|
Beautiful work. A real inspiration. You and Bruce are true craftsmen. Ricardo I find your help has been invaluable. I am almost ashamed to post my efforts!thank you for posting your updates |
| V-max. Finished. Now in phase one flight |
|
|
|
|
|
| Reto S |
| February 29, 2016, 1:27am |
|
Ace
Posts: 320
Time Online: 13 days 19 hours 26 minutes
|
Beautiful work. A real inspiration. You and Bruce are true craftsmen. Ricardo I find your help has been invaluable. I am almost ashamed to post my efforts!thank you for posting your updates
Brian Thank you for your kind words, but looking at your project and great progress I am humbled. Your wind generator is super cool! You almost there! Cheers Reto |
|
|
|
|
|
| beragoobruce |
| February 29, 2016, 7:37am |
|
Built an Eros - now I'm flying it! AcePosts: 1,065
Time Online: 19 days 10 hours 41 minutes
|
Did you already decide how your colour scheme will look?
Not yet. I've finished spraying the fuselage white. I'm doing overlays with tracing paper on the 3 view drawing trying to work out what looks best by way of some stripes to provide some contrast. Stripes will probably be a fairly deep blue. I wish I was more artistic! Bruce |
|
|
|
|
|
| Reto S |
| February 29, 2016, 4:04pm |
|
Ace
Posts: 320
Time Online: 13 days 19 hours 26 minutes
|
Not yet. I've finished spraying the fuselage white. I'm doing overlays with tracing paper on the 3 view drawing trying to work out what looks best by way of some stripes to provide some contrast. Stripes will probably be a fairly deep blue.
I wish I was more artistic!
Bruce
Wished that would be my "only" task which is left to do... You might have better links already: https://www.google.co.uk/searc.....rc=tEyu3D8PtkSS2M%3AReto |
|
|
|
|
|
| beragoobruce |
|
Built an Eros - now I'm flying it! AcePosts: 1,065
Time Online: 19 days 10 hours 41 minutes
|
Hey, great link Reto - thanks! There are some very pretty aeroplanes there: nearly all beyond my beginner's skills at spray painting  The trouble with trying to get a side stripe along the fuselage to 'work' is that the Eros is a shoulder wing. So if you put the stripe below the wing it can't be seen on the ground, & if you try putting it at upper longeron level the wing root gets in the way. But I think I've worked out something that might look ok. I'm still trying for the retro look! Cheers Bruce |
|
|
|
|
|
| Reto S |
|
Ace
Posts: 320
Time Online: 13 days 19 hours 26 minutes
|
The trouble with trying to get a side stripe along the fuselage to 'work' is that the Eros is a shoulder wing. So if you put the stripe below the wing it can't be seen on the ground, & if you try putting it at upper longeron level the wing root gets in the way.
Yep, it's not easy... Only 2 pictures found in my Reno air racing book...
|
|
|
|
|
|
| Ricardo |
|
Videos in UTube: ral1951 AcePosts: 2,772
Time Online: 75 days 23 hours 15 minutes
|
This design would be very inspiring.
|
|
|
|
|
|
| beragoobruce |
|
Built an Eros - now I'm flying it! AcePosts: 1,065
Time Online: 19 days 10 hours 41 minutes
|
All good stuff. But Ricardo, I'd need a girl with smaller boobs or they wouldn't fit my fuselage. . .
Sorry Reto. I shouldn't be filling your excellent build thread with this stuff.
Bruce |
|
|
|
|
|
| Ricardo |
|
Videos in UTube: ral1951 AcePosts: 2,772
Time Online: 75 days 23 hours 15 minutes
|
All good stuff. But Ricardo, I'd need a girl with smaller boobs or they wouldn't fit my fuselage. . .
Sorry Reto. I shouldn't be filling your excellent build thread with this stuff.
Bruce
no problem,I'll remove it in a couple of days, let other builders get some ideas. |
|
|
|
|
|
| Reto S |
|
Ace
Posts: 320
Time Online: 13 days 19 hours 26 minutes
|
no problem,I'll remove it in a couple of days, let other builders get some ideas.
Bruce, Ricardo I absolutely don't mind. Please leave it because I like it... . It shouldn't be a too serious affair to build a flying machine anyway! Bruce you mentioned vintage, that's why I dug out on old Reno book... Cheers guys |
|
|
|
|
|
| lake_harley |
|
Ace
Posts: 1,090
Time Online: 25 days 1 hours 54 minutes
|
I guess this paint scheme discussion could get out of hand, but here's one of my favorites. It's FUN-looking!! http://blog.duncanaviation.com.....itation I too will delete the post if desired to keep the thread on track. But, I couldn't resist. Lynn |
|
|
|
|
|
| beragoobruce |
|
Built an Eros - now I'm flying it! AcePosts: 1,065
Time Online: 19 days 10 hours 41 minutes
|
Lynn, have you been sneaking a look at my plane? That's exactly how my fuselage looks! |
|
|
|
|
|
| lake_harley |
|
Ace
Posts: 1,090
Time Online: 25 days 1 hours 54 minutes
|
Cool....that makes 2 now...the Citation and your MiniMAX! If I have my way there could be a 3rd, providing I build another plane and have the nerve to paint it like the Citation. Anybody can have a plane painted with swoopy lines, but it takes a real man to paint blotches on one!  Lynn |
|
|
|
|
|
| Reto S |
|
Ace
Posts: 320
Time Online: 13 days 19 hours 26 minutes
|
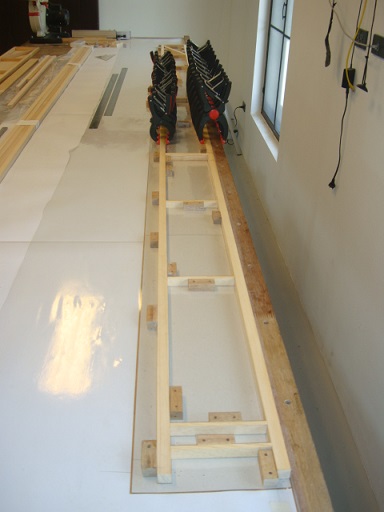
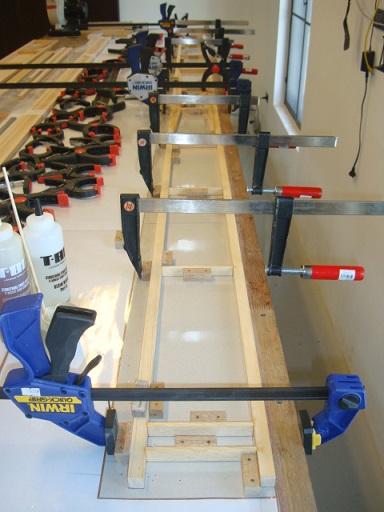
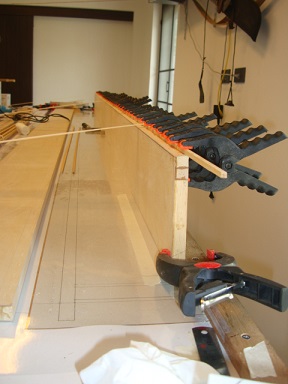
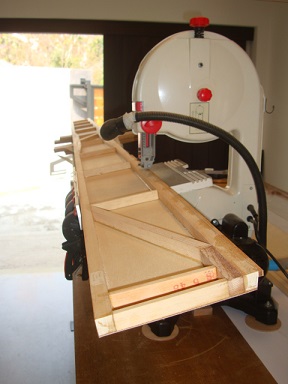
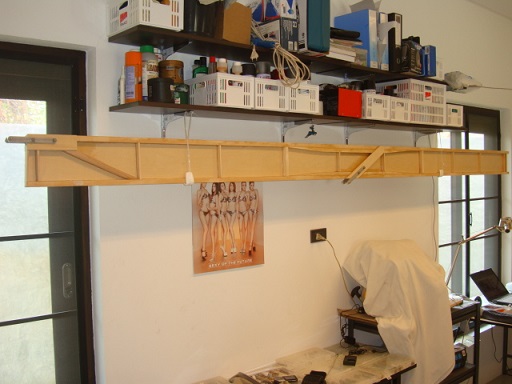
Second front wing spar is borne...
|
|
|
|
|
|
| Reto S |
|
Ace
Posts: 320
Time Online: 13 days 19 hours 26 minutes
|
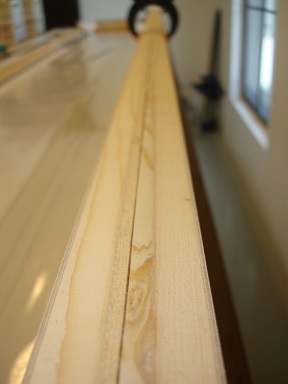
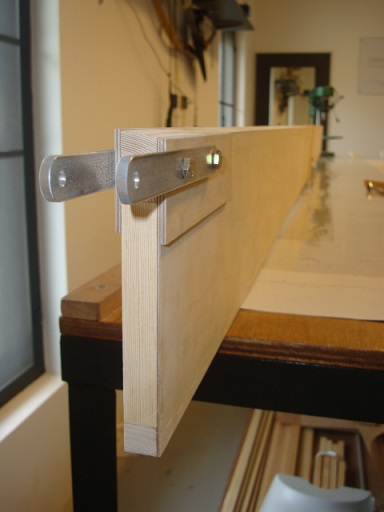
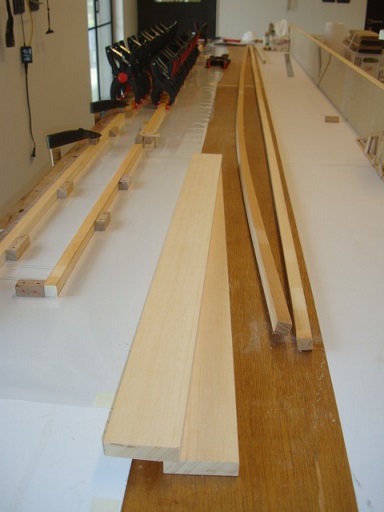
Still working on the front spars (actually fiddling)...
The strut fittings are completed.
Unfortunately some of the spar caps are varying in thickness, are not true and 1/32 under size.
To fix this, as first step, I sanded the lower spar part straight and true. Then I decided to cut off as little as possible on top and did the first 10.5 deg angle cut. I glued some 1/4 x 1/4 cap sticks on the (still) flat part on top and then did a 2nd cut with the band saw. Now the spar total width is back to the required 6 7/8" and the undersized spare caps have got minimal material loss from the cut (full strength)...
Happy with the result...
|
|
|
|
|
|
| beragoobruce |
|
Built an Eros - now I'm flying it! AcePosts: 1,065
Time Online: 19 days 10 hours 41 minutes
|
That looks great, Reto. And your bandsaw is a proper tool - makes mine look like a toy! Still about the most useful tool in the shop, though. And I congratulate you on your immaculate workshop. I started off with good intentions, but sadly failed to live up to them.
Once you get those ribs in place you'll really get a buzz.
|
|
|
|
|
|
| Reto S |
|
Ace
Posts: 320
Time Online: 13 days 19 hours 26 minutes
|
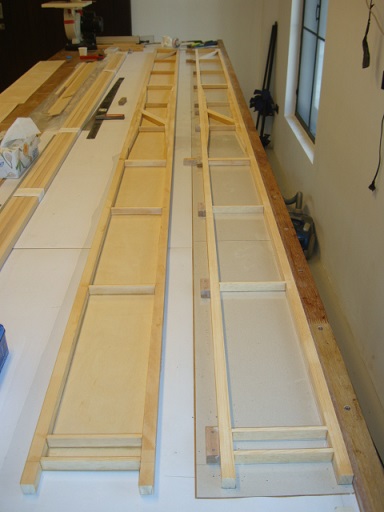
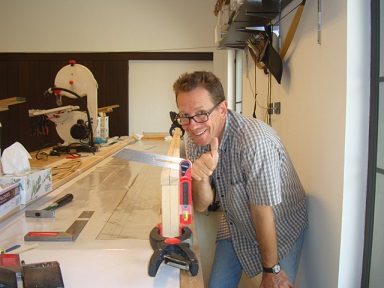
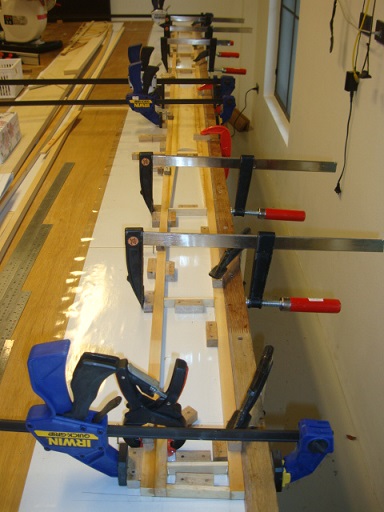
Motivation is hanging on the wall.
Had to replace some more banana wood with spruce.
Rear spar in the making...
|
|
|
|
|
|
| bigbrixx1 |
|
Ace
Posts: 822
Time Online: 20 days 16 hours
|
Beautiful work! |
| V-max. Finished. Now in phase one flight |
|
|
|
|
|
| Reto S |
|
Ace
Posts: 320
Time Online: 13 days 19 hours 26 minutes
|
That looks great, Reto. And your bandsaw is a proper tool - makes mine look like a toy! Still about the most useful tool in the shop, though. And I congratulate you on your immaculate workshop. I started off with good intentions, but sadly failed to live up to them.
Once you get those ribs in place you'll really get a buzz.
Bruce You can't imagine how many times I had to fix my (made in China) bandsaw already, actually it's a miracle that it's still alive... I wished I could stand in knee-deep saw dust, but due to my breathing problems I need to get rid of the dust as much as I can... Hope all well on your end! Reto |
|
|
|
|
|
| Reto S |
|
Ace
Posts: 320
Time Online: 13 days 19 hours 26 minutes
|
Beautiful work!
Brian Thank you for your kind words, but progress is sooo slow, because the caps are bent and not true and it takes a lot of time to make the wood fit together. I want to have proper joints for glueing. You are very close to the finishing line, great job! I am happy for you. Cheers Reto |
|
|
|
|
|
|


 Logged