|
|
 Reto S Reto S |
|
Ace
Posts: 320
Time Online: 13 days 19 hours 26 minutes
|
Dear forum members
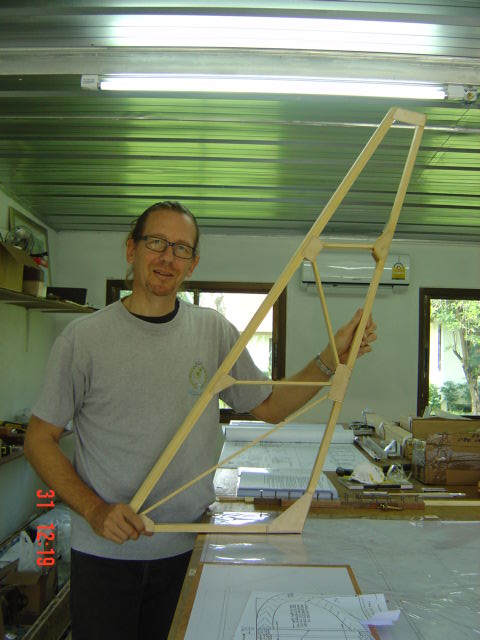
My name is Reto and quite a while ago I have joined this forum with the intention to start building my MM Eros.. At that time I still lived in Philippines, but facing some health issues.. Now, 4 month, a surgery and 2 moves (Philippines - Bangkok / Bangkok - Chiang Mai in northern Thailand) later, I am happy to report that the Eros project has finally taken off..
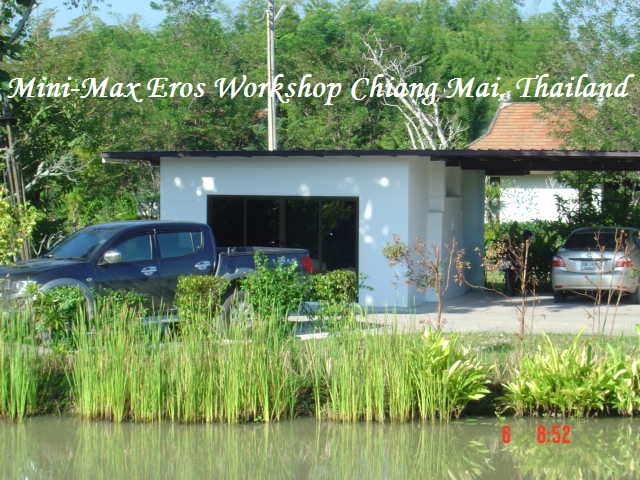
We (my gf and 2 cats) made new friends here and my landlord build a great workshop.. As a Swiss guy I appreciate the cooler climate in Chiang Mai with its stunning scenery.. In short we found the ideal new home..
Certainly there will be questions and uncertainties surfacing during the construction process.. The collective wisdom and knowledge of you guys will help tremendously.. Thank you in advance for any support..
Kind regards
Reto
PS
A big "thanks" to David C. from MM for his advise and helping to overcome monumental import hurdles..
|
|
|
|
|
|
| AC1600R |
|
Ace
Posts: 420
Time Online: 21 days 8 hours 2 minutes
|
Welcome to the Lonesome Buzzards Reto. This is undoubtedly the kindest forum on the web! Enjoy the build and don't hesitate to ask any questions that come to mind.
-Sean |
| Sean Winship
Middle Tennessee |
|
|
|
|
|
| superswamper |
|
Flight Leader  Posts: 143
Time Online: 18 days 4 hours 1 minutes
|
Reto, welcome to the board! ask lots of questions, and send lots of pics. most of all have fun building. Jim |
|
|
|
|
|
| Ricardo |
|
 Videos in UTube: ral1951 AcePosts: 2,772
Time Online: 75 days 23 hours 15 minutes
|
Welcome aboard Reto. This site is very international! |
|
|
|
|
|
| Arthur Withy |
|
 Happy 1500R owner - building a Jodel D18 AcePosts: 2,532
Time Online: 32 days 12 hours 14 minutes
|
Hello and Welcome Reto....glad to have you here. Thanks for sharing your story and photos with us, and I will very keen to watch your progress.
cheers Arthur
Adelaide, South Australia. |
|
|
|
|
|
| Phil |
|
 Ace AcePosts: 1,071
Time Online: 15 days 4 hours 18 minutes
|
Hi..we're supposed to be neighbors in the Philippines. I'm glad we are living in the same house here in East Tennessee. Feel at home Reto this is big happy family WELCOME  ....,Phil |
|
|
|
|
|
| aeronut |
|
 blue sky and tail winds to everyone AcePosts: 1,560
Time Online: 28 days 22 hours 31 minutes
|
Welcome! These guys are the best builders asset that you can have. Enjoy your time here and I am looking forward to your build posts and the report of your first flight. |
| never surrender; never give-up |
|
|
|
|
|
| pkoszegi |
|
 Ace AcePosts: 1,363
Time Online: 41 days 7 hours 42 minutes
|
Hi Reto, welcome ! The best active forum I have ever come across with and I am really an addict of Maxes. Having 3 of them The best part will come when you start to fly these beauties. But until, you can really count on help on this forum ! Peter from Hungary |
|
|
|
|
|
| Reto S |
| November 7, 2013, 10:28am |
|
Ace
Posts: 320
Time Online: 13 days 19 hours 26 minutes
|
Dear Sean, Jim, Ricardo, Arthur, Phil, "Aeronut", Peter & David
Thank you for the warm welcome!
Appreciate your help and guidance...
Status:
90 hours into the build, vertical stabilizer and rudder finished, 2 ribs done...
Cheers
Reto
|
|
|
|
|
|
| Phil |
|
Ace
Posts: 1,071
Time Online: 15 days 4 hours 18 minutes
|
Reto..soon you will be in finishing stage...keep in touch...take care..
please share your accomplishments...it means a lot for us...
Phil |
|
|
|
|
|
| Bob Hoskins |
|
 Fly Safe AcePosts: 1,208
Time Online: 38 days 16 hours 39 minutes
|
Hi Rito;
Welcome to the best group on the net. Don't ever hesitate to ask a question, we are here to share. Don't forget, we all love pictures. Welcome again.
Bob |
| Fly safe and have fun. |
|
|
|
|
|
| Reto S |
| November 8, 2013, 12:43pm |
|
Ace
Posts: 320
Time Online: 13 days 19 hours 26 minutes
|
Reto..soon you will be in finishing stage...keep in touch...take care..
please share your accomplishments...it means a lot for us...
Phil
Phil, certainly I will... accomplishments and cock ups...  |
|
|
|
|
|
| Reto S |
| November 8, 2013, 12:48pm |
|
Ace
Posts: 320
Time Online: 13 days 19 hours 26 minutes
|
Dear Bob and TTT, thank you for your kind words...
|
|
|
|
|
|
| Reto S |
|
Ace
Posts: 320
Time Online: 13 days 19 hours 26 minutes
|
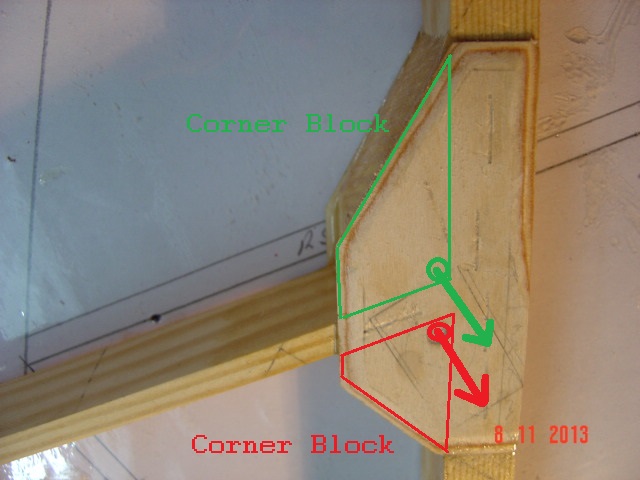
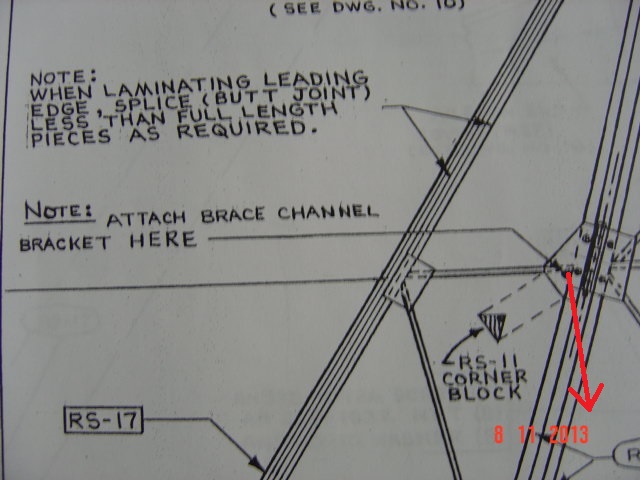
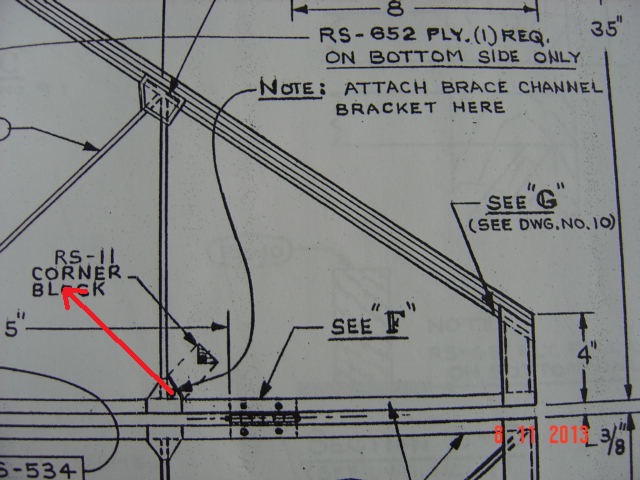
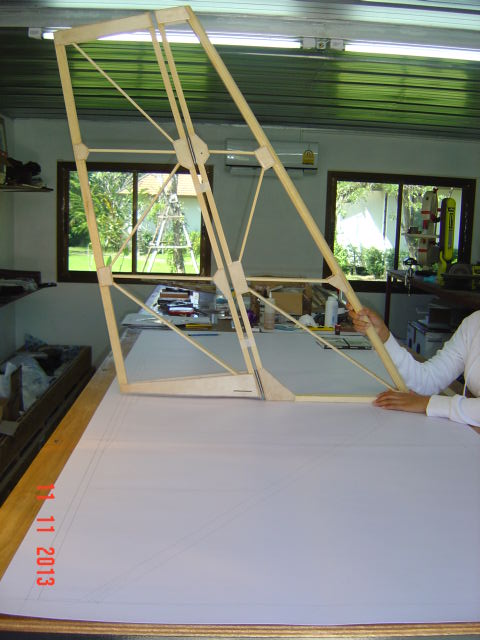
Dear forum members, here it comes... My first question: Looking at the construction plans, I can't help it, but I feel a bit uneasy when high loads are passed through several wood sections of the structure. Particularly at the vertical stabilizer where the brace channel brackets are attached. I have already drilled the hole according plan (corner, below the rib). The corner block (red drawing) makes this section strong, but wouldn't it be much stronger to attach the bracket just above the rib? I already have glued a second (bigger) corner block in place (above the rib, green drawing). I understand there will be quite some push/pull forces acting on that section. Interestingly, with the horizontal stabilizer the brace channel brackets ARE attached outside the rib (which would correspond to the "green" drawing with the vertical stab. What is your opinion? Please tell me if I am over-cautious... Thank you for sharing your thoughts.
|
|
|
|
|
|
| Bob Daly |
|
Ace
Posts: 888
Time Online: 45 days 22 hours 25 minutes
|
The loads aren't that high. The maximum tail load is a 220 lb download (see http://www.lonesomebuzzards.com/cgi-bin/forum/Blah.pl?v-download/f-minimaxstressanalysis_7196.pdf/). The stabilizer spar resists the load in bending but let's suppose the whole 220 lb load is reacted by the fin spar in compression. The bearing strength of the 3/16" bolt hole is at least 900 lbs. The ply gussets alone provide a shear strength of at least 500 lbs. The horizontal member in the fin at the strut attachment point provides little if any resistance to the vertical load, any resistance it might offer ultimately gets resolved into the ply gussets. The bigger block above the horizontal member does make the attachment stronger but only because the bigger block has larger glue surfaces with the fin's spar and the ply gussets. Edit: Taking another look at the bearing stress of the hole. The bearing stress might be reduced by moving the hole as proposed because now the bolt is bearing at least partly perpendicularly to the grain in the crossmember which is ~10% the bearing strength parallel to the grain. So, you'd probably want to move the hole up a half-inch from the crook of the crossmember/spar junction so that the bolt is bearing on the parallel(more or less) grain on the wood in the block. |
|
 Logged Logged |
|
|
|
|
| lake_harley |
|
Ace
Posts: 1,090
Time Online: 25 days 1 hours 54 minutes
|
I have no intention of sidetracking the discussion, but wanted to say "thanks" to you, Bob, for posting the stress analysis report. I've always wanted to print it out, always forgot, but finally did today. It should provide some interesting info about "our" little plane. Just at a glance, I'd bet there is W-A-Y more documented engineering info on the MiniMAX than any number of other small planes that are available by plans or kits.
Thanks!
Lynn |
|
|
|
|
|
| Reto S |
|
Ace
Posts: 320
Time Online: 13 days 19 hours 26 minutes
|
Dear Bob
Thank you for the link. The document is of great value and reassuring. Furthermore your explanation makes perfect sense.
In my case it will be an Eros model, around 700 lbs GW with metal landing gear ("VV" shape) and Hirth 55HP...
Are there any specific areas which I still could/should re-enforce during construction?
Thank you!
Reto |
|
|
|
|
|
| Bob Daly |
|
Ace
Posts: 888
Time Online: 45 days 22 hours 25 minutes
|
Lynn,
You're very welcome. Another great source is ANC-18 which is a reference for the TEAM report. I'd also suggest Richard Hiscock's "Design of Light Aircraft" and Tom Rhodes' "Stress Without Tears". Together, these secondary sources have helped me begin to understand how the TEAM analysis was done. |
|
| Logged |
|
|
|
|
| Bob Daly |
|
Ace
Posts: 888
Time Online: 45 days 22 hours 25 minutes
|
Reto,
I developed a spreadsheet to investigate the loads described in the TEAM analysis and plugging in a 700 lb gross weight yields a tail down load of nearly 300 lbs. Still, low enough that the tail bracing as specified in the plans is sufficient. I am not an engineer. I suggest you stick to the plans. When you begin to make changes, you can initiate a chain of analysis that results in redesigning the whole airplane. |
|
| Logged |
|
|
|
|
| Reto S |
|
Ace
Posts: 320
Time Online: 13 days 19 hours 26 minutes
|
Bob
Appreciate your help and thank you for the load figures.
I certainly will stick to the plans.
Reto |
|
|
|
|
|
| Reto S |
| November 15, 2013, 3:11am |
|
Ace
Posts: 320
Time Online: 13 days 19 hours 26 minutes
|
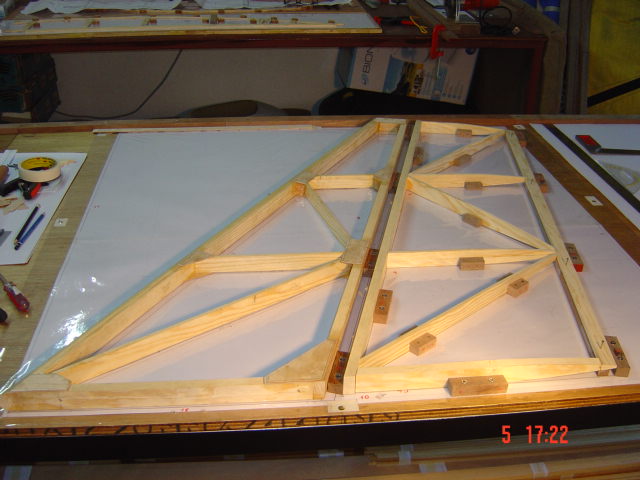
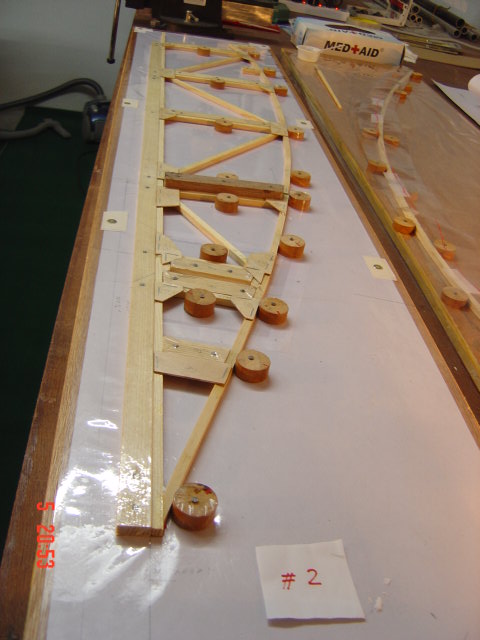
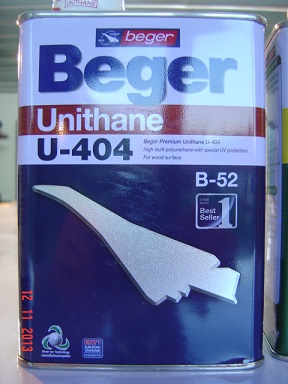
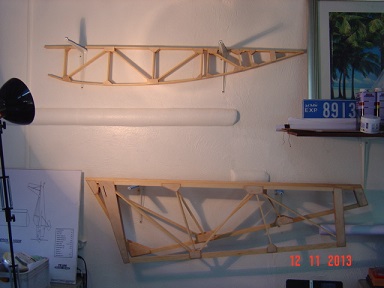
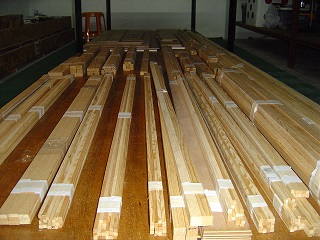
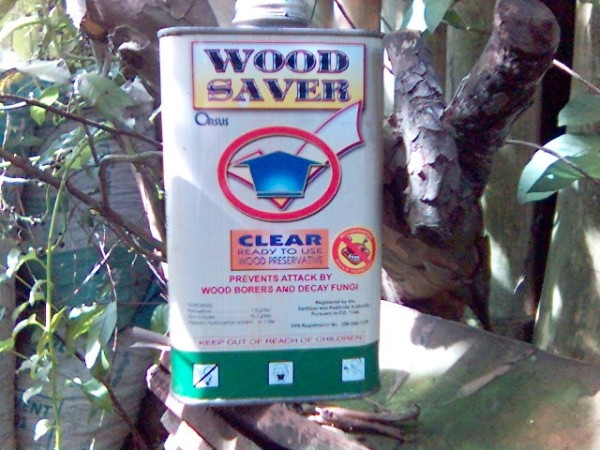
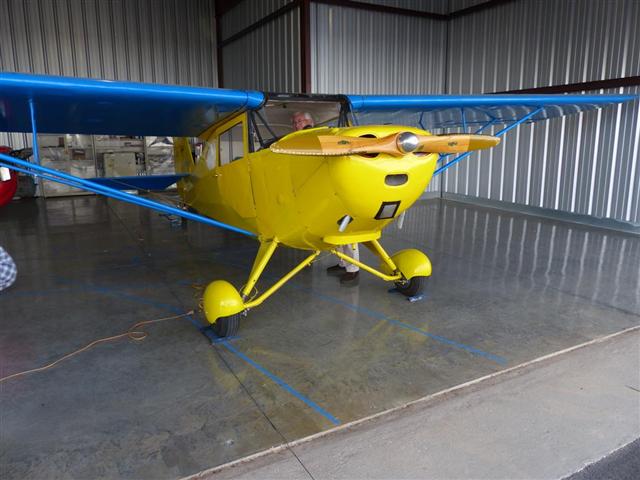
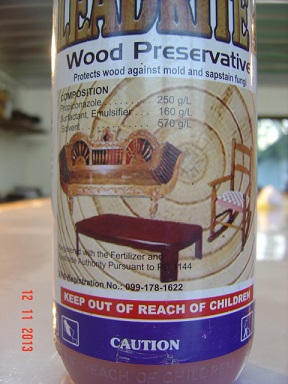
Dear members The progress is a bit slow, but I am enjoying the build. 5 ribs, vert. stab plus rudder finished, started with horizontal stab. 120 hours into the build. I got some question regarding the treatment/protection of the partially finished parts (ribs, stabilizer, etc.) . It is difficult to get hold of well known products here in Thailand. At the moment the workshop has a controlled environment with humidity steady around 50% and temperature 77F. To achieve this we are running air-conditioning plus de-humidifier 24/7. Thailand has a tropical climate. The wood was in closed crates for over 2 month (high humidity) before I started the build. There are no visual clues of mould, but some metal parts in the kit show sign of corrosion. Q1: At this stage of the build is it advisable to use an anti-fungal/mould protection and apply a good polyurethane lacquer or would the mould protection be enough? Q2: Are this two substances compatible (on the long run)? Q3: Would the polyurethane negatively affect the future assembly of the wing (T88 bonding)? Q4: Will I have to sand down the polyurethane before further assembly? Product and build pictures are attached. Thank you for sharing your opinion. Cheers Reto
|
|
 |
|
|
|
|
|
|
| Bob Daly |
| November 15, 2013, 2:20pm |
|
Ace
Posts: 888
Time Online: 45 days 22 hours 25 minutes
|
Reto,
I refer you to ANC-18, "Design of Wood Aircraft Structures". It contains two sets of strength tables, one for use in temperate climes where the wood equilibrium moisture content is 15% and one for tropical where the moisture content stabilizes at 20%. "This moisture content represents an equilibrium with high relative humidity, approximately 90% or over, corresponding to conditions in tropical areas where high humidity is prevalent for long periods of time or more or less continuously." - ANC-18. Various sources say a wood moisture content below 20% will not support fungal growth. I believe your climate controlled shop will be sufficient, even ideal for building with no concerns about protecting the wood from fungus. You could probably save some money by running the air conditioning on a reduced schedule. |
|
| Logged |
|
|
|
|
| aeronut |
| November 15, 2013, 2:55pm |
|
blue sky and tail winds to everyone AcePosts: 1,560
Time Online: 28 days 22 hours 31 minutes
|
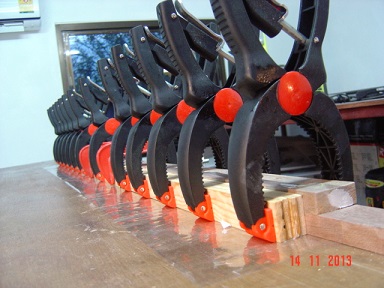
The storage of the wood structural parts in the kit is probably important in your case. Flat shelving that allows good air circulation would be helpful. It looks like you are coming along with your build just fine. Keep up the good work and thanks for the post. |
| never surrender; never give-up |
|
|
|
|
|
| Reto S |
| November 15, 2013, 3:43pm |
|
Ace
Posts: 320
Time Online: 13 days 19 hours 26 minutes
|
Reto,
I refer you to ANC-18, "Design of Wood Aircraft Structures". It contains two sets of strength tables, one for use in temperate climes where the wood equilibrium moisture content is 15% and one for tropical where the moisture content stabilizes at 20%. "This moisture content represents an equilibrium with high relative humidity, approximately 90% or over, corresponding to conditions in tropical areas where high humidity is prevalent for long periods of time or more or less continuously." - ANC-18. Various sources say a wood moisture content below 20% will not support fungal growth. I believe your climate controlled shop will be sufficient, even ideal for building with no concerns about protecting the wood from fungus. You could probably save some money by running the air conditioning on a reduced schedule.
Bob Thank you for your reply. My concern is that non-visible fungus/mould might have infested the wood during the 2 month high humidity/high temperature storage prior the start of the build. In the reference book "Wood building technique" they talk about possible fungi infestation leading to "dry rot" at a later stage. That's why I asked the specific questions above. Btw, the electricity bill is paid by my generous landlord... |
|
|
|
|
|
| Reto S |
| November 15, 2013, 3:50pm |
|
Ace
Posts: 320
Time Online: 13 days 19 hours 26 minutes
|
The storage of the wood structural parts in the kit is probably important in your case. Flat shelving that allows good air circulation would be helpful. It looks like you are coming along with your build just fine. Keep up the good work and thanks for the post.
Hi Aeronut Shelving and wood turning is in progress.. We had the same thought.. Still not sure about anti-fungi treatment and Polyurethane coating though (questions above).. Cheers Reto
|
|
|
|
|
|
| Reto S |
| November 15, 2013, 4:10pm |
|
Ace
Posts: 320
Time Online: 13 days 19 hours 26 minutes
|
Bob Thank you for your reply. My concern is that non-visible fungus/mould might have infested the wood during the 2 month high humidity/high temperature storage prior the start of the build. In the reference book "Wood building technique" they talk about possible fungi infestation leading to "dry rot" at a later stage. That's why I asked the specific questions above. Btw, the electricity bill is paid by my generous landlord...
Had a look at the reference manual ANC-18. Thank you for the "heads-up" regarding this document. Page 227 mentions the rot problem (specifically in the tropics). It doesn't mention a possible anti fungal treatment though. |
|
|
|
|
|
| Tom |
| November 15, 2013, 6:37pm |
|
Ace
Posts: 744
Time Online: 16 days 10 hours 21 minutes
|
You won't want to polyurethane any parts that will be glued. However you could use WEST System(tm) epoxy with the Special Coating Hardener to completely coat all componentsl. This would prevent warping and rot and you can sand it lightly wherever subsequent gluing will be needed and it will bond fine. If you do that you won't need any other fungal protection. For gluing I use the G/Flex epoxy by the same people who make the WEST System. This particular epoxy is very good at gluing parts in difficult situations.
Tom |
|
|
|
|
|
| Bob Daly |
| November 15, 2013, 6:50pm |
|
Ace
Posts: 888
Time Online: 45 days 22 hours 25 minutes
|
It's my understanding that once properly dried and protected from direct, prolonged contact with liquid water, lumber in a tropical climate with average humidity near 90% reaches an equilibrium moisture content near 20%. And 20% moisture content is the threshold for fungi growth according to the US Forest Products Wood Handbook. My opinion is that two months at the threshold for fungi growth is not a concern. Use of a preservative may very well degrade the epoxy bonds and using a varnish will require sanding off the varnish from mating surfaces before gluing. Of course, once an assembly is completed it should be varnished. |
|
| Logged |
|
|
|
|
| Tom |
| November 15, 2013, 7:46pm |
|
Ace
Posts: 744
Time Online: 16 days 10 hours 21 minutes
|
Some kinds of anti-fungal treatments will definitely interfere with bonding.
Tom |
|
|
|
|
|
| Phil |
| November 15, 2013, 9:14pm |
|
Ace
Posts: 1,071
Time Online: 15 days 4 hours 18 minutes
|
Hi Reto,
The project is looking good.. BTW, It was my concerned too especially in tropic country like Philippines..I did applied wood preservatives followed with polyurethane varnish after assemblies.
Phil
|
|
|
|
|
|
|