|
|
 beragoobruce beragoobruce |
| November 17, 2014, 11:46am |
|
Built an Eros - now I'm flying it! Ace Posts: 1,067
Time Online: 19 days 10 hours 58 minutes
|
Not sure about this gross weight = build time. Usually, building something light (and strong) takes longer than building it heavy & strong. I reckon it'd be quicker to build an Evans VP1 with its plywood ribs, etc, than a Max. And from what I've read, the dear old Evans struggles to get itself airborne, never mind with any payload. . . Thanks to all for your compliments on my build. I'm not sure they're justified, though. All the pix I've seen of others' builds look to be of a very high standard. I guess it concentrates the mind wonderfully when you know your life could depend on the quality of your build!! Ricardo, I bought an old Rotax 503. It's missing a few bits, but claims to have had the bottom end checked & a top end overhaul. At some point I'll need to check all the bolt torques, buy the missing bits, re-weld the ancient exhaust, and make up a test frame to put some time in on the ground. Oh, and make a propellor, too. And my flying is pretty rusty now. Last time I flew was getting my glider wings, 3 years ago. So I'm going to need a few hours dual to get current again. But I decided to concentrate on the build before I get back into flying, because once I get up there, it's going to take lots of time out of my build programme. No chance of flying by Christmas, then  Cheers Bruce |
|
|
|
|
|
| pkoszegi |
| November 17, 2014, 1:27pm |
|
 Ace AcePosts: 1,363
Time Online: 41 days 7 hours 42 minutes
|
Bruce, Minimax is wonderful. Just remember from your gliding that the rate of descent is more dramatical than a glider.  But NASA has those flying bricks too, so no worries. You have all those woodwork skills I totally miss. Great job. Peter |
|
|
|
|
|
| Ricardo |
| November 17, 2014, 1:32pm |
|
 Videos in UTube: ral1951 AcePosts: 2,772
Time Online: 75 days 23 hours 15 minutes
|
Minimaxes can't glide as well as we wish but they sure can turn on a dime  |
|
|
|
|
|
| beragoobruce |
| November 18, 2014, 11:57am |
|
Built an Eros - now I'm flying it! AcePosts: 1,067
Time Online: 19 days 10 hours 58 minutes
|
Well at least I've had a bit of practice landing with no engine - no 'go arounds' when you're gliding! And looking at my old engine, I might need those skills  Bruce |
|
|
|
|
|
| texasbuzzard |
| November 18, 2014, 1:03pm |
|
 airbike Buzzard AcePosts: 1,238
Time Online: 8 days 23 hours 51 minutes
|
Bruce with a 2-stroke it's not if but when. seriously if your engine is old make sure you check it out completely or have it done especially the rubber products[ seals, boots, etc.]. 2-strokes are very reliable if maintained and setup right. i have learned this the hard way but now my 277 has been very reliable.
monte |
|
|
|
|
|
| beragoobruce |
| December 16, 2014, 1:50am |
|
Built an Eros - now I'm flying it! AcePosts: 1,067
Time Online: 19 days 10 hours 58 minutes
|
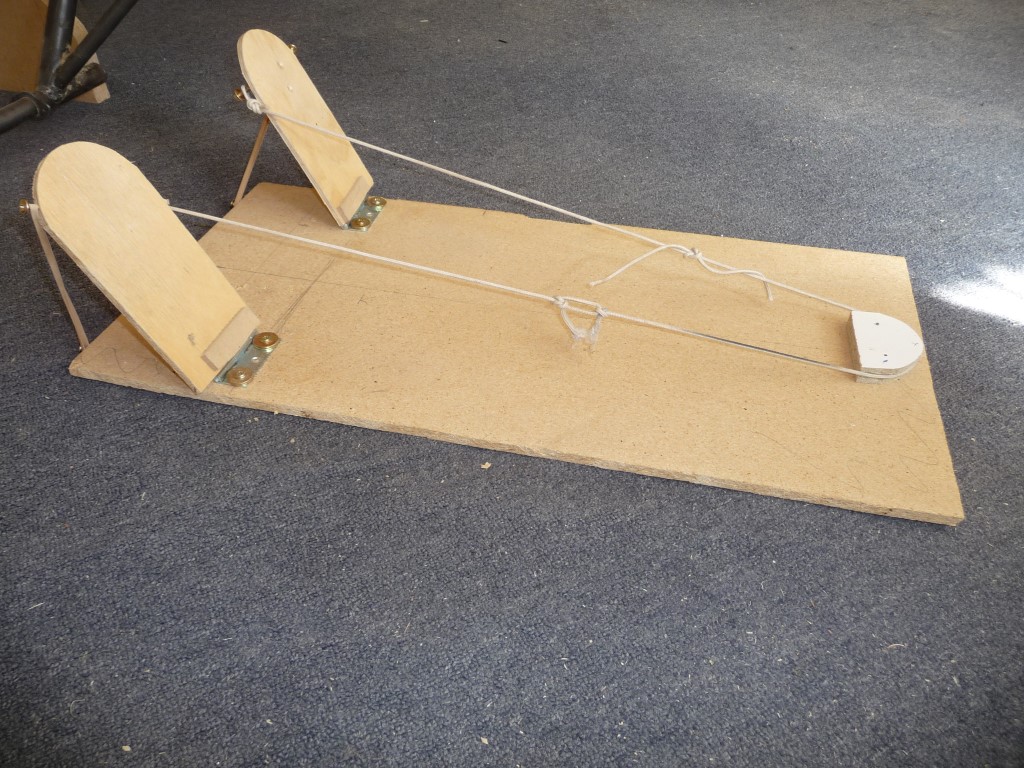
Hadn't realized it was Nov 15th that I posted last on my build. At that point, I was soaking the aileron leading edge ply. After soaking, I wrapped it to a plastic pipe to get a tighter radius. It was then straightforward to wrap it around the aileron noseribs.
|
|
|
|
|
|
| beragoobruce |
| December 16, 2014, 2:11am |
|
Built an Eros - now I'm flying it! AcePosts: 1,067
Time Online: 19 days 10 hours 58 minutes
|
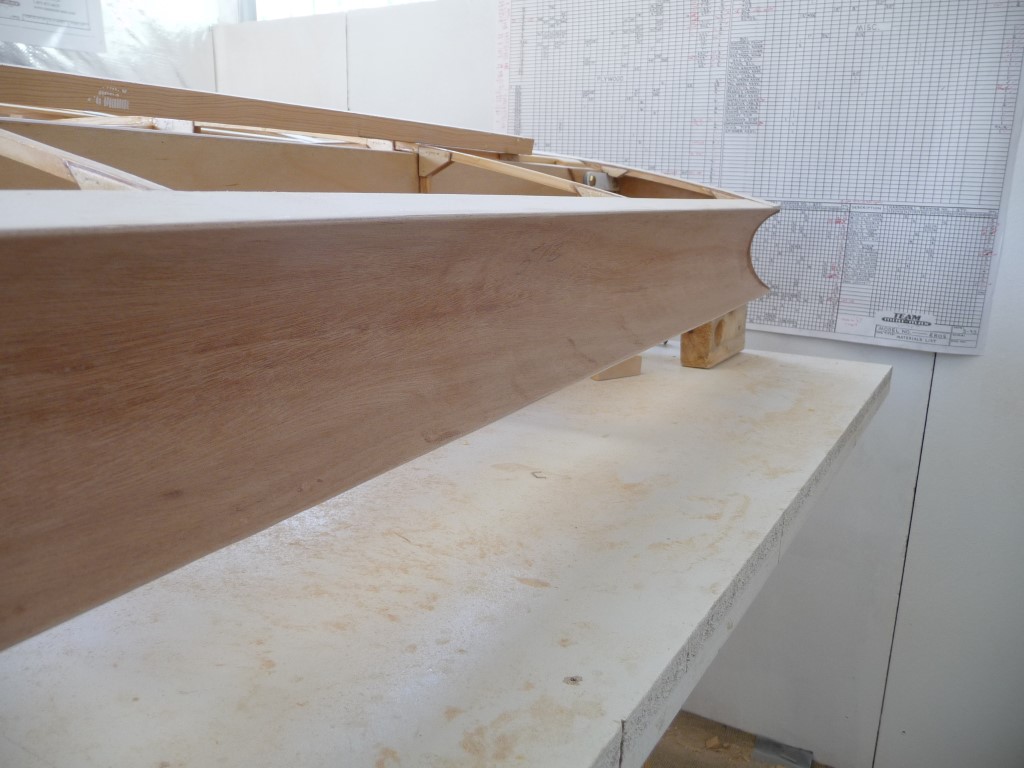
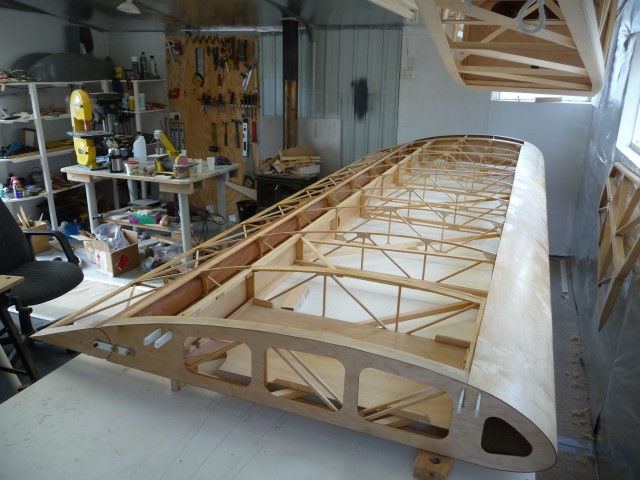
The trickier bit was the "closing web" for the rear spar.
The drawings show the rear spar open forward of the aileron leading edge. From reading of others' experiences here, this can lead to a couple of problems. Firstly, all manner of bugs & other unwanted wildlife can enter the wing to set up home. Round here, we have mud wasps that build huge mud nests in all sorts of unlikely places, and I'd rather not fly with that sort of asymmetrical load.
Secondly is the much vaunted 'trailing edge curl'. One idea that has been used to combat this is additional reinforcing at each rib gusset, using short lengths of RS1 to provide extra glued area. This is clearly better than nothing, but it is still a localized solution, which would not help to inhibit curl between rib positions.
So I decided to fully bond the trailing edges of the wing (in the aileron area) to a 'closing web', both to seal the wing space & give full span support to the trailing edges.
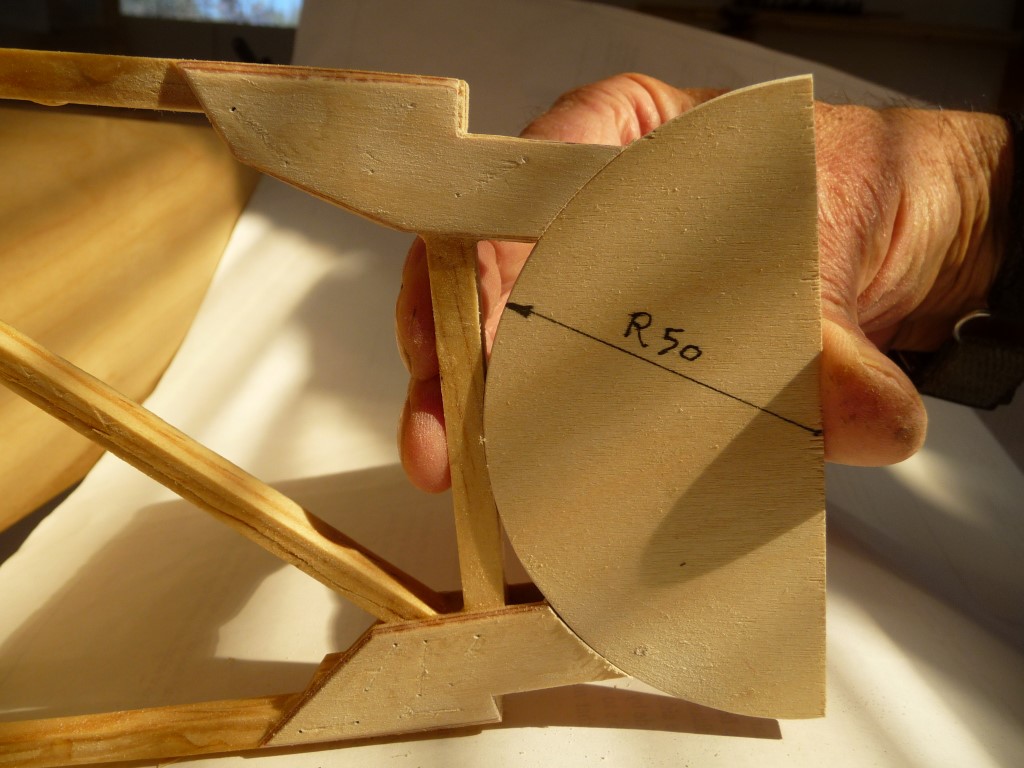
This caused a few problems, as there is only a small clearance between the aileron L/E & the wing structure. I had already allowed for this curved closing web when I cut my rear rib gussets, as I wanted them to provide some support for the plywood. But to get a good fit while still maintaining clearance, the ribs & trailing edges had to be accurately shaped.
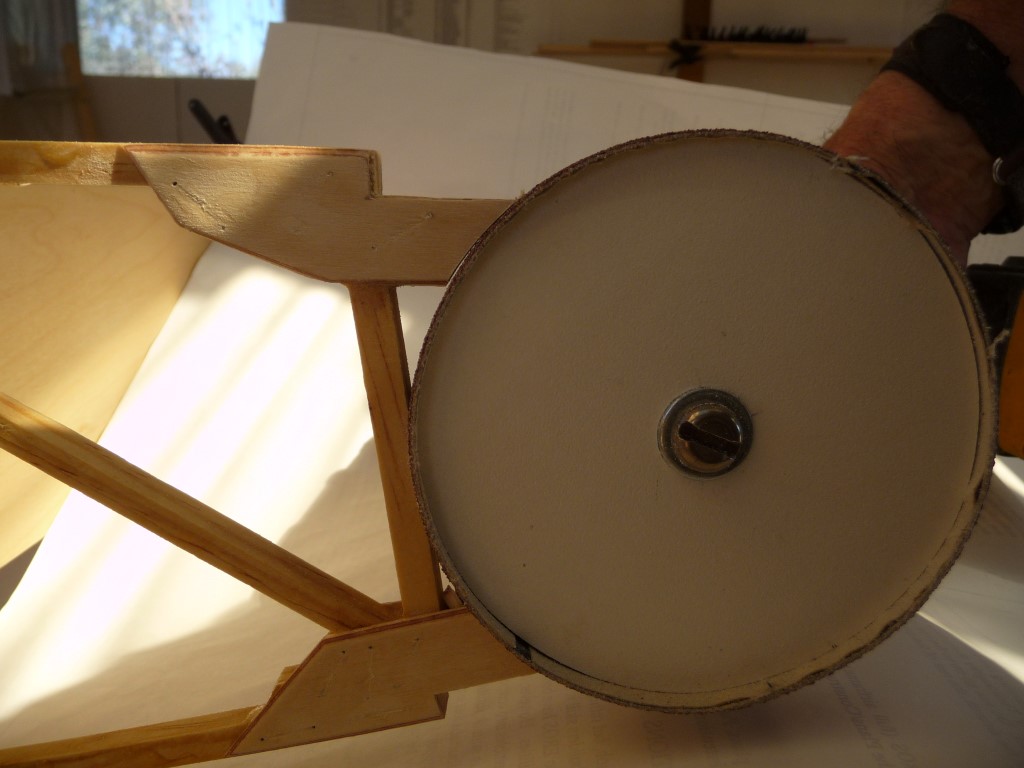
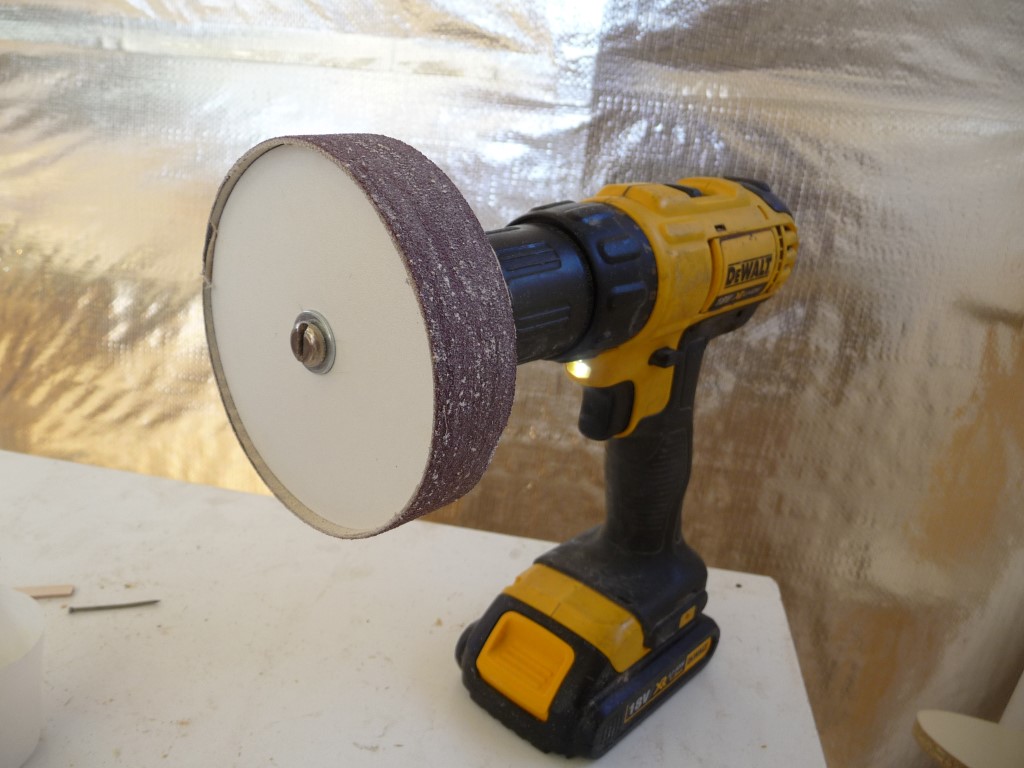
So I drew a section through the aileron L/E area, and found that I needed a curved recess of 50mm (roughly 2") radius to provide clearance.
To form this, I made a circular sanding tool of 98mm dia, and stuck on some coarse sandpaper with double sided tape. I then used this to form the gussets & T/E to accept the curved closing web.
|
|
 |
|
|
|
|
|
|
| beragoobruce |
| December 16, 2014, 2:28am |
|
Built an Eros - now I'm flying it! AcePosts: 1,067
Time Online: 19 days 10 hours 58 minutes
|
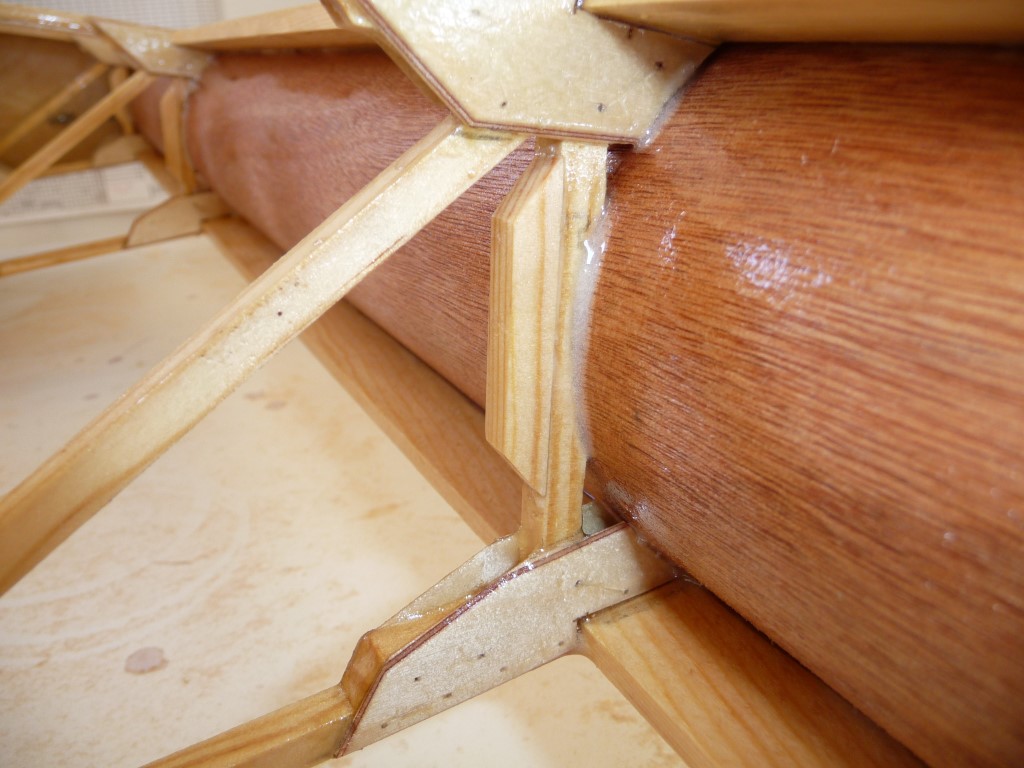
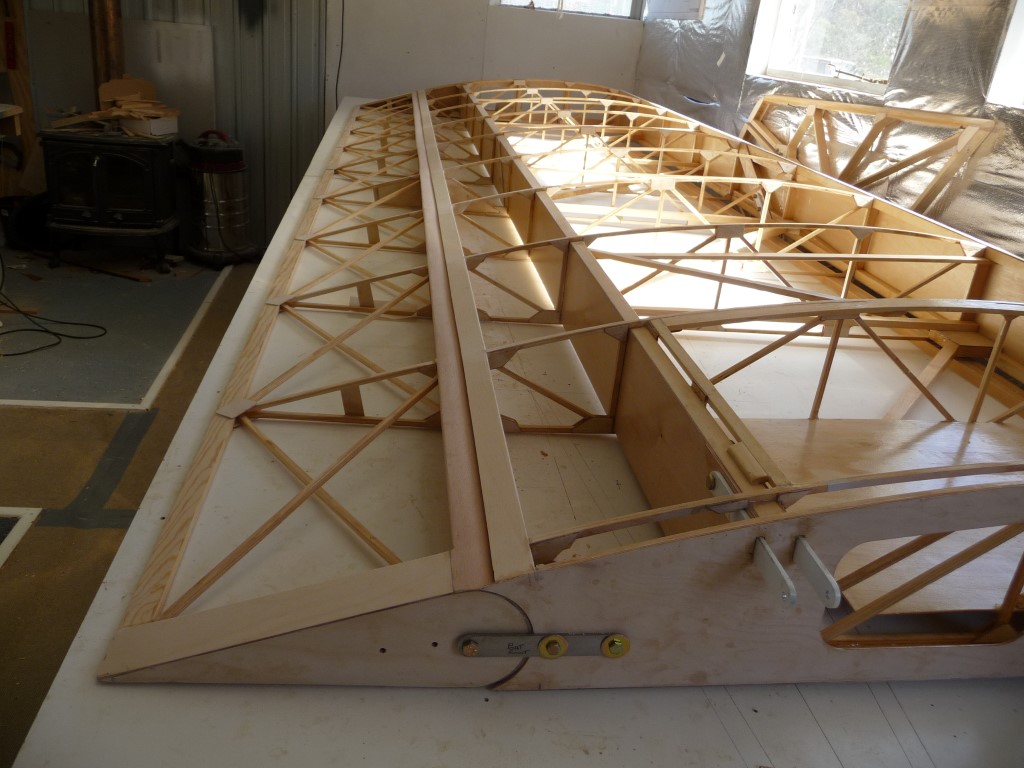
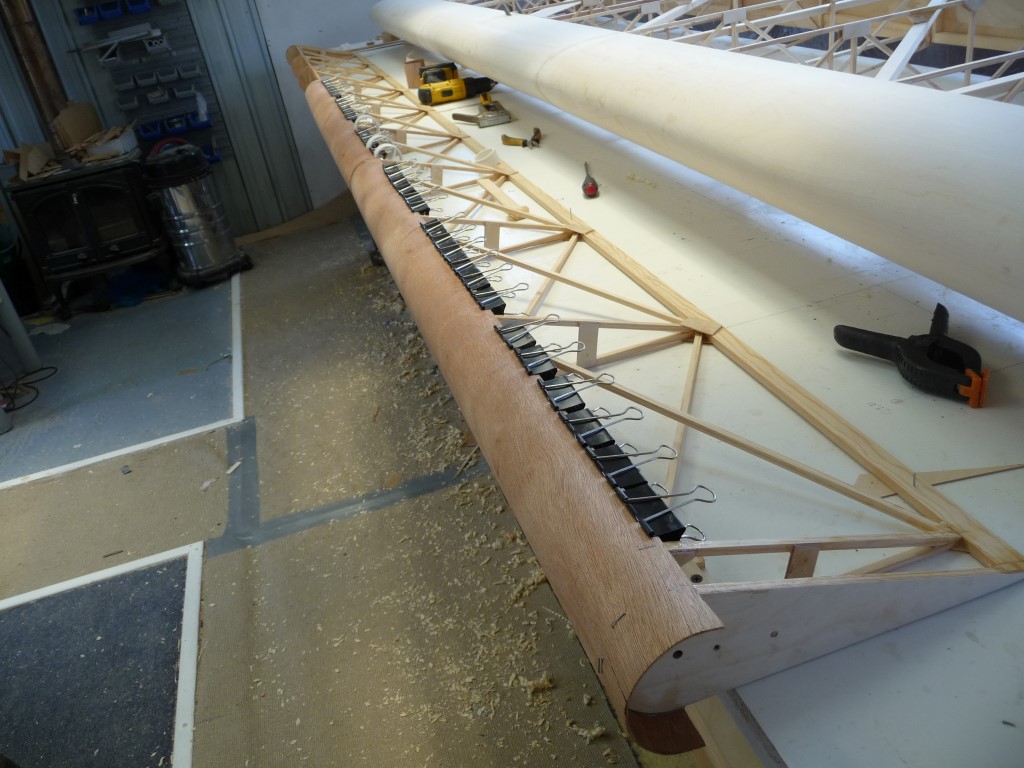
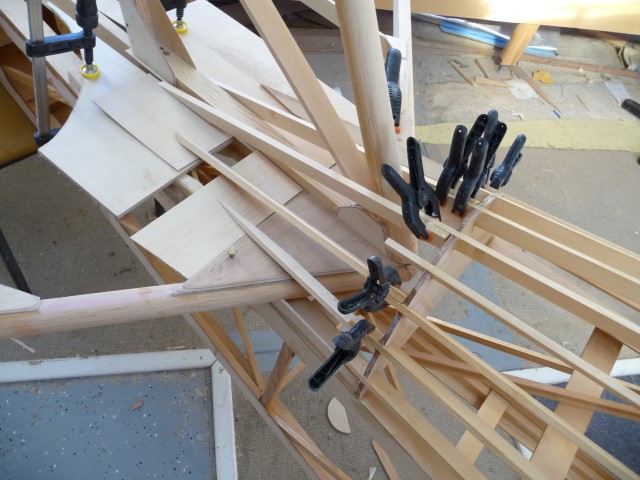
Then I pre-bent the web material (kindly provided by the Coop, for which many thanks!) as per the aileron L/E, and glued it to the structure using WEST epoxy thickened with microfibres. I used this because the thickened epoxy creates a solid fillet to help bond & strengthen the web to T/E join.
The finished job came out quite well: the trailing edges are very much stiffer to prevent curl; the wingspace is completely closed off, & there is about a 3/32" gap between the aileron L/E & the closing web to allow for the Dacron skins.
|
|
|
|
|
|
| beragoobruce |
| December 16, 2014, 2:30am |
|
Built an Eros - now I'm flying it! AcePosts: 1,067
Time Online: 19 days 10 hours 58 minutes
|
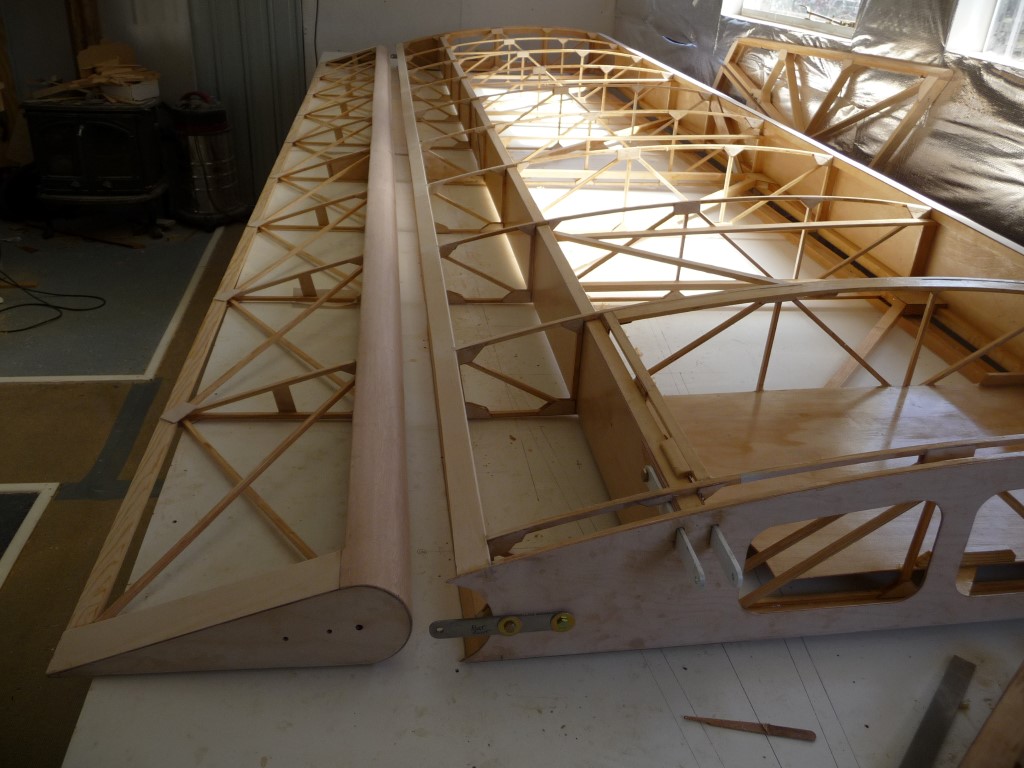
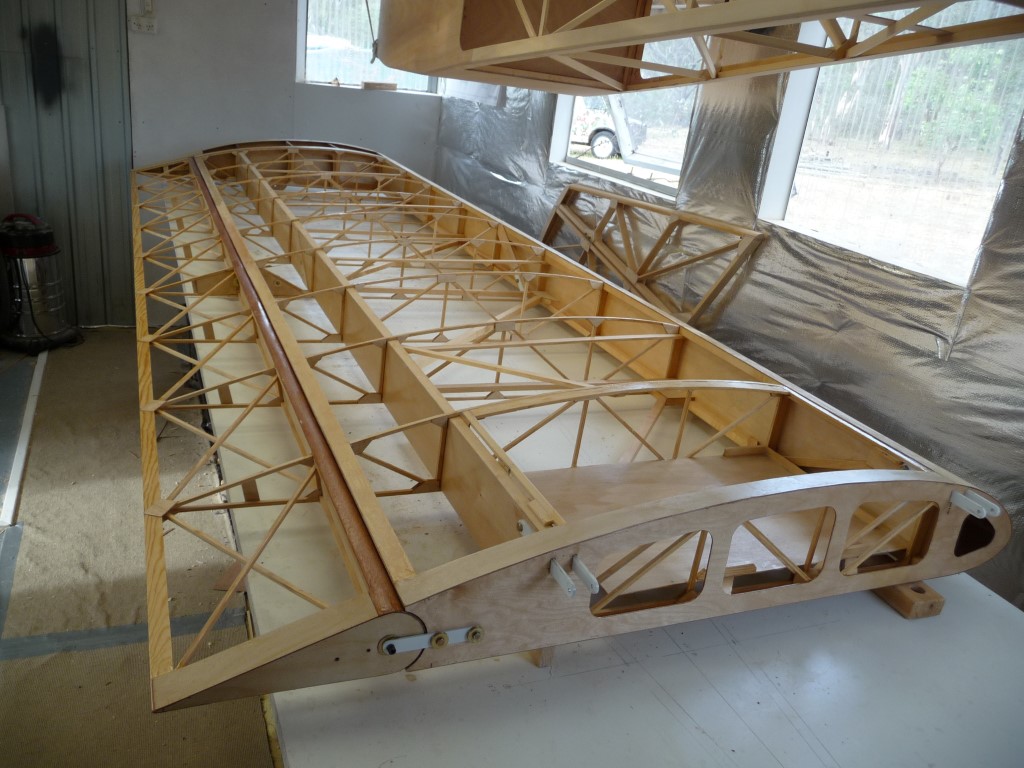
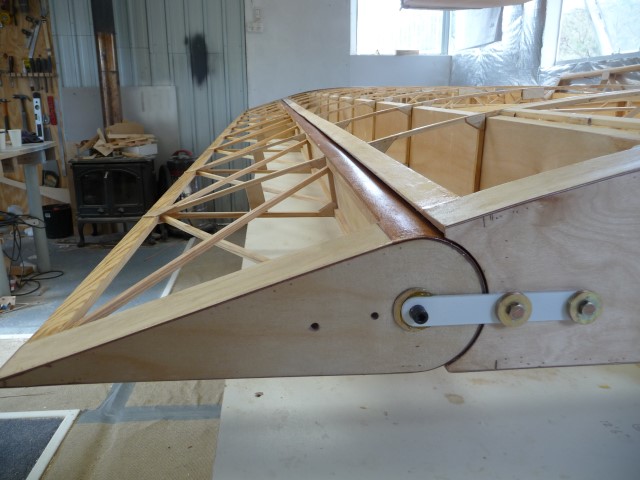
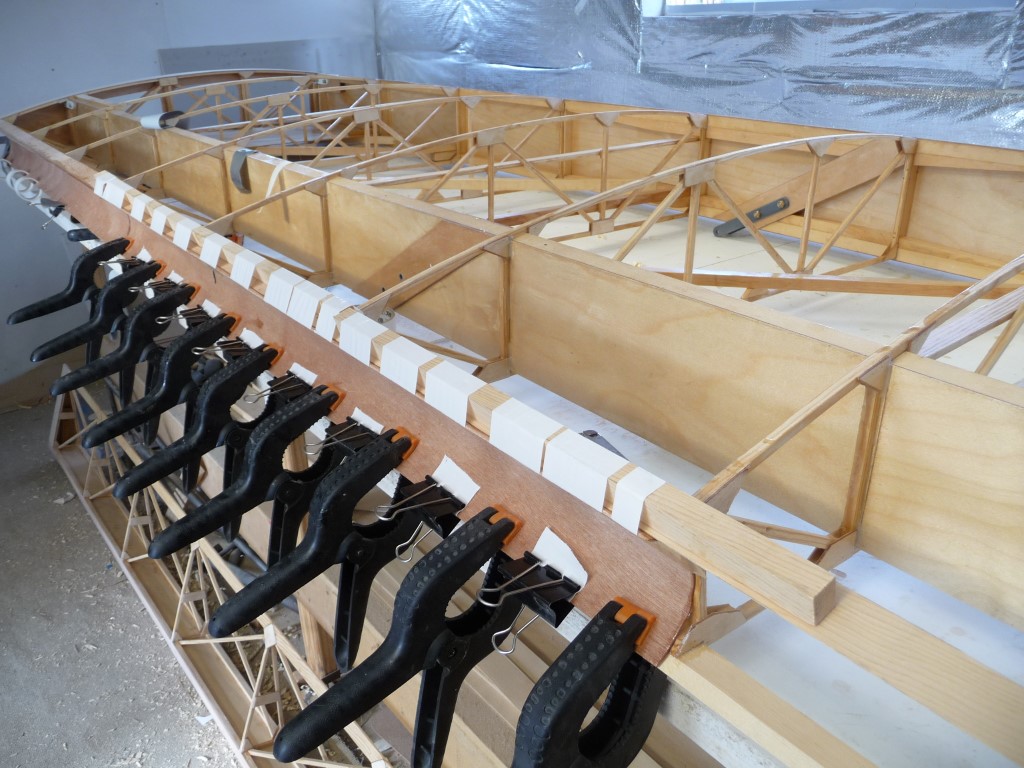
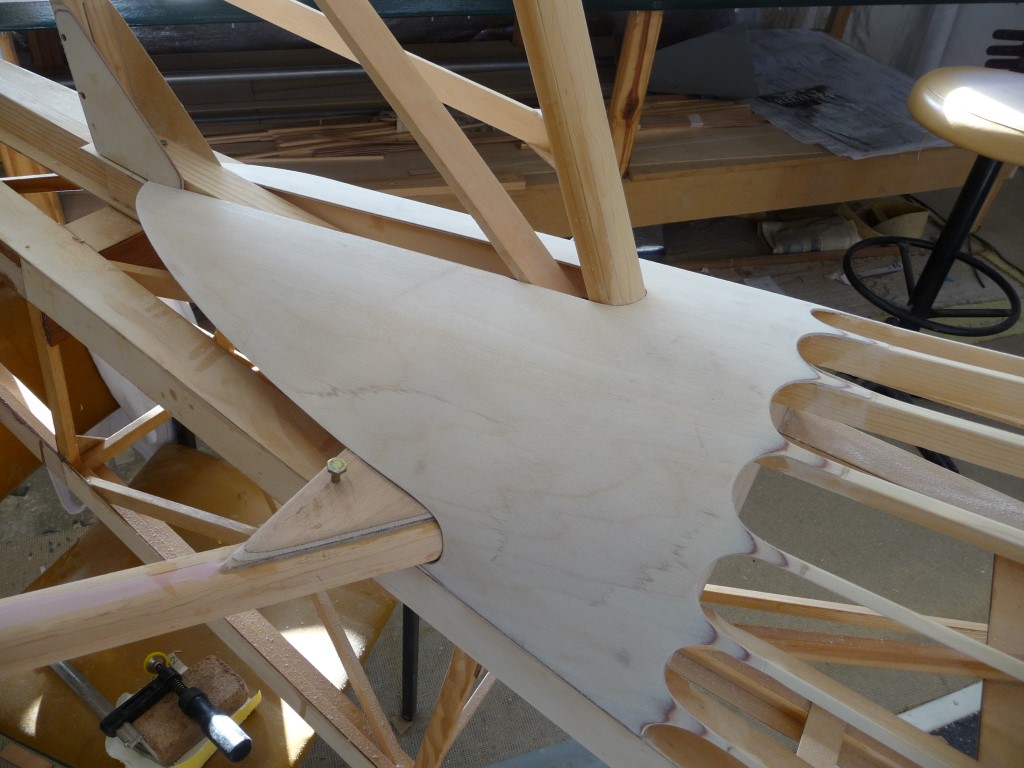
More pix, showing the rear of the closing web, again WESTed to the rib, with a doubler where I had to remove material for the radius.
Also showing the aileron assembled into wing. |
|
|
|
|
|
| beragoobruce |
| December 16, 2014, 2:36am |
|
Built an Eros - now I'm flying it! AcePosts: 1,067
Time Online: 19 days 10 hours 58 minutes
|
Sorry - forgot the pix! 
|
|
|
|
|
|
| beragoobruce |
| December 16, 2014, 2:44am |
|
Built an Eros - now I'm flying it! AcePosts: 1,067
Time Online: 19 days 10 hours 58 minutes
|
|
|
|
|
|
| beragoobruce |
| December 16, 2014, 3:02am |
|
Built an Eros - now I'm flying it! AcePosts: 1,067
Time Online: 19 days 10 hours 58 minutes
|
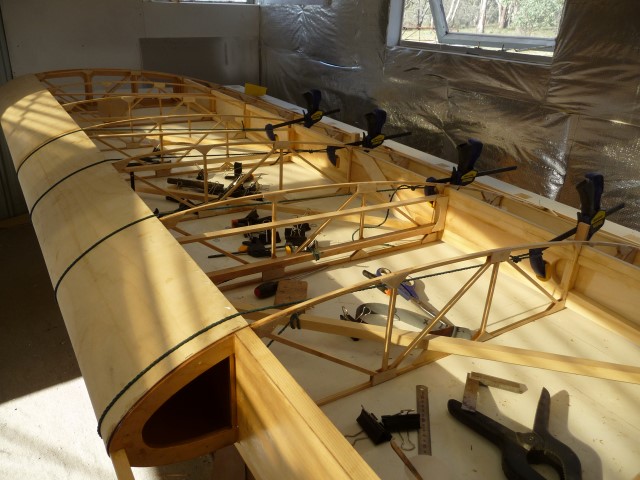
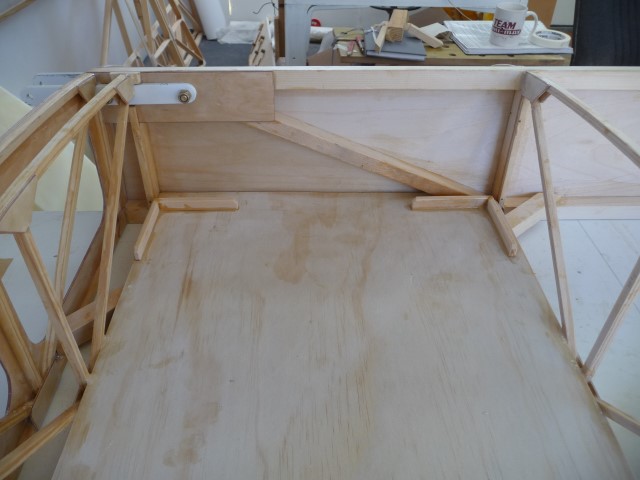
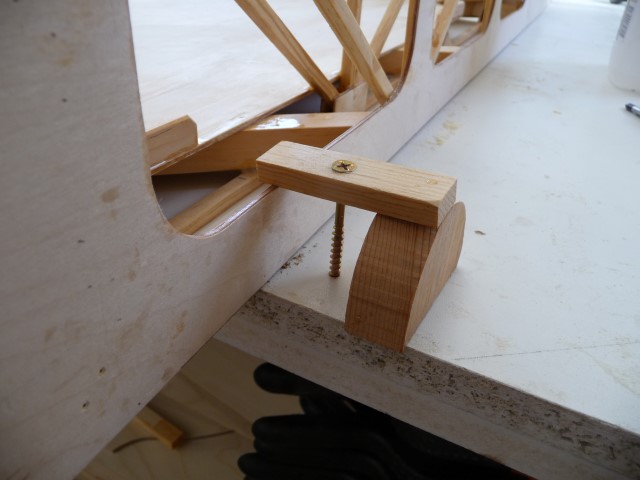
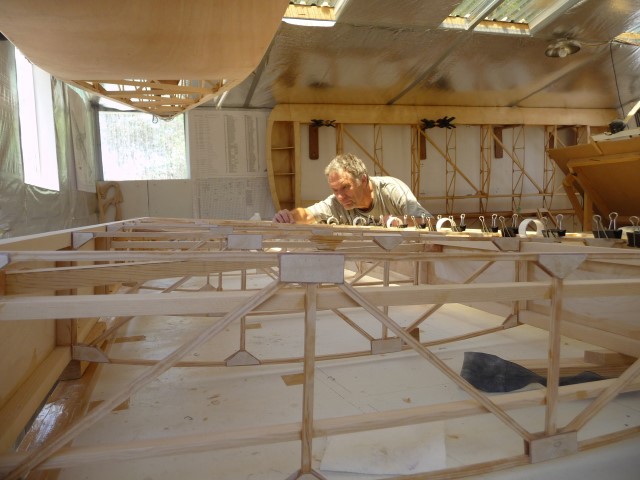
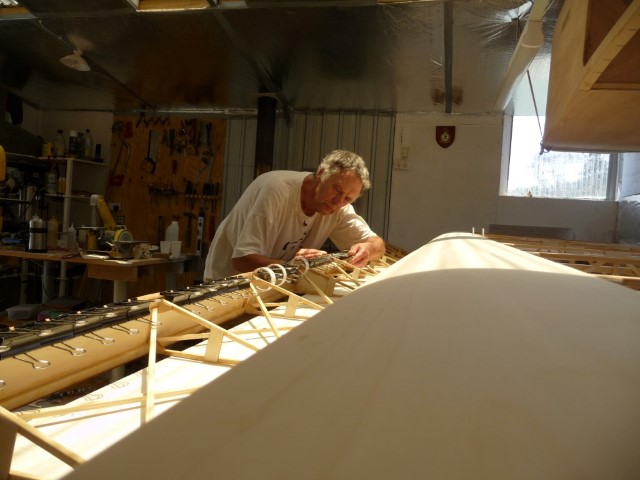
I'm now working on the second wing - I've got as far as gluing the main L/E on. Pix also show additional cleats used to locate fuel tank; the method I use to hold the wing firmly flush to the table while skinning the L/E, a general view of the clamped L/E ply, & finally one of me for the inspector (following your lead, Bigbrix!!).
Next post will prolly be on the Hoerner wingtips I'm making (out of plywood).
I've got a few things coming up soon - vaguely grandson & Christmas related, so will prolly have to back off on the build for a bit.
Hope you all have exactly the Christmas you want, with happy flying and/or building, if that's included.
Bruce
|
|
|
|
|
|
| aeronut |
| December 16, 2014, 3:26am |
|
 blue sky and tail winds to everyone AcePosts: 1,560
Time Online: 28 days 22 hours 31 minutes
|
Looks like you are coming along finest kind. |
| never surrender; never give-up |
|
|
|
|
|
| lake_harley |
| December 16, 2014, 4:28am |
|
Ace
Posts: 1,095
Time Online: 25 days 7 hours 43 minutes
|
|
|
|
|
|
| Arthur Withy |
| December 16, 2014, 8:00am |
|
 Happy 1500R owner - building a Jodel D18 AcePosts: 2,532
Time Online: 32 days 12 hours 14 minutes
|
Well Done Bruce...certainly a wonderful effort with outstanding results regards Arthur |
|
|
|
|
|
| bigbrixx1 |
| December 16, 2014, 12:39pm |
|
 Ace AcePosts: 822
Time Online: 20 days 16 hours
|
Hey Bruce. As usual your work is impeccable .... All I have to say is WOW!!! |
| V-max. Finished. Now in phase one flight |
|
|
|
|
|
| texasbuzzard |
| December 16, 2014, 1:16pm |
|
airbike Buzzard AcePosts: 1,238
Time Online: 8 days 23 hours 51 minutes
|
very nice work Bruce.
monte |
|
|
|
|
|
| Ricardo |
| December 16, 2014, 1:23pm |
|
Videos in UTube: ral1951 AcePosts: 2,772
Time Online: 75 days 23 hours 15 minutes
|
|
|
|
|
|
| beragoobruce |
| December 16, 2014, 10:23pm |
|
Built an Eros - now I'm flying it! AcePosts: 1,067
Time Online: 19 days 10 hours 58 minutes
|
Gosh, thanks guys! It's enough to make a girl blush . . .  But I hope some of these posts will be of a bit of help to others contemplating a build. Cheers Bruce |
|
|
|
|
|
| beragoobruce |
| January 13, 2015, 10:52pm |
|
Built an Eros - now I'm flying it! AcePosts: 1,067
Time Online: 19 days 10 hours 58 minutes
|
I have now completed the second wing. Not much point in showing more pix of the same thing, other than these few, showing how useful the file clips that Bigbrix uses have proved. Thanks Brian! (Oh, & the obligatory selfie for both inspector & as proof of body mass reduction).
I'm going to show my Hoerner wingtip as a separate thread, as it may be of interest to anyone searching this topic.
|
|
|
|
|
|
| beragoobruce |
|
Built an Eros - now I'm flying it! AcePosts: 1,067
Time Online: 19 days 10 hours 58 minutes
|
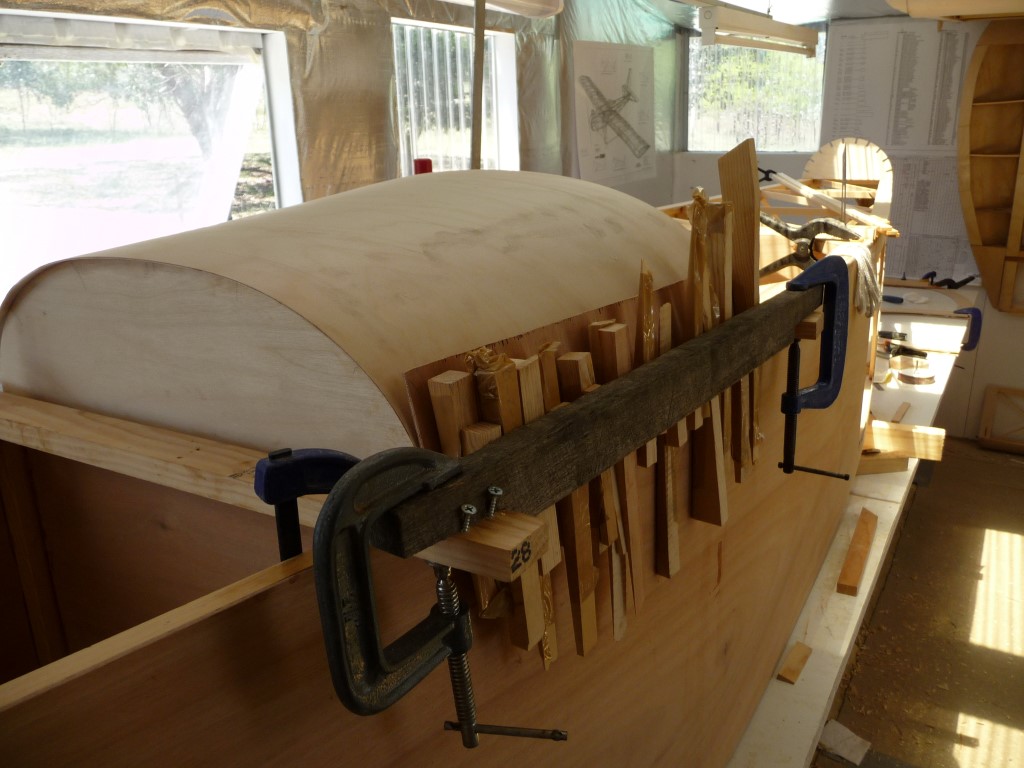
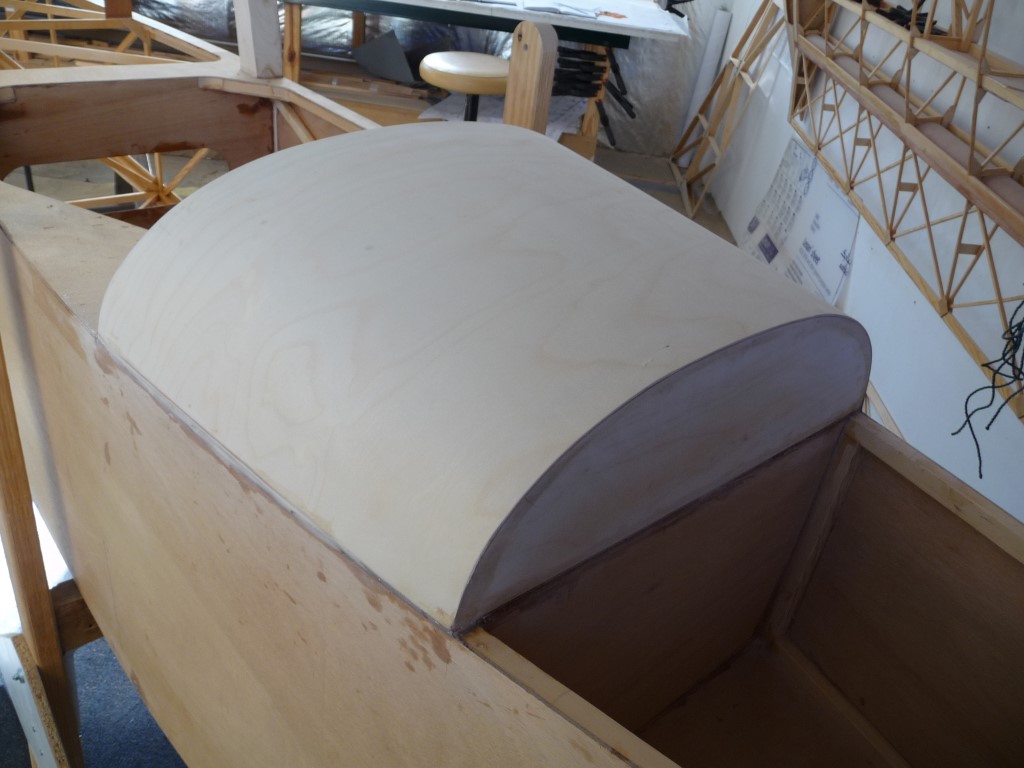
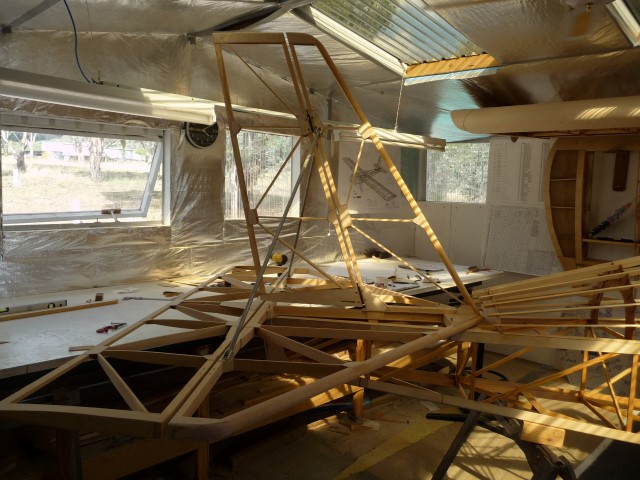
So, with the wings finished & hanging up out of the way, time to re-organize the workshop floorspace to start on the fuselage turtledecks.
Forward one first. This should have been easy, but the plywood supplied for this item, although the correct dimensions, had the grain in the wrong orientation. That meant I had to bend the ply round a fairly tight radius with the stiffest grain outermost.
It is surprising how much stiffer ply is, bending against the grain instead of across it. But I eventually persuaded the ply to stay put using lots of wedges.
|
|
|
|
|
|
| beragoobruce |
|
Built an Eros - now I'm flying it! AcePosts: 1,067
Time Online: 19 days 10 hours 58 minutes
|
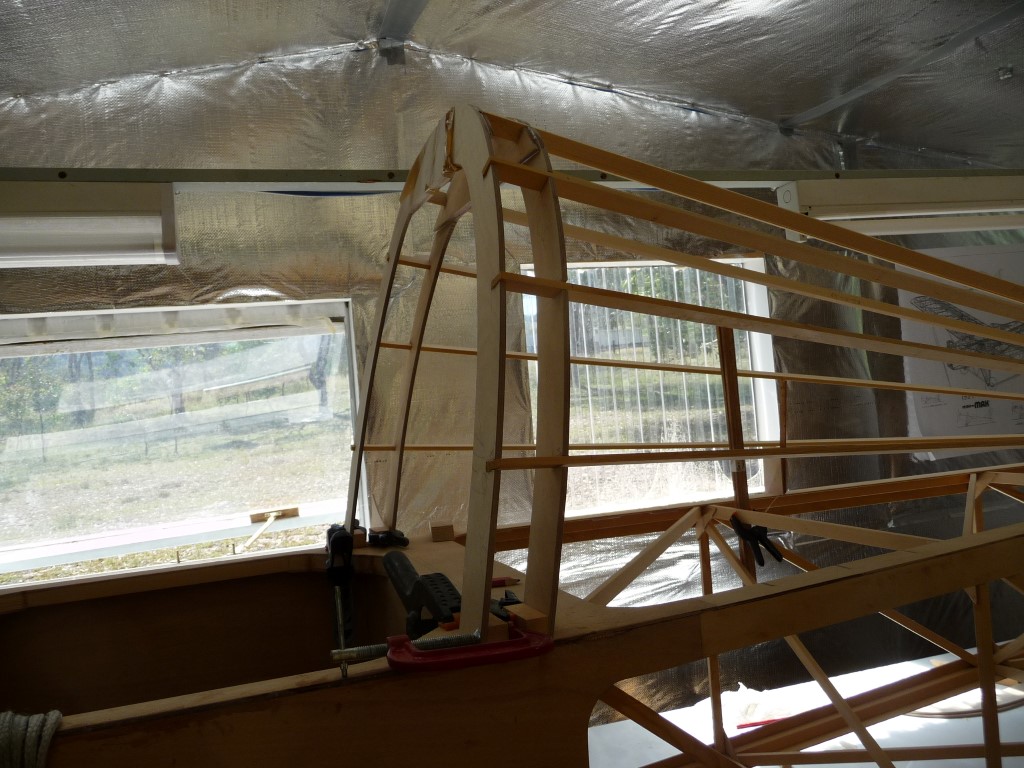
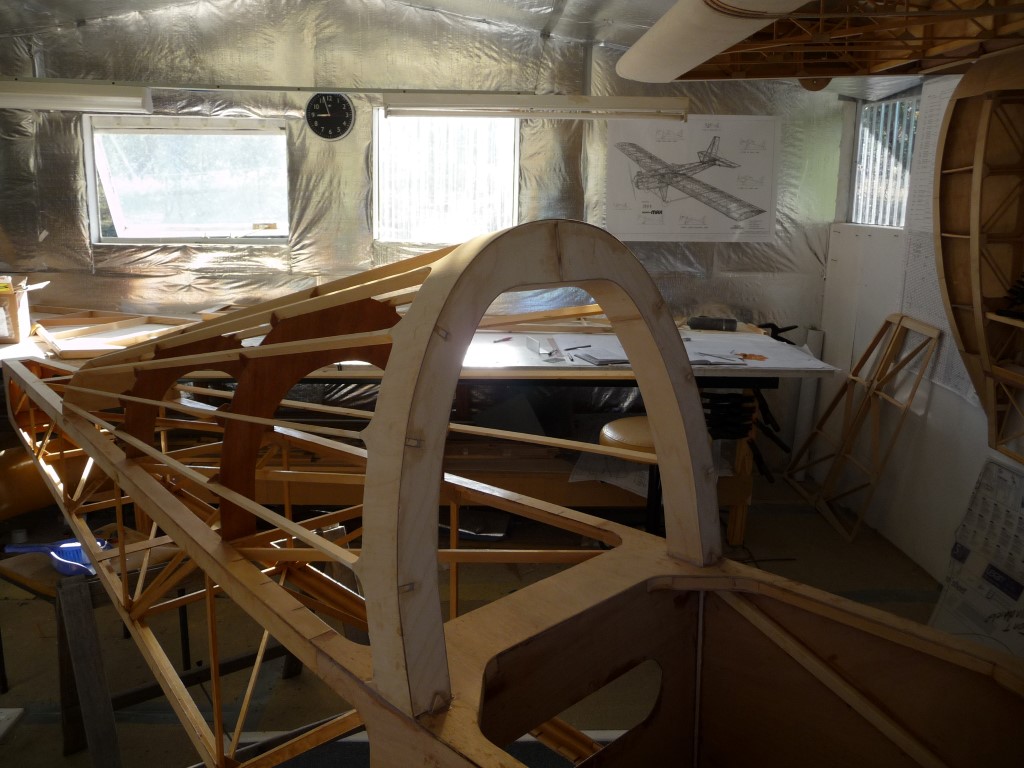
Main formers next. I added 3/4" height to the main frame (F3) for a bit of extra headroom. This meant all other formers aft also had to increase incrementally.
I doubled up on the the main former (as per UK A.D.s), then boxed it in with ply.
|
|
|
|
|
|
| beragoobruce |
|
Built an Eros - now I'm flying it! AcePosts: 1,067
Time Online: 19 days 10 hours 58 minutes
|
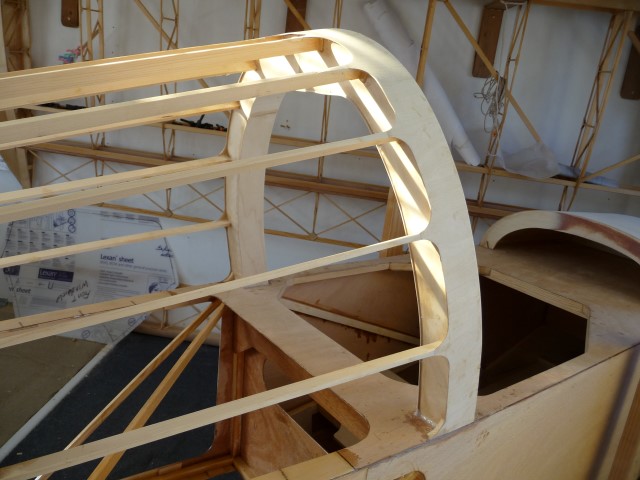
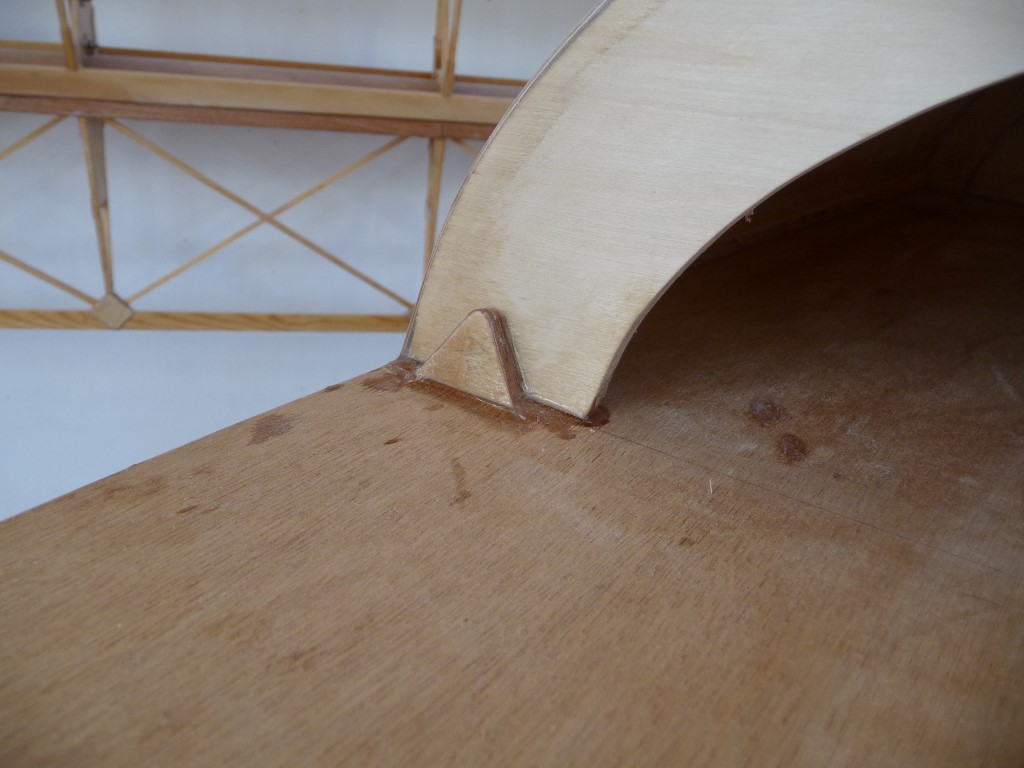
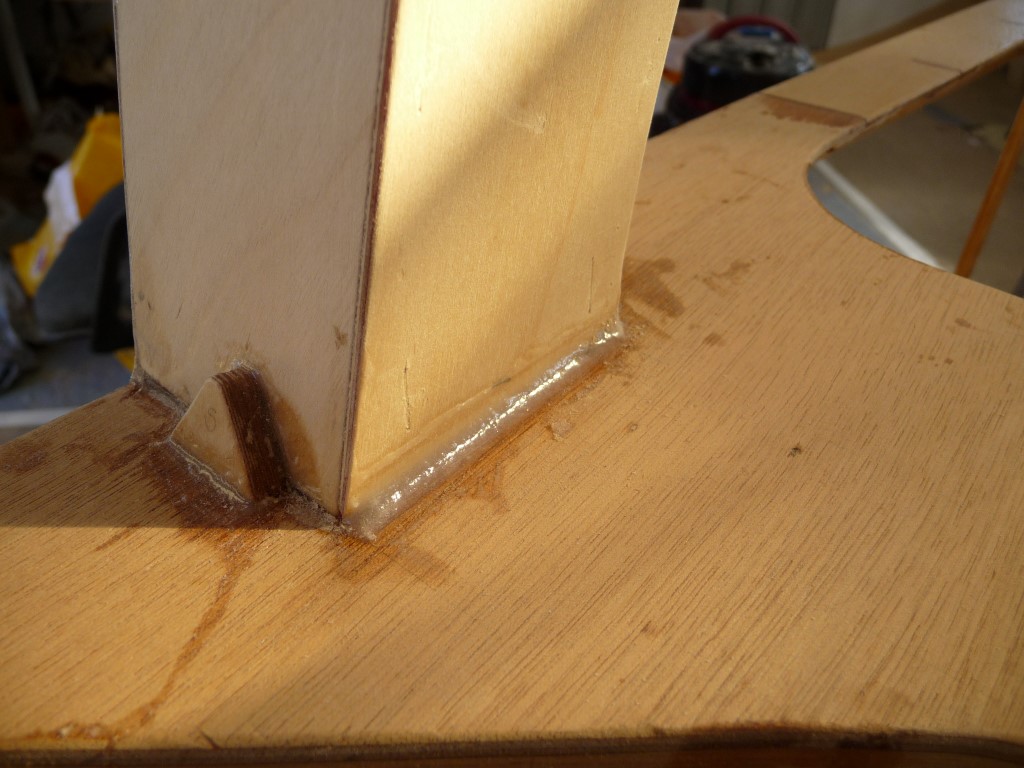
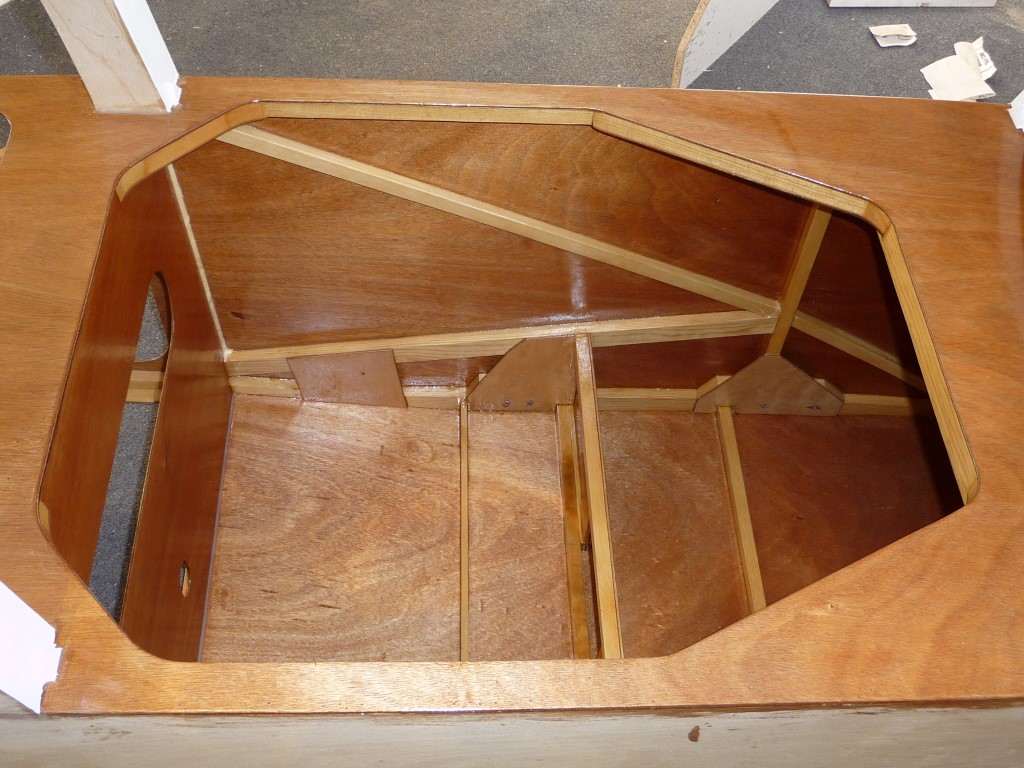
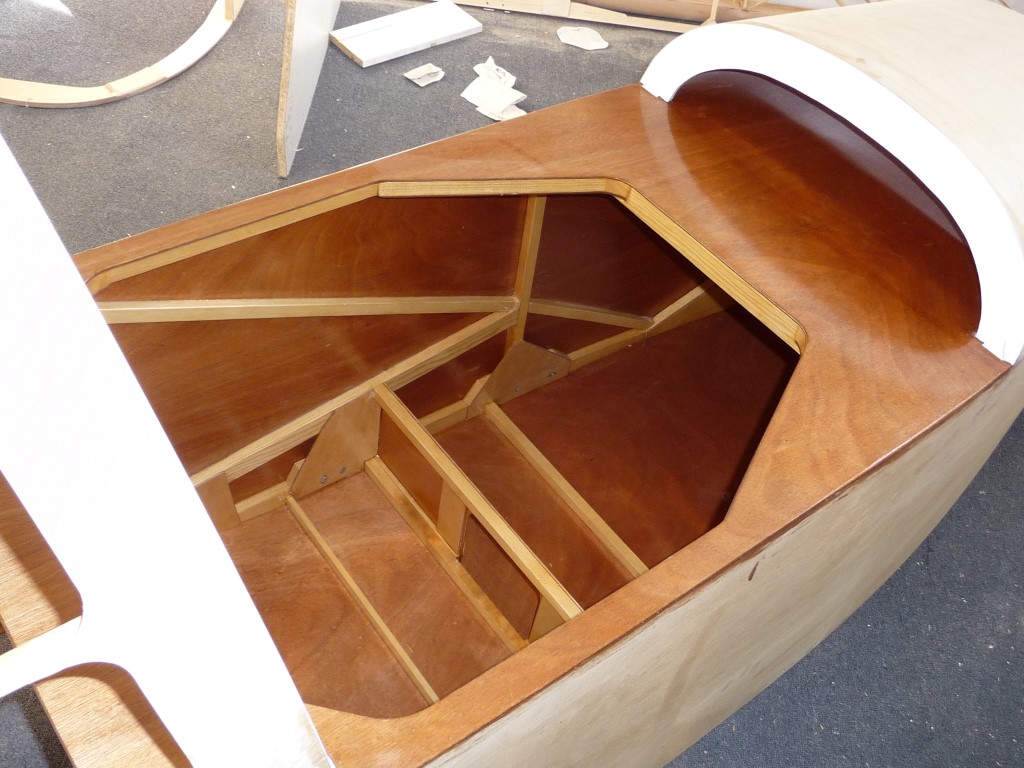
I made 2 canopies, one enclosed, one open. I haven't fitted the Lexan yet.
To locate the canopy when closed, I made a vee shaped notch in the base 4 corners of the canopy frame, and epoxied closely fitting 6mm ply blocks to the mating fuselage surface. This guides the canopy sides to exactly where I wanted them, to ensure the sides are flush. It also provides some lateral support. I'm indebted to Richard Greene of the UK for this idea - thanks Richard!
Canopy locking devices still to be fitted.
|
|
|
|
|
|
| beragoobruce |
|
Built an Eros - now I'm flying it! AcePosts: 1,067
Time Online: 19 days 10 hours 58 minutes
|
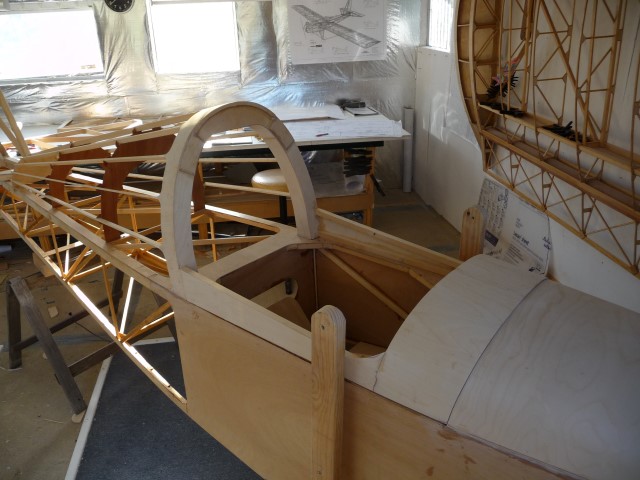
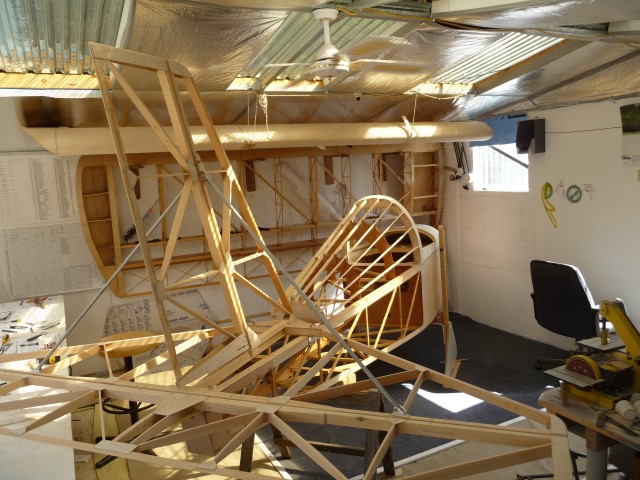
To give myself a bit of encouragement, I offered up the empennage to the fuse. At last it looks (a bit) like a plane! Then I fitted the fin/tailplane brace tubes.
|
|
|
|
|
|
| beragoobruce |
|
Built an Eros - now I'm flying it! AcePosts: 1,067
Time Online: 19 days 10 hours 58 minutes
|
I added some additional diagonal members to the cockpit. These are to attempt some sort of 'crash cell' around the pilot, by providing a loadpath up to the main frame from the fuselage floor in the event of a very heavy landing. Also to act as panel breakers on the large slabs of thin ply sides, which I suspect would otherwise drum under vibration, making a noisy cockpit even noisier.
They may also offer a hardpoint to mount throttle, trim & flap levers later. (Yet to be decided on. . .)
Then I varnished the cockpit. This was messy, as I had to climb inside to get to the forward end of the floor & underside of engine bay. I hate varnishing!
|
|
|
|
|
|
| beragoobruce |
|
Built an Eros - now I'm flying it! AcePosts: 1,067
Time Online: 19 days 10 hours 58 minutes
|
When the varnish was hard enough - which took a few days, even in my shop temp of 90+ - I fitted the seat & setback to let me sit in it & make suitable sound effects. I made a mockup of the floor & rudder pedals, and played around with placement of rudder pedals and heel brake levers (not shown on pic). With this fitted, I found the seating arrangement very comfortable, and headroom enough to allow for a helmet if I decide to wear one.
|
|
|
|
|
|
| lake_harley |
|
Ace
Posts: 1,095
Time Online: 25 days 7 hours 43 minutes
|
I always enjoy your updates. Such beautiful, detailed work. It seems too that the lighting and shadows in your shop add dimension and beauty to the "furniture quality" build you are doing. Or, are you just that skilled a photographer too?
Looking forward to the next installment.........
Lynn |
|
|
|
|
|
| beragoobruce |
|
Built an Eros - now I'm flying it! AcePosts: 1,067
Time Online: 19 days 10 hours 58 minutes
|
Thanks Lynn!
My interweb connection disappeared, just as I was trying to post this last instalment.
I'll try again.
|
|
|
|
|
|
| beragoobruce |
|
Built an Eros - now I'm flying it! AcePosts: 1,067
Time Online: 19 days 10 hours 58 minutes
|
The tail fairing with my kit was for a 1030, so didn't suit my build. Dave kindly sent me the piece of plywood I asked for as a replacement, as I prefer using wood to GRP when possible. My thanks to Gary Clare for sending this on to me - good on yer Gaz!
I extended a few of the turtledeck stringers aft of the rear former to support the thin ply fairing. I cut the slots for the tailplane & fin, extending them forward until the mounting holes aligned.
Later I will fit a radiussed dorsal fairing, but I'll do this after covering to maker the covering process easier.
|
|
|
|
|
|
| AirCab |
|
Fledgling Member  Posts: 15
Time Online: 13 days 11 hours 3 minutes
|
Yes, Yes, Yes ! Very Nice Work, and thanks for taking the time to take great pics, and documenting the build. This of course is great inspiration !
Steve |
|
|
|
|
|
|


 Logged