|
|
 bigbrixx1 bigbrixx1 |
|
 Ace Ace Posts: 822
Time Online: 20 days 16 hours
|
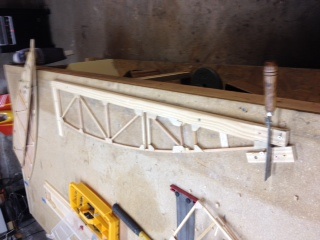
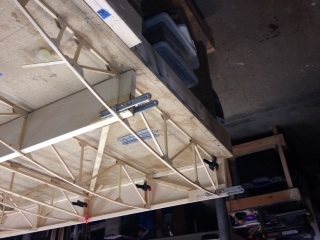
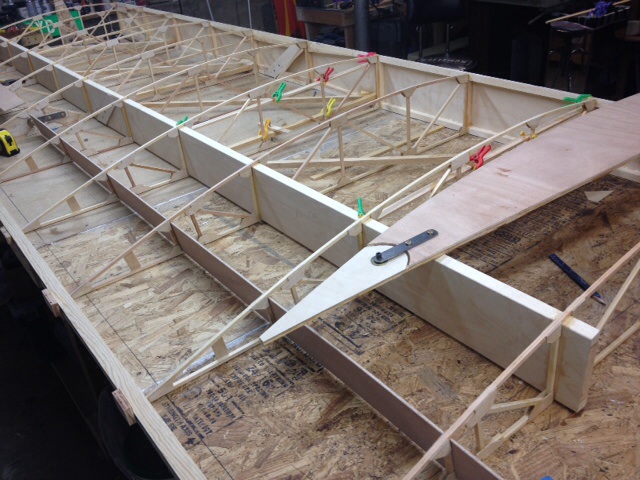
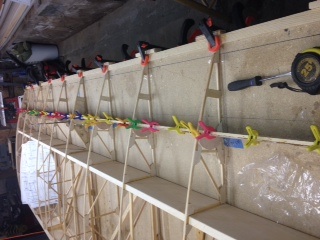
Ok. Total weight loss 29 pounds! MAde a jig to make all ribs the exact same length. Assembled wing and set up drag braces and compression braces. Made parts for both wings! Took a few hours. Most of the time was interpreting the plans. Each drag brace and associated compression braces different. Working tomorrow. Going to glue on Wednesday!
|
| V-max. Finished. Now in phase one flight |
|
|
|
|
|
| Jack Coleman |
|
 Flight Leader  Posts: 158
Time Online: 2 days 18 hours 39 minutes
|
AWESOME JOB on the weight loss!!!! |
|
|
|
|
|
| bigbrixx1 |
|
Ace
Posts: 822
Time Online: 20 days 16 hours
|
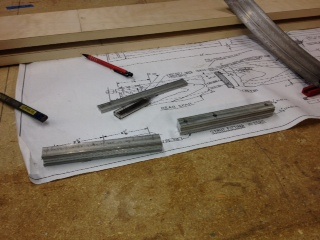
Thanks Jack. My Max is keeping me motivated!
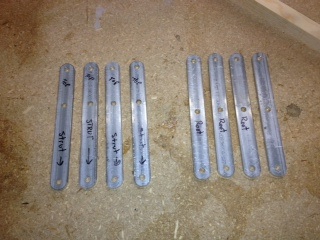
Starting on the wing root carry thru straps and strut races. I found cutting the stack to length then stacking them 4 high. With 3m spray contact. Adhesive allows me to drill them perfectly. When done they seperated easily. Then clean off contact adhesive with acetone!
|
| V-max. Finished. Now in phase one flight |
|
|
|
|
|
| bigbrixx1 |
|
Ace
Posts: 822
Time Online: 20 days 16 hours
|
Then using technique I saw here I outline the ends and sand to shape on my belt sander!
|
| V-max. Finished. Now in phase one flight |
|
|
|
|
|
| bigbrixx1 |
|
Ace
Posts: 822
Time Online: 20 days 16 hours
|
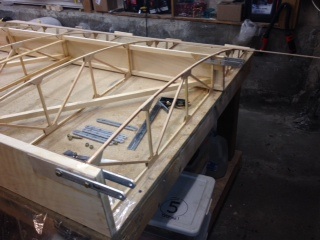
More on attachment to wing
|
| V-max. Finished. Now in phase one flight |
|
|
|
|
|
| edwinkania |
|
Flight Leader Posts: 140
Time Online: 1 days 15 hours 51 minutes
|
Big,
That looks like an awesome Idea!!! I have to remember that!!!
Ed~ |
|
|
|
|
|
| bigbrixx1 |
|
Ace
Posts: 822
Time Online: 20 days 16 hours
|
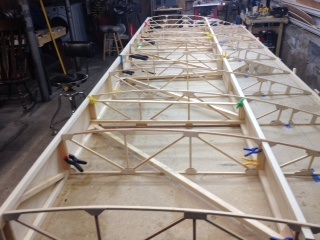
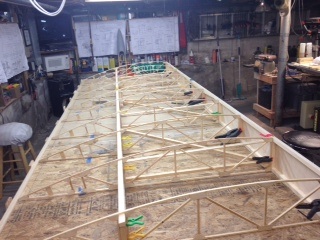
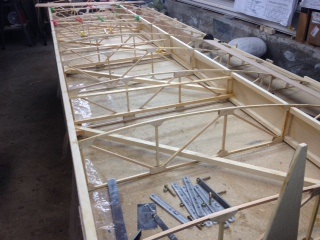
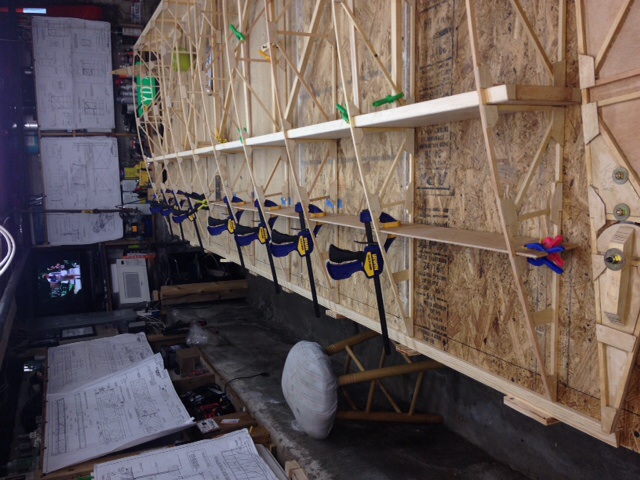
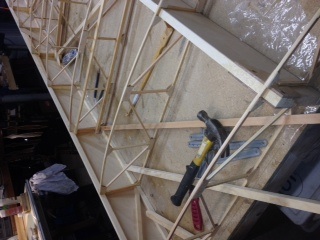
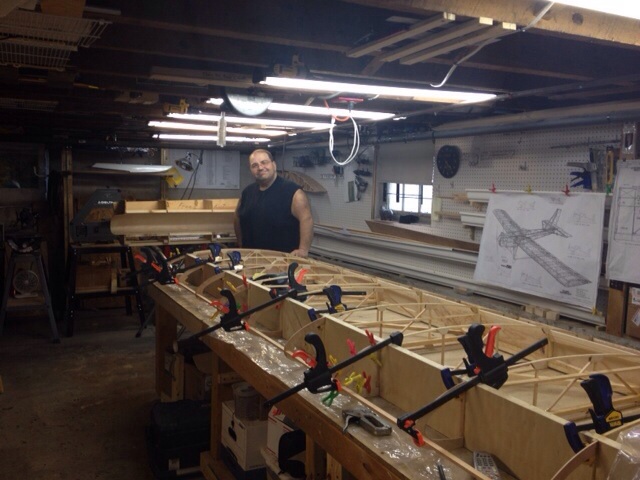
No more weight loss at this time... But drag struts cut and glued. Front and back spar have all ribs glued on except tip and root rib. Now fitting aileron spar web
|
| V-max. Finished. Now in phase one flight |
|
|
|
|
|
| bigbrixx1 |
|
Ace
Posts: 822
Time Online: 20 days 16 hours
|
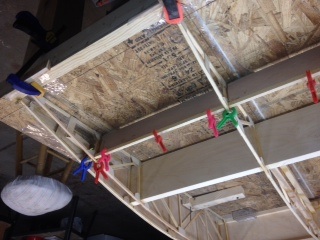
Webbing for ailerons glue up. Waiting to dry
|
| V-max. Finished. Now in phase one flight |
|
|
|
|
|
| bigbrixx1 |
|
Ace
Posts: 822
Time Online: 20 days 16 hours
|
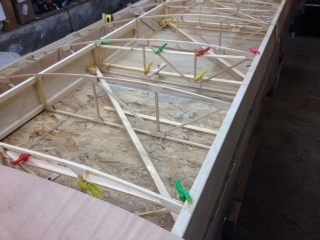
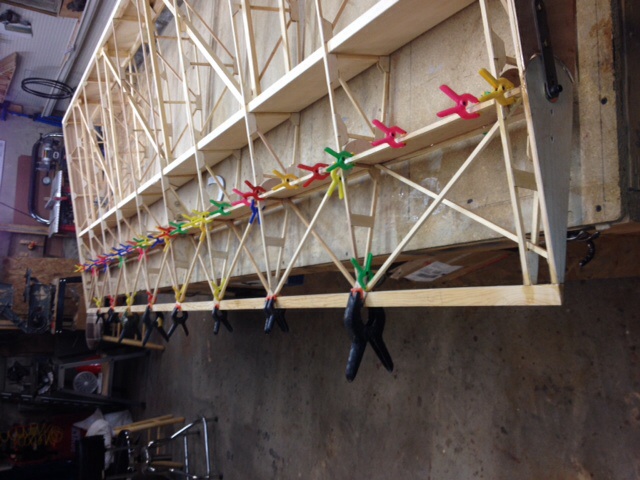
1 more pound lost! Total 30!!! Ok messed up with drag struts! If you are using wing tanks...and I am...... refer to tank mount drawings. The drag brace in the tank area sits lower. Carefully using a heat gun and putty knife I was able to remove offending drag strut and RS 11 reinforcements!
I now have relocated braces glued in. Trailing edge glued with gussets. Aileron web top stringers and diagonals glued.
|
| V-max. Finished. Now in phase one flight |
|
|
|
|
|
| bigbrixx1 |
|
Ace
Posts: 822
Time Online: 20 days 16 hours
|
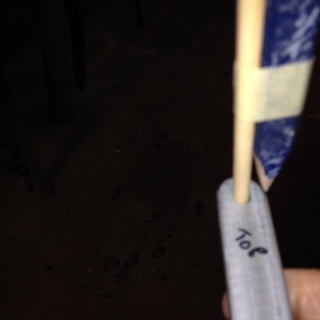
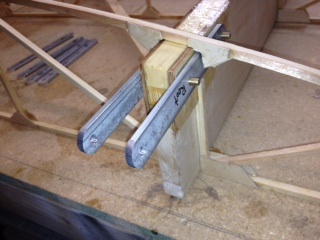
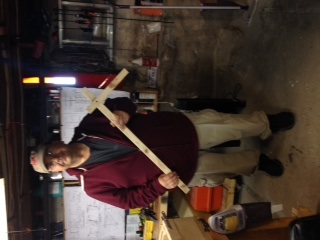
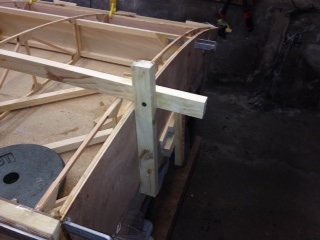
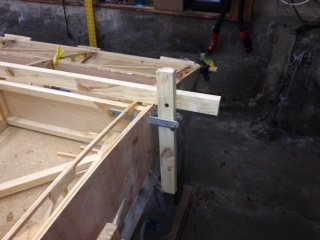
I made a very basic tool to set 3 degree angle on root rib. Works great! I think the pictures explain everything!
|
| V-max. Finished. Now in phase one flight |
|
|
|
|
|
| bigbrixx1 |
|
Ace
Posts: 822
Time Online: 20 days 16 hours
|
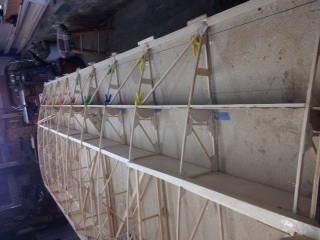
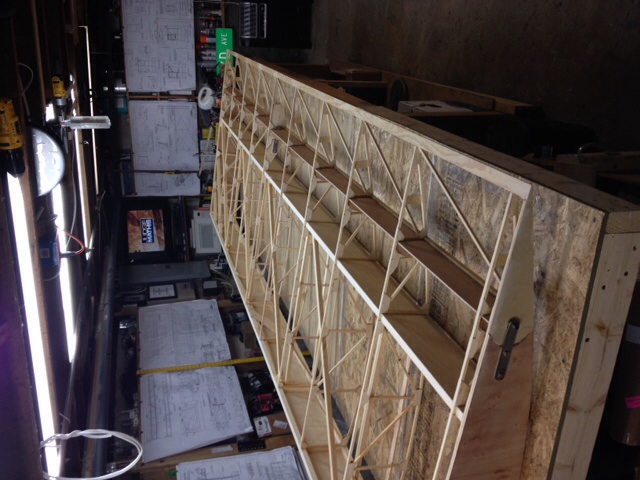
One more pic of aileron diagonal and aileron D sections glued in place
|
| V-max. Finished. Now in phase one flight |
|
|
|
|
|
| texasbuzzard |
|
 airbike Buzzard AcePosts: 1,238
Time Online: 8 days 23 hours 51 minutes
|
looks like your construction is coming along great... keep it up and also your slim down.
monte |
|
|
|
|
|
| bigbrixx1 |
|
Ace
Posts: 822
Time Online: 20 days 16 hours
|
Thanks Monty. I have found it very rewarding. The support here and from Dave at Minimax has been fantastic! Flipped the wing.cleaned up squeeze out epoxy and runs with heat gun and putty knife. Added the RS 3 to the bottom aileron spar and bottom aileron diagonals. Also bottom trailing edge gussets. This is also a great time to fill any voids you cannot see from the top. Mixing milled fiber with T-88 makes a nice filler that does not run. And I believe doesn't weaken glue bond!
|
| V-max. Finished. Now in phase one flight |
|
|
|
|
|
| Jack Coleman |
|
Flight Leader Posts: 158
Time Online: 2 days 18 hours 39 minutes
|
Ok. Total weight loss 29 pounds! MAde a jig to make all ribs the exact same length. Assembled wing and set up drag braces and compression braces. Made parts for both wings! Took a few hours. Most of the time was interpreting the plans. Each drag brace and associated compression braces different. Working tomorrow. Going to glue on Wednesday!
By the way, I am steeling this idea!!! |
|
|
|
|
|
| bigbrixx1 |
|
Ace
Posts: 822
Time Online: 20 days 16 hours
|
Go for it jack. It worked out very well. Not only using this forium to document and research my build. I hope to help others also! |
| V-max. Finished. Now in phase one flight |
|
|
|
|
|
| bigbrixx1 |
|
Ace
Posts: 822
Time Online: 20 days 16 hours
|
Another 1.5 pounds gone! 31.5 total!
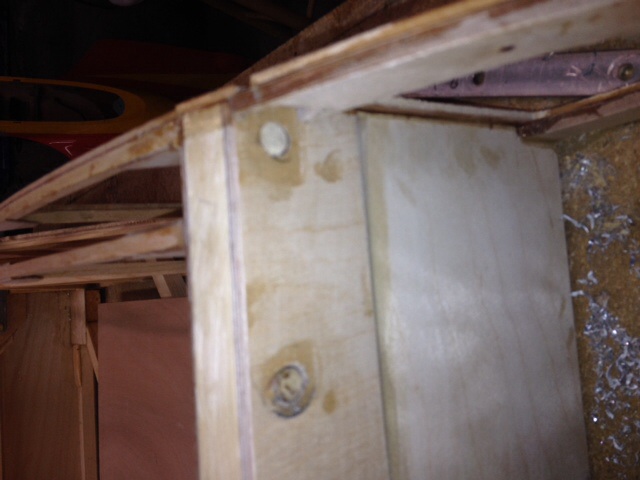
Added the nose braces to the wing. Built a jig to form the nose plywood sheeting. I soak the plywood in the tub for about 90 minutes.... My poor wife is used to my projects. She no longer questions plywood soaking in the tub.... Or freshly glued parts curing in the warmth of the living room. LOL....Made a small error when drilling holes for root brackets. I drilled them leaving 2 3/8 distance from root instead of 2 3/16. My plan is to double root plywood. With the t-88 and 1/8 ply doubled up that will leave brackets the correct length, anybody see a problem with this solution?
|
| V-max. Finished. Now in phase one flight |
|
|
|
|
|
| Bob Daly |
|
Ace
Posts: 888
Time Online: 45 days 22 hours 25 minutes
|
Made a small error when drilling holes for root brackets. I drilled them leaving 2 3/8 distance from root instead of 2 3/16. My plan is to double root plywood. With the t-88 and 1/8 ply doubled up that will leave brackets the correct length, anybody see a problem with this solution?
I don't believe you have a problem. The holes in the spar carry-through will be slightly closer to the aircraft centerline that's all. There will be a small change in the bending load on the carry-through, I doubt it will be anything to worry about. |
|
 Logged Logged |
|
|
|
|
| bigbrixx1 |
|
Ace
Posts: 822
Time Online: 20 days 16 hours
|
Thanks for the input Bob. I talked to Dave at minimax. He isn't worried either. I am going to add another 1/8 piece of plywood to root rib. Between that and glue that brings the measurement within 1/16 of spec. My real concern was the bolts holding the bracket to the spar are to 3/16 farther out. I.E. 3/16 closer to end of spar end... Maybe not leaving enough material to keep root brackets from pulling out under load. I believe most of the loads are under compression, with only a moderate amount under shear. I don't believe this to be a problem at all. |
| V-max. Finished. Now in phase one flight |
|
|
|
|
|
| Bob Daly |
|
Ace
Posts: 888
Time Online: 45 days 22 hours 25 minutes
|
My real concern was the bolts holding the bracket to the spar are to 3/16 farther out. I.E. 3/16 closer to end of spar end... Maybe not leaving enough material to keep root brackets from pulling out under load. I believe most of the loads are under compression, with only a moderate amount under shear.
Right, I hadn't considered the spar bolts being nearer the spar end which becomes an issue for negative g and landing loads. The bolt hole edge distance is too small for the inboard most bolt. The extra ply will help. I'm not sure if it completely mitigates the mistake. Refrain from any outside loops  |
|
| Logged |
|
|
|
|
| Harless Greear |
|
 Ace AcePosts: 884
Time Online: 35 days 14 hours 19 minutes
|
I would just add the third bolt between the other two and fly it.. If you have not drilled the holes in the carry through you don't even have to add the extra plywood. |
| HARLESS in Va. |
|
|
|
|
|
| bigbrixx1 |
|
Ace
Posts: 822
Time Online: 20 days 16 hours
|
You know I had considered adding a third bolt. I don't see why that wouldn't work! |
| V-max. Finished. Now in phase one flight |
|
|
|
|
|
| Jack Coleman |
|
Flight Leader Posts: 158
Time Online: 2 days 18 hours 39 minutes
|
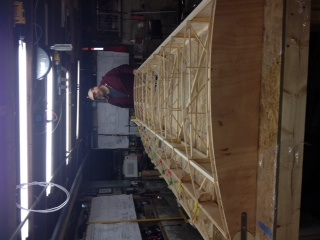
I like seeing how your airplane is coming along. It's looking very good. Thanks for posting lots of pictures.
Jack |
|
|
|
|
|
| bigbrixx1 |
|
Ace
Posts: 822
Time Online: 20 days 16 hours
|
Thanks Jack. I am in the process if repairing my goof. Pics go follow |
| V-max. Finished. Now in phase one flight |
|
|
|
|
|
| bigbrixx1 |
|
Ace
Posts: 822
Time Online: 20 days 16 hours
|
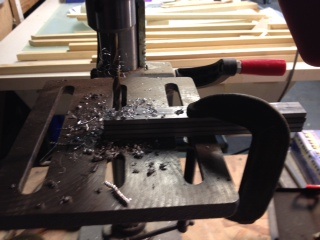
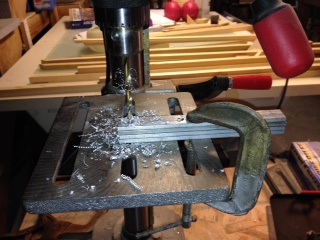
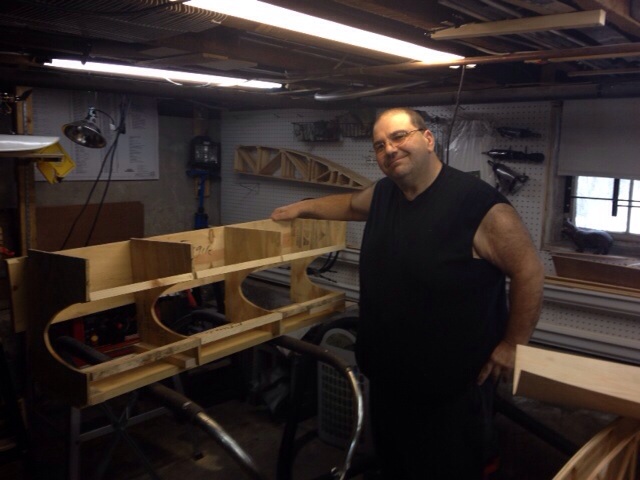
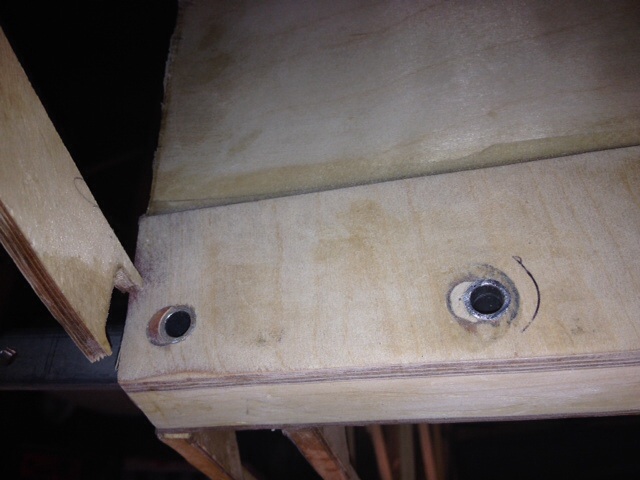
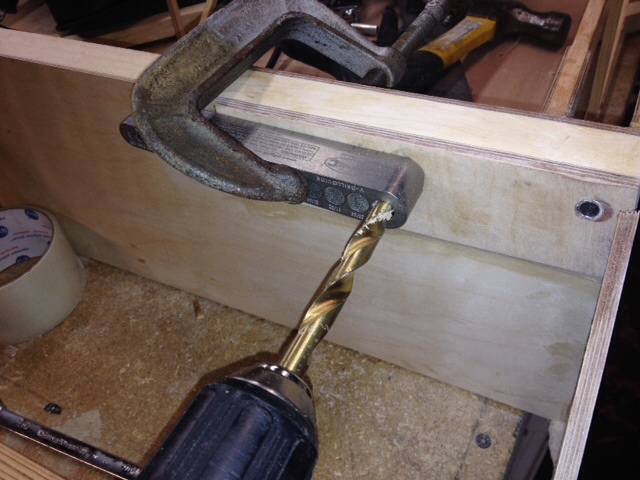
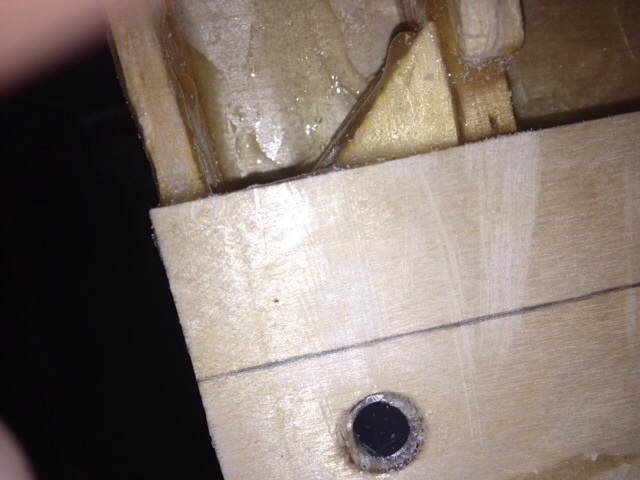
So here is what I decided to do.... Made plywood plugs and doweled extra spar material. Then glued then in place. Sanded. Drilled holes in proper place. Still considering the third bolt. BTW I included picture of kick butt drill jig I picked up. Pretty darn accurate! Sort of a portable drill press!
|
| V-max. Finished. Now in phase one flight |
|
|
|
|
|
| lake_harley |
|
Ace
Posts: 1,095
Time Online: 25 days 7 hours 43 minutes
|
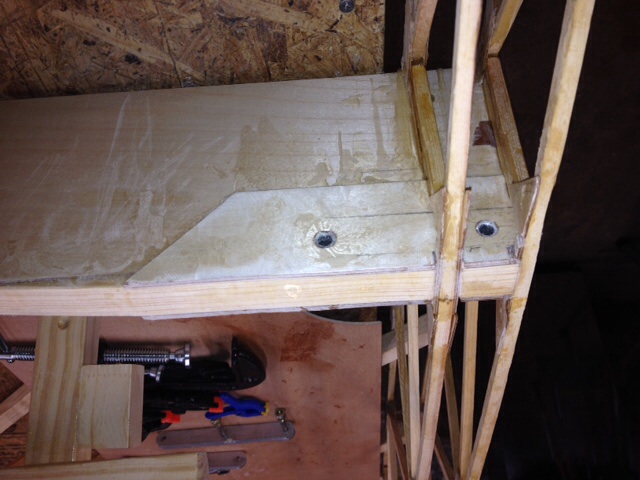
Looks like a good fix to me.....of course, keep in mind that I'm a first time builder too. Looks like you also used steel bushings to spread the fitting bolt load out to a larger area?
....and yeah, that drill jig could be a very handy tool to have in the toolbox!
Lynn |
|
|
|
|
|
| Bob Daly |
|
Ace
Posts: 888
Time Online: 45 days 22 hours 25 minutes
|
Very good. The bushings make the connections half again (1.5 times) as strong as the original design.
-Edit: This is a VMax so the bushings are specified. |
|
| Logged |
|
|
|
|
| bigbrixx1 |
|
Ace
Posts: 822
Time Online: 20 days 16 hours
|
Thanks guys. The metal bushing are actually called for in the plans. I am not completely happy with repair and have removed the plywood reinforcements and replacing those also. Then I will feel confident in the repair. I found the best way to remove them was to chisel them down to about one or two laminations then remove the rest with a heat gun and putty knife. More pics tomorrow! |
| V-max. Finished. Now in phase one flight |
|
|
|
|
|
| bigbrixx1 |
|
Ace
Posts: 822
Time Online: 20 days 16 hours
|
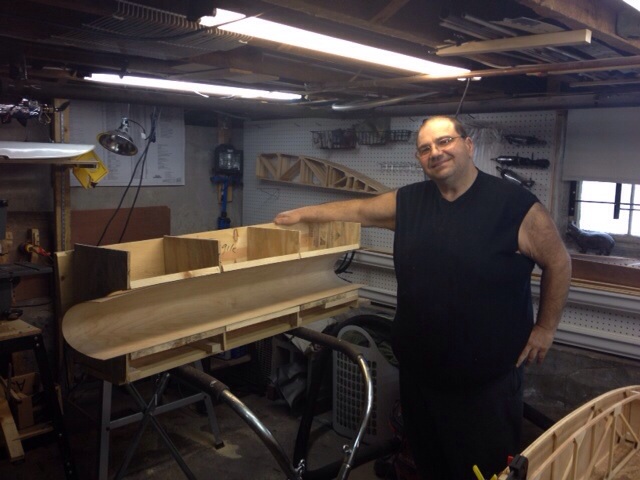
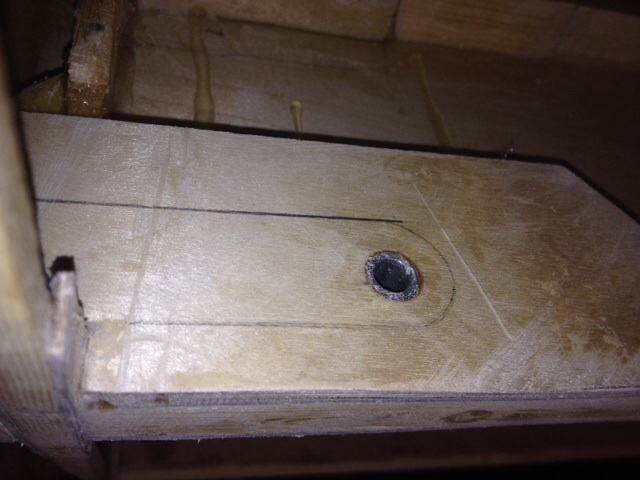
Ok repair complete and I am very pleased with results. Weight loss stalled at 31 lbs. but going to kick it up a notch!
Plywood reinforcements removed and replaced! Finally a repair I am willing to "bet my life on" still have some cleanup work. Sanding ect!!
|
| V-max. Finished. Now in phase one flight |
|
|
|
|
|
| bigbrixx1 |
|
Ace
Posts: 822
Time Online: 20 days 16 hours
|
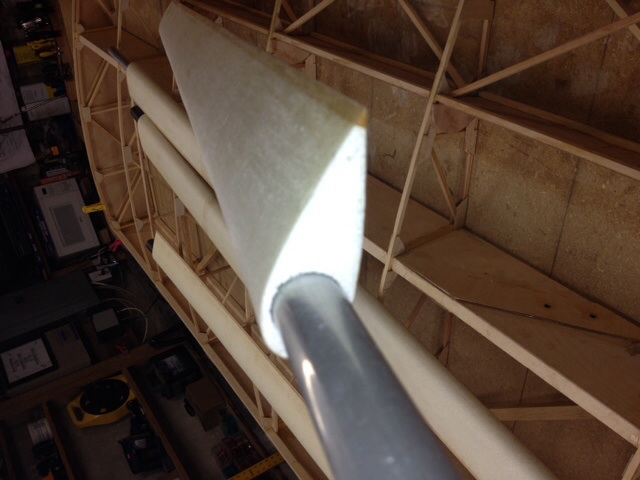
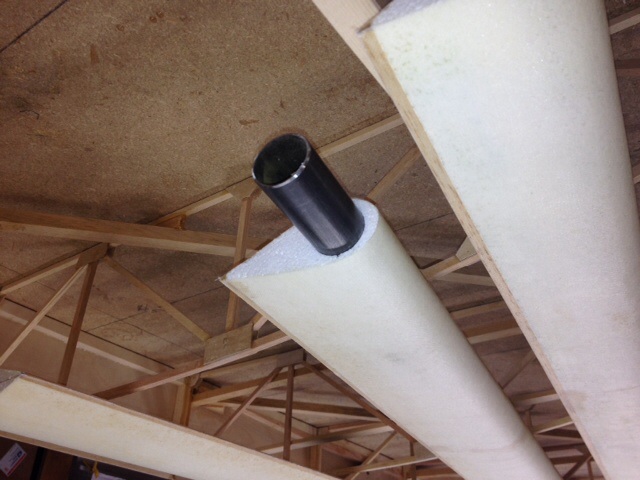
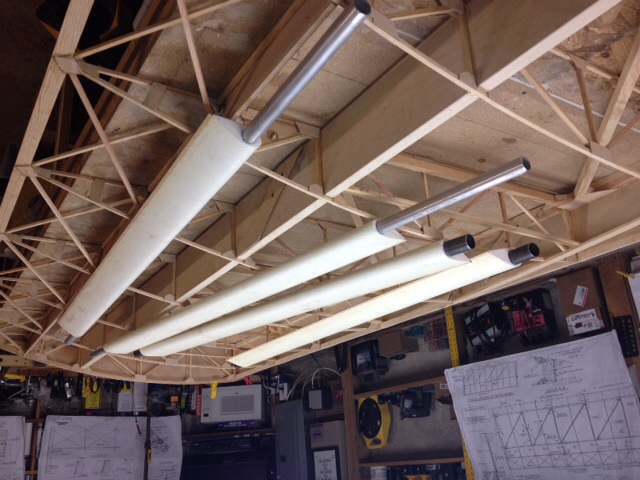
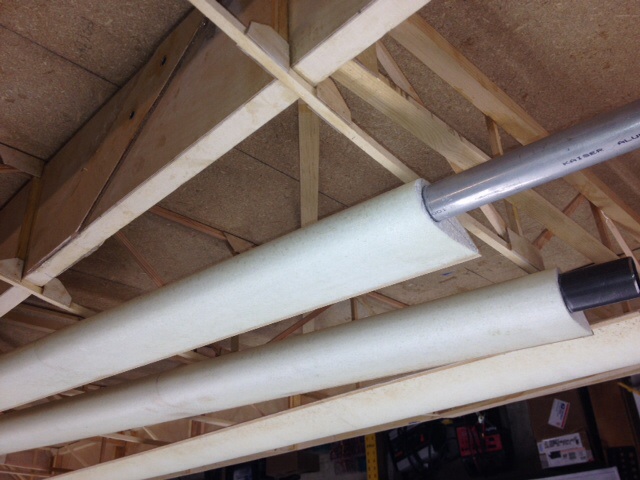
My buddy volunteered to streamline my struts. He just dropped them off. High density foam. Covered with 3 oz fiberglass cloth and resin.....hardwood trailing edge. One of my concerns was inability to monitor for rust on the struts under the foam. So they were cleaned and coated with T-88 epoxy to protect them. Then foam was t-88 to the struts. 
|
| V-max. Finished. Now in phase one flight |
|
|
|
|
|
| dalek56 |
|
 Ace AcePosts: 641
Time Online: 16 days 23 hours 53 minutes
|
wow...those are nice. he ought to go into business making them... |
| You don't need to know anything about flying inorder to pilot a plane. You do need to know something about flying fly inorder to pilot a plane twice! |
|
|
|
|
|
|