|
|
 bigbrixx1 bigbrixx1 |
|
 Ace Ace Posts: 822
Time Online: 20 days 16 hours
|
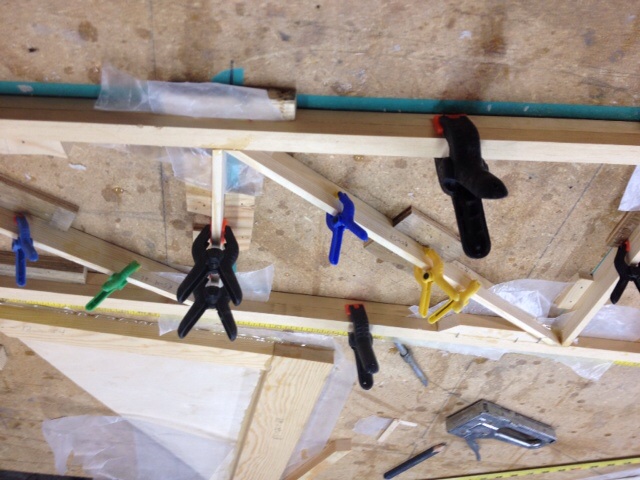
Guys thanks for all the great ideas. A combination of all theses ideas should give me exactly what I need! I I think I the shielded wire run along the back side of the rear spar. Accessed thru the aileron opening. Secured with spaced out small one inch tubes cut from paper towel rolls varnished and glued about at each rib and one between each rib. will be perfect. Accessible, light, serviceable, and easy to inspect! Thanks for all the great input! Brian  |
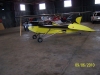
| V-max. Finished. Now in phase one flight |
|
|
|
|
|
| PUFF |
|
 Ace AcePosts: 1,518
Time Online: 34 days 6 hours 18 minutes
|
yup, no tubes needed, and add unnecessary weight.... |
|
|
|
|
|
| stevejahr |
|
 Airbike plans examiner AcePosts: 200
Time Online: 4 days 11 hours 43 minutes
|
BTW model rocketry uses various sizes of paper laminated tubes for the body. Just thinking that the slop in a TP sized tube may make the guide not much of a guide? |
|
|
|
|
|
| bigbrixx1 |
|
Ace
Posts: 822
Time Online: 20 days 16 hours
|
BTW model rocketry uses various sizes of paper laminated tubes for the body. Just thinking that the slop in a TP sized tube may make the guide not much of a guide?
Great idea! |
| V-max. Finished. Now in phase one flight |
|
|
|
|
|
| beragoobruce |
|
Built an Eros - now I'm flying it! AcePosts: 1,067
Time Online: 19 days 10 hours 58 minutes
|
Brian, if I were going to fit strobes, I'd just run the wire along the aft side of the rear spar, & use small cable ties to attach it at each rib station. It's hard to see what advantage you'd get from running wires through a tube after you've covered the wing. And as Harless said earlier, you can access the wires anytime by removing the aileron.
Cheers
Bruce |
|
|
|
|
|
| bigbrixx1 |
|
Ace
Posts: 822
Time Online: 20 days 16 hours
|
Brian, if I were going to fit strobes, I'd just run the wire along the aft side of the rear spar, & use small cable ties to attach it at each rib station. It's hard to see what advantage you'd get from running wires through a tube after you've covered the wing. And as Harless said earlier, you can access the wires anytime by removing the aileron.
Cheers
Bruce
Hi Bruce Although I am sure that would world work okey dokey, I just can't do it. I was able to find some lightweight model rocket tubes. I plan on securing them along the TE of rear spar every few inches. For now though I just purchased a nice lightweight LED strobe for the horizontal tail. It is most likely all I will run for now. But I want the option to easily add wing tip strobes later. Thank you all for suggestions and thoughts! Back to the build! Onto the fuse! This is very exciting! First I outlined the fuse dimensions directly onto the bench area with green tape. Then put exact dimensions onto the green tape. That makes the outline easy to identify.......And easily removable later. First side 1 pieces cut secured in place and glued! . Wax paper added between bench and side 1 at all glue areas before gluing. I found you know when epoxy has cured completely if wax paper almost falls of joint. When epoxy still curing wax paper will not come of easily! Again every time I made a piece I made an identical second piece for side 2! Once side 1 dry. I then (using wax paper to separate) laid side 2 directly over side one. The precut pieces made this a quick task.... And the glued side 2
|
|
 |
|
| V-max. Finished. Now in phase one flight |
|
|
|
|
|
| bigbrixx1 |
|
Ace
Posts: 822
Time Online: 20 days 16 hours
|
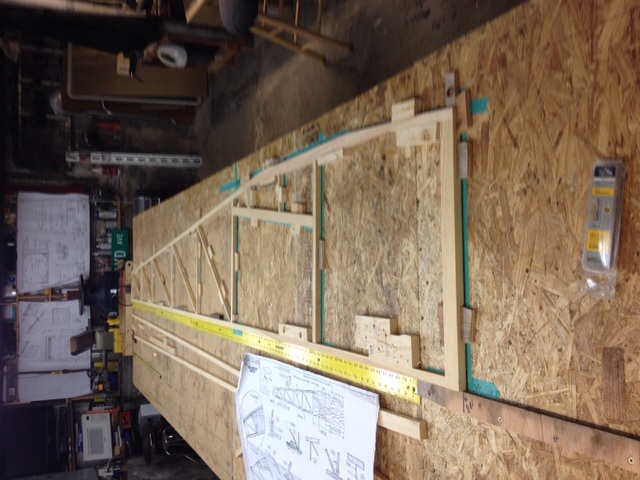
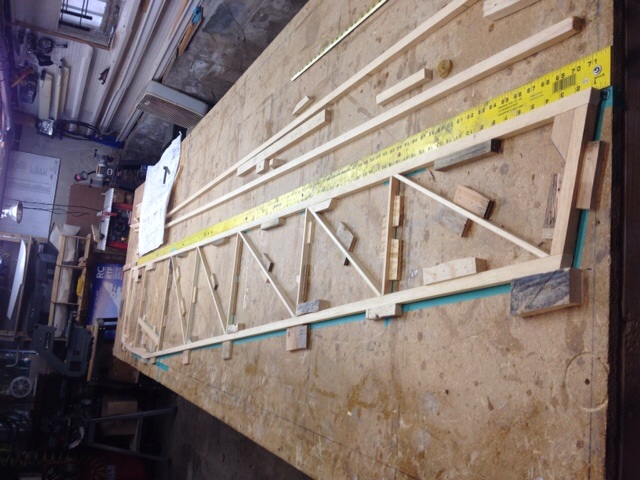
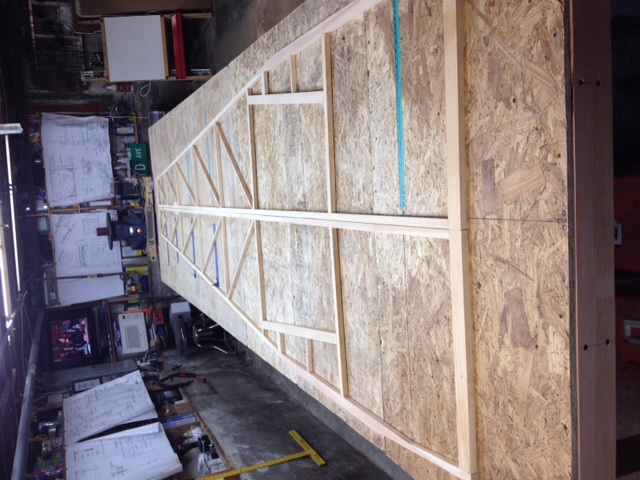
On a special note with the wings being at another location. I used the rib jig to make sure carry thru stations EXACTLY where the should be. It turn out all measurements correct first time. But it made me feel better checking!
|
| V-max. Finished. Now in phase one flight |
|
|
|
|
|
| bigbrixx1 |
|
Ace
Posts: 822
Time Online: 20 days 16 hours
|
Fuse side 2 glued and drying on top of side 1. You will note in these pictures while waiting for glue to dry I have started to cut and build LG Legs! Slight hold up here. I need to order a couple more pieces of RS-9 I messed op a RS9 compression strut way back and forgot to replace it! No big deal. Dave's prices are reasonable. And time to order my brakes anyways! It will not hold me up plenty to do!
|
| V-max. Finished. Now in phase one flight |
|
|
|
|
|
| bigbrixx1 |
|
Ace
Posts: 822
Time Online: 20 days 16 hours
|
LG legs awaiting epoxy cleanup and RS 9 stock to continue!
|
| V-max. Finished. Now in phase one flight |
|
|
|
|
|
| bigbrixx1 |
|
Ace
Posts: 822
Time Online: 20 days 16 hours
|
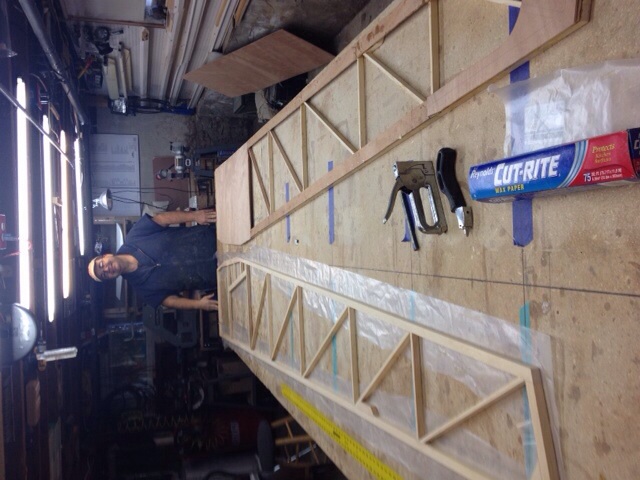
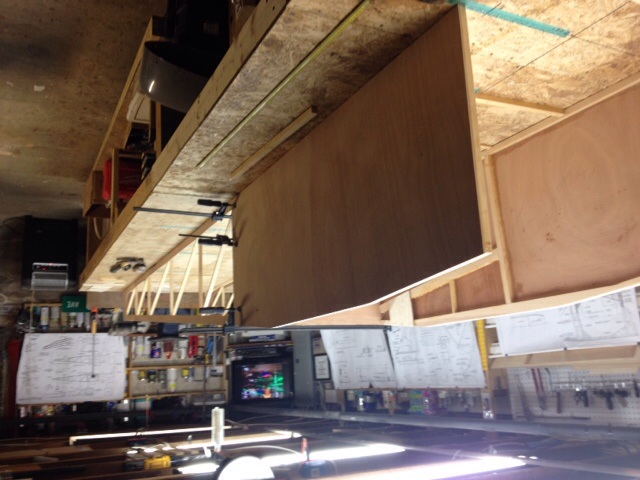
Two fuse sides cleaned up ready to have plywood glued on!
|
| V-max. Finished. Now in phase one flight |
|
|
|
|
|
| beragoobruce |
|
Built an Eros - now I'm flying it! AcePosts: 1,067
Time Online: 19 days 10 hours 58 minutes
|
Hi Brian Your fuse sides look great - up to your usual standard. If you glue the plywood sides onto the frame at this stage, be prepared for some pretty strong resistance when you come to assemble the two sides, particularly the forward bend at the front carry through. You will need to have some long clamps (30" or so) ready to pull in the sides to make the curve. These are expensive to buy, but you could make some using threaded bar & some imagination. It would also be useful to make a large set square out of 2" x 1" or similar, plus plywood. This is to check the sides are square to the base, etc. The forces you generate when bending the ply-covered side frames will tend to distort the sides out of square. You might also consider making an external jig to hold everything true while the glue hardens. You'll prolly suss all this when you do a dry run, before gluing. (it's a bit late when you've got a wet glued structure going off!!). Personally, I chose to bend the sides before skinning them. That way, the loads are much lighter, although of course you still need various methods of jigging & clamping. It's just easier to bend, so loads are lower. And it's quite easy to glue on the sideskins after the frame is glued up. Another area to beware of is making both sides bend in an equal amount, so that the fuse is symmetrical about the centreline. Last point is to allow plenty of time after you've finished before you take the clamps off. I'd wait a minimum of 3 days (remember epoxy takes weeks to attain full strength, & you'll feel how hard the skinned sides are trying to pull apart when you clamp them to the curved shape). Sorry if all this is stating the obvious, but it may be of help to others less experienced or able than yourself Good luck - I look forward to your pix. Bruce |
|
|
|
|
|
| Harless Greear |
|
 Ace AcePosts: 884
Time Online: 35 days 14 hours 19 minutes
|
At normal room temps, 24 hours are more that enough time. cooler temps takes longer of course.. |
| HARLESS in Va. |
|
|
|
|
|
| bigbrixx1 |
|
Ace
Posts: 822
Time Online: 20 days 16 hours
|
At normal room temps, 24 hours are more that enough time. cooler temps takes longer of course..
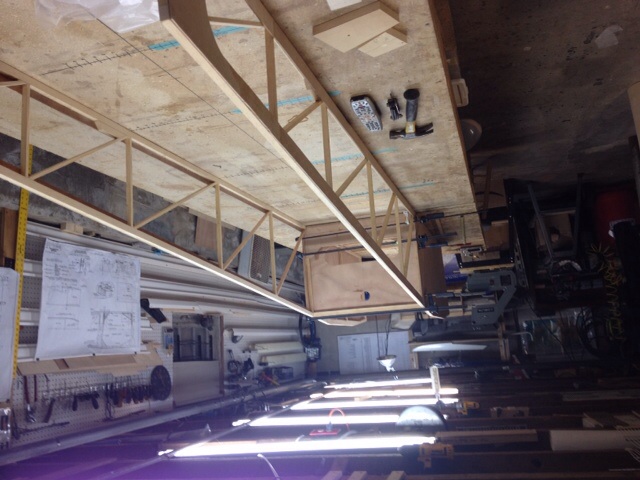
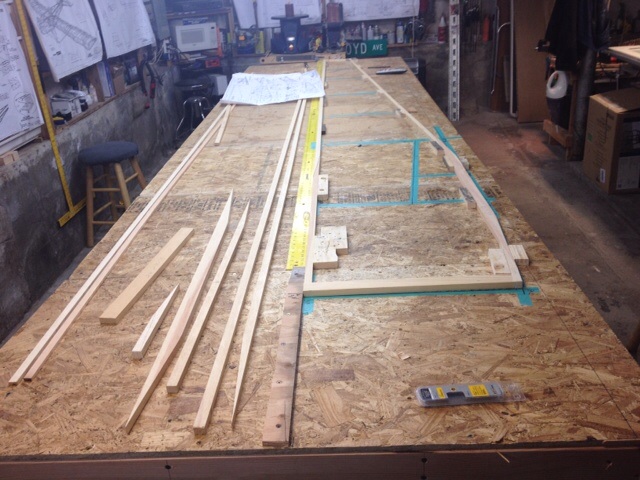
Thanks for the hints Bruce! Your idea of A-frames are great. I am cutting the material for them now. After a lot of consideration I have decided to sheet the frames and then form them. Mainly because they are soooooo fragile before they receive the side sheeting. As far as 30 inch clamps I anticipated their need and have accumulated a bunch over the last year. Harbor freight has some very nice. And with a 20 percent off coupon only are about 6 dollars each! Here you see one side sheeted. The other side is also sheeted! Notice a lot less of me in this photo. Add 2.8 pounds to the loss side of the board! Total 58.3 pounds. I do not plan to have a plane I cannot fit in when it is done! As far as drying time. My basement this time of year averages 54-60 degrees. So it takes 3 days to get to "sandable" condition with the T-88. With the pressures I expect on the nose, I plan on leaving them on 3 days! I also followed your lead Bruce and rounded out the bottom angles to make bending the bottom sheeting a bit easier!
|
|
 |
|
| V-max. Finished. Now in phase one flight |
|
|
|
|
|
| bobnafe |
| January 11, 2015, 11:54pm |
|
Flight Leader  Posts: 173
Time Online: 17 days 7 hours 38 minutes
|
Brian
Many years ago I wrapped the stringers with wet towels for 8 hours prior to bending. Puts less pressure on the stringers. I also used bar clams. After setup for a couple of days I installed ply wood side panels. Worked well for me.
BobN
Note: NOT WET AT GLUE JOINTS. |
|
|
|
|
|
| bigbrixx1 |
| January 12, 2015, 12:49am |
|
Ace
Posts: 822
Time Online: 20 days 16 hours
|
Brian
Many years ago I wrapped the stringers with wet towels for 8 hours prior to bending. Puts less pressure on the stringers. I also used bar clams. After setup for a couple of days I installed ply wood side panels. Worked well for me.
BobN
Note: NOT WET AT GLUE JOINTS.
Sounds like a great idea. Won't work for me the plywood sides are on! Luckily Dave at minimax is building the same fuselage I am. He is slightly ahead of me and posting the pictures on his facebook. Hopefully I can follow his lead! Thanks for Ll the help and suggestions guys! |
| V-max. Finished. Now in phase one flight |
|
|
|
|
|
| bigbrixx1 |
|
Ace
Posts: 822
Time Online: 20 days 16 hours
|
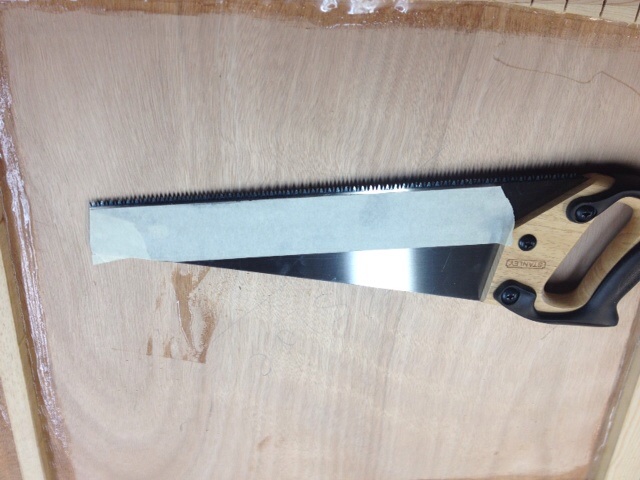
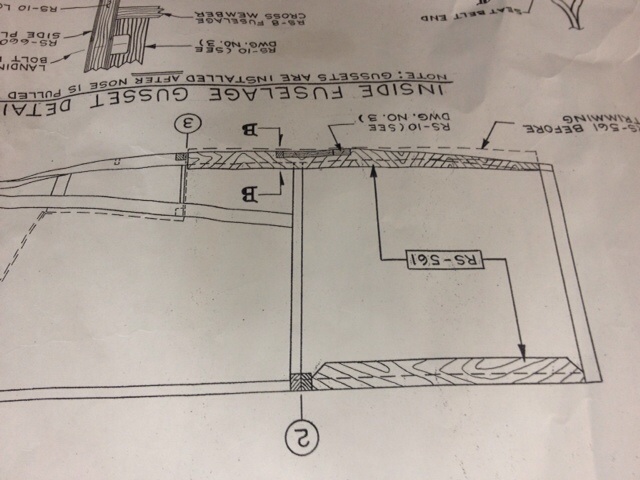
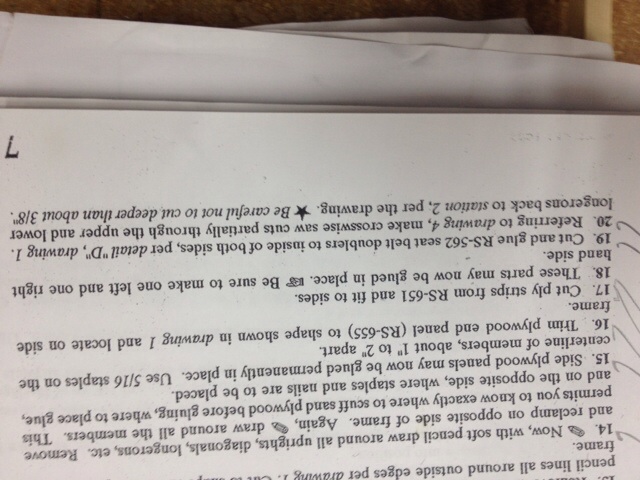
Rear carry thru bulkhead completed. Remember to varnish inside before completion. Front carry thru laminated. I will cut 2 degree angle in the morn before gluing up sides. Saw cuts in front section completed. 5/16 deep every one inch as per plans. I used a hand saw with masking tape depth guage.
|
| V-max. Finished. Now in phase one flight |
|
|
|
|
|
| bigbrixx1 |
|
Ace
Posts: 822
Time Online: 20 days 16 hours
|
Saw with depth guage and saw cuts
|
| V-max. Finished. Now in phase one flight |
|
|
|
|
|
| bigbrixx1 |
|
Ace
Posts: 822
Time Online: 20 days 16 hours
|
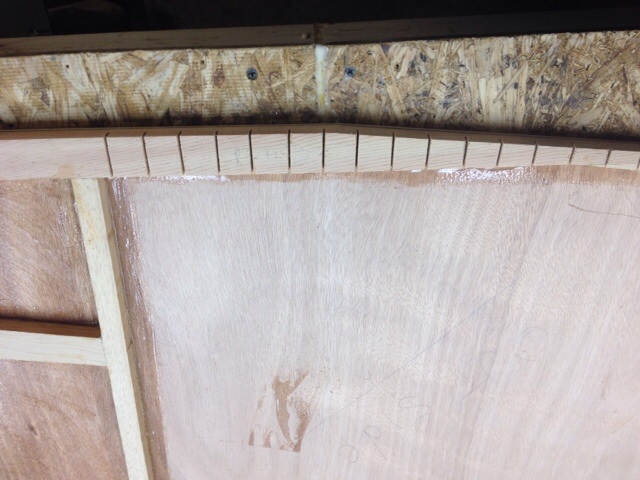
One more of saw cuts in nose section.
|
| V-max. Finished. Now in phase one flight |
|
|
|
|
|
| bigbrixx1 |
|
Ace
Posts: 822
Time Online: 20 days 16 hours
|
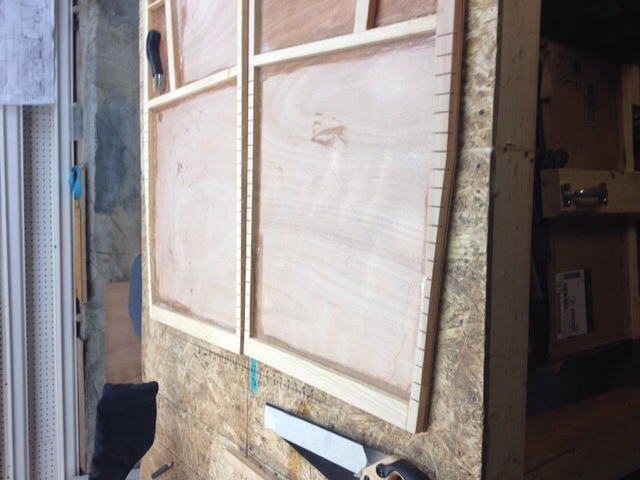
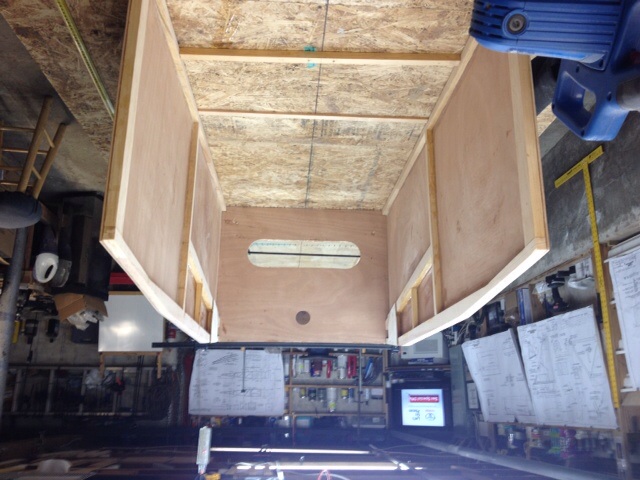
Dry fitting of bulkhead in fuselage. Notice markings on workbench. Lines drawn 90 degrees from center line drawn on bench. Lines are at each fuselage section. Also drew a scale left and right from center line and ruled it out 12 inches each side to help keep fuse straight during assembly!
|
| V-max. Finished. Now in phase one flight |
|
|
|
|
|
| beragoobruce |
|
Built an Eros - now I'm flying it! AcePosts: 1,067
Time Online: 19 days 10 hours 58 minutes
|
Good work Brian.
I'm sure those saw cuts in the forward longerons will make it much easier to bend.
Are you sure they won't weaken the structure? My plans (Eros) don't show any cuts.
It might be a good idea to laminate a length of 1/4" spruce over the inside (cut) face after you've glued up the bends.
Or perhaps I'm talking bollox & your drawings show these cuts, & just rely on the glue to provide the required strength.
Bruce
|
|
|
|
|
|
| George Sychrovsky |
| January 16, 2015, 12:02pm |
|
Guest User |
You have just cut up the most important structural components that hold your plane together
Basically you have ruined it |
|
 Logged Logged |
|
|
|
|
| PUFF |
| January 16, 2015, 12:21pm |
|
Ace
Posts: 1,518
Time Online: 34 days 6 hours 18 minutes
|
I think I would add some strength back to it with some ply after it's bent..... |
|
|
|
|
|
| bigbrixx1 |
| January 16, 2015, 12:46pm |
|
Ace
Posts: 822
Time Online: 20 days 16 hours
|
Good morning guys. Thank you all for your concern. The V-max has a very short nose compared to the other models, due to the heavy engine. The saw cuts are clearly called out for in the plans. Puff you are correct! After the bend 3 mm plywood is used to restore the strength!
|
| V-max. Finished. Now in phase one flight |
|
|
|
|
|
| bigbrixx1 |
| January 16, 2015, 12:48pm |
|
Ace
Posts: 822
Time Online: 20 days 16 hours
|
The cuts facilitate bending on the short nose. Also the instruction call out for cuts on both top and bottom stringers........it broke my heart to put them there. The plans call out for 3/8. I kept them a bit shallow at 5/16
|
| V-max. Finished. Now in phase one flight |
|
|
|
|
|
| texasbuzzard |
| January 16, 2015, 12:58pm |
|
 airbike Buzzard AcePosts: 1,238
Time Online: 8 days 23 hours 51 minutes
|
Brixx the plans show the cuts and you made them shallower than the callout. i would not worry about it... keep building.
monte |
|
|
|
|
|
| bigbrixx1 |
|
Ace
Posts: 822
Time Online: 20 days 16 hours
|
Thanks Monte.....although I didn't like doing it. I am comfortable with it! There are over 300 Vmaxes out there. Without having this version of the plans I understand everyone's concern. You are all watching out for my well being and I appreciate that! if you guys think I did something dangerous or silly please don't hesitate to tell me! |
| V-max. Finished. Now in phase one flight |
|
|
|
|
|
| Ricardo |
|
 Videos in UTube: ral1951 AcePosts: 2,772
Time Online: 75 days 23 hours 15 minutes
|
I think you're doing everything just fine!....... Except on placing your pictures upside down  |
|
|
|
|
|
| Bob Daly |
|
Ace
Posts: 888
Time Online: 45 days 22 hours 25 minutes
|
You could drip some thickened epoxy into the kerfs just before bending in the sides, some masking tape underneath the longeron to keep it from running out. |
|
| Logged |
|
|
|
|
| theecoop |
|
 Flying AcePosts: 1,330
Time Online: 19 days 5 hours 17 minutes
|
Yes the Kerf joints get filled with epoxy, Brian is doing great job on it. |
| Perfect Practice makes perfect! |
|
|
|
|
|
| beragoobruce |
|
Built an Eros - now I'm flying it! AcePosts: 1,067
Time Online: 19 days 10 hours 58 minutes
|
Hmmm. . .
No doubt TEAM have done a static test, or possibly calculations, to prove this method is satisfactory.
But I would not feel happy removing 50% or so of a major structural member.
OK, so you fill the kerf with epoxy, and bond a 1/8" ply gusset on the outside. But gluing end grain will not give the same strength as an intact member. At least the tests I did showed failure of the glue line in end grain, unlike gluing the face parallel to the grain, when the wood always failed rather than the glue.
And sticking a bit of 1/8" ply on will not give the same strength as the 3/8" or 5/!6" of spruce you have sawed through. Hence my suggestion of laminating a length of 1/4" spruce on the outside: that plus whatever strength gained from the kerf gluing would be nearer the strength of an uncut longeron.
It just seems to me a crazy way to approach this issue. It would make much more sense to use full length longerons (as per any other non-VW Max), and form them in the usual way (with or without the ply outer skin, but it's much easier without). A scrap cross member, or just a long clamp, would hold the shape until the epoxy was completely cured.
Then you would cut the extra longeron length off at the firewall, and skin the sides.
Sorry, I had to say this. No disrespect to TEAM, but I think they missed a trick here.
Bruce |
|
|
|
|
|
|