|
|
 bigbrixx1 bigbrixx1 |
|
 Ace Ace Posts: 822
Time Online: 20 days 16 hours
|
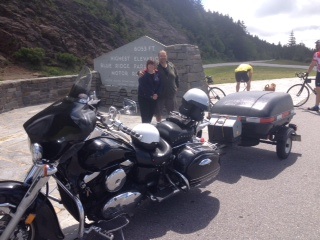
Hey folks I am back. Had a little hand surgery. Then a 2 week motorcycle trip that turned into nearly 3 weeks. Had to get my radio control jets ready for the season... On the trip we stopped by another buzzards place to. Check out his high max. Great workmanship paul. Thanks for letting us stop by! I went to a local event and connected with an EAA technical advisor. I am contact with him and we are making plans for him to come by and check out my workmanship! Time to fit the drooping wingtip and roll the plywood on the LE of aileron! |
| V-max. Finished. Now in phase one flight |
|
|
|
|
|
| bigbrixx1 |
|
Ace
Posts: 822
Time Online: 20 days 16 hours
|
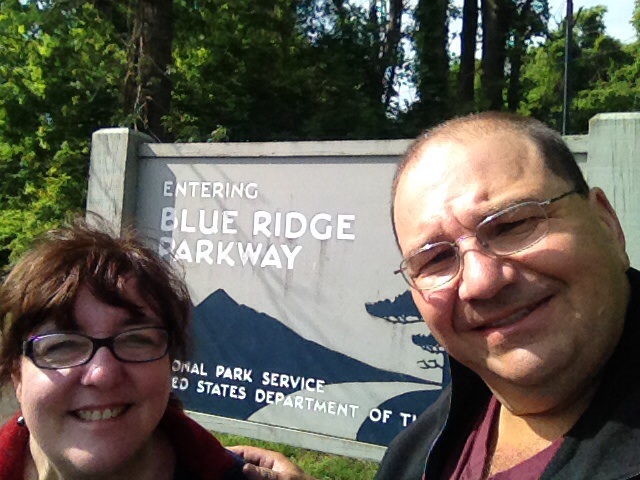
Some photos from our trip
|
| V-max. Finished. Now in phase one flight |
|
|
|
|
|
| bigbrixx1 |
|
Ace
Posts: 822
Time Online: 20 days 16 hours
|
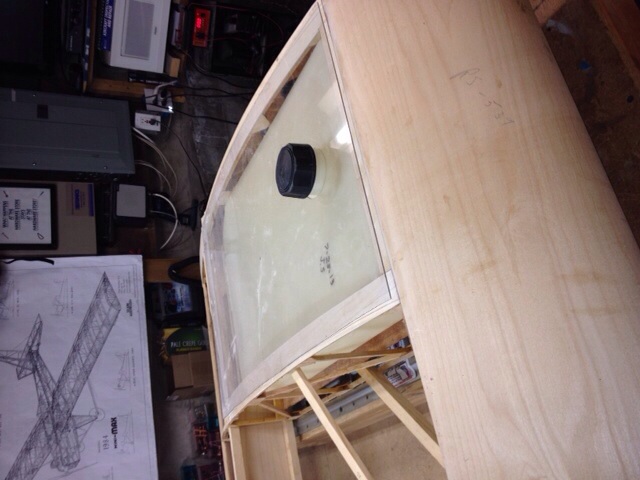
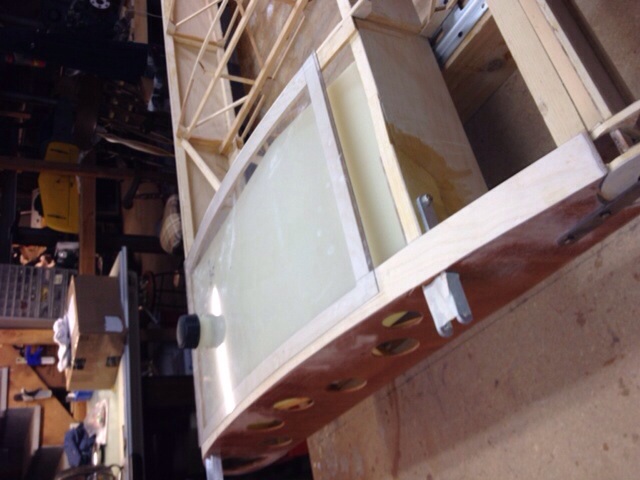
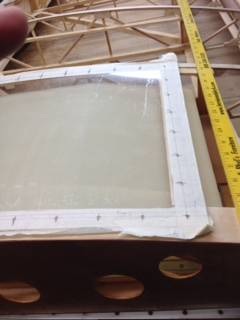
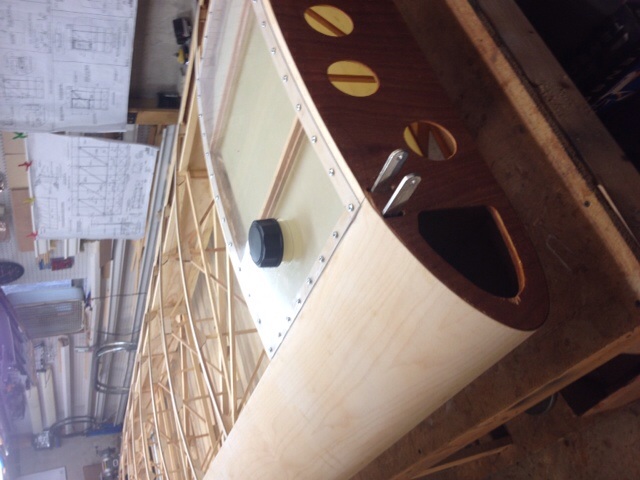
Fuel tank area coming together well. Fitting plexiglass top now. I filled the tank with fuel for a few days so it would swell to size before final fitting. What size and type screws are you guys using?
|
| V-max. Finished. Now in phase one flight |
|
|
|
|
|
| bigbrixx1 |
|
Ace
Posts: 822
Time Online: 20 days 16 hours
|
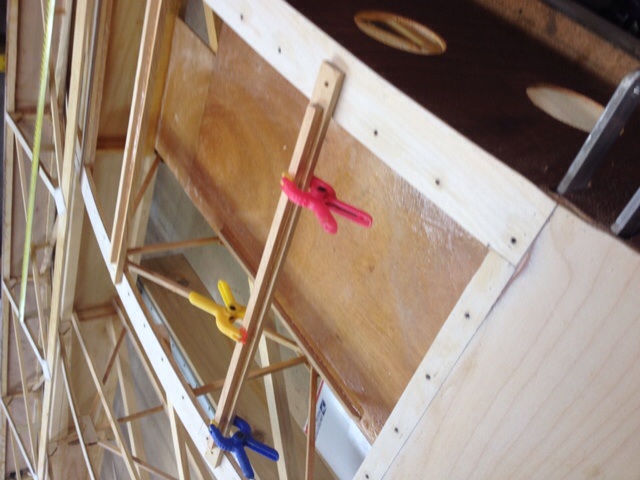
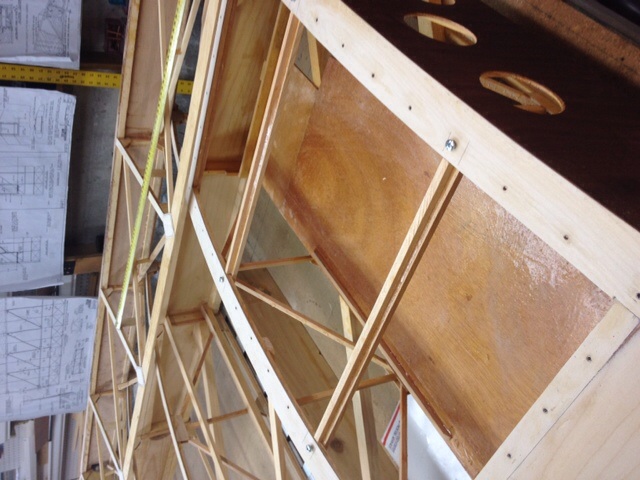
Fitting drooping wingtips. Removed area for aileron. Really think they jazz up the plane!!!
|
| V-max. Finished. Now in phase one flight |
|
|
|
|
|
| JonF |
|
 Ace AcePosts: 357
Time Online: 7 days 16 hours 10 minutes
|
|
|
|
|
|
| bigbrixx1 |
| September 19, 2014, 2:40am |
|
Ace
Posts: 822
Time Online: 20 days 16 hours
|
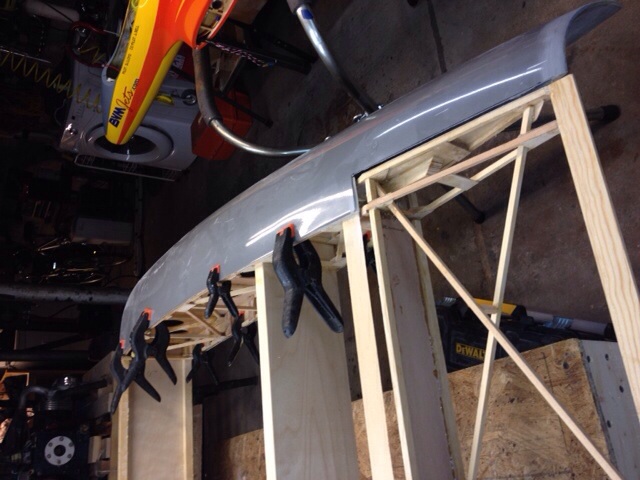
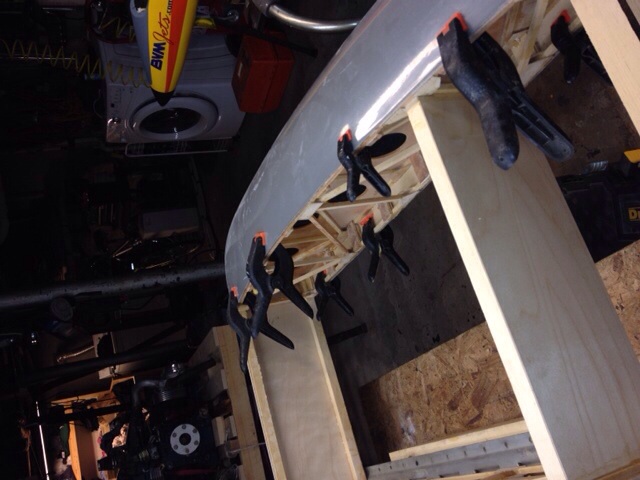
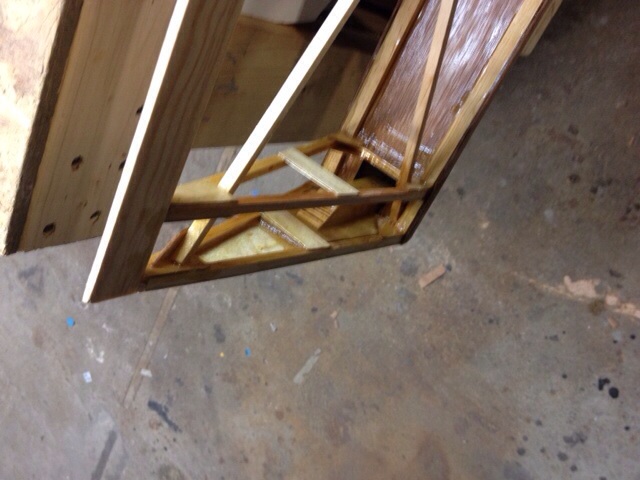
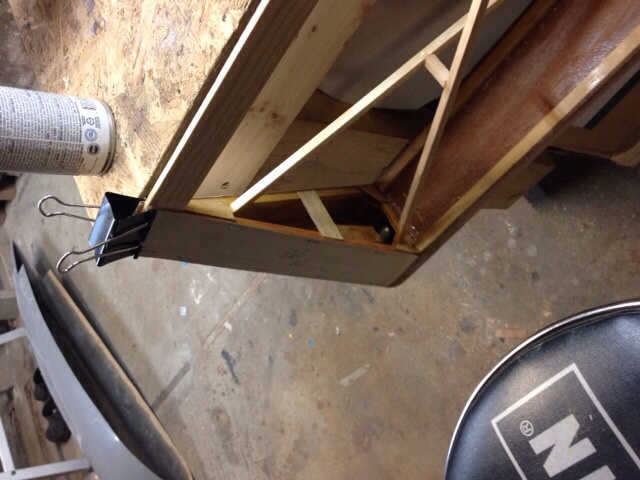
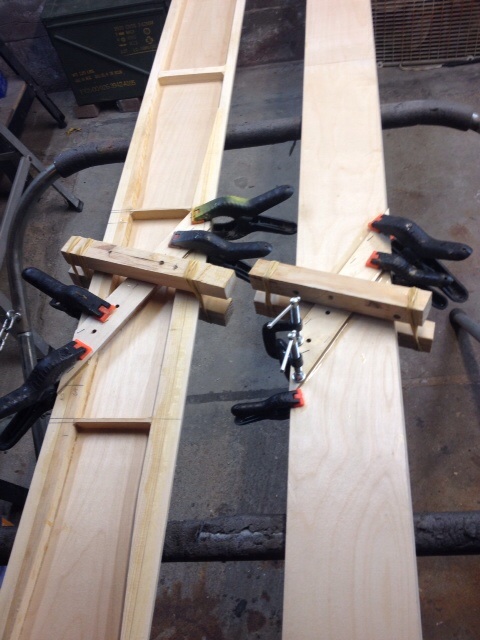
Summer sadly coming to a close. Outside activities kept me from the workshop. But now with cooler weather coming in it is time to get back to my V-max. Formed the sheeting that goes over the aileron leading edge. First I dampened them and then clamped them over the aileron LE. I let them dry. Then varnished the area where the aileron will will be sealed and not accessible. I found Q-tips great for getting varnish into drilled holes! Just like the wing LE don't varnish where you are going to glue. Then glue on just like the wing LE. Much much easier. Holding them on was done with 2 inch binder clips. Also some 1/4 inch staples. Works very well!!! Letting it dry
|
| V-max. Finished. Now in phase one flight |
|
|
|
|
|
| bigbrixx1 |
| September 21, 2014, 2:40pm |
|
Ace
Posts: 822
Time Online: 20 days 16 hours
|
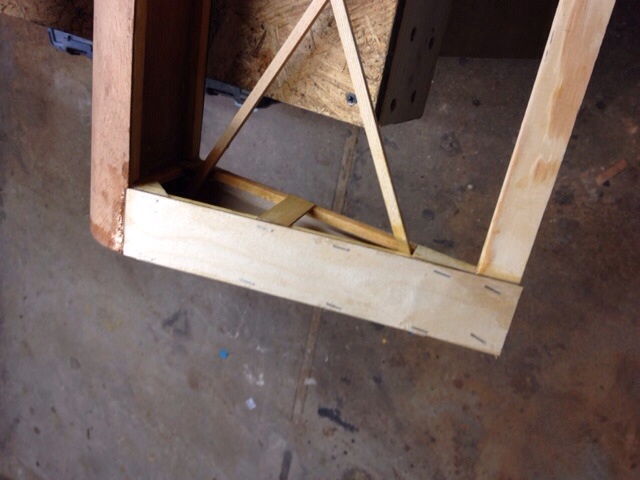
Finishing up LE of aileron. I first soaked the plywood in the tub for 1/2 hour to soften and then pre formed it on a jig. I found you only need to moisten one side with water then it former easily wait to dry then glue.
|
| V-max. Finished. Now in phase one flight |
|
|
|
|
|
| bigbrixx1 |
| September 25, 2014, 11:50am |
|
Ace
Posts: 822
Time Online: 20 days 16 hours
|
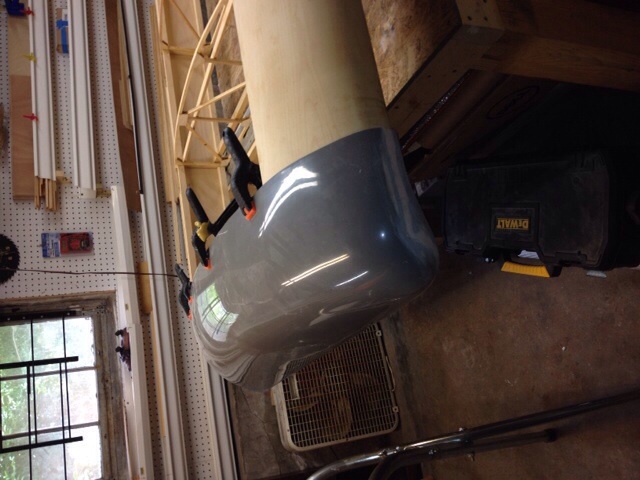
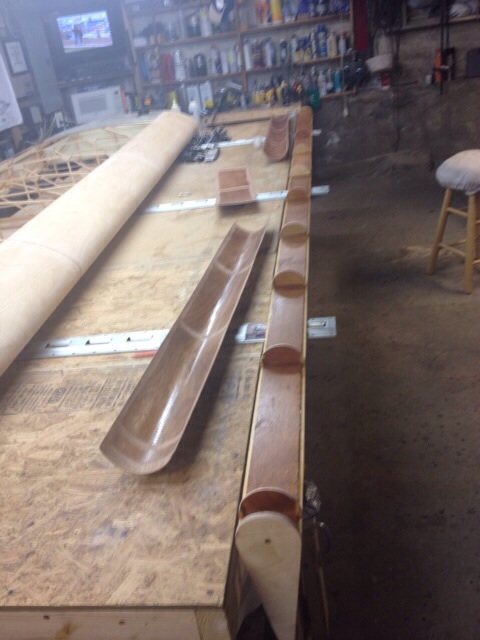
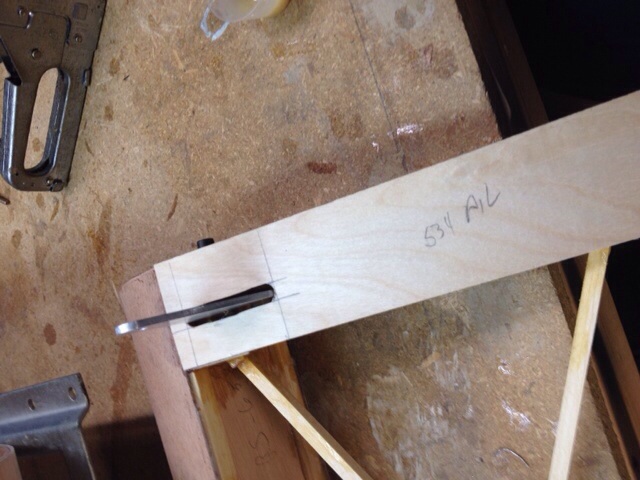
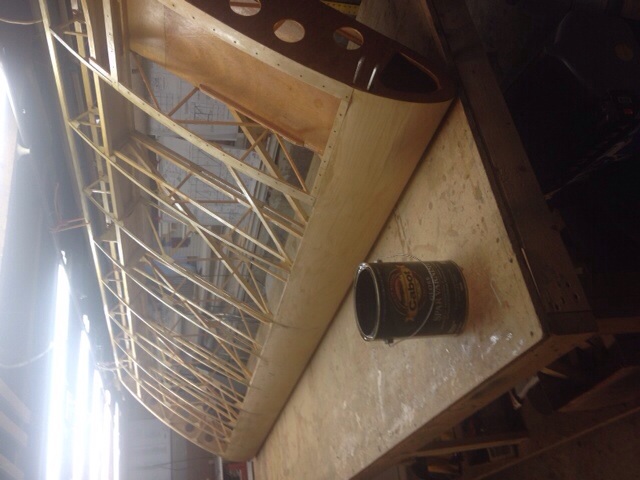
I varnished the ends of the aileron where it will be sheeted. Also varnished the areas where hardware is to be installed. Using cotton swabs I varnished the drilled holes. When dry I ran a drill bit into the holes to clean them. then skim coated the plywood end pieces with T-88 and epoxied them in place. The steel hardware primed and painted. Also glued trailing edge reinforcements using left over 1/4 inch stock trying to avoid the trailing edge "lift"
|
| V-max. Finished. Now in phase one flight |
|
|
|
|
|
| bigbrixx1 |
| September 25, 2014, 12:09pm |
|
Ace
Posts: 822
Time Online: 20 days 16 hours
|
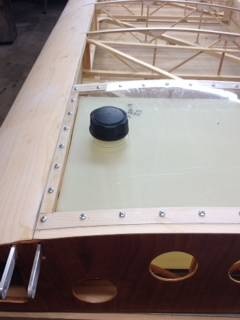
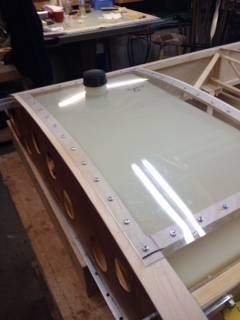
Today I drill the screw hole for tank cover. I think I will use number 8 screws
|
| V-max. Finished. Now in phase one flight |
|
|
|
|
|
| aeronut |
| September 25, 2014, 2:00pm |
|
 blue sky and tail winds to everyone AcePosts: 1,560
Time Online: 28 days 22 hours 31 minutes
|
Great pictures. You have one of the best documented builds that there is. Congratulations and keep up the fantastic work; thanks for posting.  |
| never surrender; never give-up |
|
|
|
|
|
| bigbrixx1 |
| September 29, 2014, 11:46am |
|
Ace
Posts: 822
Time Online: 20 days 16 hours
|
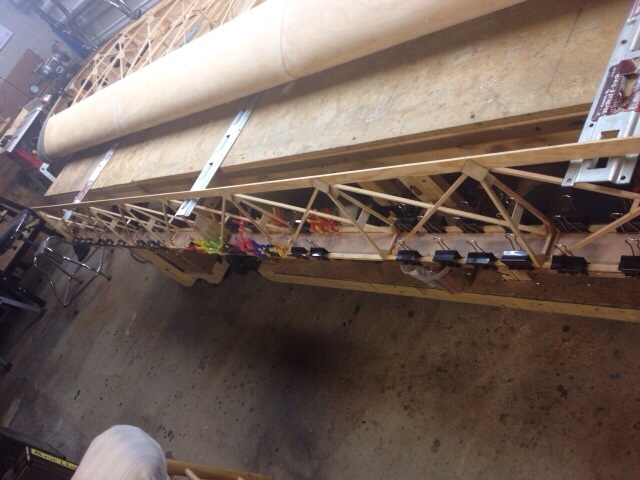
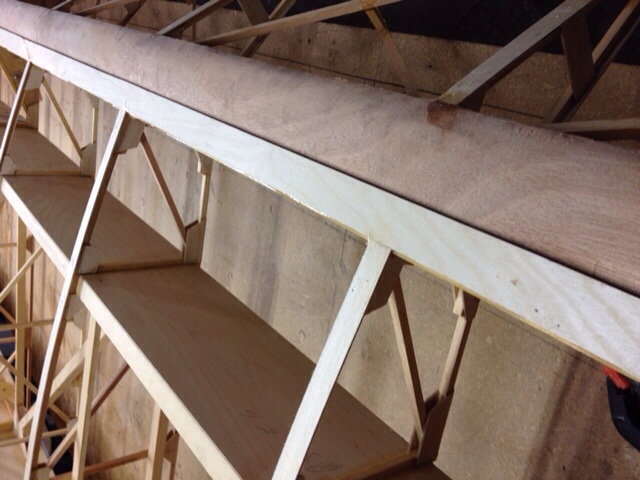
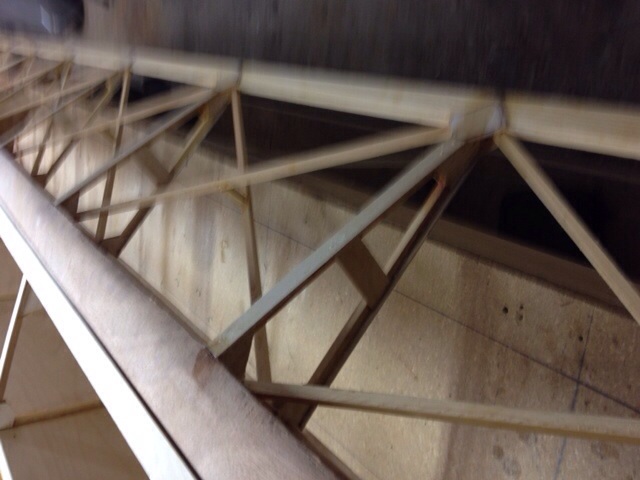
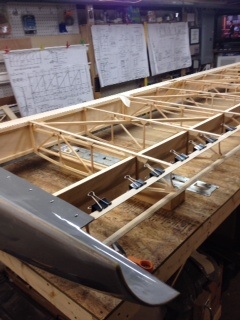
Thanks for the support and compliment Aeronut. I am trying to stay true to the plans. I know weight is the enemy of aircraft. That said I decided to add cap strips to the ribs and trailing edge of wings. It will give me more surface area to glue the covering on and a much nicer looking surface. I used 1/2 inch 1.5 mm ply to ribs and one inch 1.5 mm ply to trailing edge. Ply is set back 1/8 inch to give the rib cap strips a little surface to glue to. Top is done . Now the bottom
|
| V-max. Finished. Now in phase one flight |
|
|
|
|
|
| bigbrixx1 |
| September 29, 2014, 6:42pm |
|
Ace
Posts: 822
Time Online: 20 days 16 hours
|
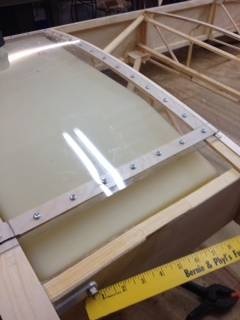
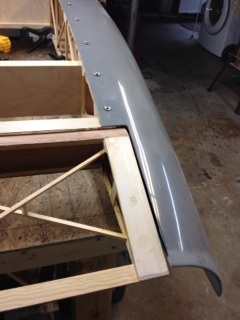
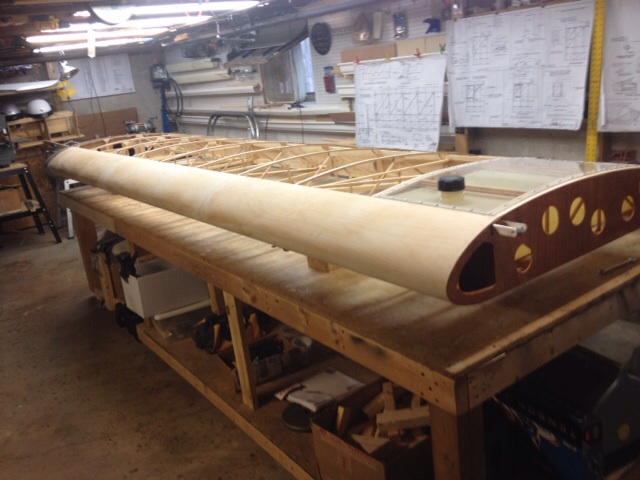
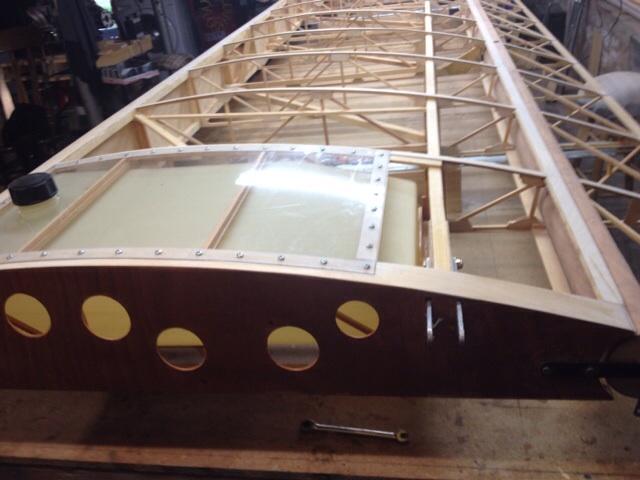
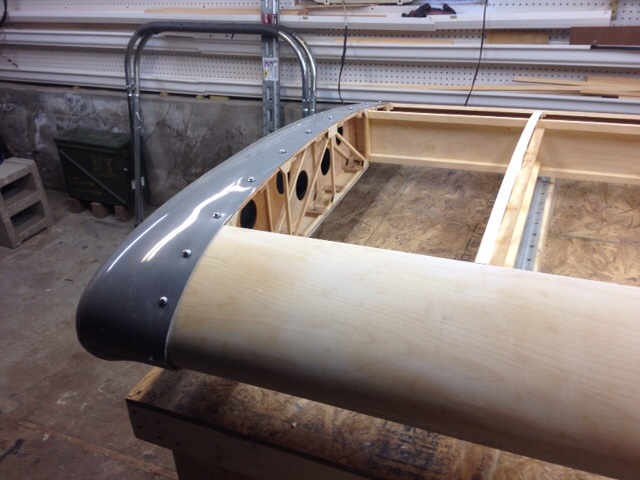
Mounted the wingtip using number 10 screws and "bonded" washers.Used masking take to mark out plexiglass drill points for fuel tank cover. Drilled out cover then secured to wing with number 8 by 3/8 screws as called out on plans. Tank cover screw spacing Pprox 2 inch on center. All holes has "threads" reinforced using thin CA glue. Flipped wing and added plywood rib and trailing edge 1.5 mm ply caps. Notice use I'd 2inch binder clips again. Pick some up they are cheap and very handy! Also notice simple drill jig using inexpensive ruler!
|
| V-max. Finished. Now in phase one flight |
|
|
|
|
|
| bigbrixx1 |
| September 29, 2014, 6:58pm |
|
Ace
Posts: 822
Time Online: 20 days 16 hours
|
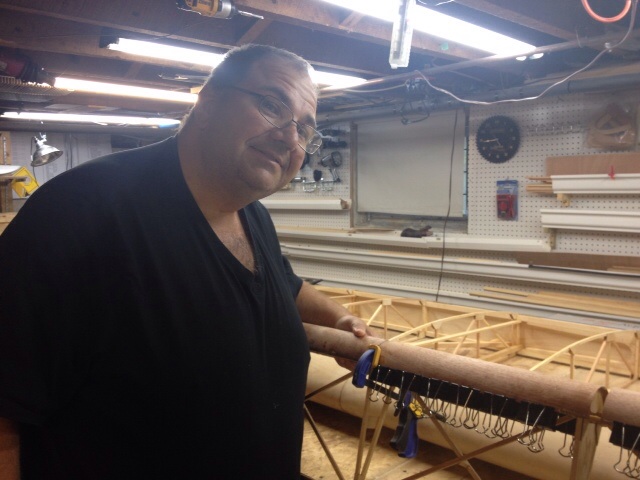
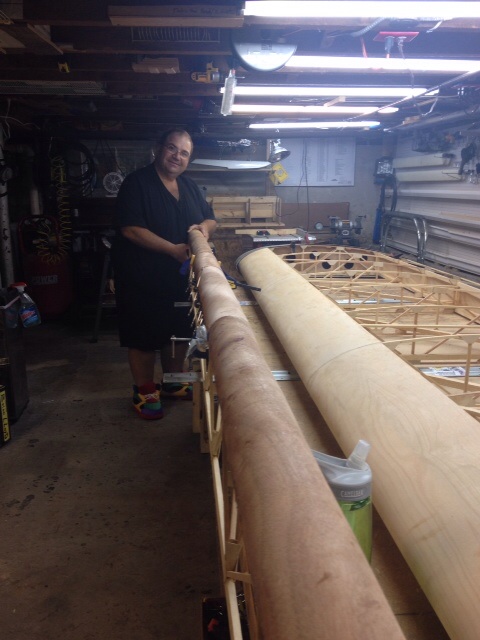
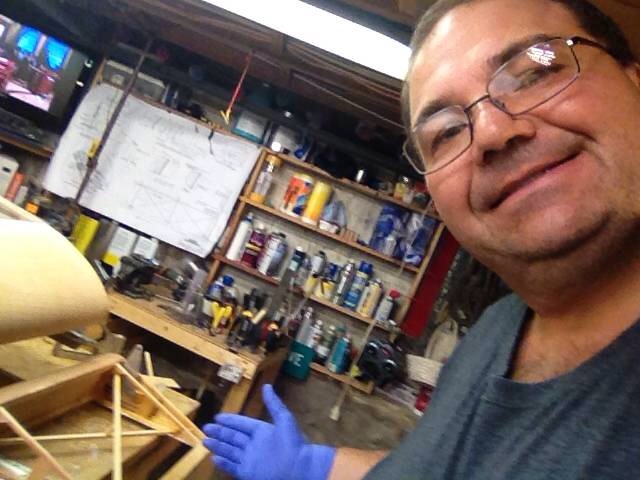
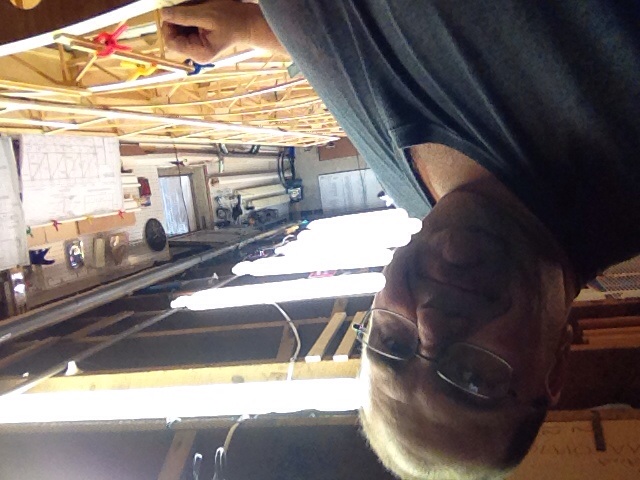
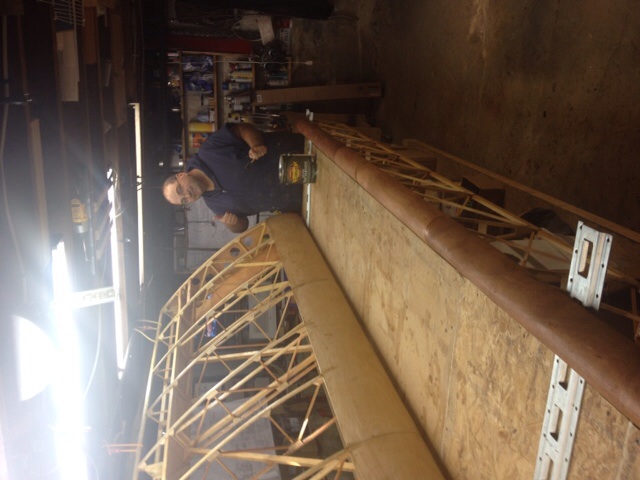
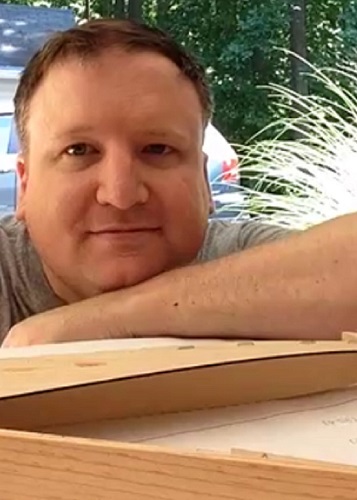
I have been told to put more pictures of myself in the build. In order to prove I am the one doing the work!!!! So here we go....Gentlemen hold onto your ladies!
|
| V-max. Finished. Now in phase one flight |
|
|
|
|
|
| beragoobruce |
| September 30, 2014, 9:06pm |
|
Built an Eros - now I'm flying it! AcePosts: 1,067
Time Online: 19 days 10 hours 58 minutes
|
Looking good, BB. (I'm referring more to the build here ) Love the binder clips. Which varnish are you using? bruce |
|
|
|
|
|
| bigbrixx1 |
|
Ace
Posts: 822
Time Online: 20 days 16 hours
|
I will check in the morning when I get home from work. I decided to stay with the minimax theme and am just using an oil base marine varnish from home depot |
| V-max. Finished. Now in phase one flight |
|
|
|
|
|
| bigbrixx1 |
|
Ace
Posts: 822
Time Online: 20 days 16 hours
|
Today I finished the wing tank mounts. They secure with number 8 5/8 screws. The longer screws are used in place of 4 3/8 screws on tank cover where mounts cross over
|
| V-max. Finished. Now in phase one flight |
|
|
|
|
|
| bigbrixx1 |
|
Ace
Posts: 822
Time Online: 20 days 16 hours
|
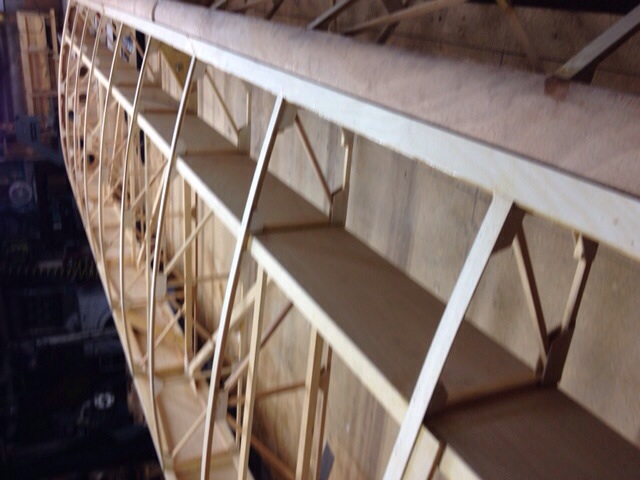
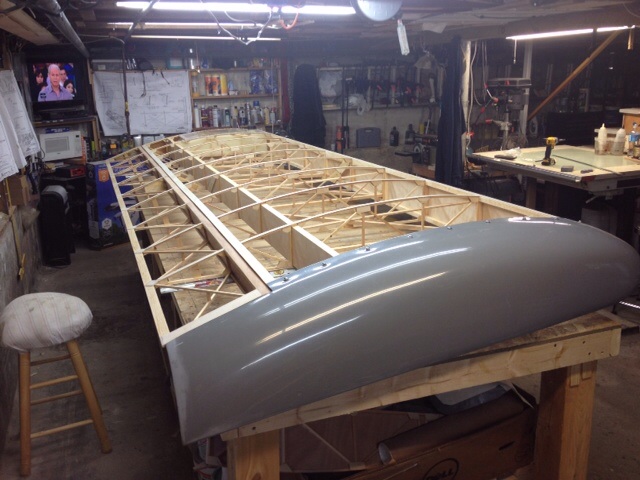
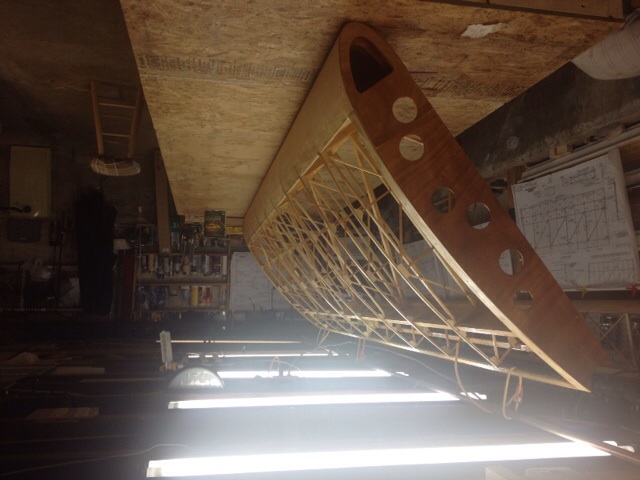
What we have here folks is a completed wing! Only thing left to do is varnish! What a feeling of accomplishment !!!! Should have it varnished by end of week. I plan on starting other wing Monday. It should go MUCH quicker!!
|
| V-max. Finished. Now in phase one flight |
|
|
|
|
|
| bigbrixx1 |
|
Ace
Posts: 822
Time Online: 20 days 16 hours
|
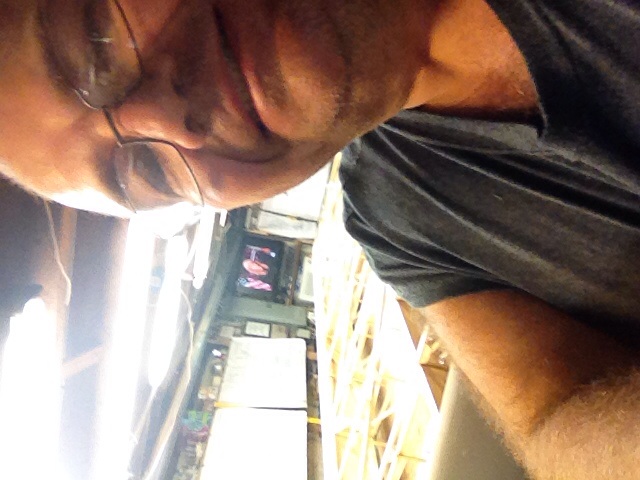
A photo of me in the build for the inspector....
|
| V-max. Finished. Now in phase one flight |
|
|
|
|
|
| Dick Rake |
|
 Home phone 602-999-3715/Mini-max with Hirth 2704 AcePosts: 755
Time Online: 40 days 13 hours 26 minutes
|
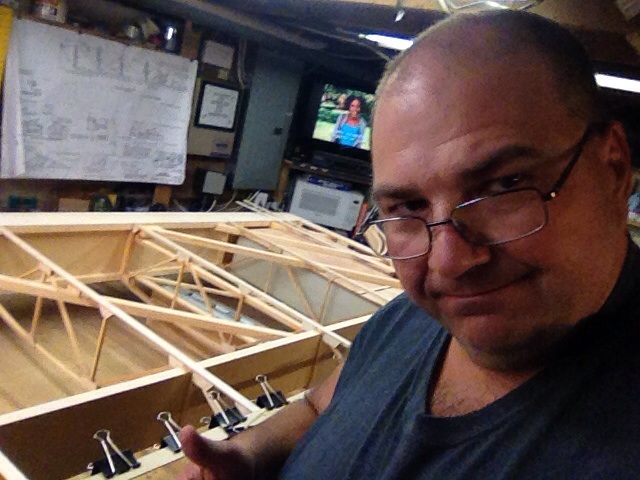
A photo of me in the build for the inspector....
Bigbrixx, To make it really convincing for the FAA or DAR you need to show a picture where you accidentally glued yourself to one of the parts you are working on. Showing them where the skin peeled off your fingers after the part was separated will make it even more convincing. Dick PS. Outstanding workmanship. |
|
|
|
|
|
| bigbrixx1 |
|
Ace
Posts: 822
Time Online: 20 days 16 hours
|
Thanks Dick, I should also save the splinter I dug out of my thumb last week when I was ripping plywood for the cap strips lol. I should also add to the build I always save the left over mixed epoxy and do a scratch test to assure it cures properly!
I have exciting (to me anyways) news. Last year I joined my local EAA 106 chapter. They have a hanger at local airport and rent out space when available. I have just secured the workshop area at at very reasonable monthly rate! The plan is to continue build the wings in my basement. I will build the fuselage and all firewall forward installation at the workshop! |
| V-max. Finished. Now in phase one flight |
|
|
|
|
|
| lake_harley |
|
Ace
Posts: 1,095
Time Online: 25 days 7 hours 43 minutes
|
I can attest that your basement can become quite full as construction progresses, so I think you'll appreciate the extra space. How far is it from your house to the airport though? Any travel time could be a slight detriment to making a little progress anytime you have a little time to spare. My project is now split between my basement and my shop. The wrong things always seem to be at the wrong place, which causes a lot of trips back and forth, and they're only about 450' apart.
Your progress looks great!
Lynn |
|
|
|
|
|
| bigbrixx1 |
|
Ace
Posts: 822
Time Online: 20 days 16 hours
|
A bit further than the 450 feet you have to go lol. About a 30 min drive. I am putting together a "travel kit" that will go back and forth with me. I find I am waiting a lot when glue is drying. also I hope to take advantage of the experienced guys who often hang out at the hanger. I suspect there is a LOT of knowledge there! |
| V-max. Finished. Now in phase one flight |
|
|
|
|
|
| bigbrixx1 |
|
Ace
Posts: 822
Time Online: 20 days 16 hours
|
Wing has Been varnished! Took a lot Longer than expected! Nearly 7 hours! I applied the varnish with foam brush! I used a small brush to "flood" varnish into nook and crannies then blew out excess with compressed air. It is a messy technique, but effective! Wear safety glasses! Now onto aileron!
|
| V-max. Finished. Now in phase one flight |
|
|
|
|
|
| bigbrixx1 |
| October 11, 2014, 12:13pm |
|
Ace
Posts: 822
Time Online: 20 days 16 hours
|
Wing and aileron varnished! Time to put it away! Going to start layout for wing 2! My goal is to have wing 2 ready by Xmas!
|
| V-max. Finished. Now in phase one flight |
|
|
|
|
|
| bigbrixx1 |
|
Ace
Posts: 822
Time Online: 20 days 16 hours
|
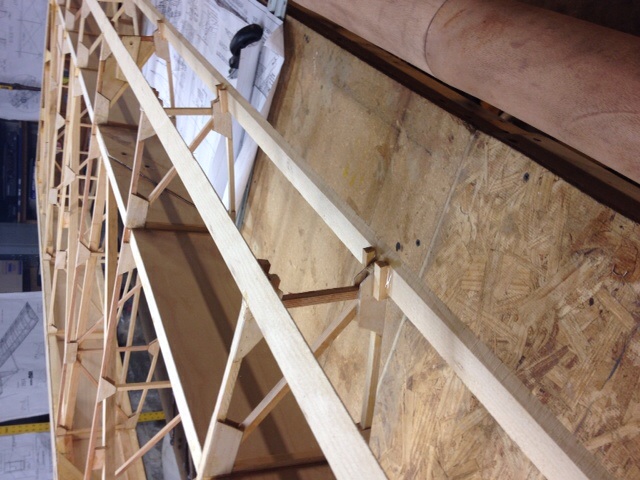
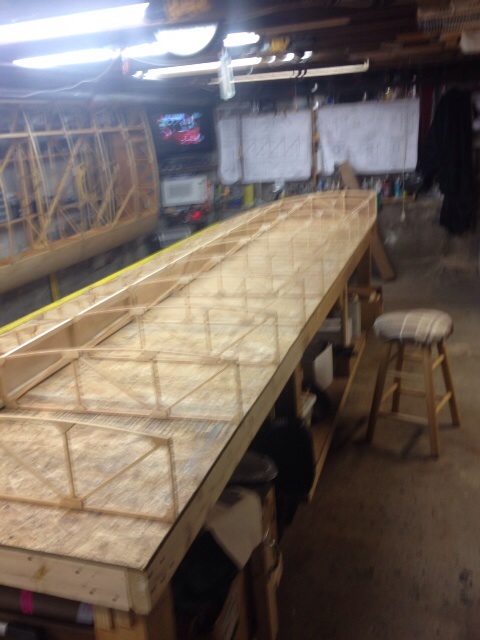
Wing one has been hung up next to the bench. Great for reference! The spars have been prepped for second wing!
|
| V-max. Finished. Now in phase one flight |
|
|
|
|
|
| PUFF |
| October 13, 2014, 11:46am |
|
 Ace AcePosts: 1,518
Time Online: 34 days 6 hours 18 minutes
|
|
|
|
|
|
| bigbrixx1 |
|
Ace
Posts: 822
Time Online: 20 days 16 hours
|
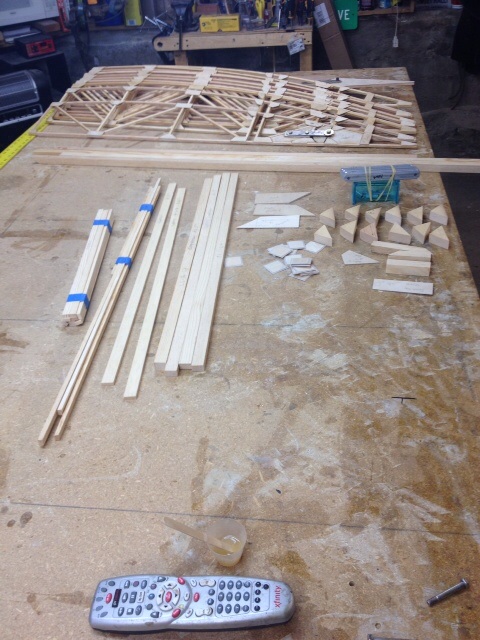
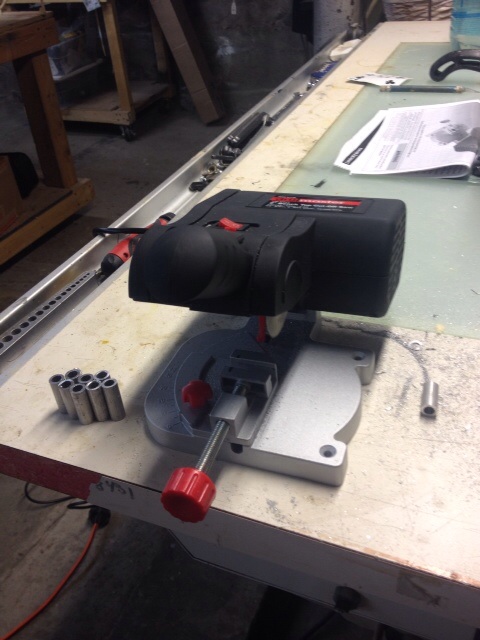
Yes indeed Puff I am getting her done! And having a blast doing it! My weight stalled over the summer but back to the max and weight loss ! Good news didn't gain weight this summer. Not so good news didn't loose any! I was having trouble making the spacers. It was labor intensive, I went to my friends at harbor freight. Purchased this tool for 21 dollars. Nice for the aluminum spacers and I'll bet I can find many more uses for it. Today I finished up both spars and glued on strut reinforcements. Planed a smidge of the rear spar cap (about 1/32 ) so the ribs slide on easy. Cleaned up the ribs and tomorrow when the T-88 sets I begin assembly. Notice the "kit" pieces on table. When I made the last wing. Every time I made a piece I made a copy for this wing. Compression braces, reinforcements ect. I didn't per make drag struts because I felt small differences in rib spacing would affect them to much. This should really save time on this wing! My goal two completed wings by Christmas! And 25 pounds less
|
|
 |
|
| V-max. Finished. Now in phase one flight |
|
|
|
|
|
| bigbrixx1 |
|
Ace
Posts: 822
Time Online: 20 days 16 hours
|
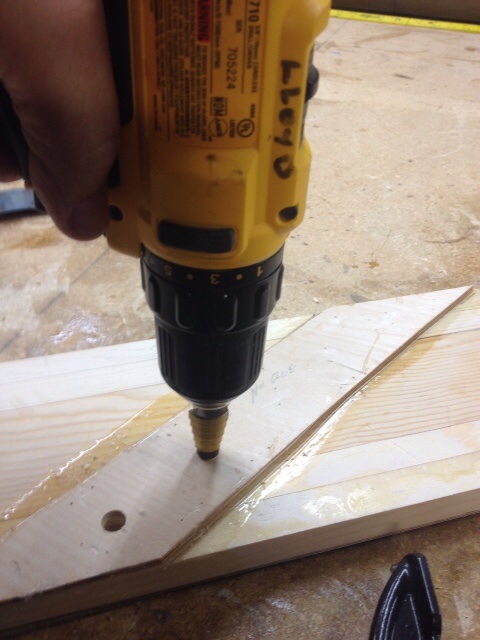
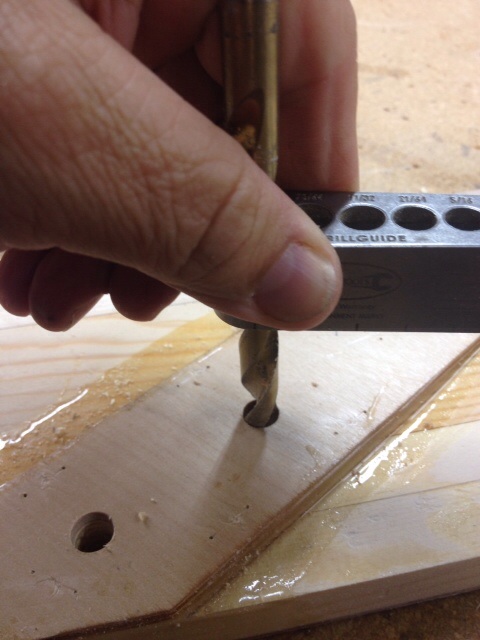
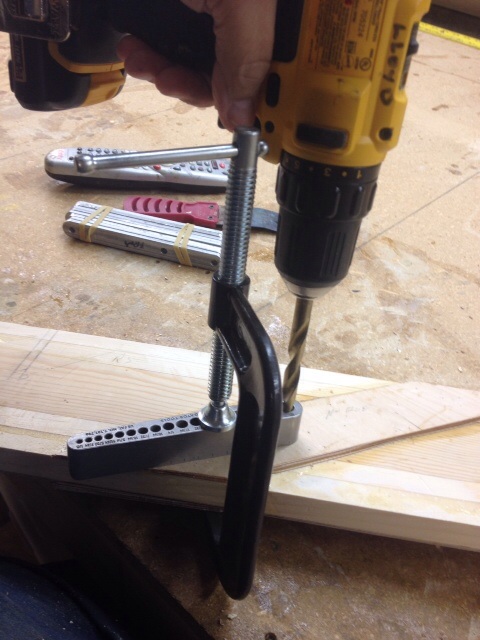
1/4 inch holes had to be opened up to 3/8 for alum reinforcements. This method works great for me. Extremely accurate. First open up 1/4 holes with a step drill to a depth of approx 1/4 inch. If possible do this to both sides of piece. Then using 3/8 drill bit as a guide I clamp drill jig to work piece. Then drill through! Works great every time!
|
| V-max. Finished. Now in phase one flight |
|
|
|
|
|
| bigbrixx1 |
|
Ace
Posts: 822
Time Online: 20 days 16 hours
|
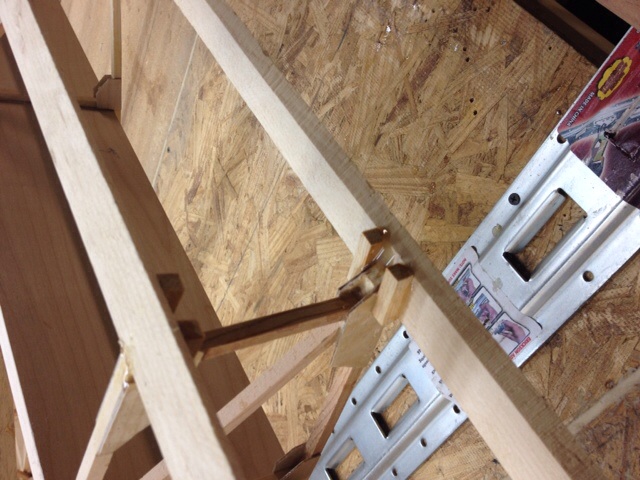
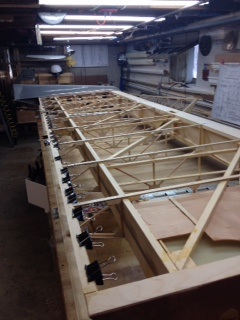
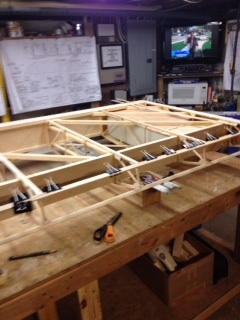
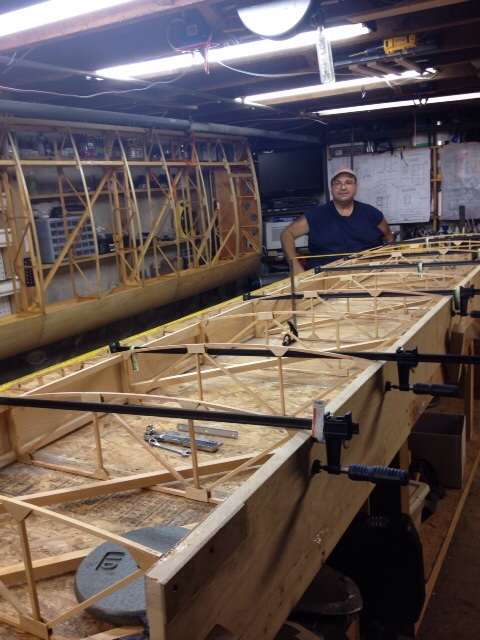
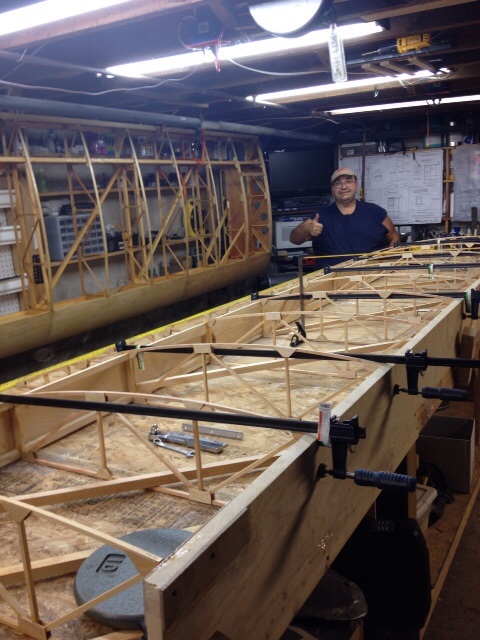
Rear spar ready to accept ribs. Ribs in place. In the am I begin to fit drag braces.
|
| V-max. Finished. Now in phase one flight |
|
|
|
|
|
| bigbrixx1 |
|
Ace
Posts: 822
Time Online: 20 days 16 hours
|
Ribs glued in to front and rear spar. All drag bars in place ready to glue. Remember to have them in place before ribs are glued or you will not be able to insert them in place! Two drag bars are glued in place at this point. Root and tip ribs go in next. Used a nice trick from my R/C plane builds. The plans only give you one wing. I put baby oil on plans it makes them translucent. You can then turn plan around and the wing orientation will be correct for other wing. That way you don't build two left wings! Also having the wing that is built right there makes building wing two much easier! I reference it often!
|
| V-max. Finished. Now in phase one flight |
|
|
|
|
|
|


 Logged