|
|
 Ricardo Ricardo |
|
 Videos in UTube: ral1951 Ace Posts: 2,772
Time Online: 75 days 23 hours 15 minutes
|
Just missed the great news. Congratulations! Maybe you'll be able to do the maiden flight with your Minimax. |
|
|
|
|
|
| bigbrixx1 |
| October 21, 2015, 12:23am |
|
 Ace AcePosts: 822
Time Online: 20 days 16 hours
|
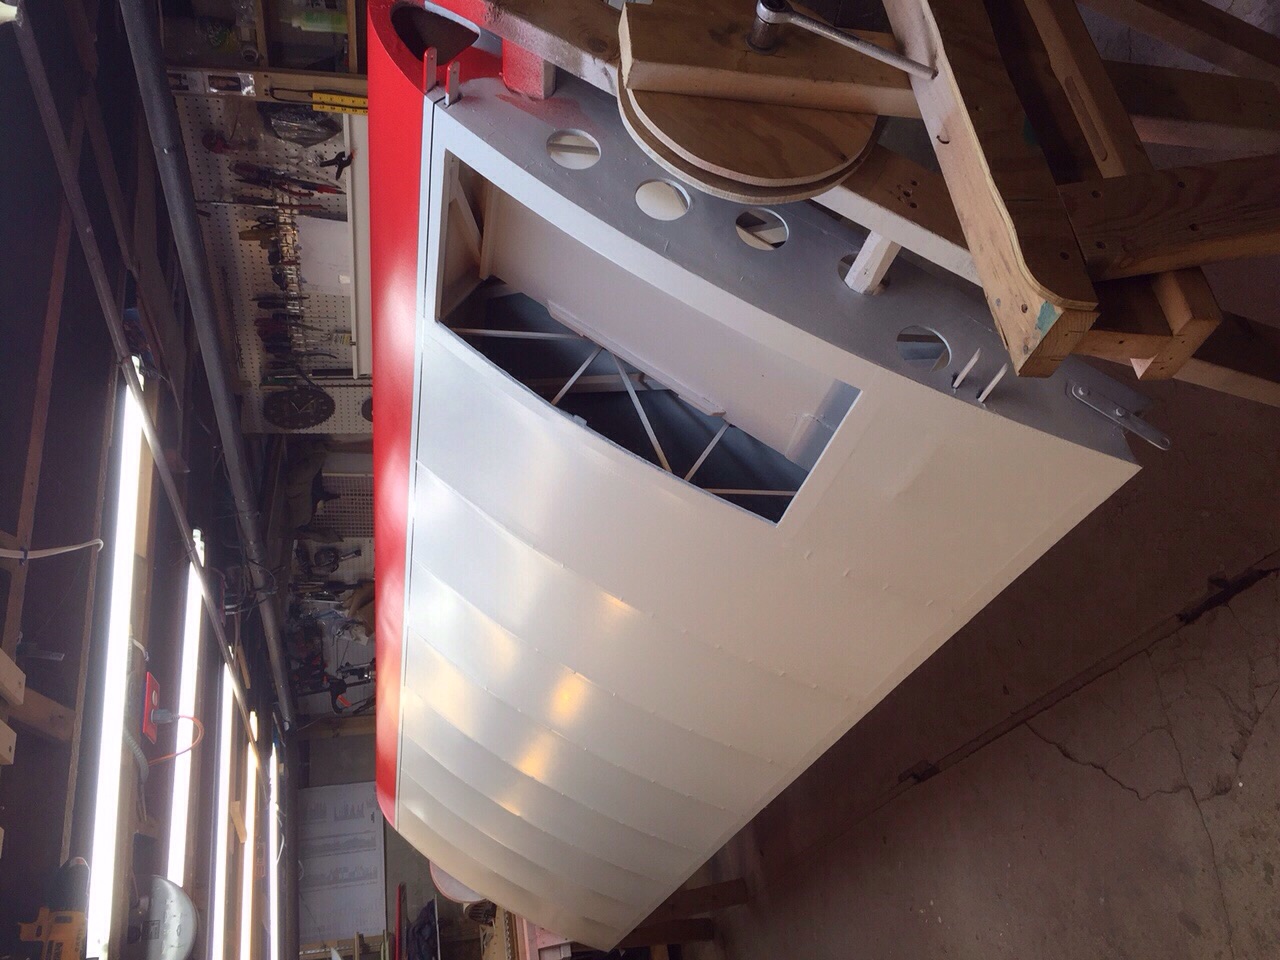
Thanks guys! Vitek Congrats on your recent solo! Bruce your work motivates me and makes me strive to do my best! Puff I plan on moving forward and getting certified as soon as possible! Ricardo I hope to be performing taxi tests by Summer! Thanks to everyone for the support. One wing is ready to cover back in the basement. Supplies are on their way to rib stitch! Watching videos now to learn technique! More updates to follow! |
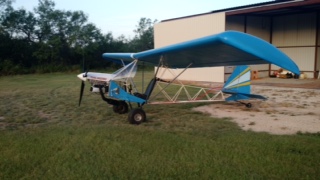
| V-max. Finished. Now in phase one flight |
|
|
|
|
|
| bigbrixx1 |
| October 30, 2015, 11:10am |
|
Ace
Posts: 822
Time Online: 20 days 16 hours
|
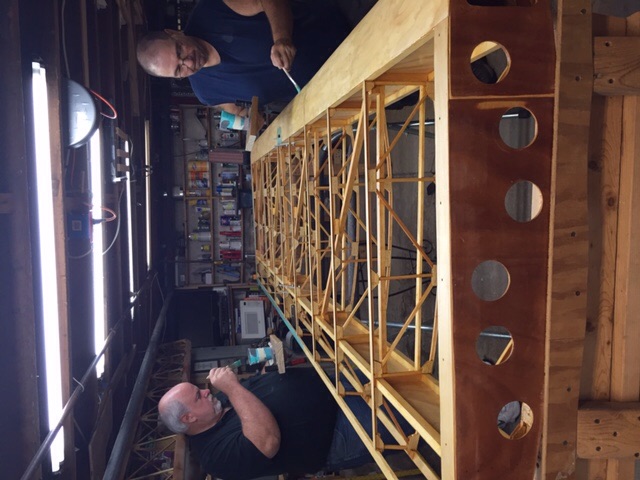
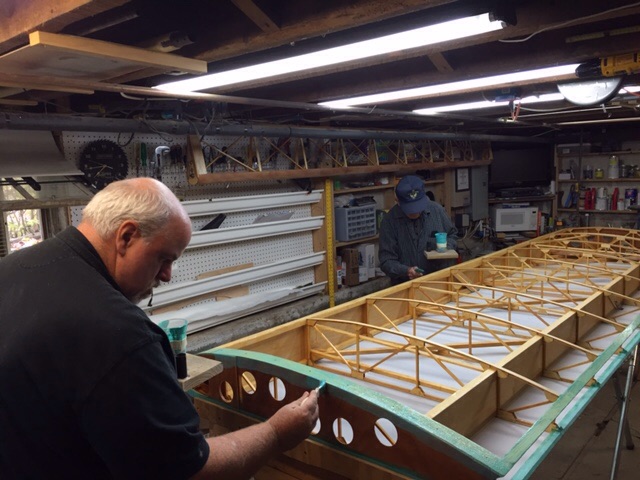
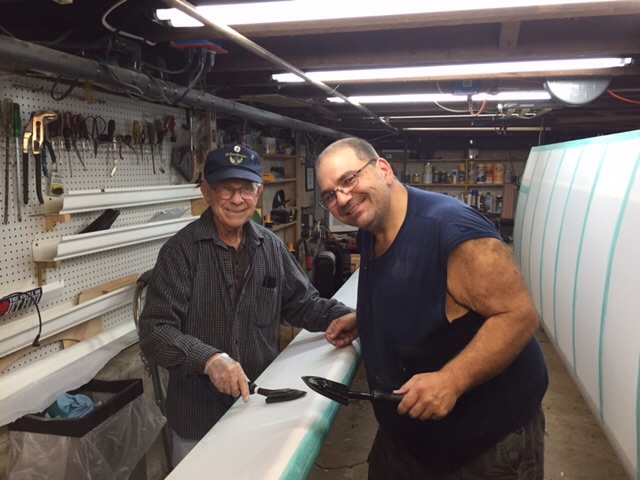
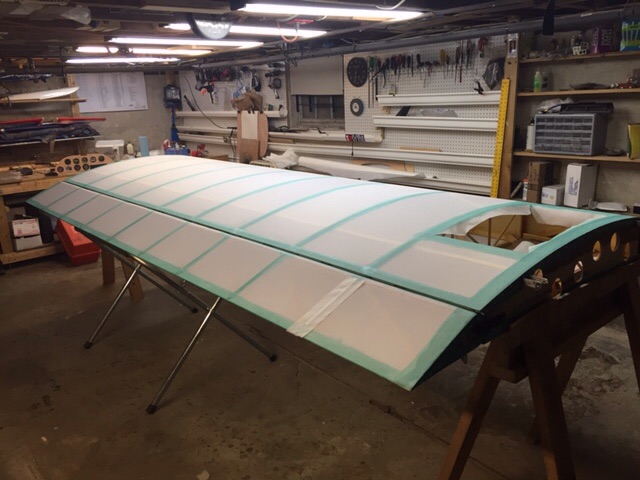
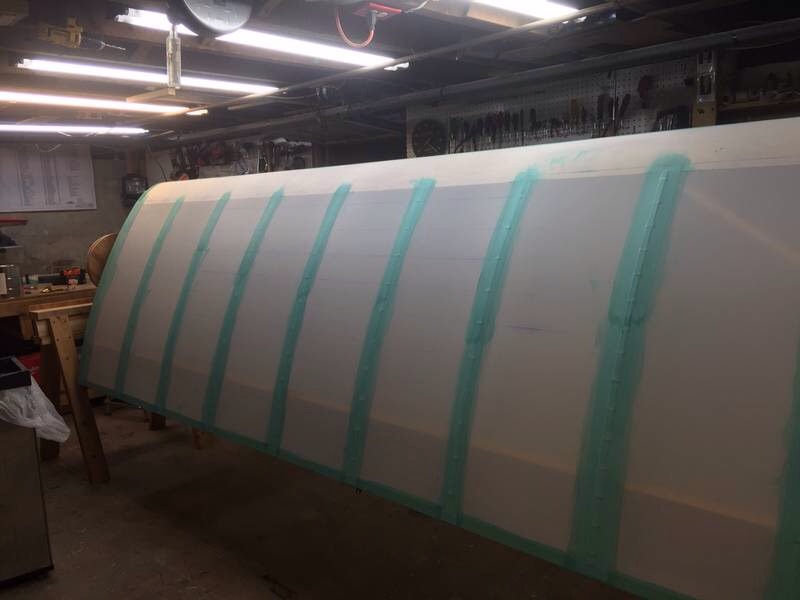
While I fly off my 5 solo hours ( cannot believe I am flying SOLO!!!!) it time to cover first wing. I am using stewards system to attach covering. The irons are coverite 21st century brand and I am using a laser thermometer to verify temps on the irons. The irons are nice and the temps are very accurate! With instructions in hand and after watching all the stewards videos. I without shame, invited a couple buddies over for "lunch"! I then trapped them in the basement. With the knowledge they will not get food until completed my prisoners and I began!
First the spar varnish is sanded with 320 sandpaper. Cleaned up with tack cloth and compressed air. The first piece cut to size. We then painted the glue onto wing ribs, perimeter and a 4 inch strip on LE. We let it dry until light a light tack. (About 10 minutes) Perimeter stretched and secured with iron at 275. We the fully secured covering by painting glue over perimeter and wiping off immediately for a clean finish! Take care to work glue into weave! (Paint about a 18-24 inches work glue into fabric and wipe clean! Once the dries to a light tack we then shrunk fabric at 250, then 275 and a final shrink at 300.
Once final shrink was completed we then secured fabric to ribs with iron then secured by painting and wiping clean technique! Flipped wing and repeated on top. Remember to wrap TE material under and secure. I did a 3 inch overlap on LE then a 4 inch pinked reinforcement piece securing the front seam! On TE I sliced "tail " material around rib area when working under
|
|
 |
|
| V-max. Finished. Now in phase one flight |
|
|
|
|
|
| bigbrixx1 |
| October 30, 2015, 12:00pm |
|
Ace
Posts: 822
Time Online: 20 days 16 hours
|
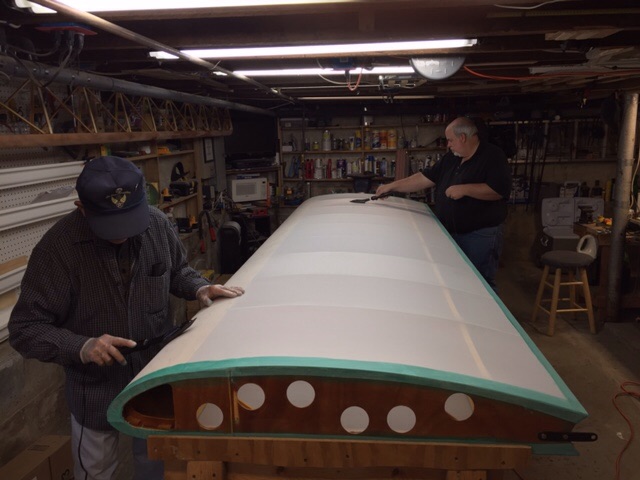
Wing bottom
|
| V-max. Finished. Now in phase one flight |
|
|
|
|
|
| bigbrixx1 |
| October 30, 2015, 12:12pm |
|
Ace
Posts: 822
Time Online: 20 days 16 hours
|
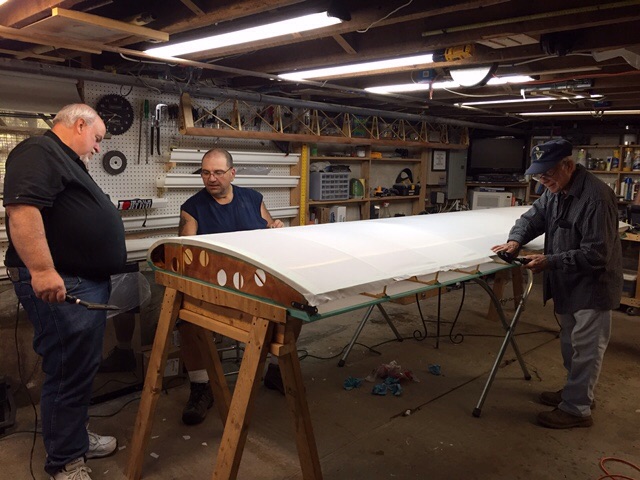
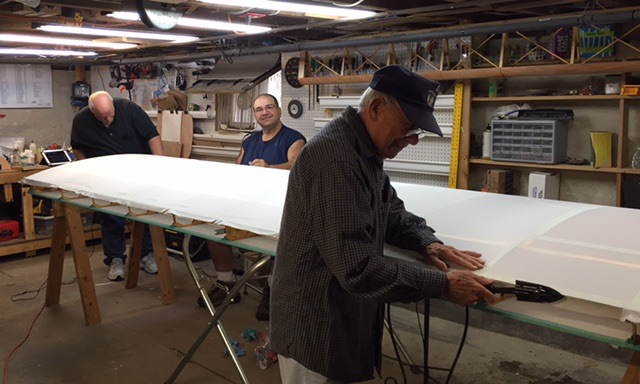
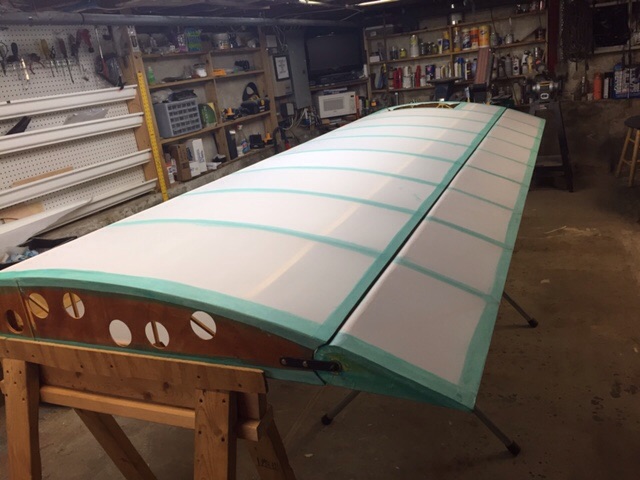
Wing top. Basically flip the wing and do the same as bottom. 3 inch overlap front edge with 4 inch pinked tape over front seam . Aileron done in one piece with 3 inch overlap and 3 inch pinked edge over front seam the whole process for wing and aileron took 6 hours
|
| V-max. Finished. Now in phase one flight |
|
|
|
|
|
| bigbrixx1 |
| October 30, 2015, 12:18pm |
|
Ace
Posts: 822
Time Online: 20 days 16 hours
|
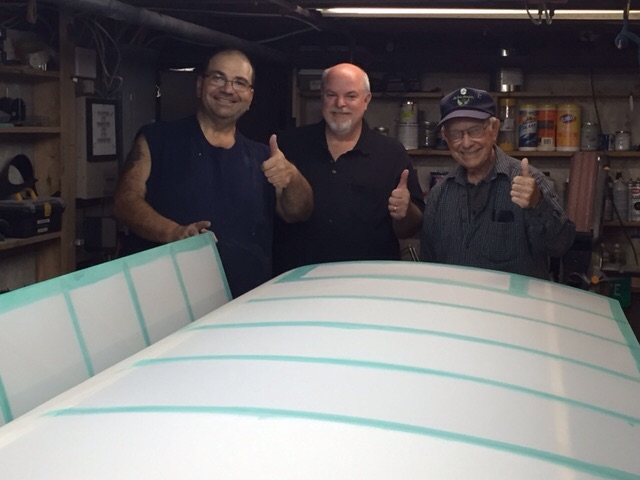
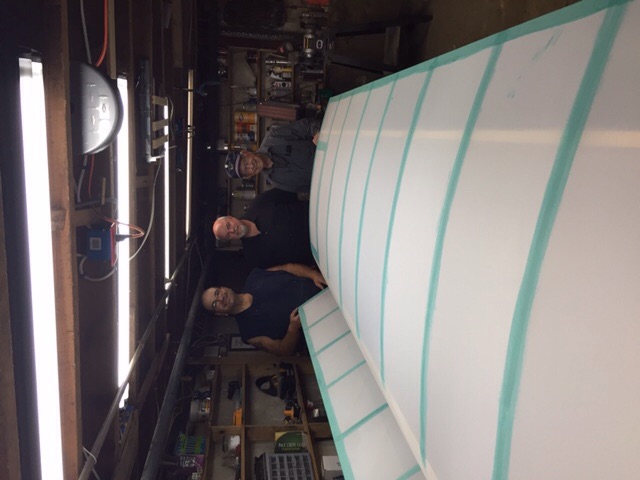
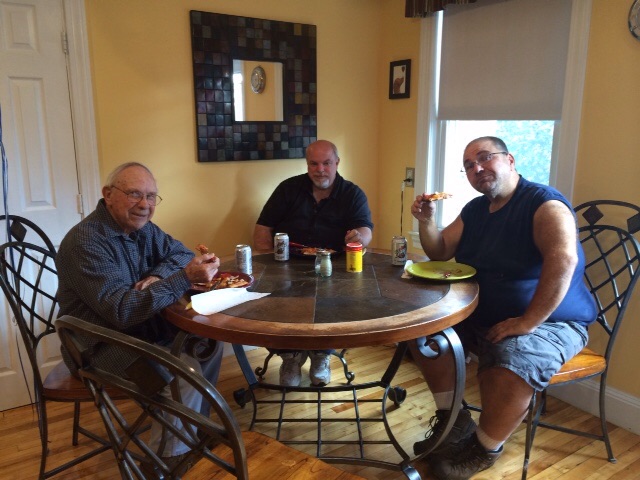
The " motley" crew displays their final work. Look we even lined up in order by height!
|
| V-max. Finished. Now in phase one flight |
|
|
|
|
|
| bigbrixx1 |
| October 30, 2015, 12:24pm |
|
Ace
Posts: 822
Time Online: 20 days 16 hours
|
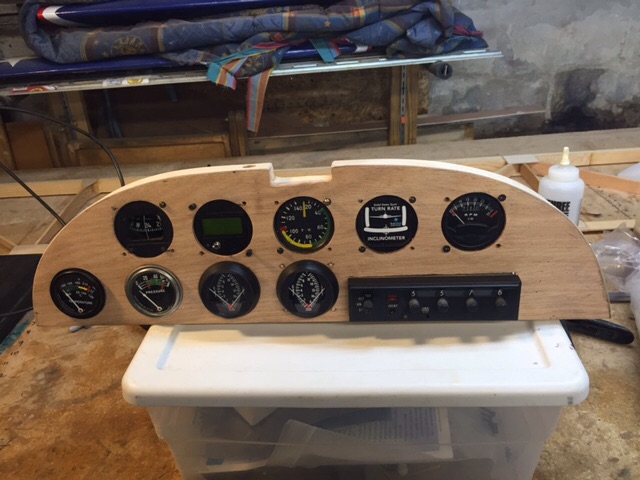
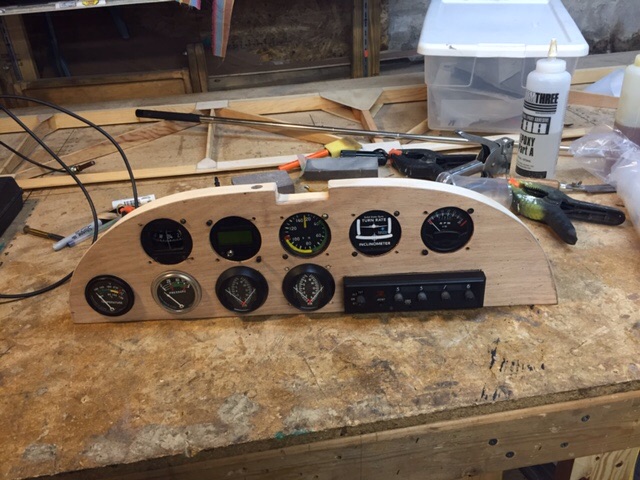
Finally their well earned reward! My famous.... In my mind😊😉 homemade pizza! Here is a sneak preview of instrument panel. More details to come!
|
| V-max. Finished. Now in phase one flight |
|
|
|
|
|
| Dick Rake |
| October 30, 2015, 12:32pm |
|
 Home phone 602-999-3715/Mini-max with Hirth 2704 AcePosts: 755
Time Online: 40 days 13 hours 26 minutes
|
There's something about wood and fabric that just floats my boat! Looking good Brian! |
|
|
|
|
|
| texasbuzzard |
| October 30, 2015, 12:33pm |
|
 airbike Buzzard AcePosts: 1,238
Time Online: 8 days 23 hours 51 minutes
|
Great covering job and a good looking motly crew. I see you at the other end of the crew soon.
monte |
|
|
|
|
|
| beragoobruce |
| October 30, 2015, 12:35pm |
|
Built an Eros - now I'm flying it! AcePosts: 1,067
Time Online: 19 days 10 hours 58 minutes
|
Wow! Well done Brian.
Bruce |
|
|
|
|
|
| aeronut |
| October 30, 2015, 10:02pm |
|
 blue sky and tail winds to everyone AcePosts: 1,560
Time Online: 28 days 22 hours 31 minutes
|
That shrinking fabric thing was the most fun of building my Max. Looks like a great job. Keep having fun with your build cause spring is just a few months away. |
| never surrender; never give-up |
|
|
|
|
|
| bigbrixx1 |
|
Ace
Posts: 822
Time Online: 20 days 16 hours
|
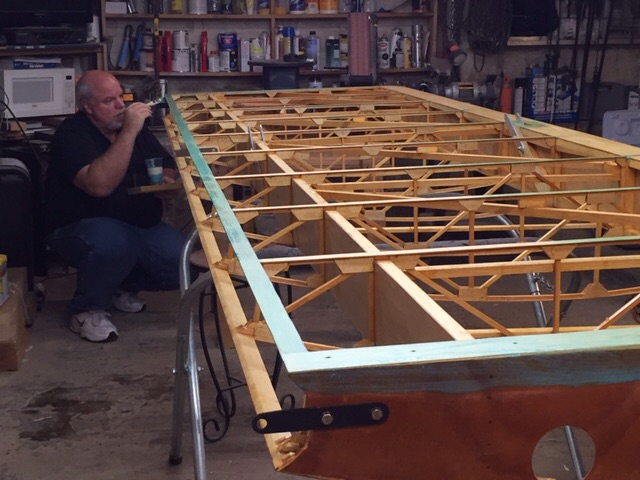
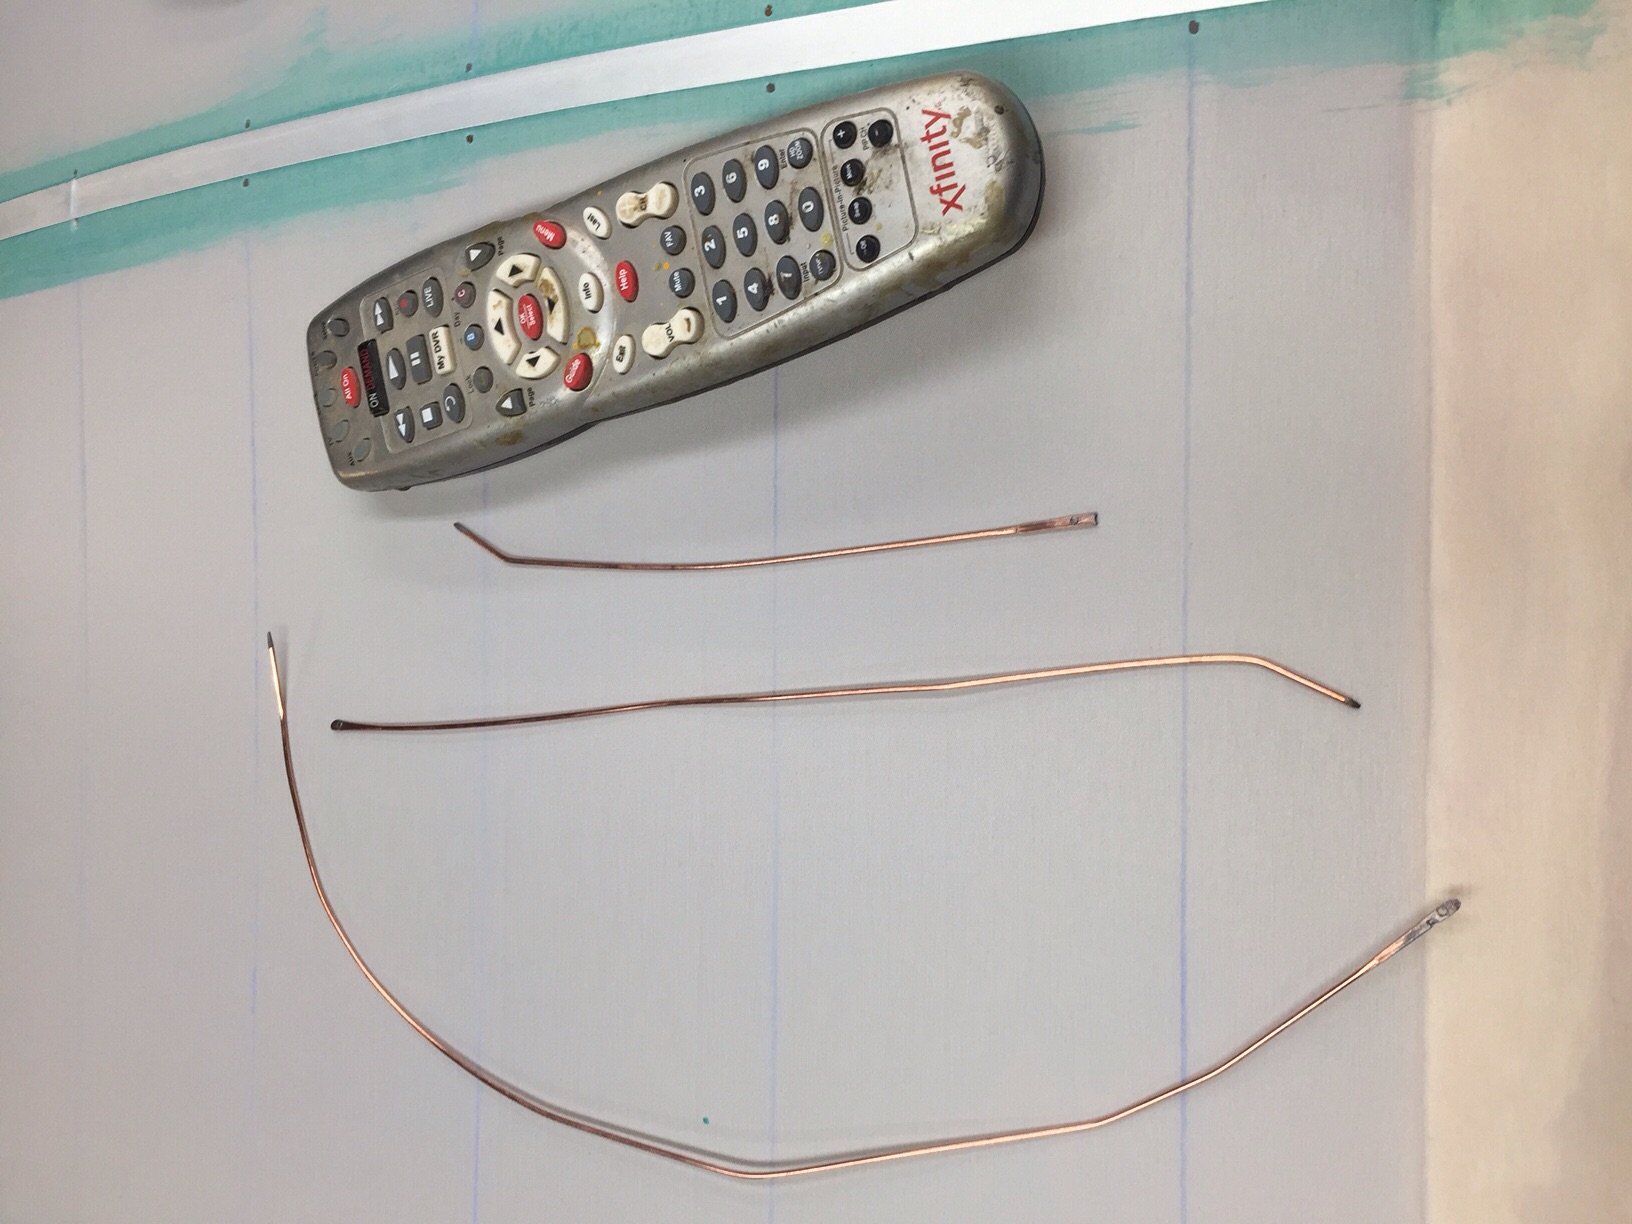
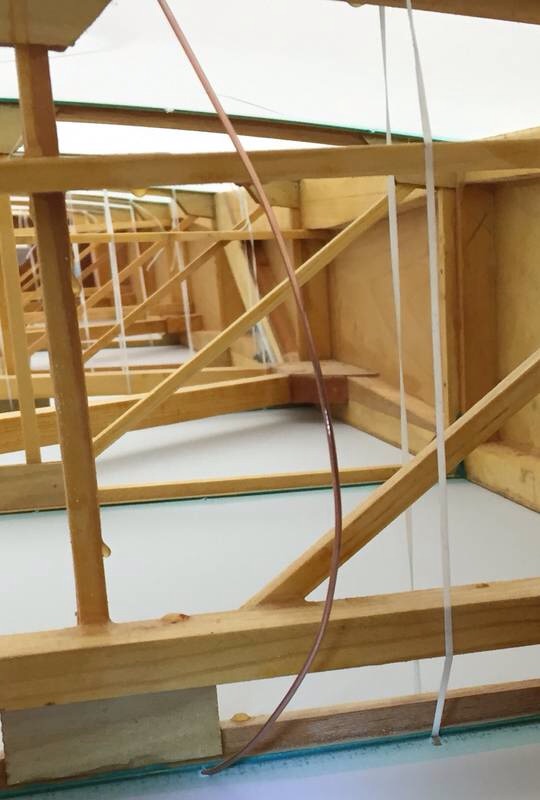
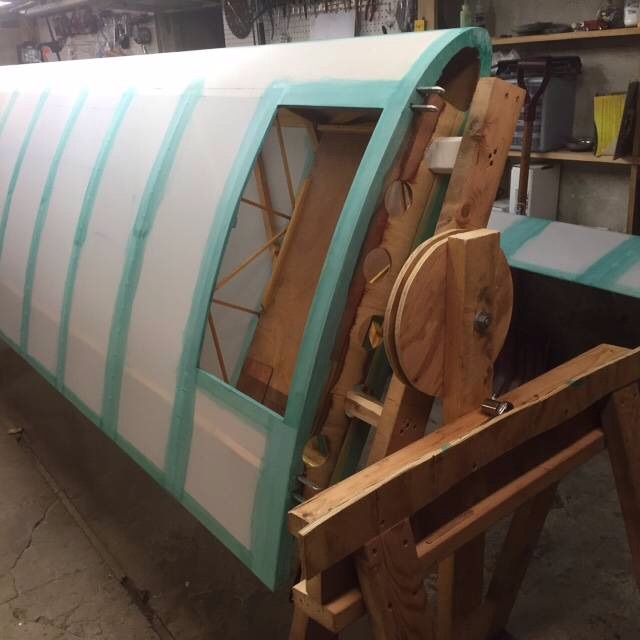
Thanks guys! It is very satisfying time! Now the rib stitching. I made my own needles using 1/16 mild steel welding rod. Works well. I made about 6 different types. Hammer one end flat and drill the hole for thread. I used a long carved needle and was able to get around the compression struts easily. Then a few speciality ones in some areas to clear braces ect. It took about one hour a rib for ribs with compression braces and about 45 minutes a rib on the others. The Modified seine knot drove me crazy! I went with the "beach staggering knot" much nicer! I used 1/2 inch reinforcement tape over the rib caps. "Remember I capped my ribs with plywood, 1/2 inch. . Once stitched, I then glued 2 inch pinked tape over stitching with 3 1/2 inch spacing. The ribs in prop blast received 3 inch pinked tape with 2 1/2 inch spacing on stitches. Same treatment on aileron! |
| V-max. Finished. Now in phase one flight |
|
|
|
|
|
| bigbrixx1 |
|
Ace
Posts: 822
Time Online: 20 days 16 hours
|
Needles
|
| V-max. Finished. Now in phase one flight |
|
|
|
|
|
| bigbrixx1 |
|
Ace
Posts: 822
Time Online: 20 days 16 hours
|
More
|
| V-max. Finished. Now in phase one flight |
|
|
|
|
|
| bigbrixx1 |
| November 9, 2015, 10:49pm |
|
Ace
Posts: 822
Time Online: 20 days 16 hours
|
Curved needle around compression struts....
|
| V-max. Finished. Now in phase one flight |
|
|
|
|
|
| bigbrixx1 |
| November 9, 2015, 11:09pm |
|
Ace
Posts: 822
Time Online: 20 days 16 hours
|
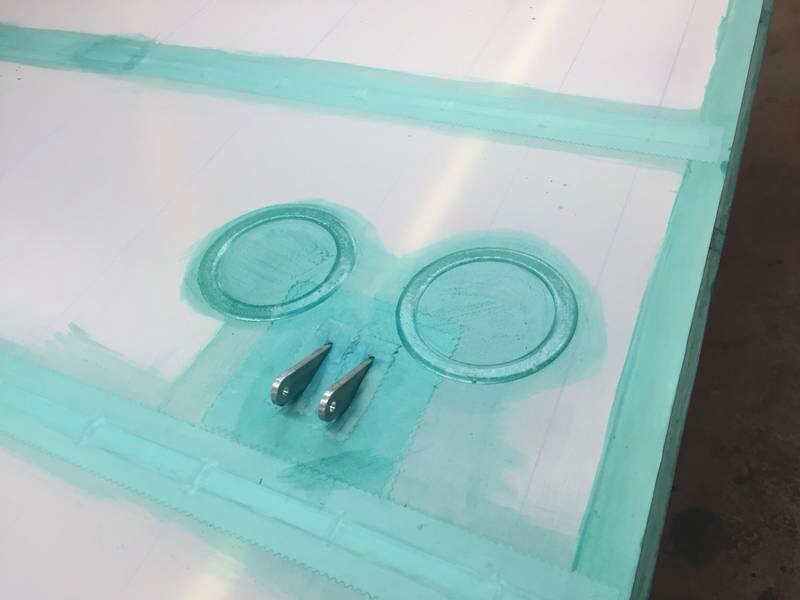
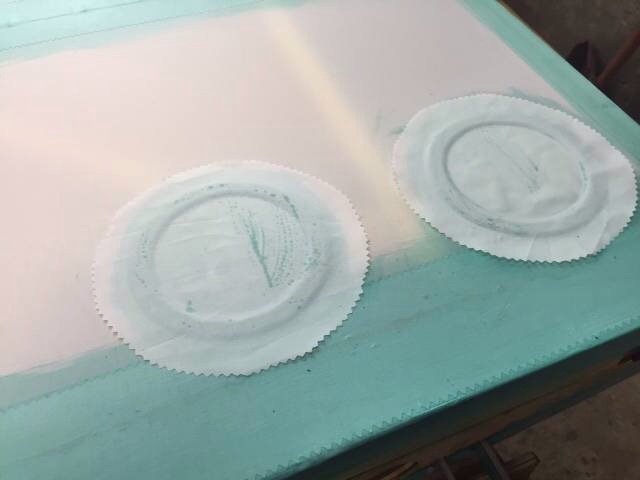
Inspection rings installed. The lines you see on fabric is where I "snapped" lines for stitching spacing . Sorry pics out of order..... First pics rings in place... Second pics. Rings and tape in place. Third pic "doilies" ready to iron in place. You can also see reinforcement patches at strut brackets
|
| V-max. Finished. Now in phase one flight |
|
|
|
|
|
| beragoobruce |
| November 10, 2015, 2:11am |
|
Built an Eros - now I'm flying it! AcePosts: 1,067
Time Online: 19 days 10 hours 58 minutes
|
That all looks great, Brian. What research/books/learning videos did you find that helped?
Keep going - you're pathfinding for me!!
Cheers
Bruce |
|
|
|
|
|
| Ricardo |
| November 10, 2015, 12:40pm |
|
Videos in UTube: ral1951 AcePosts: 2,772
Time Online: 75 days 23 hours 15 minutes
|
|
|
|
|
|
| texasbuzzard |
| November 10, 2015, 1:15pm |
|
airbike Buzzard AcePosts: 1,238
Time Online: 8 days 23 hours 51 minutes
|
Brian that looks great...can't wait to see the engine mounted.
monte |
|
|
|
|
|
| bigbrixx1 |
| November 10, 2015, 8:05pm |
|
Ace
Posts: 822
Time Online: 20 days 16 hours
|
That all looks great, Brian. What research/books/learning videos did you find that helped?
Keep going - you're pathfinding for me!!
Cheers
Bruce
I have been watching all the videos from the stewards system website! Very helpful. I was going to prime with the gallon of ecofill I have but its about 18 months old and it appears it is only good for a year. Apparently it is very sensitive to its experation date! According to them I should not use it! Oh well. I am going to prime and paint with household latex paint! The spacing on stitching I found in a chart for FAA acceptable practices. It helps a LOT to plan your spacing nd needle shape prior to covering! A 1/4 inch either way makes a big difference when trying to clear drag braces ect! Ricardo I see you rolled your paint on. How did that work for you? Texas buzzard ... Engine mounting very very soon! |
| V-max. Finished. Now in phase one flight |
|
|
|
|
|
| bigbrixx1 |
| November 12, 2015, 1:46pm |
|
Ace
Posts: 822
Time Online: 20 days 16 hours
|
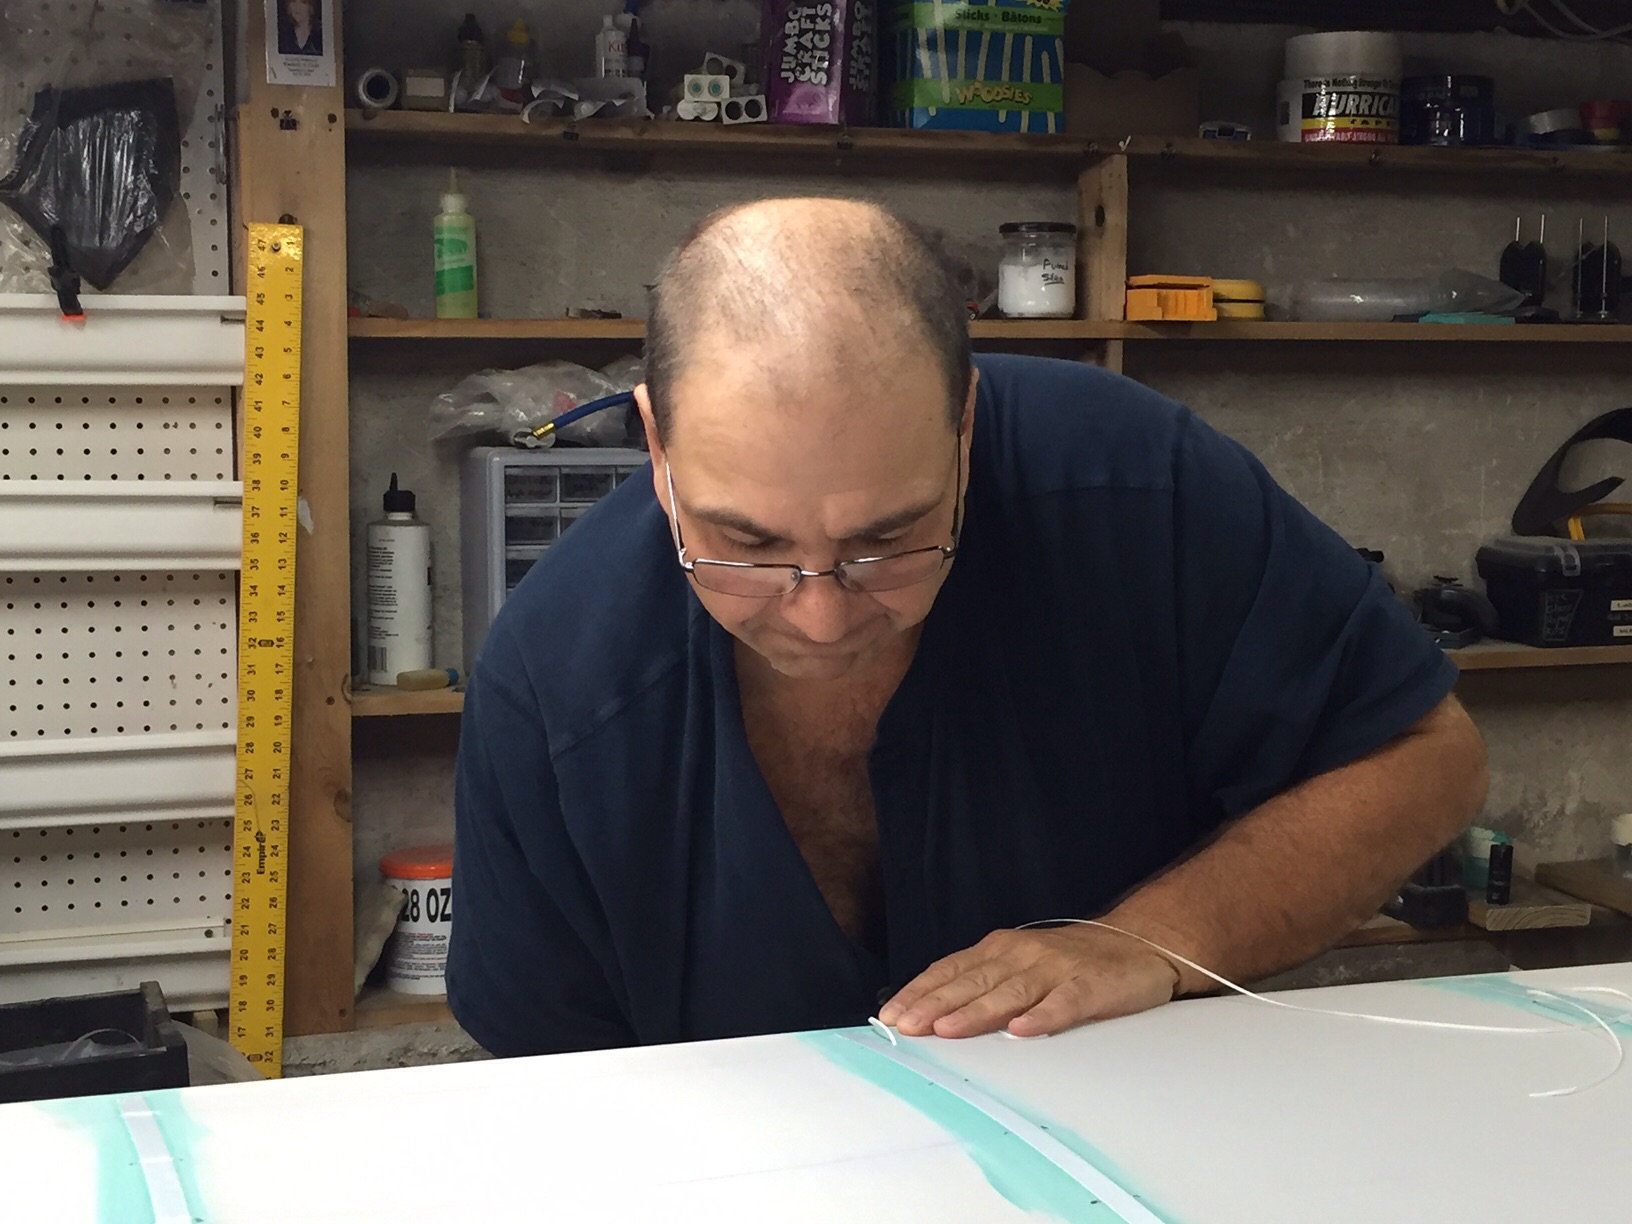
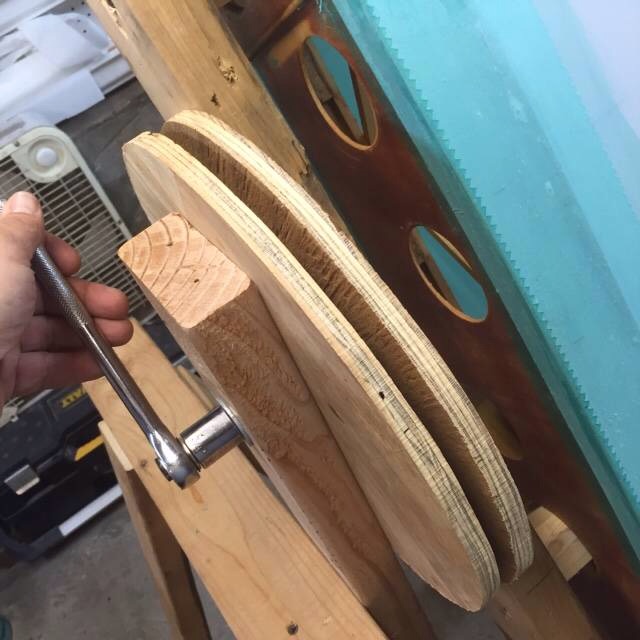
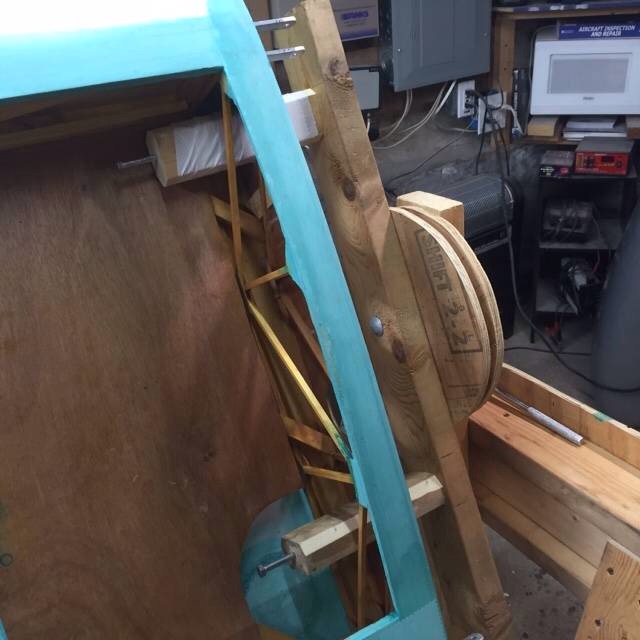
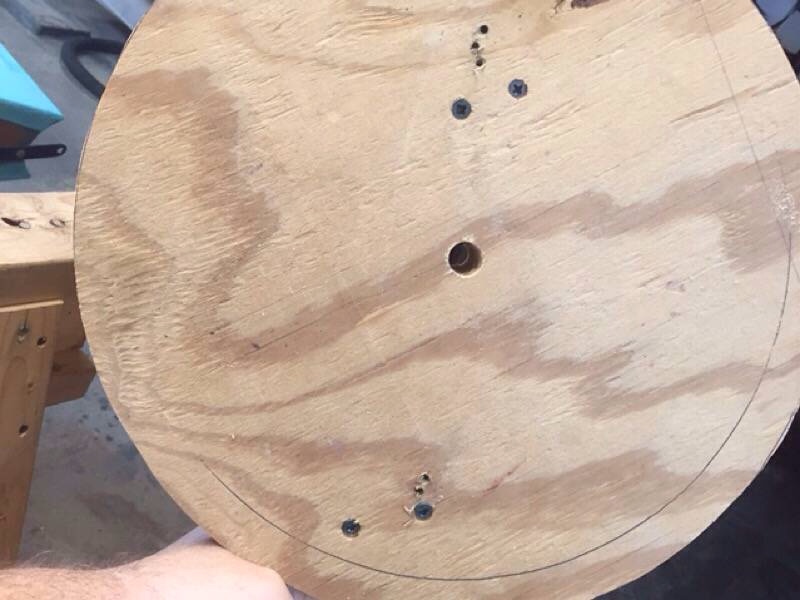
I felt a way to rotate the wings for painting and for rib stitching would be nice........after some thought I came up with this! Using left over plywood and 2x4 for wood. I also had two 1/2 inch bolts left over from a deck I built a few years ago! Works really nice. Loosen the bolts allows you to rotate wings easily! I can rotate wings 360 degrees......Tighten the bolts and wing stays put! Wish I has this when stitching this wing!
|
| V-max. Finished. Now in phase one flight |
|
|
|
|
|
| bigbrixx1 |
| November 12, 2015, 4:48pm |
|
Ace
Posts: 822
Time Online: 20 days 16 hours
|
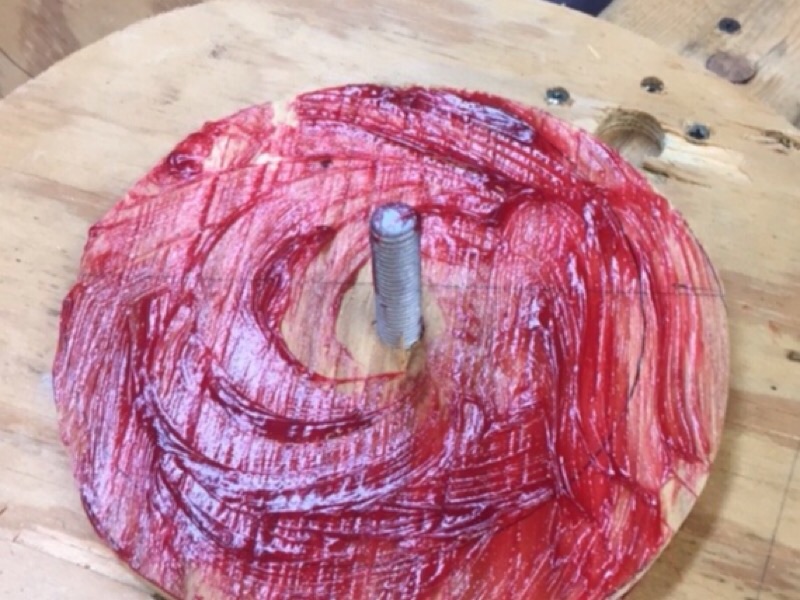
Pivot mechanism is basically 3 plywood disks. Two larger outer disks one slightly smaller inner disk. Outer disks screwed to 2x4,s. One 2x4 screwed to sawhorse. Other 2x4 has wing attachment method. I used 2x3 rounded off a bit that insert into holes I had in root and tip panels on wings. You may notice lag screws coming out of these 2x3 holders. These are safety "catches" . The inner disc was then greased with wheel bearing grease ( any grease will work, it's just what I had) I made this disk smaller so that grease would not contaminate project and to clear screws holding disks to 2x4's for smooth operation. The whole mechanism is bolted together with 1/2 x6 inch carriage bolts I had left over from a deck project. To pivot wing loosen bolts. To hold in place tighten. Works awesome! Cost was zero dollars and 90 minutes of work!
|
| V-max. Finished. Now in phase one flight |
|
|
|
|
|
| beragoobruce |
| November 12, 2015, 7:45pm |
|
Built an Eros - now I'm flying it! AcePosts: 1,067
Time Online: 19 days 10 hours 58 minutes
|
|
|
|
|
|
| Ricardo |
| November 12, 2015, 11:37pm |
|
Videos in UTube: ral1951 AcePosts: 2,772
Time Online: 75 days 23 hours 15 minutes
|
High Brian:
The rolling paint was very very simple, no bubbles or dripping at all. I used window cleaner to dilute the latex paint.
I will delete this post to keep your thread "clean"
|
|
|
|
|
|
| bigbrixx1 |
| November 13, 2015, 3:07am |
|
Ace
Posts: 822
Time Online: 20 days 16 hours
|
I do too Bruce IMHO it's one of my better ideas. Ricardo thank you for the information. I am going to attempt to roll the bottom of wing and spray the top and compare results. Please feel free to leave the post. The thread is here for information sharing. Thank you for the information!
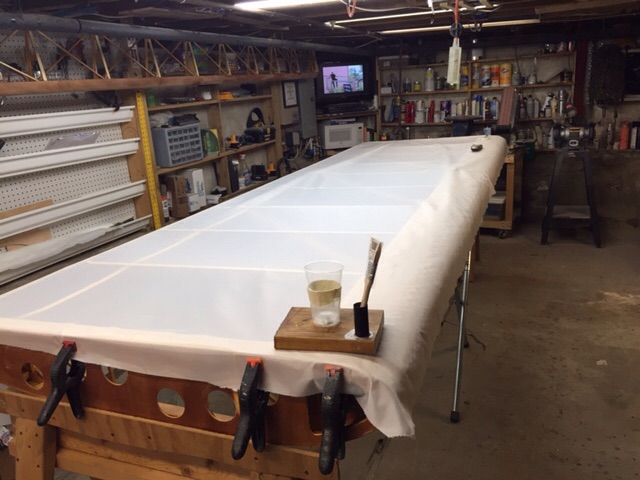
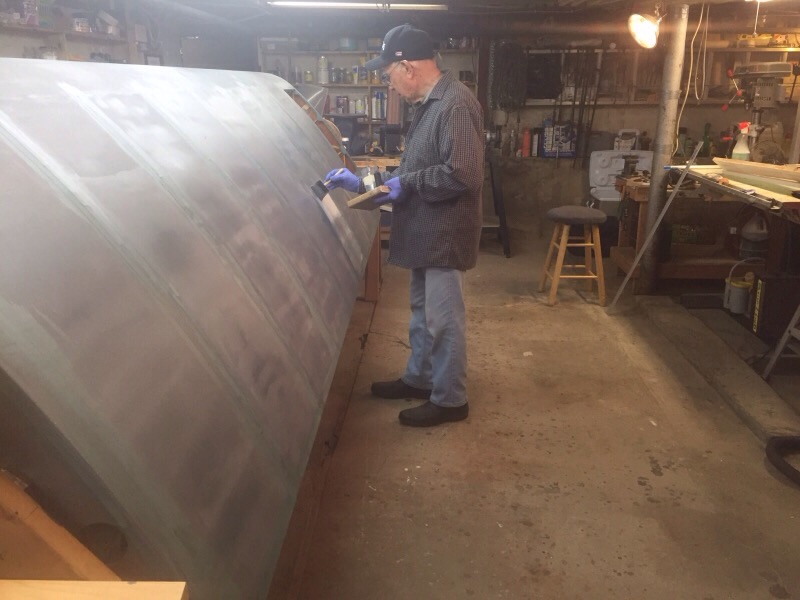
OK here is the wing rotation rack being used! My buddy Ralph made the foolish mistake of stopping by for coffee.... As usual I made him work for it! Also turns out my gallon of Ecofill is still good to use. One cross coat so far. It goes on well. The ability to rotate wing sure makes painting soooo much easier! This rack is also easily adaptable to the fuselage when the time comes!
|
| V-max. Finished. Now in phase one flight |
|
|
|
|
|
| Tom |
| November 13, 2015, 1:08pm |
|
Ace
Posts: 744
Time Online: 16 days 10 hours 21 minutes
|
You are doing such a good job I hesitate to even offer advice when I know the subject. However for what it's worth I would suggest thinking about one additional option to consider as well as spraying or rolling. This third option is "rolling and tipping". To be very brief this means using two people or one person in a slow drying situation. One person works their way along rolling on the paint in one direction using a very thin foam roller cover. A second person follows along at 90 degrees to the rolling with a brush NOT dipped in paint and smoothes out the paint to a very even thickness. As the paint cures it tends to tighten up and any remaining brush strokes disappear over a few days. This is the technique developed for and used in high end yacht work where the very finest work on complex objects is required. You can probably teach yourself this method with some practice panels. It does take practice to develop the "hands" for it. When you have it is pretty unbeatable. If anybody wants more information I can direct you to a good article in a book on yacht finishing.
Tom |
|
|
|
|
|
| bigbrixx1 |
| November 13, 2015, 2:31pm |
|
Ace
Posts: 822
Time Online: 20 days 16 hours
|
Thanks Tom, been watching a lot of videos on rolling and tipping since you posted that info. That may be what I am looking for. Time to try some practice panels to see what works! Sure would be nice to get a great finish without spraying! |
| V-max. Finished. Now in phase one flight |
|
|
|
|
|
| lake_harley |
| November 13, 2015, 3:02pm |
|
Ace
Posts: 1,095
Time Online: 25 days 7 hours 43 minutes
|
I did the roller/tipping method on my MiniMAX and also used latex thinned about 20-25% with windshield washer fluid. I'm pleased enough with the result, but certainly wouldn't compare it to a spray paint quality. Now, granted, I'm painfully lazy and generally interested in just getting finished than any show quality job. I justify it by saying function trumps glitz. Since I wasn't concerned about winning a Lindy award at Oshkosh, I used semi-gloss paint, figuring that a shiny surface draws attention to surface imperfections (My favorite "color" is flat black). The roller/tipping method can really end up nice if one takes the time to do some sanding between coats, followed by sanding down to very fine grit paper and buffing after the last coat. My MiniMAX will never be entered into judging and if the paint seals and protects the fabric I consider myself ready to move on. If there was ever a case where "Your Mileage May Vary" (YMMV).....this is it!  Carry on Brixx! Lynn |
|
|
|
|
|
| bigbrixx1 |
| November 13, 2015, 11:27pm |
|
Ace
Posts: 822
Time Online: 20 days 16 hours
|
All good info guys! I think I have to do some test Pieces to see what will meet the standards I am looking for. That BTW is "very good" not perfect. Updates to follow! Thanks for all the great advise guys! Keep it coming |
| V-max. Finished. Now in phase one flight |
|
|
|
|
|
| bigbrixx1 |
| November 24, 2015, 3:01pm |
|
Ace
Posts: 822
Time Online: 20 days 16 hours
|
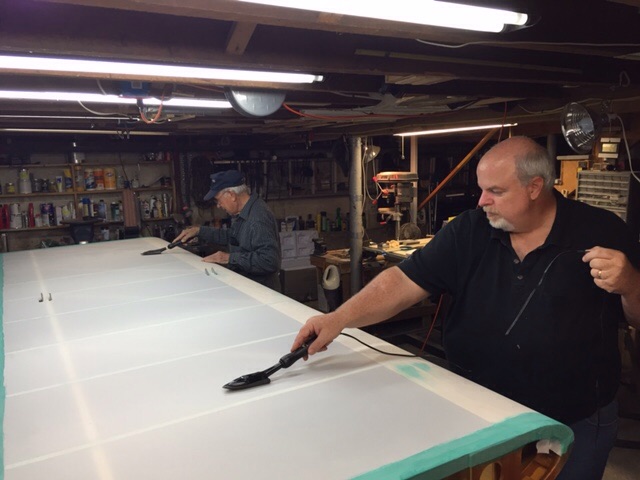
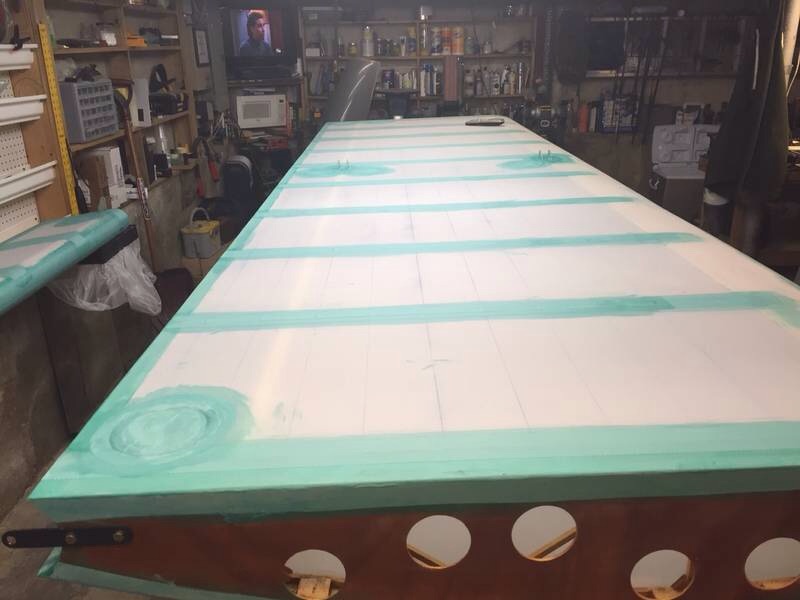
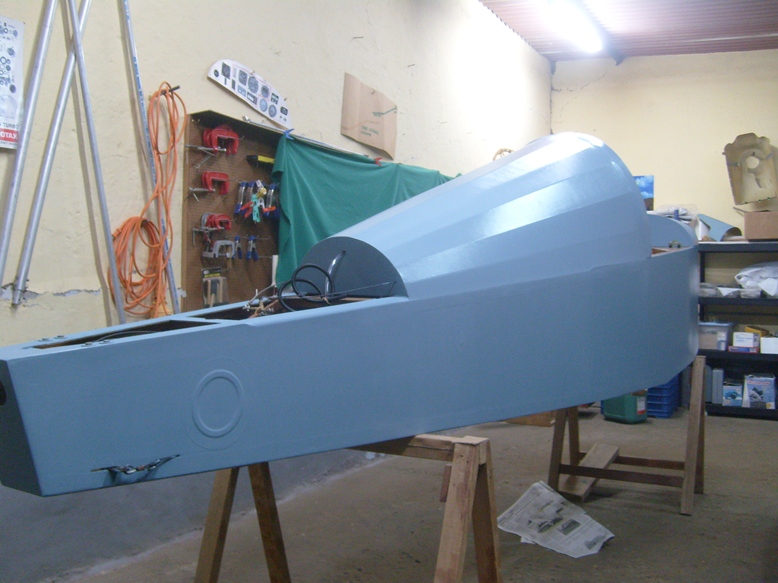
Ok I did some practice pieces and the results, not unexpectedly are........rolling latex paint.... Good results. Rolling followed by tipping...... Better. Spraying.... Best...as a matter of fact "pretty darn good" which is my standard! I had a buddy come over who has been painting his large scale aircraft with latex paint for years. He quickly took me thru the the process. Here are the results! The nice crisp line between colors was blue painters tape. Put a mist coat of primary color along tape line to prevent bleed thru then spray color! Works nice as you can see. We thinned Benjamin Moore semi gloss exterior paint thinned with distilled water. To consistency a bit thicker than milk. Not as thick as heavy cream. Spray 2 mist coats let dry to light tack. Followed by color "wet" coats. White needed 2 wet coats. Red needed only one. I choose a soft gloss which I felt was a better fit than high gloss on this style aircraft. I am very happy with that decision. And I am very pleased with results. In a week or so I can wet sand with 1000 grit then 1500 grit sandpaper and polish if I choose. To be honest the finish is very nice right now. I may omit that step until after its flying! I wanted to load more images but I am having a lot of trouble lately. I keep getting error messages. Hopefully someone is trying to fix this. Updates are taking me a loooooong time due to this. Weight is coming off slow but still on track. 2 pounds since last update.
|
|
 |
|
| V-max. Finished. Now in phase one flight |
|
|
|
|
|
|


 Logged