|
|
 bobnafe bobnafe |
|
Flight Leader  Posts: 173
Time Online: 17 days 7 hours 38 minutes
|
|
|
|
|
|
| bigbrixx1 |
|
 Ace Ace Posts: 822
Time Online: 20 days 16 hours
|
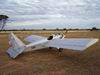
TY he did an awesome job. Wouldn't take any cash. It was done for the cost of material and pizza!!! |
| V-max. Finished. Now in phase one flight |
|
|
|
|
|
| edwinkania |
|
Flight Leader Posts: 140
Time Online: 1 days 15 hours 51 minutes
|
|
|
|
|
|
| bigbrixx1 |
|
Ace
Posts: 822
Time Online: 20 days 16 hours
|
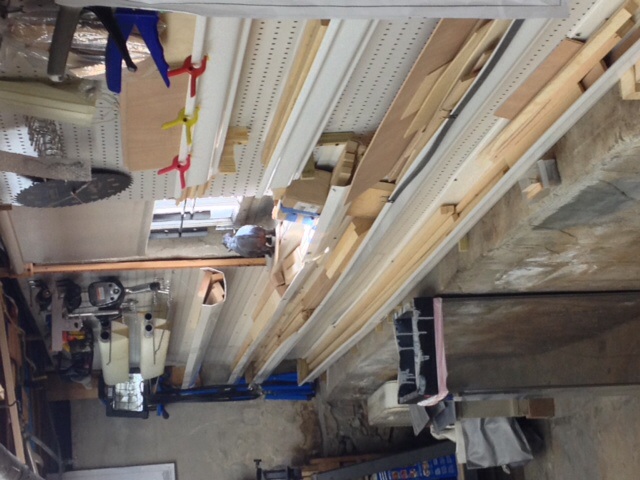
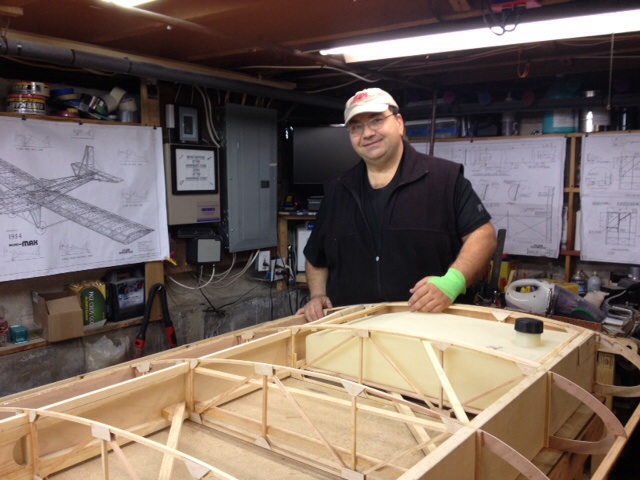
Ok moving forward. Gluing up the tank area. Looks like the plans really are for TEAMS older 5 gallon wing tanks. So some slight modifications are in order. But no big deal. Got a great hint from Dave at Minimax. Fill up the tank with fuel and let sit a couple days. It will swell to its "working" size! Don't forget to empty it.... Lol. Also I posted a pic of inexpensive storage idea for all those long pieces of wood. plastic gutters . Perfect and inexpensive!
|
| V-max. Finished. Now in phase one flight |
|
|
|
|
|
| bigbrixx1 |
|
Ace
Posts: 822
Time Online: 20 days 16 hours
|
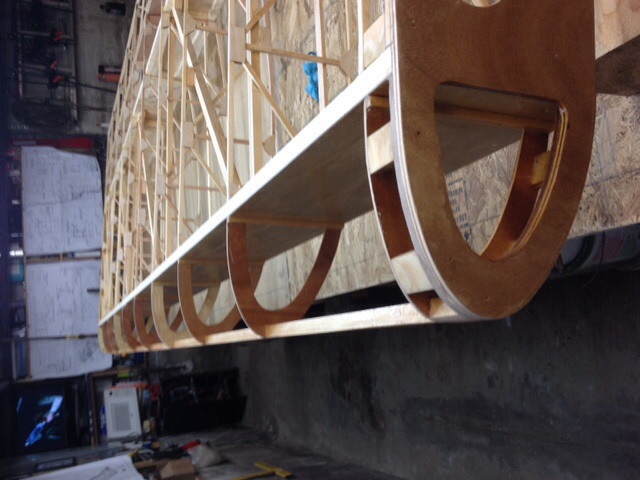
Since I am using the TEAM drooped wingtips. I was told to just screw them on with wood screws into the 1.5 mm plywood . I decided to add reinforcements to the last two ribs. I found spacing of 5 inches works great. I will be adding one more D rib to Mach the second rib so I can add reinforcements there also. I will then secure wingtips with blind nuts and machine screws. Also glued up a few more reinforcements to tank area and glued on root plywood.
|
| V-max. Finished. Now in phase one flight |
|
|
|
|
|
| edwinkania |
|
Flight Leader Posts: 140
Time Online: 1 days 15 hours 51 minutes
|
Brixx,
You are making me Jealous, Bro!!! I cant wait till I can get back home and start on my MAX.
Ed |
|
|
|
|
|
| bigbrixx1 |
|
Ace
Posts: 822
Time Online: 20 days 16 hours
|
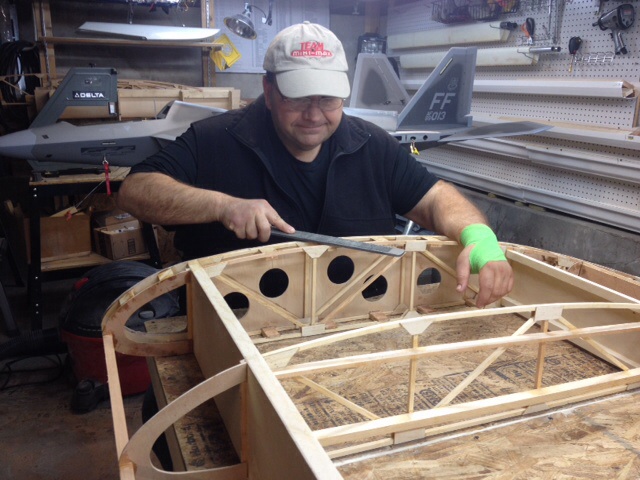
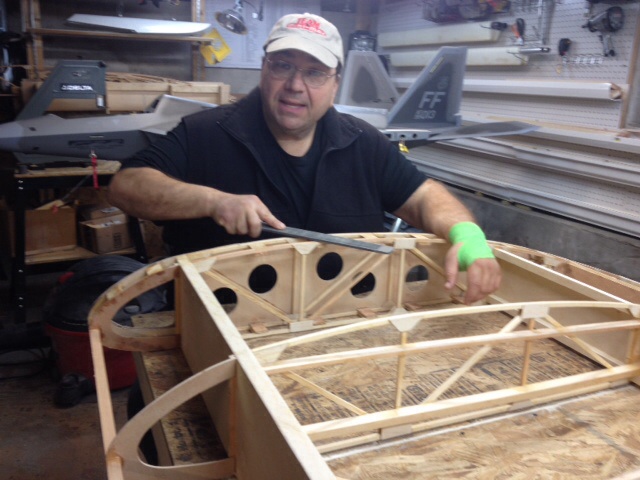
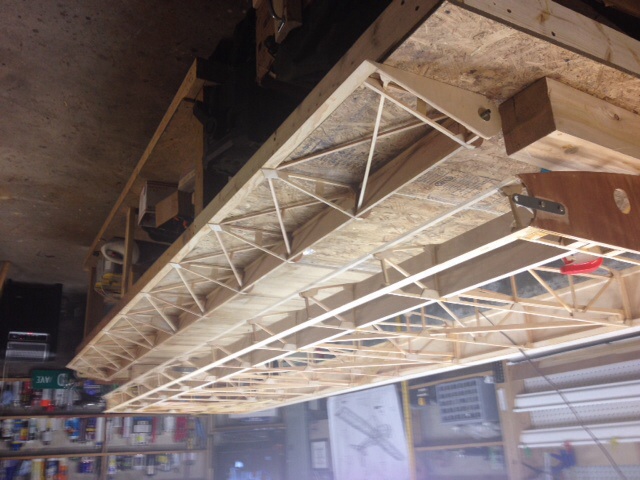
Wing upside down. Extra nose rib in place. Reinforcements for wing tips glued in and drying. Once dry I plan on varnishing the front spar forward in preperation for the leading edge plywood! Now that spring has arrived progress will slow.Also Just had carpal tunnell surgery do down to one good mitt for a couple weeks!
|
| V-max. Finished. Now in phase one flight |
|
|
|
|
|
| bigbrixx1 |
|
Ace
Posts: 822
Time Online: 20 days 16 hours
|
Thanks for the kind words Ed. Can't wait for you to start yours this has been very rewarding! |
| V-max. Finished. Now in phase one flight |
|
|
|
|
|
| aeronut |
|
 blue sky and tail winds to everyone AcePosts: 1,560
Time Online: 28 days 22 hours 31 minutes
|
Nice build, keep up the good work and I hope you heal quickly from your surgery. |
| never surrender; never give-up |
|
|
|
|
|
| edwinkania |
|
Flight Leader Posts: 140
Time Online: 1 days 15 hours 51 minutes
|
Brixx,
Hope you feel better, I actually need the same operation this summer. I feel for you, I know how carpal tunnel feels. Not fun dropping things all of the time and not feeling what you touch. Get well soon Brother!!!
ED~ |
|
|
|
|
|
| Jack Coleman |
|
 Flight Leader Posts: 158
Time Online: 2 days 18 hours 39 minutes
|
Brian, when you feel up to it give me a call or let me know when you feel up to it and I'll call you. I have the same problem in my ankles. Didn't know what it was until I got back from the pediatrist. I Didn't know you could get it in the ankles also. Isn't getting old fun..lol |
|
|
|
|
|
| bigbrixx1 |
|
Ace
Posts: 822
Time Online: 20 days 16 hours
|
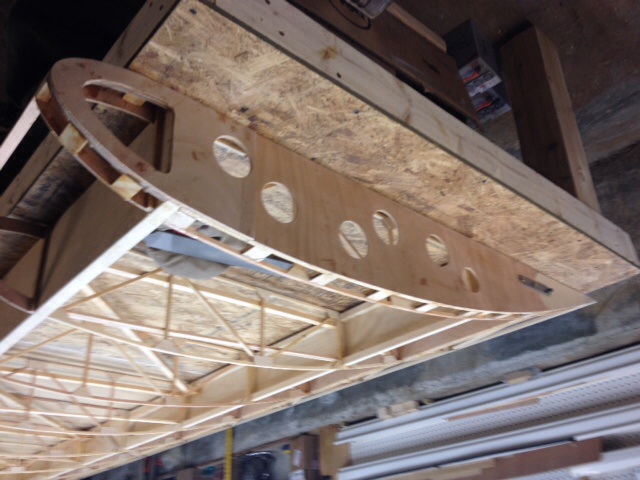
Hey jack. Call anytime. Feeling pretty good. And home for a few weeks. It does suck getting old. My right hand is being done this upcoming Friday. I snuck downstairs to to a bit of work on wing with my good hand. But wife came home and caught me. Lol.... Was able to sand wingtip area. And fuel tank area complete. I drilled holes into plywood on tip and root ribs. There is some weight savings. But really wanted the holes there for inspections down the road!
|
| V-max. Finished. Now in phase one flight |
|
|
|
|
|
| bigbrixx1 |
|
Ace
Posts: 822
Time Online: 20 days 16 hours
|
Wing tank area. I also took a straight edge on leading edge D sections and ground down high spots. Tomorrow I varnish with my good mitt. Then prepare to put on leading edge plywood. Thanks for all the encouragement guys!
|
| V-max. Finished. Now in phase one flight |
|
|
|
|
|
| edwinkania |
|
Flight Leader Posts: 140
Time Online: 1 days 15 hours 51 minutes
|
Brixx,
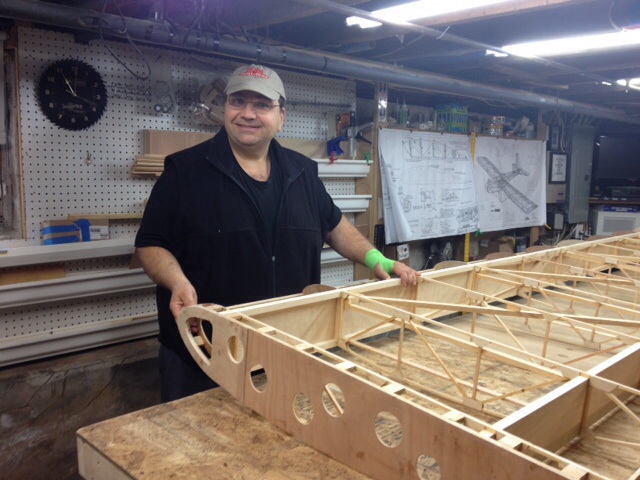
I am sooooo jealous! I envy your progress and love the F-22 behind you..... I cannot wait till I get home and fly some RC and Real planes and get back to work on my MAX!!!!
ED~ |
|
|
|
|
|
| bigbrixx1 |
|
Ace
Posts: 822
Time Online: 20 days 16 hours
|
Thanks Ed. That's a yellow aircraft F 22. Turbine powered. Clocked at speeds nearly 3 time the cruise speed of my soon to be V-max...Must be killing you not able to build your Max |
| V-max. Finished. Now in phase one flight |
|
|
|
|
|
| Arthur Withy |
|
 Happy 1500R owner - building a Jodel D18 AcePosts: 2,532
Time Online: 32 days 12 hours 14 minutes
|
Hey some of the most excitement Ive had in aviation was racing fast RC planes....but a Minimax is just pure pleasure...and a true fun and adventure machine..
my 2 cents....
great Model too....and the Minimax is cheaper...
regards Arthur |
|
|
|
|
|
| bigbrixx1 |
|
Ace
Posts: 822
Time Online: 20 days 16 hours
|
Lol I think your right about cost.. The Max may be cheaper. But the R/C heats are a blast! I really am excited about Max also!
I was able to put 2 coats of varnish on main spar forward. Also on LE plywood. I let them dry 24 hours then put on first piece of LE plywood today! I was careful when varnishing not to get any on the areas to be glued.
|
| V-max. Finished. Now in phase one flight |
|
|
|
|
|
| lake_harley |
|
Ace
Posts: 1,095
Time Online: 25 days 7 hours 43 minutes
|
Looking good! Did you get the LE skin on by yourself, or did you have a helper? I had a helper when I did mine, and still thought it was a pain! I'd better get busy or you'll be flying before me....and I had several month's head start  Keep up the good work and BTW you're looking more lean and mean as time goes on! Good for you! Lynn |
|
|
|
|
|
| bigbrixx1 |
|
Ace
Posts: 822
Time Online: 20 days 16 hours
|
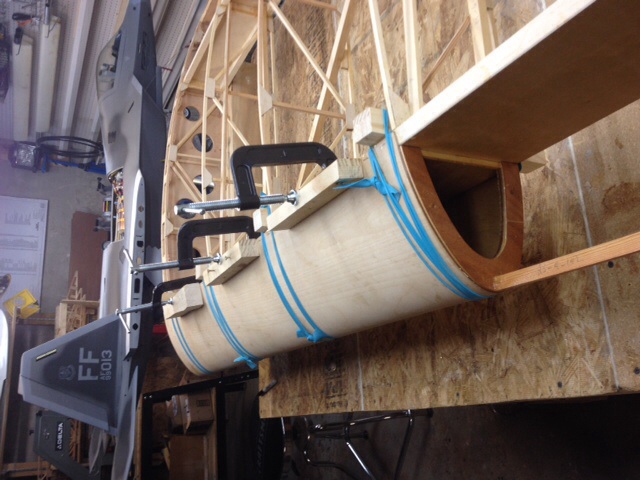
I needed help. Mainly because of my left hand surgery. It wasn't too bad. I preformed the plywood by soaking in a tub for an hour. Then let them dry in a jig. Then when varnished I held the shape with elastic bands... AKA tourniquets  . Then painted on epoxy on both the plywood and wing. Then slid it on. Add clamps elastic bends and some staples!!!! Holy cow... I guess it was a lot of work! Lol |
| V-max. Finished. Now in phase one flight |
|
|
|
|
|
| bigbrixx1 |
|
Ace
Posts: 822
Time Online: 20 days 16 hours
|
Also TY on noticing the weigh loss. I was stalled for a couple weeks. But back on target. add 1.5 more to the loss side . Now 33 pounds gone. 68 to go! The Max is a great motivator. Hate to have a completed plane and not fit in her |
| V-max. Finished. Now in phase one flight |
|
|
|
|
|
| bigbrixx1 |
|
Ace
Posts: 822
Time Online: 20 days 16 hours
|
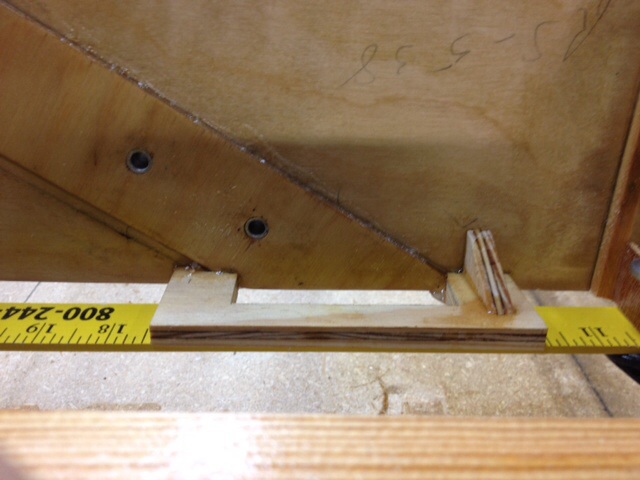
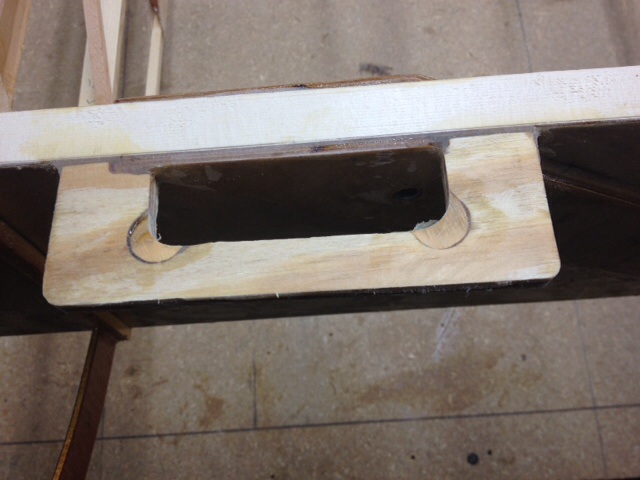
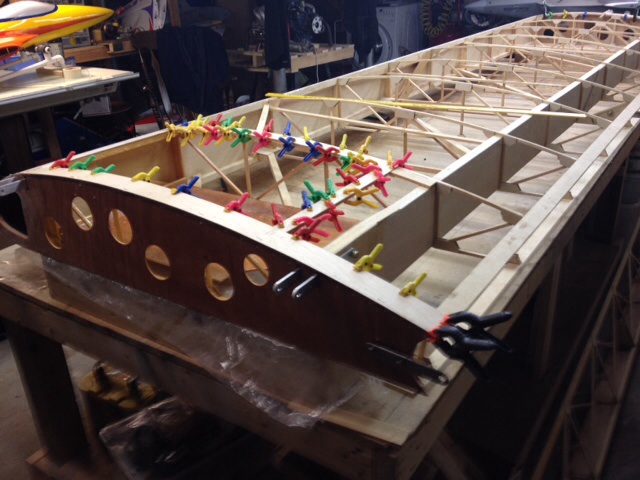
I wanted an inspection port for the forward strut attachment bracket. This is what i came up with. I added a piece of 3/8 plywood to bottom of spar. I milled a lip on the inside opening so I can make a hatch out of 1/8 material and screw either plywood or maybe a piece of lexan as an inspection hatch. I would hold it on with a few screws. When I roll the plywood LE I will glue the plywood bracket right to the LE plywood.
|
| V-max. Finished. Now in phase one flight |
|
|
|
|
|
| bigbrixx1 |
|
Ace
Posts: 822
Time Online: 20 days 16 hours
|
Question....On the blocks of plywood I installed for inspection ports I didn't radius the corners . Should I? Is wood susceptible to the same fatigue cracks as metal? If is I will drill out the corners put in dowels and radius them. |
| V-max. Finished. Now in phase one flight |
|
|
|
|
|
| beragoobruce |
|
Built an Eros - now I'm flying it! AcePosts: 1,067
Time Online: 19 days 10 hours 58 minutes
|
The structure you are adding is non load bearing: it's not doing anything, so even if it cracked it wouldn't matter. But wood is much more tolerant of sharp corners than metal.
So either way, present part is fine for its job.
Bruce |
|
|
|
|
|
| bigbrixx1 |
|
Ace
Posts: 822
Time Online: 20 days 16 hours
|
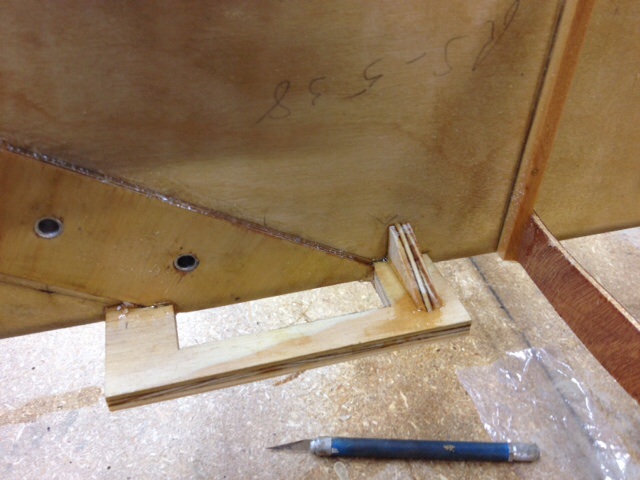
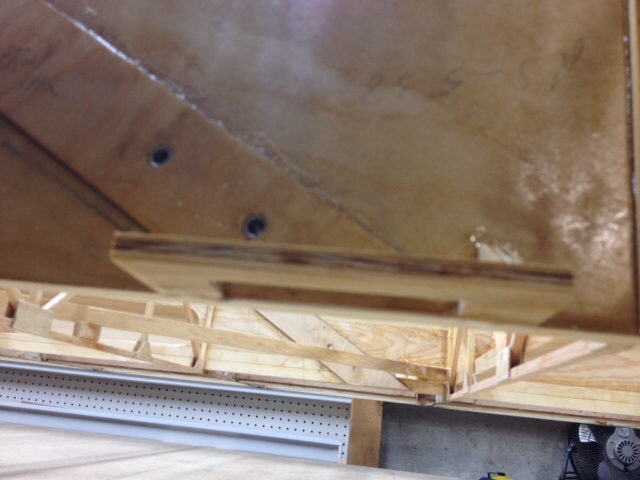
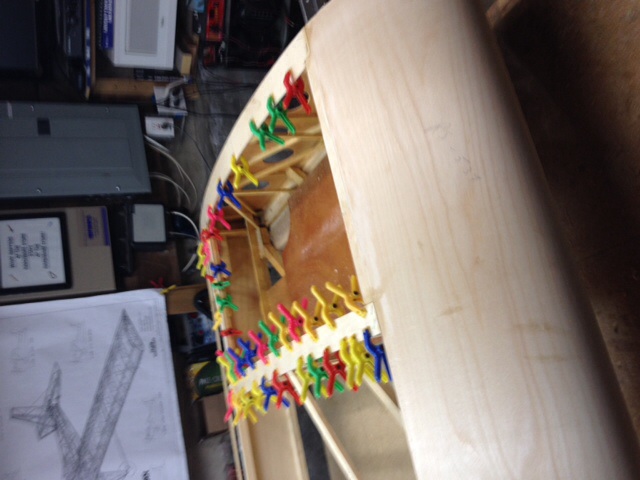
Decided to get rid of sharp corner on block. Ground out corners and replaced with plywood as seen in photos. Sheeted middle section of wing. Added a small 1/64 ply shelf over wing carry thru bracket in front of front spar. So that when I sheet that section I won't get "squeeze out" epoxy all over bracket. Put the wife to work taday. Since both hands have had carpal tunnell surgery I cannot stretch the bands properly. Today I acted as the boss lol overseeing the project! she is a trooper. She got epoxy all over her shirt!
|
| V-max. Finished. Now in phase one flight |
|
|
|
|
|
| bigbrixx1 |
|
Ace
Posts: 822
Time Online: 20 days 16 hours
|
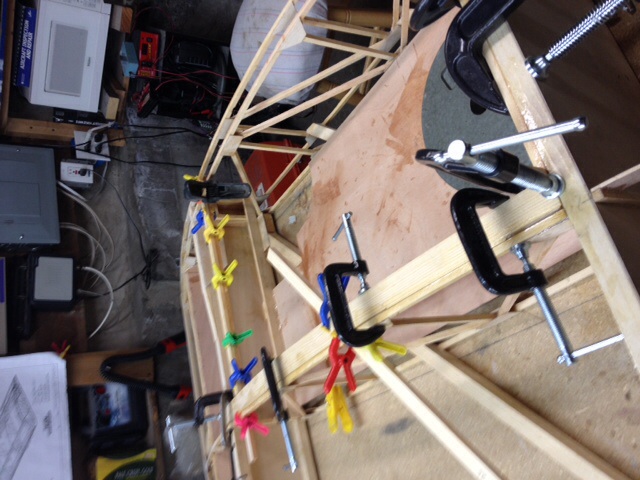
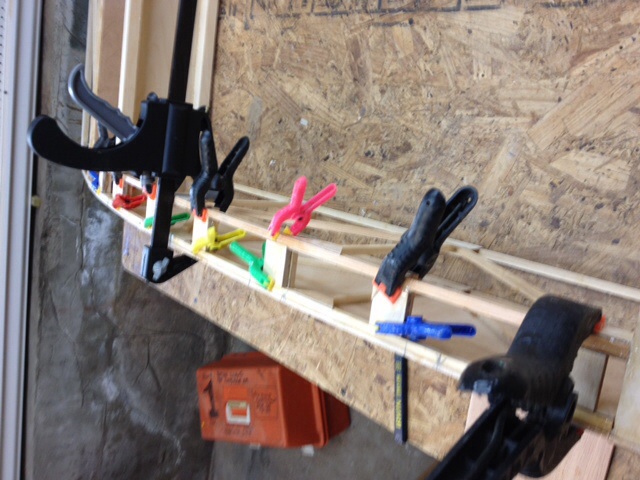
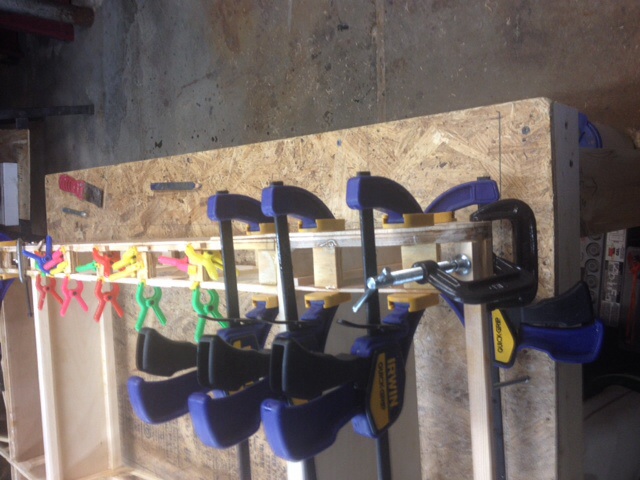
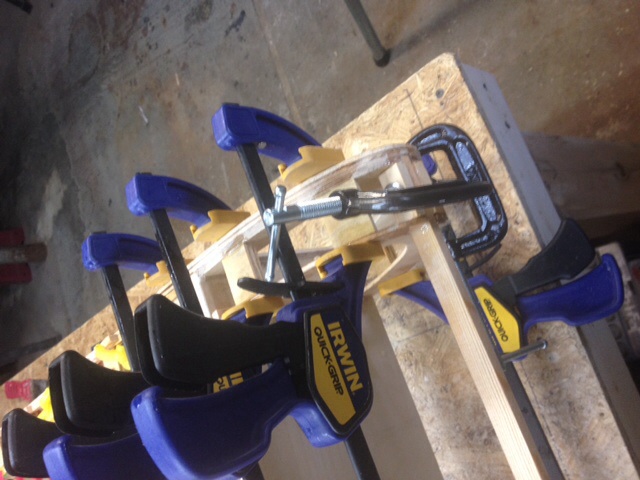
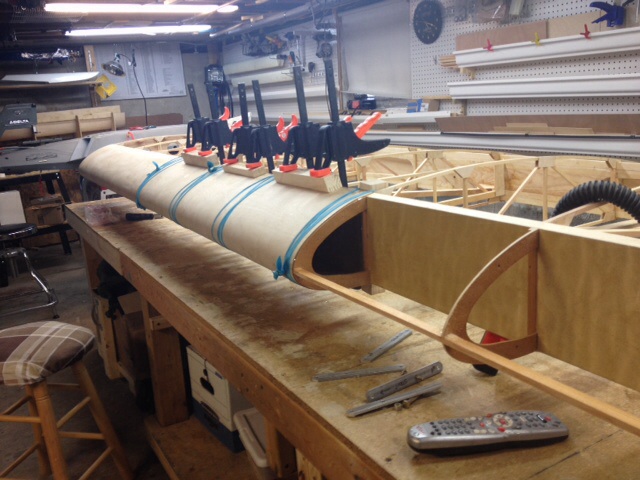
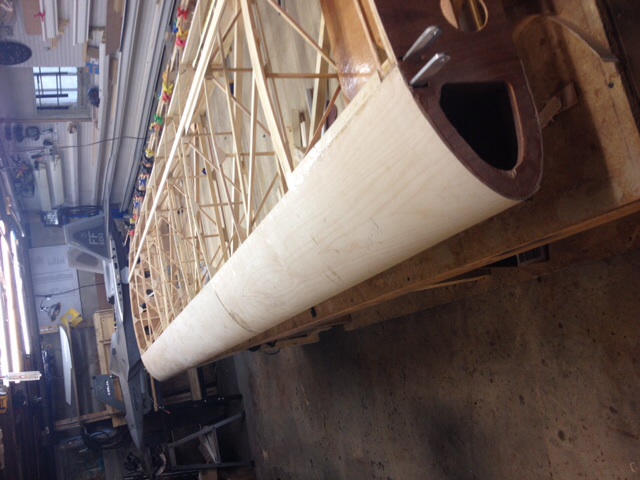
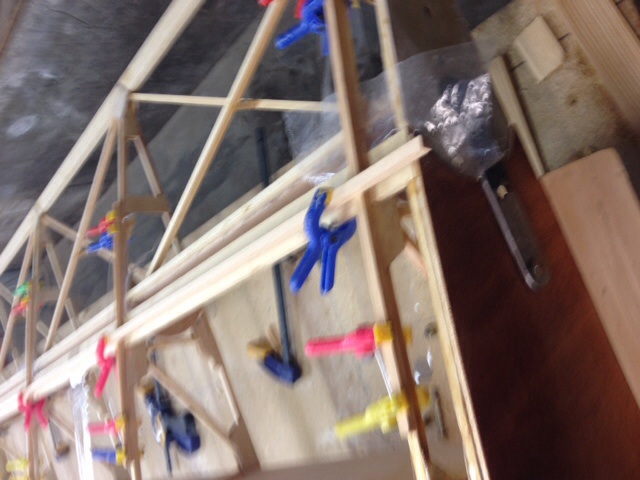
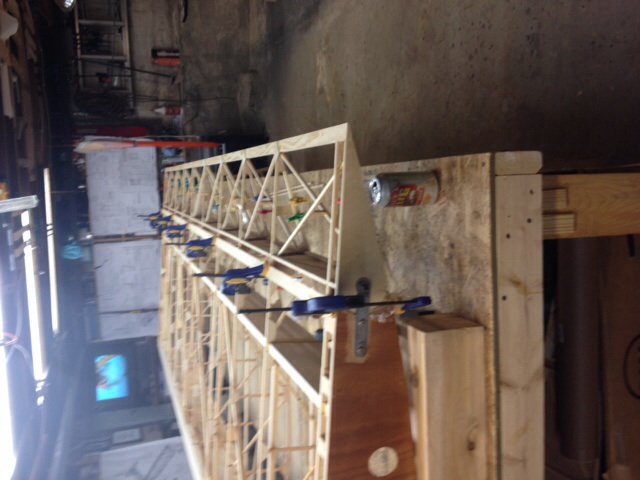
Leading edge fully sheeted. Cut back of ribs for trailing edge. About halfway thru the rib building process I started to add some plastic wrap to keep the pieces from being glued to each other. between the 1/4 inch stock where it is cut away for the trailing edge. Highly recommend. Those pieces came out easy. The others had to be carefully sliced apart. Glued on top trailing edge stock. To keep it perfectly aligned I clamped 1/4 inch stock over the rib as a jig. Then clamps TE stick to that (see pics) I used a hand razor saw to cut away 1/4 inch rib stock. Also I cut in the 45 degree bevel into the TE stock with my bandsaw prior to gluing. I believe that to be the best way to do it! At least it worked well for me
|
| V-max. Finished. Now in phase one flight |
|
|
|
|
|
| maxpayne |
|
Flight Leader Posts: 155
Time Online: 15 days 1 hours
|
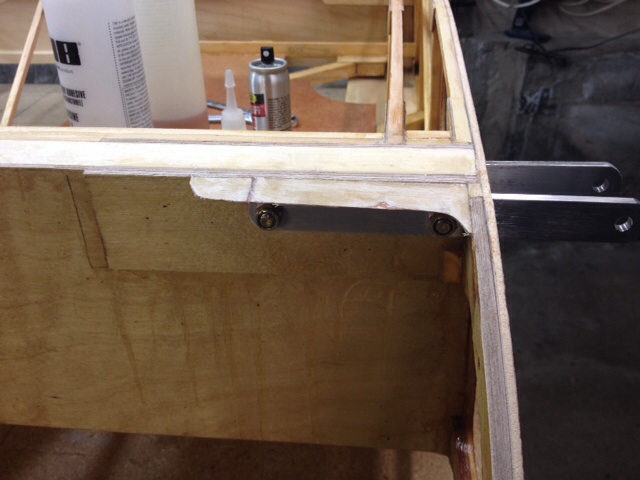
do you have inspection holes for the the bolts in photo 2404 1-3 threads protruding? If not then i would safty tie. Looks good. Was your helper wife or doughter? I find kids handy to reach those hard to reach spots. |
|
|
|
|
|
| bigbrixx1 |
|
Ace
Posts: 822
Time Online: 20 days 16 hours
|
Good eye! Those bolts have the required 1-3 threads. Actually a little over 1.5 threads. Hard to see in photo. And they are inspectable and replaceable thru fuel tank area and d section ! It is my wife helping. We are empty nesting here! And not in a sad way lol thank you for the heads up. All you folks out there if you think you see anything wrong PLEASE don't hesitate to question me on it or make suggestions! |
| V-max. Finished. Now in phase one flight |
|
|
|
|
|
| bigbrixx1 |
|
Ace
Posts: 822
Time Online: 20 days 16 hours
|
Bottom trailing edge piece cut and glued. Aileron cut free. Aileron now free to pivot. Removed aileron. Took dremel and relieved a few areas where excess glue was binding aileron. Going to reinforce the area where the TE is glued to the ribs to help prevent the TE separation that has happened and sheet forward D section of aileron next! Add one more pound to loss total now 34 pounds.
|
| V-max. Finished. Now in phase one flight |
|
|
|
|
|
| bigbrixx1 |
|
Ace
Posts: 822
Time Online: 20 days 16 hours
|
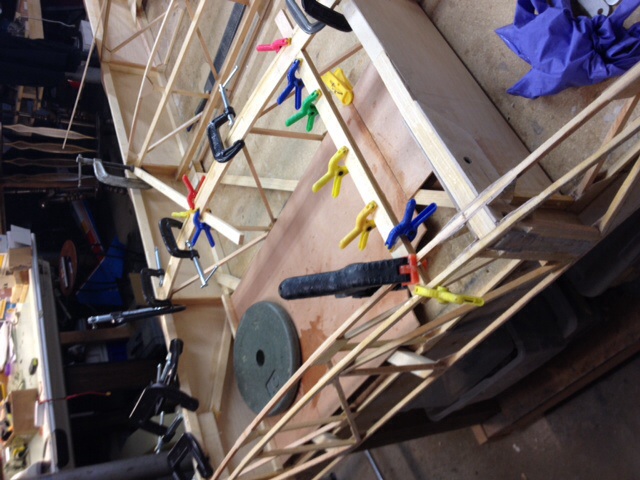
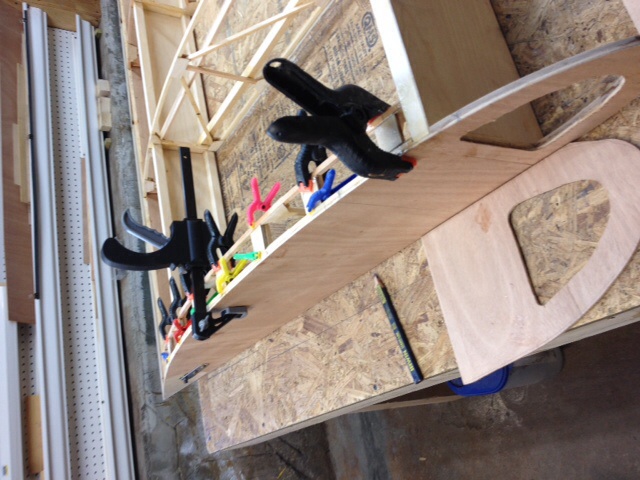
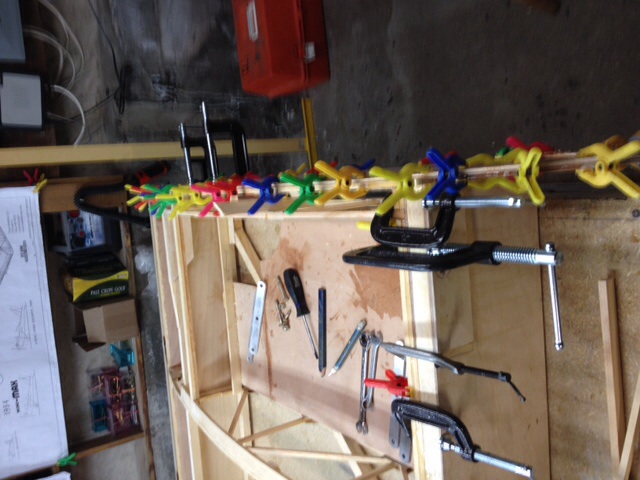
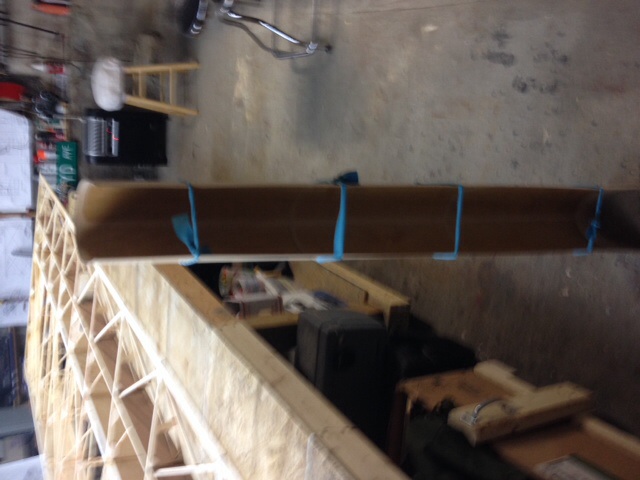
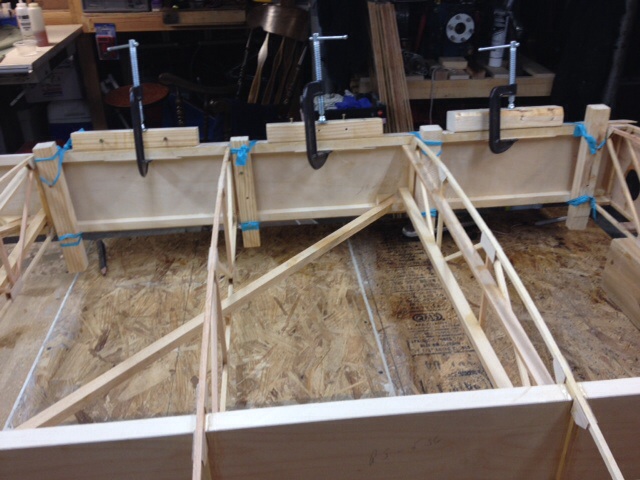
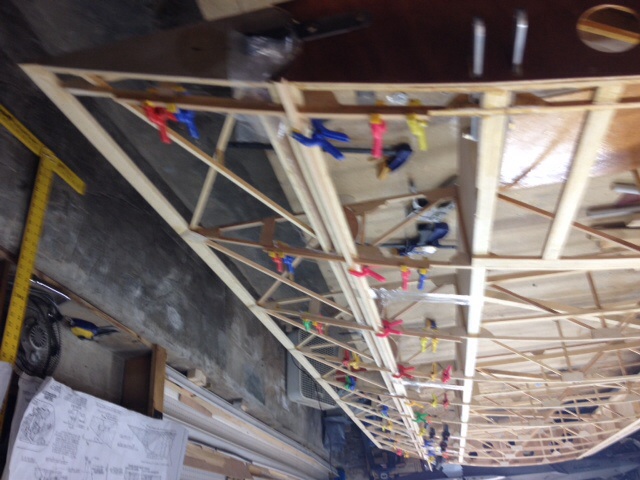
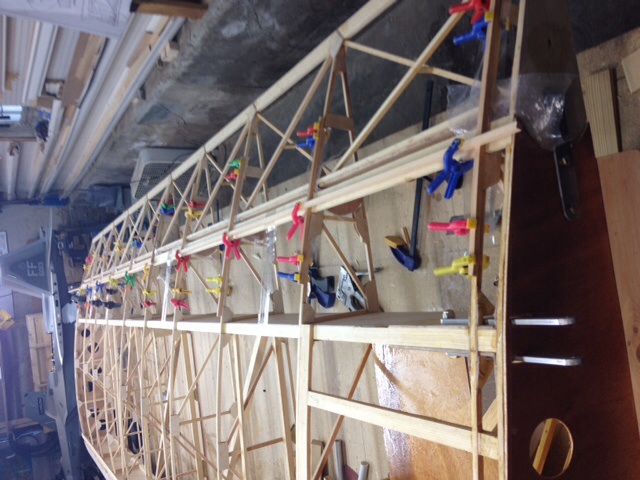
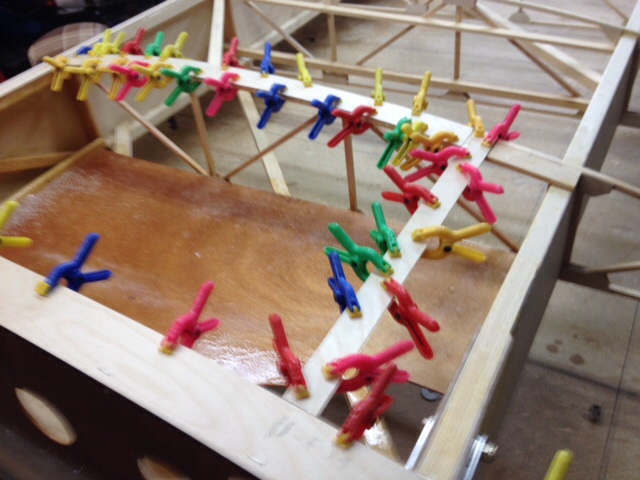
Added plywood cap strips to root and tip ribs. Also added 1.5 mm ply around tank area to give level surface for fuel tank cover. The old saying "you can never have enough clamps is soooo true. The little colorful ones you see are so useful. Got them at harbor freight on sale. There were 6-8 to a pkg for a dollar. Buy a bunch!
|
| V-max. Finished. Now in phase one flight |
|
|
|
|
|
| aeronut |
|
blue sky and tail winds to everyone AcePosts: 1,560
Time Online: 28 days 22 hours 31 minutes
|
That is cool with all the different colored clamps, it kind of brightens up the shop. Looks like you are doing a great job on those wings. Always have glue drying somewhere and you will be on to the covering before you know it. |
| never surrender; never give-up |
|
|
|
|
|
|


 Logged