I am just commencing the build of of a mid-wing Mini-Max to FAR Pt 103 compliance. Sorry for asking what might seem like a very basic question. For the Minimax 1100 or the Max 103, I was wondering how many ribs are required per wing ? The plans look like they show 10 per wing ( including end ribs ). But the construction manual says 10 plus 2 end ribs per wing making a total if 12 per wing.
I thought it should be 10 per side incuding the end ribs. Any advice will be appreciated.
(ALso I have not read the full plans / manual, but am reading just the relevant part of the the plans as I go along. So the answer probably lies somewhere down the road in the plans itself.)
Thanks, Larry. the reason I asked was because I am now on my 13 th rib today , and I think the last 6 ribs have to be built different. Good to know , thanks.
Keith1100.....Like Larry said, there are 12 ribs per wing. There are 2 "special ribs" per wing that are built different from the others in that they only get gussets on one side when they're built in your jig. They are the outer-most ribs and one gets plywood on the "right side" and the other gets plywood on the "left side". So, when you're building ribs you only put gussets on the first side, just like all the others, for one of them. That's the easy one. The other "special" rib gets temporary gussets when you assemble the rib in your jig, then you c-a-r-e-f-u-l-l-y take it out and put gussets on the "back" side only, The plywood "cap" (that has the airfoil shape of the rib) that you add later serves as the other set of gussets. Those plywood-capped ribs become the root and tip ribs, and as Larry said they are only about 2" from the rib next to them.
On the wing layout page (P, 16) the special ribs are the other-most ones. One gets located to the left of the #1 rib and the other is to the right of the #10 rib.
I don't know if my description explained it very well, but maybe reading through it while taking another look at the various wing construction drawings and views will help it all make sense.
Lynn describes it well. Page 2 of my build log has some photos and hints to how I built mine. Also note my mistake on the plywood caps that cover the inside of root rib and outside if wingtip rib. I cut them flush with front of rib. They should extend out to D sections of ribs added later. Also if I were to do it agian I would glue caps on after ribs assembled onto wing spars!
Thanks Lynn for nicely explaining it. I guess I will add 1/4 inch ply reinforcements ( for the 3x2 = 6 ribs where aileron is to be anchored / hinged ) while initial assembly of rib itself. so I need to stop at #18 and then do the 6 station-specific ribs.
Thanks Brian, Yes I did see your earlier posts too. And like you noted somewhere , I too let the glue dry overnight on the gussets on one side, before turning over the rib next day to attach the gussets on the other side. Also I am using 1.5 mm gussets on one side entirely, while on the other side I use 1.5 mm only on 6 gussets adjacent to the spars, but for all remaining gussets on side 2, I have used 1 mm gussets.
Just finished the 18 th rib. 6 more left to be done. Hope to get these 6 done before Labor Day.
Planning to build one wing first - even before the fuselage. Being an FTB ( First time builder ), I reckon that if the wing comes out OK, that will be incentive for me to press on and build the fuselage.
Looking ahead at the wing, and reading the manual, my main concern is about the wing coming out warped. A few tricky aspects I foresee at my basic skill level :
1. Attaching the front spar to the ribs, so as to get a 90 deg fit. I did not like the idea of using nails through front vertical rib stock. Is there a simpler solution than having to tack nail the rib to the front spar ?
2. Attaching the nose ribs to the front spar. ( I may have trouble holding the ribs at 90 deg to spar while glue cures.) Can I first glue the 1/4 inch vertical stock to the back of the nose rib, let it dry and then glue the nose rib + vertical to the spar web, and staple through the 1/4 inch vertical using 3/8 inch staples.
3. Attaching the leading edge ply to the nose ribs. The process looks precarious.
I am reading through some earlier posts to see potential pitfalls and how to avoid them. I guess things will fall into place the closer you get to the task, and the more you think it over.
FTB - you might want to take a look at my build site to see how I assembled the wing. Mine (AeroMax) is slightly different than yours but many are the same - as best I read the wing drawings to the other wing plans. Once you get going I think you'll be surprised at how your questions will be answered and how straightforward it is. (Not necessarily easy but straightforward.) Good luck - Darrel
Keith - you might want to take a look at my build site to see how I assembled the wing. Mine (AeroMax) is slightly different than yours but many are the same - as best I read the wing drawings to the other wing plans. Once you get going I think you'll be surprised at how your questions will be answered and how straightforward it is. (Not necessarily easy but straightforward.) Good luck - Darrel
Thanks Darrel. Your build-site is a good resource that I will use going forward. I already viewed a few of your pages this morning.
Could someone please indicate the approximate weight of a spar-cap for the main spar ? ( cut from spruce stock with size of 3/4 x 3/4 x 140 inches ). I am considering a hemlock spar cap, so this figure will help me calculate the weight penalty. Thanks
Thanks Bob, for help with that information. I have made one spar cap from hemlock, yet to be sanded and finished. Also I am waiting for delivery of a digital kitchen scale that I ordered, to figure out more details on weight of that.
There are 2 MiniMax projects listed for sale in Barnstormers. It looks like both projects are sort of identical in price, and identical in the amount of work completed (or not completed). Purely from the input material-cost angle, are these worth a look ? I am interested in the lightest air-frame ( Pt 103 ) with no frills. I do not need even the turtle deck, but these 2 projects have turtle-deck already built.
At 62 years of age, and being a slow builder, buying a project looks like a tempting option to speed things up some.
Are these sellers likely to have most raw material available with them. Because , by the time a project is listed, a builder may have lost interest for a while, meaning some raw material, wood stock, and parts may have disappeared. And in some cases, the seller is not even the person who built it, so may not even know what is missing if at all. So does it make sense to pay a couple of grand and take on a partially finished project and then still have to spend more to order wood and parts from Team or from Aircraft Spruce.
Any thoughts ? Does someone have a good / bad experience to share, on projects handed down ?
I have no particular knowledge of the planes for sale, but the seller of the top listing you posted asked questions on homebuiltairplanes.com I was thinking he had it listed on eBay, but maybe I'm wrong. Since he referred to the cost of the kit alone, but didn't mention anything about whether it was being built from a kit or being scratch built, I asked that question. It seems it was being put together from a kit and the one photo would suggest that the wooden box with additional materials is the remainder of the kit. Some of the photos I saw before showed a bunch of ribs, but unless I mis-counted or some weren't visible it looked to be a couple ribs short of the 24 required. No spars were shown, and to my understanding not yet built.
All that being said, a lot of work is completed and based on the photos it looks like nice workmanship. The tail appears to be the "light tail" version which saves some weight on the back end....and that can be a good thing. Needless to say, there's still a lot of work to be done. It's not even nearing the 90% done with 90% to go phase.
I know nothing about the plane in the second link, and only offer my humble observation regarding the plane in the first link.
Lynn, Thank you for sharing your thoughts on this. The seller told me it is the Max 103 kit, which should work for me. The project is in Birmingham, AL, so that is a 1350 mile drive (one way) from where I live. The other issue is how do I transport it over 1400 miles ? I have a mini van with all rear seats removed. The tail planes will fit inside the van. I wonder if it is legal to carry a fuselage tied to the top of a minivan. In terms of weight it is hardly any thing, less than 80 lbs. I have seen some boats being carried on top of minivans. Some sort of improvised crating may be required to protect the fuselage if it is carried on top. If it had the wings already built, then a trailer would have been the only option. Thanks.
I picked up my kit from TEAM using a minivan. The longest parts were the spar caps and trailing edges and they had to sit kinda diagonal from the left rear to the right front resting on the dash.
One of the wing trailing edges were accidently left out of my kit, during an already planned trip I stopped by TEAM and picked it up. We put it inside a PVC pipe that I attached to the luggage rack. When I got home I cut the pipe into 1" wide pieces that were then split making a zillion 'C' clamps that were quite useful in assembling the airplane. So that's another way you could transport the longer pieces.
If you removed the main gear from the fuselage i would not see any problem throwing it up on the roof and tying it down. Might be an issue if it were to rain, maybe covering it with a tarp would be sufficient.
ULBuilder, Great information . Thank you. I just purchased the project on Barnstormers a few hours back, from the seller in AL, and am planning to drive down there in the next few days to pick it up.I have all the seats removed in my minivan (except the driver's seat obviously ). So that opens up a lot of room. As you rightly said, the spar crate should fit diagonally .Basically everything should fit inside the van except for the fuselage. It helps that I was a shipping manager in an FBO in AZ and we used to ship lots of parts including Cessna skins etc to our customers. Some of the 172 and 206 skins can end up in surprisingly large boxes, and in many cases shipping charge was more than the cost of the skin.But this will be the first time shipping a fuselage, though at 15 feet long, it is a very manageable load. I was concerned about over-size limitations, but I read up that this is not considered over-size ( total size of load + vehicle should be less than 8 ft 6 in in width, and 13 ft 6 in in height, which it will be). I plan to take lot of polythene , bubble wraps to cover each fuselage member to protect from rain and scuffing, and some tarps to throw over the overhead load. Also I plan to drive back at minimum allowed speed, say 50 to 55 mph. Being retired, there are no deadlines to beat for getting back to work etc.
Congratulations on your purchase. I wish you a safe trip going to retrieve it. Also, have fun completing it. We'll all be looking forward to progress reports.
Lynn, The seller is the same person who listed it on Ebay. Appreciate your help in checking out a few things on this project, with whatever sources you had access to. I will post a full run-down after I bring the project over and inventory the parts. Thanks
A bit of clarification Incase it's of use to you. When I picked up my kit there was a 6 or 8' crate with all the wood parts except for the 12' parts. The 12' parts were not crated and is what I had to load diagonal inside the van.
Looking forward to seeing your progress, have a safe trip picking it up.
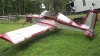
I did manage to pick up the project from Birmingham AL. Some pictures are attached. I will add more in due course.
Presently I need to paint/ varnish / protect the fuselage which seems to have been constructed about 18 years ago, but not varnished or painted. Kit seems to have been purchased from Team in 1997. It is a Max 103 kit.
I am about to start work on the wings which has not been made by original builder. In the mean time, How do I preserve the ply on the fuselage till I get around to working on it next summer ? I was wondering whether to varnish it or apply wood primer ?
I bet you got some interesting looks driving with that on top of your minivan, and a LOT of questions at gas/rest/pottie stops! Lynn
Yes Lynn, the odd shape cargo atop my minivan was a source of curiosity / amusement all the way through. At least 5 or 6 guys asked me " Hey is that not an airplane ? " Also I was driving at about 55 mph all the way back since there was not much protective crating / packaging around the fuselage. It took me nearly 3 days to travel 1400 miles at that speed. Luckily it did not rain on the way back, except for a brief 5 minute downpour north of Wichita on I135 N, when I was lucky to find an overpass under which I took shelter. To protect the fuselage from bumps / vibrations, foam lining was wrapped around the roof top carrier bars, so that the fuselage did not directly contact the roof top steel rack. I preferred to sleep inside the van for those 2 nights as I did not want to leave the delicate load unattended. One night at a Flying J at Memphis and the second night at a Pilot truck stop an hour north of Oklahoma city. I found that a good arrangement because they have food / coffee etc which is what you need when you pull up late at night. And there was good strength free wi-fi to boot. Early next morning you wake up to a nice cup of hot coffee, check your email, take a shower ( the shower is for $ 12.00 which is actually a nice deal), and after that I was all set for hitting the road for the new day's adventure.
I have completed all 24 ribs including the 1/4 inch ply fill-in on the 6 special ribs for mounting aileron hinges. Next is mounting the metal hardware for the aileron hinges. ( I took a time-out for few months due to vacation, travel etc)
Yesterday I was trying to order parts from Aircraft Spruce for mounting of aileron hinges, but am not able to locate the following 2 items :
(a) Steel tubing for making the bushing on the 6 aileron hinges. The OD is 3/8 and ID is 1/4 ( from 4130 ). Not able to find the exact same dimensions with aircraft Spruce. The closest they have is:
OD Thickness ID 3/8 .058 0.259 3/8 .065 0.245
I need just about 3 inches in length, but better to make sure I get the right size so the bolt goes through.
(b) I also could not locate the part numbers for SHCS bolts for the root and tip aileron hinges. I need 4. Does anyone have the Ac Spruce part number for it. ( Dumb question : Why is it necessary to use the SHCS on the root and tip hinges. I mean, won't a bolt and washer outside the bushing do the same job, like on the hinge on Rib #5 ? )
Without referring to plans to verify, I'll say you need the .375" X .058" tubing for the bushings. The SHCS (Socket Head Cap Screw) I used was an alloy steel (black oxide finish) allen head bolt from True Value Hardware's aviation department. They mix their aviation parts in with ordinary inventory so you have to search for it sometime You want the Allen Head bolt so it can be wiggled off of the hinge strap to remove an aileron if and when necessary. The head OD of the Allen Head bolts I used matched the OD of the bushings.
Thanks Lynn for the quick reply. For the SHCS I will call Spruce, may be they know the part number because this is standard fixture on all maxes. I have an order for some other AN hardware ready on Spruce web site, it is held up only for these 2 parts.
Someone else posted this idea, I copied it. Drill a .040 hole near the end of the SHCS so you can install a washer and cotter pin. This ensures the head of the SHCS can slip through the bracket only when you allow it. I did not like the thought of my aileron falling off because of a loose bolt or broken glue joint that allowed the root or tip rib to flex sideways.


 Logged


 You want the Allen Head bolt so it can be wiggled off of the hinge strap to remove an aileron if and when necessary. The head OD of the Allen Head bolts I used matched the OD of the bushings.
