|
|
 bob.hood bob.hood |
| September 15, 2017, 5:44pm |
|
 Ace Ace Posts: 225
Time Online: 4 days 18 hours 40 minutes
|
Reto,
Keep on posting up the pics of your build as you go along, and I think that when you've finished it and it's standing on the apron, you should take lots of photos (many in close-up) of all the detailing you've put into the finished aircraft. Then I think TEAM should use your build photos as THE text book of how to build the 'max. They should break it into chapters such as Jigs, Left Wing, Right Wing, Fuselage, etc., and they should include a copy of the book with every set of plans or kit they send out in order to show others exactly how it should be done, and what it should look like when completed.
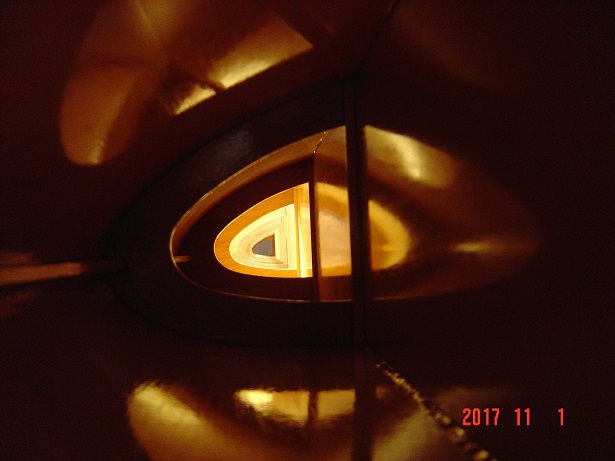
Your workmanship is stunning, as is your photography, and the photos are each worth a thousand words of explanation of where each bit should go, how it should be cut, glued, clamped, etc., and how it should look once assembled and sealed with epoxy. The picture of the inside of your wing leading edge was a thing of beauty, and it's a shame that such workmanship will forever be hidden, but yours is definitely the text book image of build quality that all other builders should aspire to.
Best regards,
|
|
|
|
|
|
| beragoobruce |
| September 16, 2017, 12:23pm |
|
Built an Eros - now I'm flying it! AcePosts: 1,066
Time Online: 19 days 10 hours 52 minutes
|
Sorry to hear of your sinus problems, Reto, but I'm glad you're back in the workplace.
I totally agree with Bob's comments in the post above. Your workmanship is truly outstanding. And no doubt this will be reflected in a beautiful finished aeroplane that flies as well as it looks.
Do keep the reports coming. They help those of us reduced to pottering around at home, putting up shelves or tiling the bathroom, when we'd much rather be building a plane. There don't seem to be many building at the moment, but I'm sure your work will inspire some new Max builds in the future.
Bruce |
|
|
|
|
|
| Reto S |
| September 16, 2017, 11:45pm |
|
Ace
Posts: 320
Time Online: 13 days 19 hours 26 minutes
|
Sorry to hear you where under the weather. Wing looks great!Hope your build is coming along and you will soon be sending us videos of your first flight. 
Thank you aeronut. In a earlier message I pledged to finish my build by the end of 2017... Trying hard. I wished that I would be in a similar productive build phase as Bruce was, when he surprised us all with his beautifully finished Max... |
|
|
|
|
|
| Reto S |
| September 17, 2017, 12:16am |
|
Ace
Posts: 320
Time Online: 13 days 19 hours 26 minutes
|
Reto,
Keep on posting up the pics of your build as you go along, and I think that when you've finished it and it's standing on the apron, you should take lots of photos (many in close-up) of all the detailing you've put into the finished aircraft. Then I think TEAM should use your build photos as THE text book of how to build the 'max. They should break it into chapters such as Jigs, Left Wing, Right Wing, Fuselage, etc., and they should include a copy of the book with every set of plans or kit they send out in order to show others exactly how it should be done, and what it should look like when completed.
Your workmanship is stunning, as is your photography, and the photos are each worth a thousand words of explanation of where each bit should go, how it should be cut, glued, clamped, etc., and how it should look once assembled and sealed with epoxy. The picture of the inside of your wing leading edge was a thing of beauty, and it's a shame that such workmanship will forever be hidden, but yours is definitely the text book image of build quality that all other builders should aspire to.
Best regards,
Bob Thank you for your kind words. Certainly it would be very rewarding if this blog would inspire some, perhaps still hesitant, new builders. I like your idea of a step by step picture guide. The only issue with that is that no building technique is written in stone so to speak. There are "many ways leading to Rome" and in this forum I have seen many other builders producing incredible results with whatever tools they have at hand. In my opinion it takes me too long to get the desired level of quality, but perhaps the doing is more important than the outcome...  Therefore my accumulated hours have to remain a secret... Your Max looks very cool! Cheers Reto |
|
|
|
|
|
| Reto S |
| September 17, 2017, 12:36am |
|
Ace
Posts: 320
Time Online: 13 days 19 hours 26 minutes
|
Sorry to hear of your sinus problems, Reto, but I'm glad you're back in the workplace.
I totally agree with Bob's comments in the post above. Your workmanship is truly outstanding. And no doubt this will be reflected in a beautiful finished aeroplane that flies as well as it looks.
Do keep the reports coming. They help those of us reduced to pottering around at home, putting up shelves or tiling the bathroom, when we'd much rather be building a plane. There don't seem to be many building at the moment, but I'm sure your work will inspire some new Max builds in the future.
Bruce
Thank you Bruce. I hope all well at your end and you are enjoying the cool season down under. It must be incredible to fly in such pleasing conditions. Logic dictates that there are only a limited number of house fixes, shelves and bathrooms to be dealt with. It's time to start your Menestrel project! I certainly wished I could be more productive... Reto |
|
|
|
|
|
| Reto S |
|
Ace
Posts: 320
Time Online: 13 days 19 hours 26 minutes
|
It has been a while since my last upload. I sat the Thai air law exam and passed. Next thing happening, supported by many, many documents, should be the (Thai) CAA license validation.
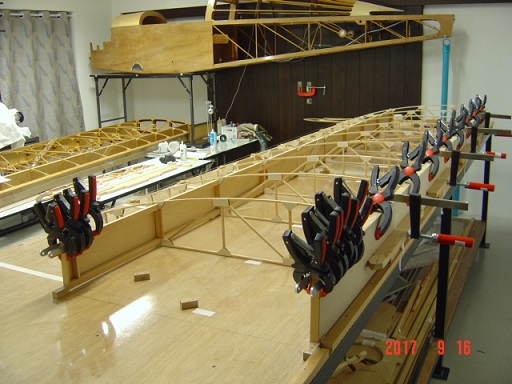
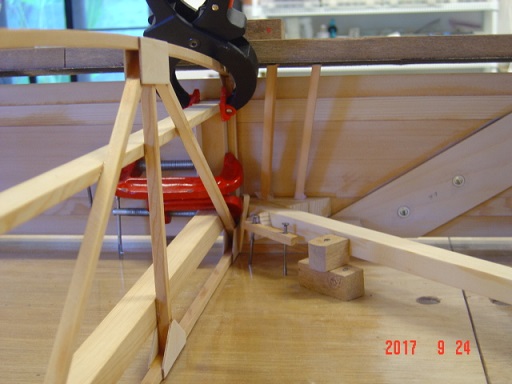
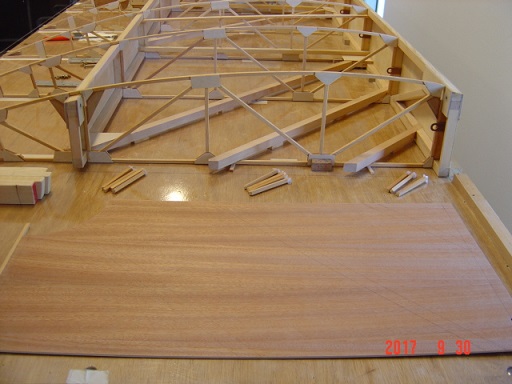
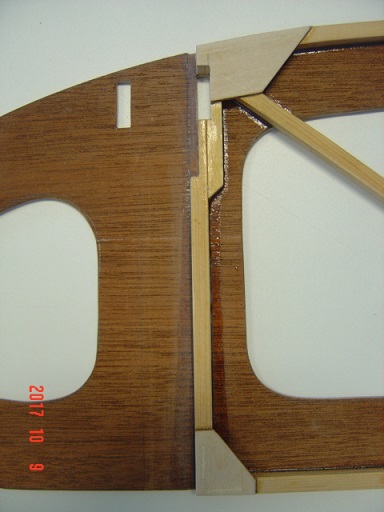
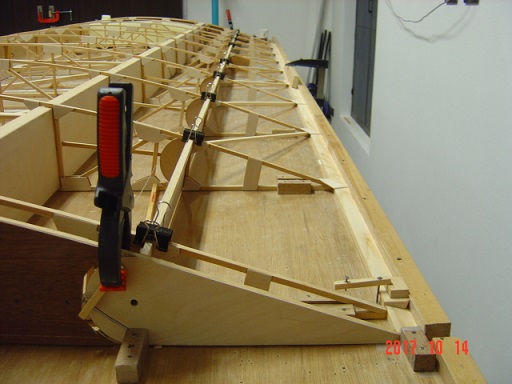
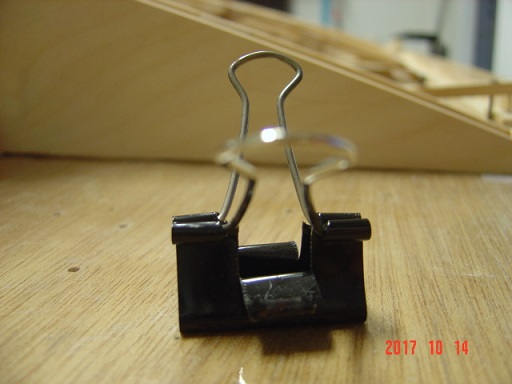
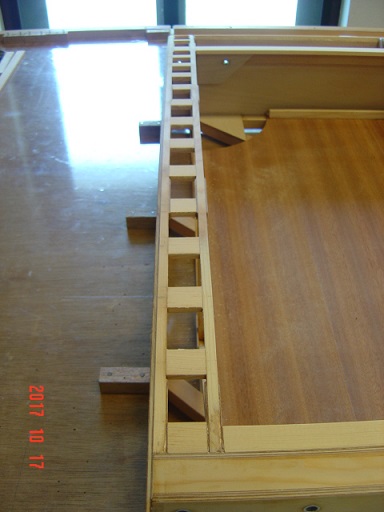
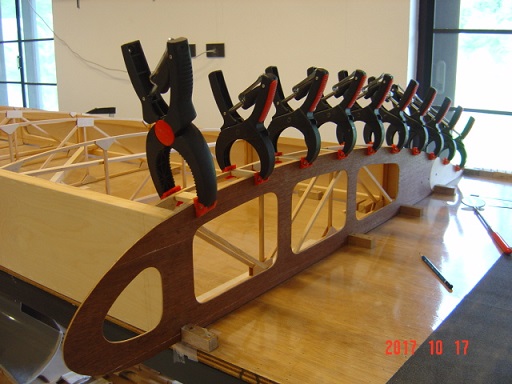
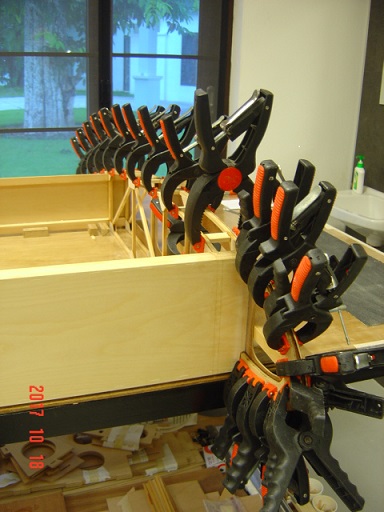
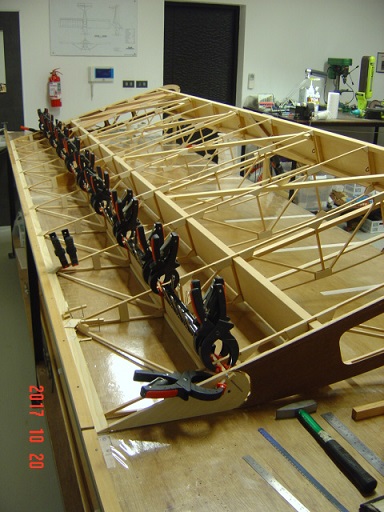
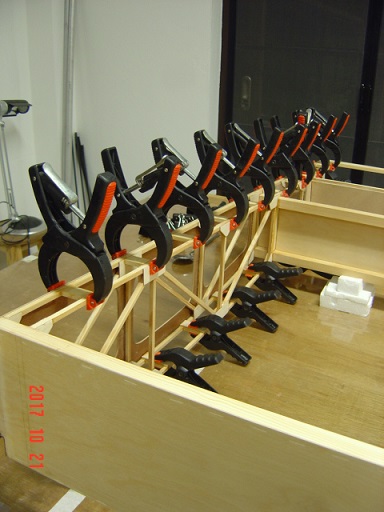
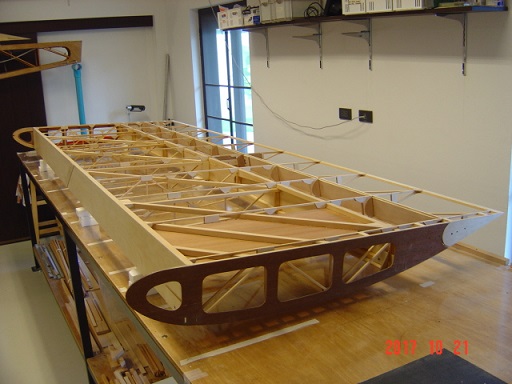
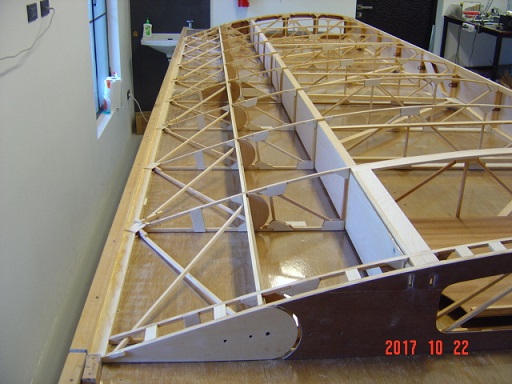
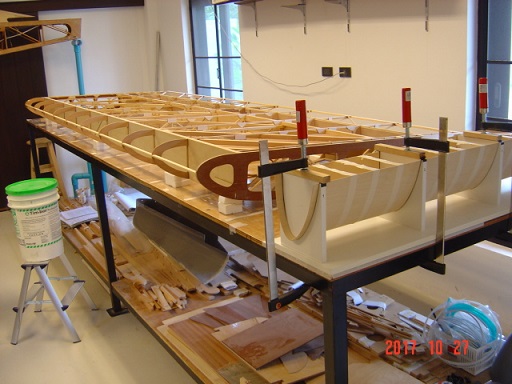
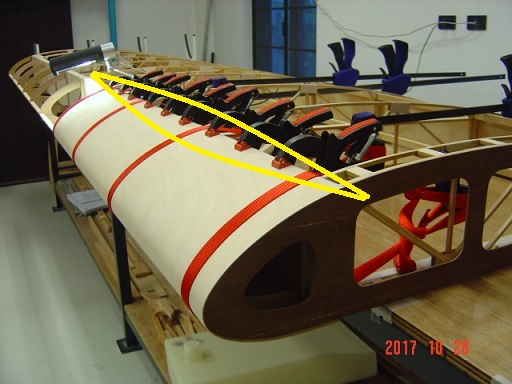
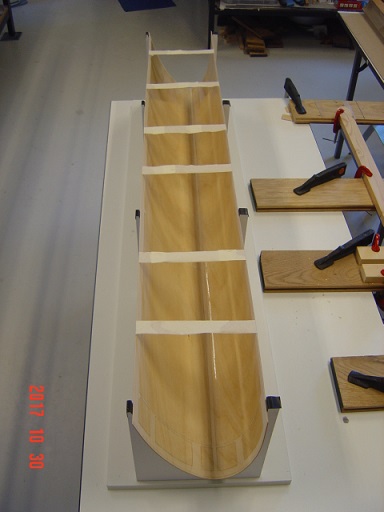
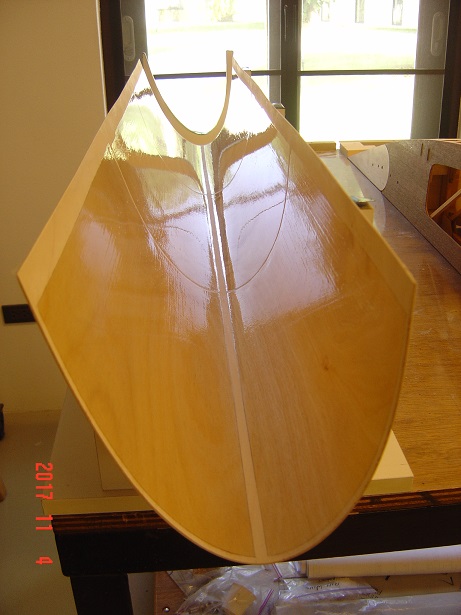
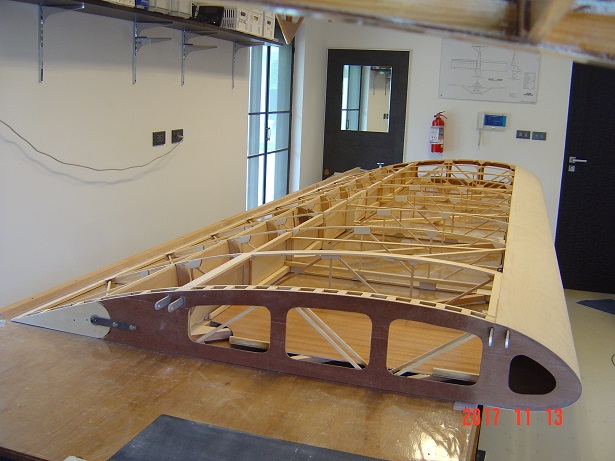
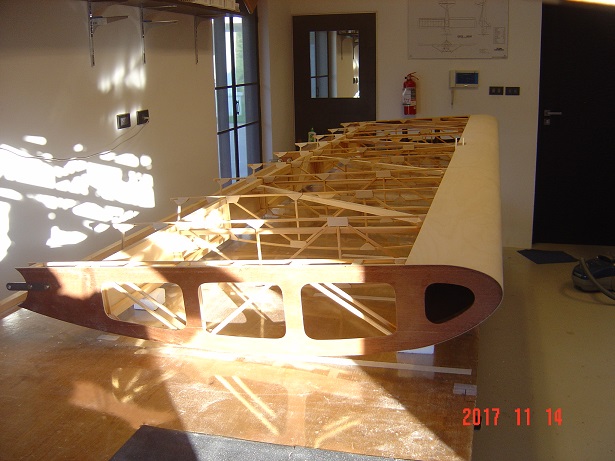
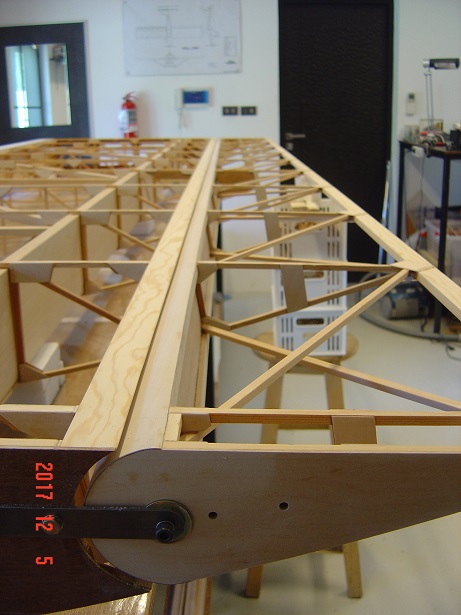
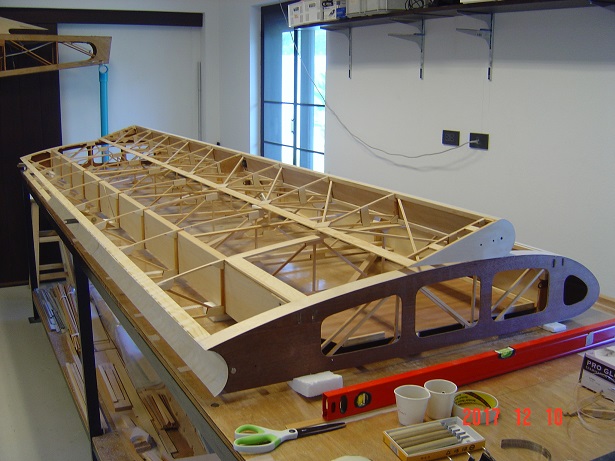
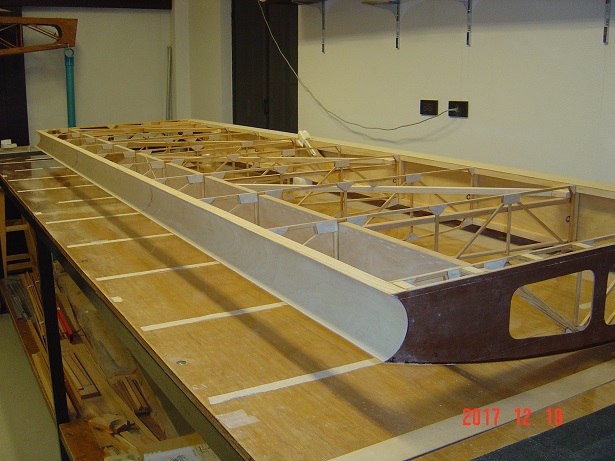
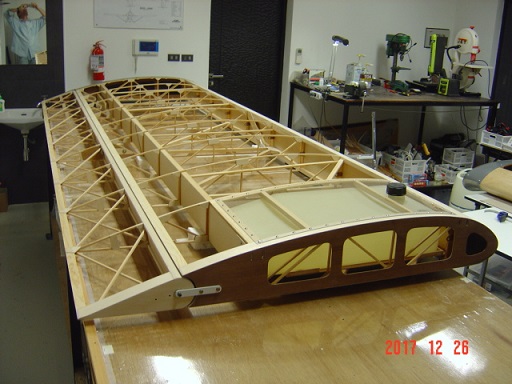
The L/H wing takes shape. The process has been already documented with text at an earlier stage for the R/H wing.
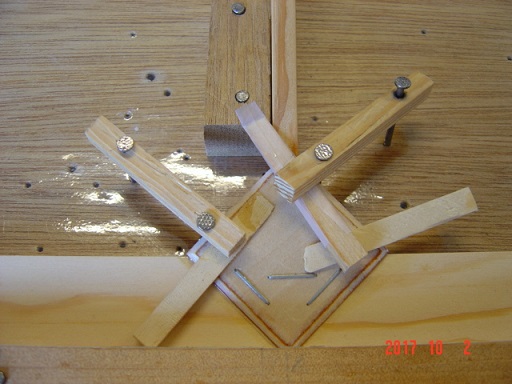
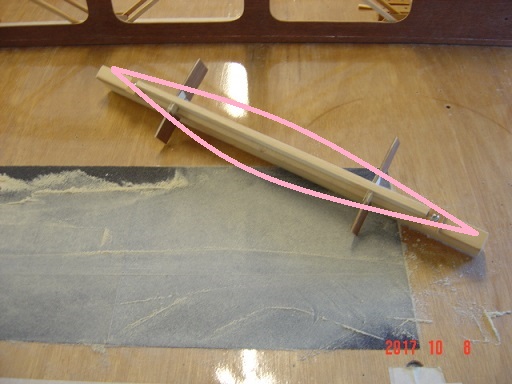
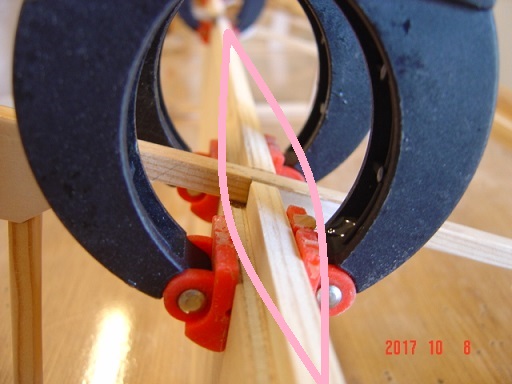
Below some pictures (without further explanation) for the work done so far on the L/H wing (until nose ply glueing)...
Enjoy
|
|
|
|
|
|
| Reto S |
|
Ace
Posts: 320
Time Online: 13 days 19 hours 26 minutes
|
|
|
|
|
|
| Reto S |
|
Ace
Posts: 320
Time Online: 13 days 19 hours 26 minutes
|
|
|
|
|
|
| lake_harley |
|
Ace
Posts: 1,092
Time Online: 25 days 5 hours 28 minutes
|
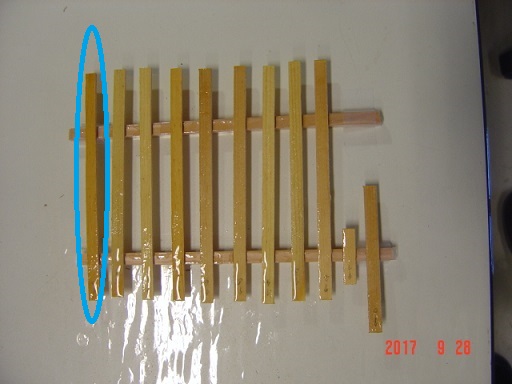
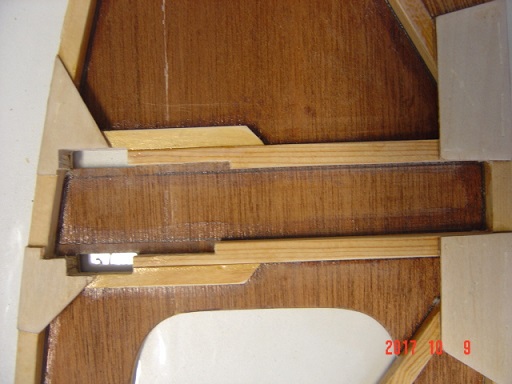
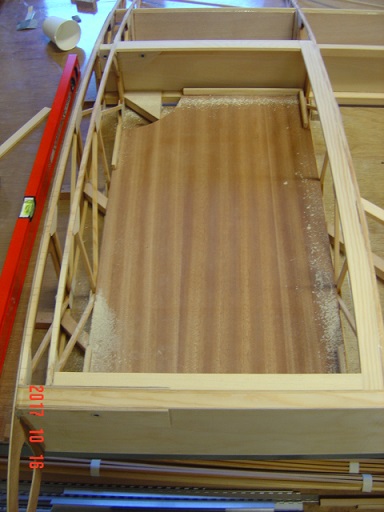
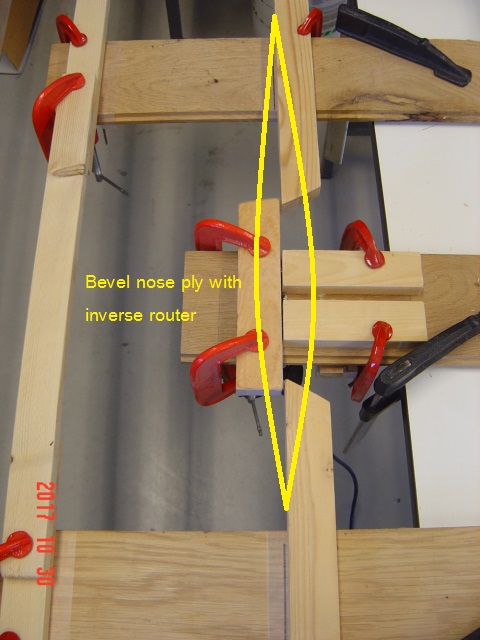
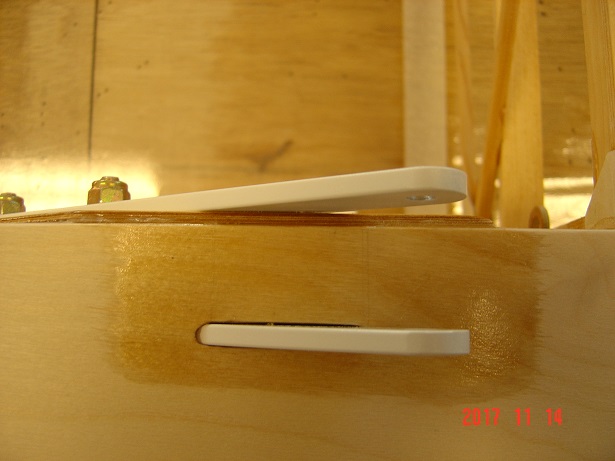
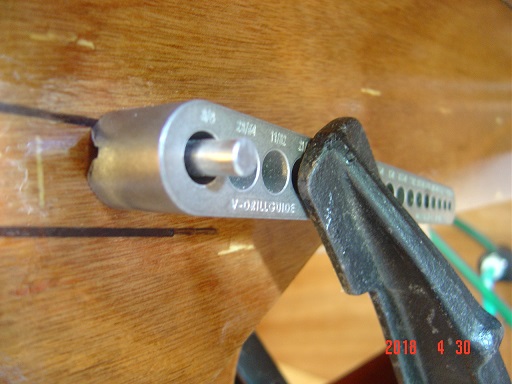
Reto S.......I'm guessing your photo that's captioned "bevel nose ply with inverse router" is about beveling the edges of the nose ply to a knife edge so it lays flat against the spars rather than having a "ledge" that would be left with a blunt end? I'm unclear from your photo though just what you have pictured. I'm guessing it is a guide system to bevel the leading edge ply but apparently I'm too dense to understand how it works with a router.
Thanks, in advance, if you could clarify a bit.
As always though.....workmanship second to none!
Lynn |
|
|
|
|
|
| aeronut |
|
 blue sky and tail winds to everyone AcePosts: 1,560
Time Online: 28 days 22 hours 31 minutes
|
The pictures are excellent as is workmanship. How do you keep such a clean orderly workshop?? |
| never surrender; never give-up |
|
|
|
|
|
| Reto S |
|
Ace
Posts: 320
Time Online: 13 days 19 hours 26 minutes
|
Reto S.......I'm guessing your photo that's captioned "bevel nose ply with inverse router" is about beveling the edges of the nose ply to a knife edge so it lays flat against the spars rather than having a "ledge" that would be left with a blunt end? I'm unclear from your photo though just what you have pictured. I'm guessing it is a guide system to bevel the leading edge ply but apparently I'm too dense to understand how it works with a router.
Thanks, in advance, if you could clarify a bit.
As always though.....workmanship second to none!
Lynn
Hi Lynn, I am terribly sorry for my late reply. My video blog project about the unbearable political situation in Europe diverted a lot of time and energy. You are absolutely right with your comment. The pre-bent nose ply section was gently pushed through the inverted router and its guide... I shall have a surprise though... |
|
|
|
|
|
| Reto S |
|
Ace
Posts: 320
Time Online: 13 days 19 hours 26 minutes
|
The pictures are excellent as is workmanship. How do you keep such a clean orderly workshop??
Thank you for your kind words aeronut. As strange as it may sound but it is a necessity to keep it as clean as possible due to a respiratory illness. I assure you though sometimes it is a complete mess and I can't find my stuff... |
|
|
|
|
|
| Reto S |
|
Ace
Posts: 320
Time Online: 13 days 19 hours 26 minutes
|
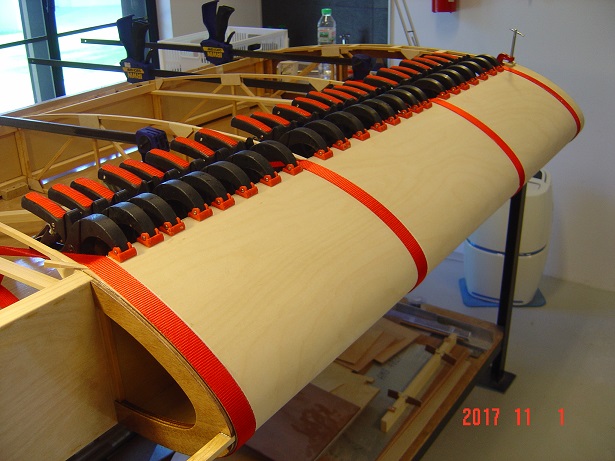
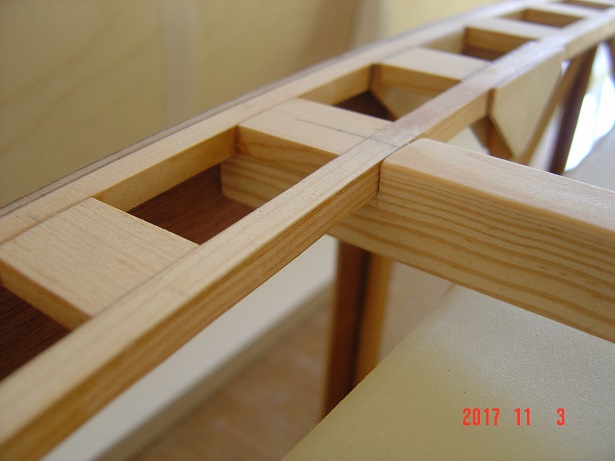
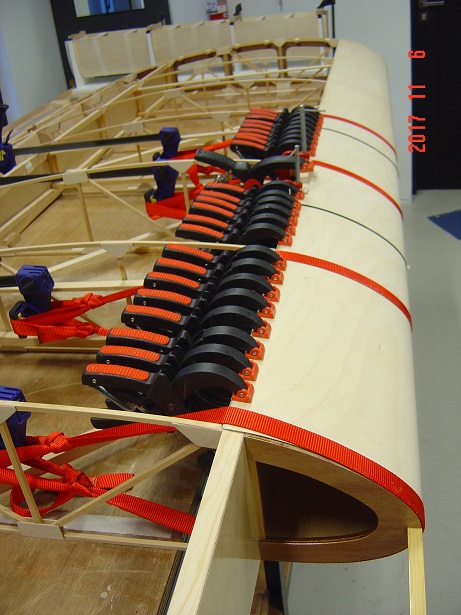
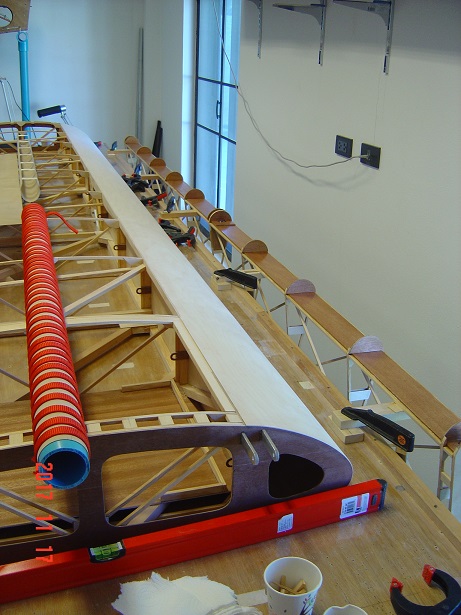
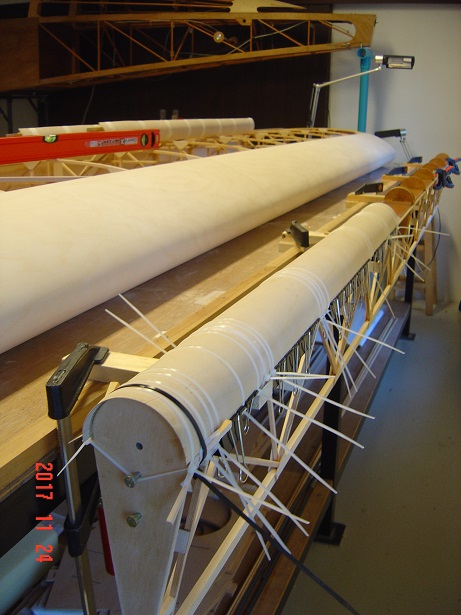
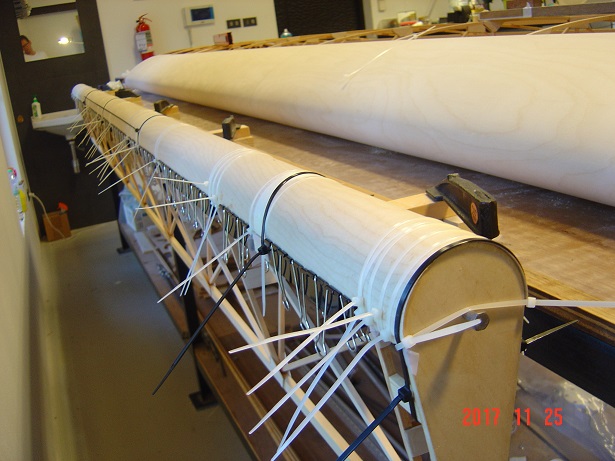
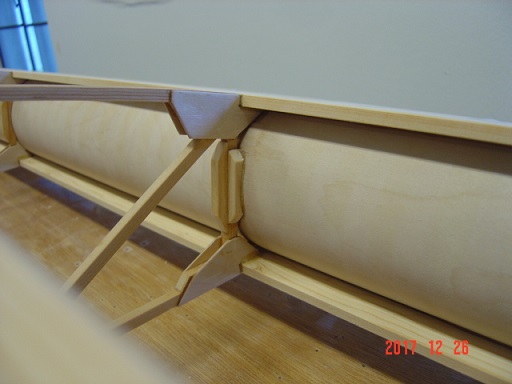
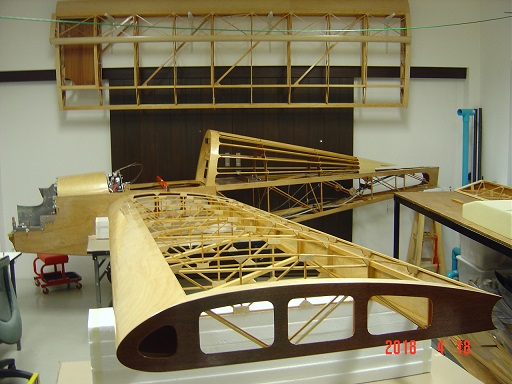
My apologies for my long absence from the forum, with the following pictures I will try to make up for it... L/H wing:
|
|
|
|
|
|
| Reto S |
|
Ace
Posts: 320
Time Online: 13 days 19 hours 26 minutes
|
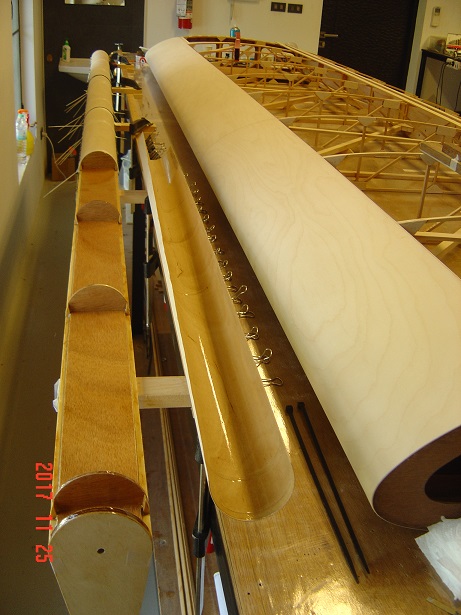
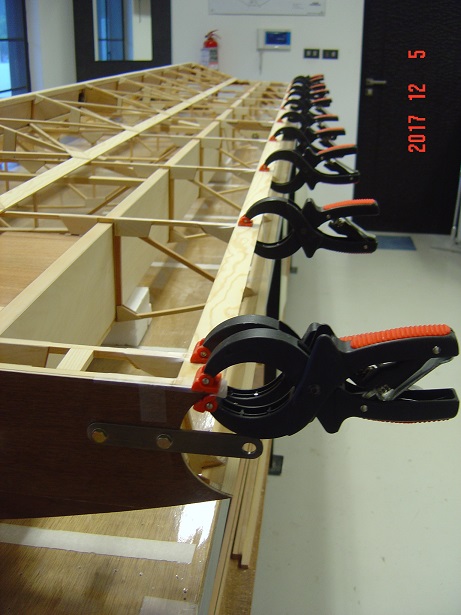
L/H wing construction cont.:
|
|
|
|
|
|
| Reto S |
|
Ace
Posts: 320
Time Online: 13 days 19 hours 26 minutes
|
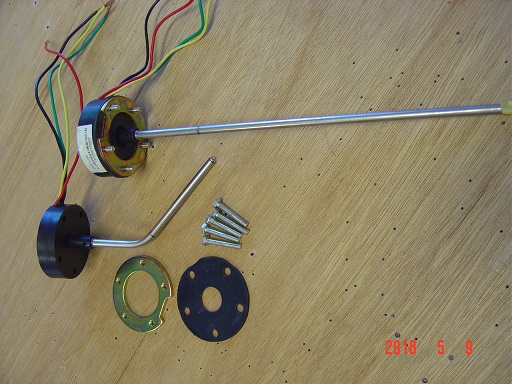
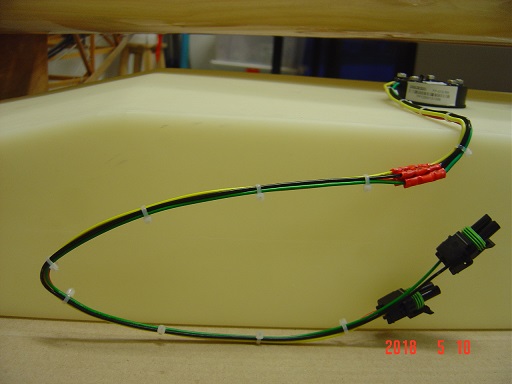
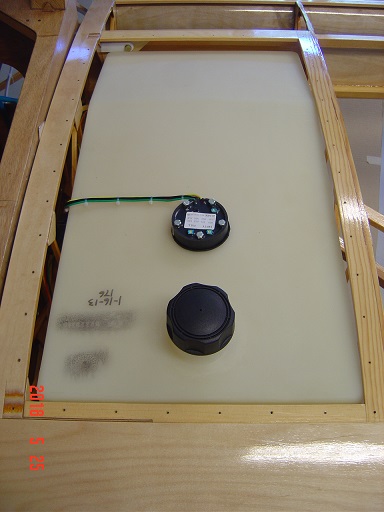
Wing tanks:
The super aggressive fuel in Thailand and the MM plastic tank material are not compatible. It lets the tank swell out of proportions!
Thankfully, MM's David Cooper was agreeing to fabricate aluminium tanks with the same specs.
They are on the way to here as I write this forum entry...
|
|
|
|
|
|
| Reto S |
|
Ace
Posts: 320
Time Online: 13 days 19 hours 26 minutes
|
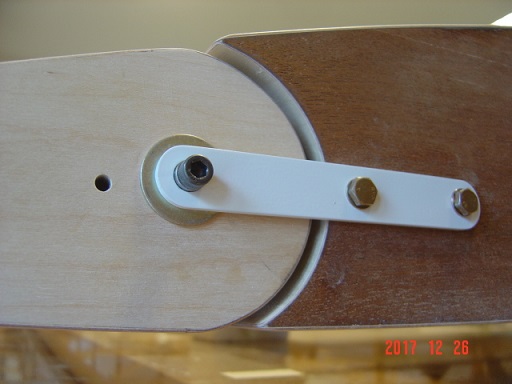
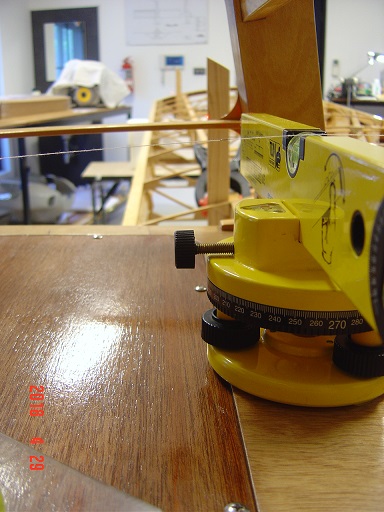
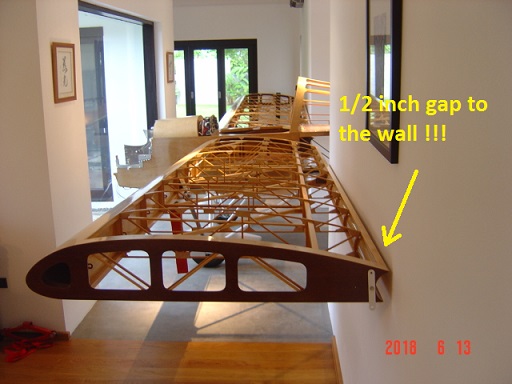
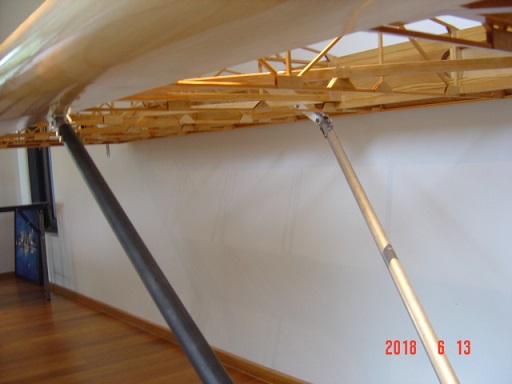
Rigging:
Due to lack of space in the workshop I could only rig one wing at the time and had to move in the house for rigging of both wings at the same time.
We couldn't believe that the wings would fit with 1/2 inch space to the walls.
My gf wasn't too happy though about the mess caused by final drilling...
|
|
|
|
|
|
| Reto S |
|
Ace
Posts: 320
Time Online: 13 days 19 hours 26 minutes
|
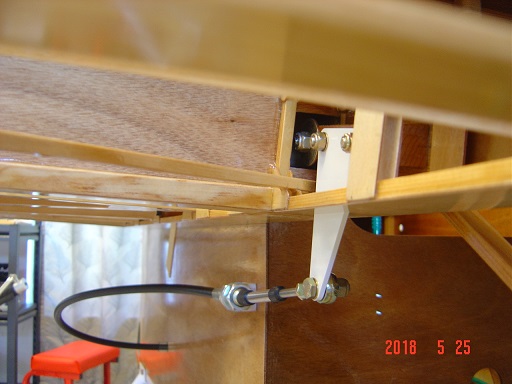
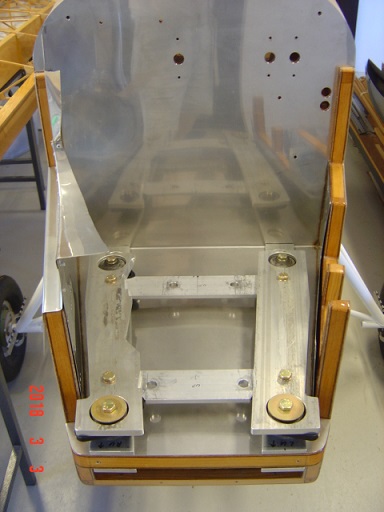
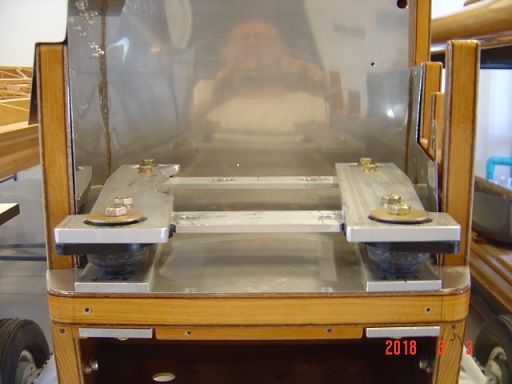
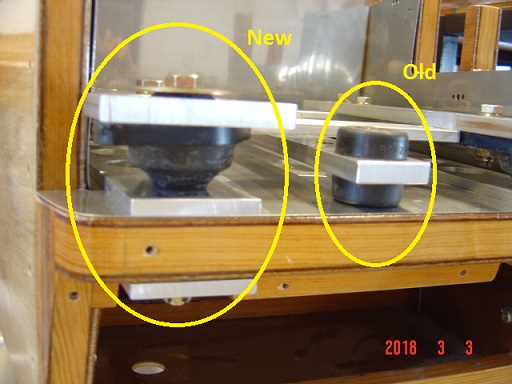
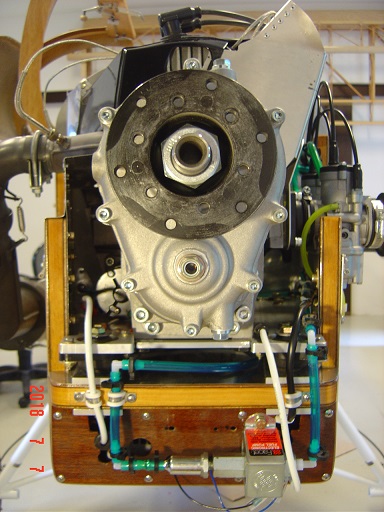
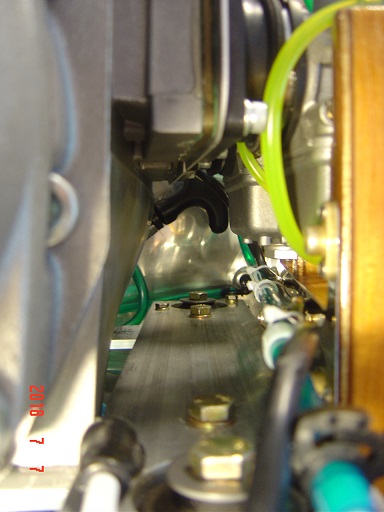
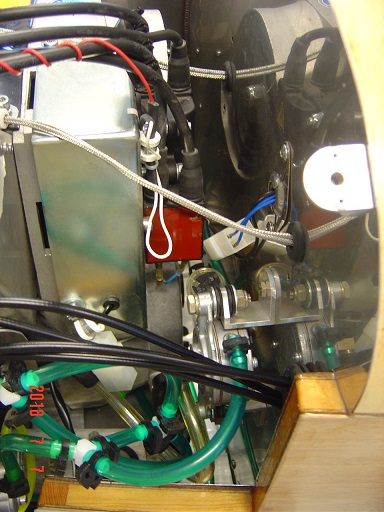
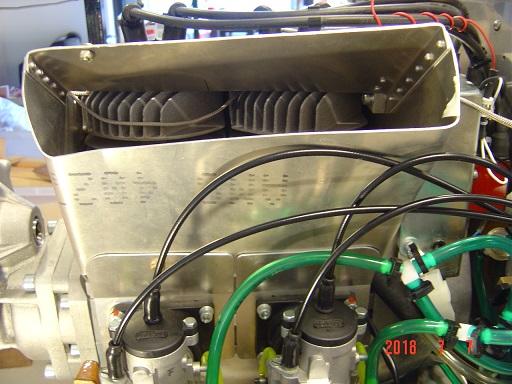
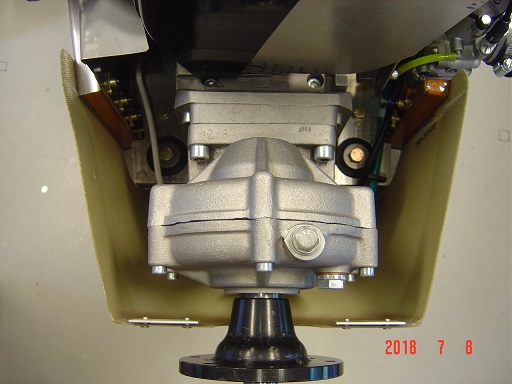
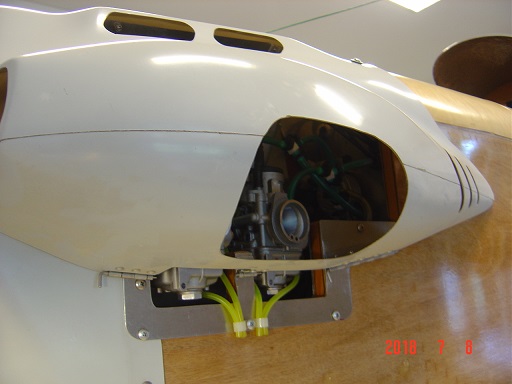
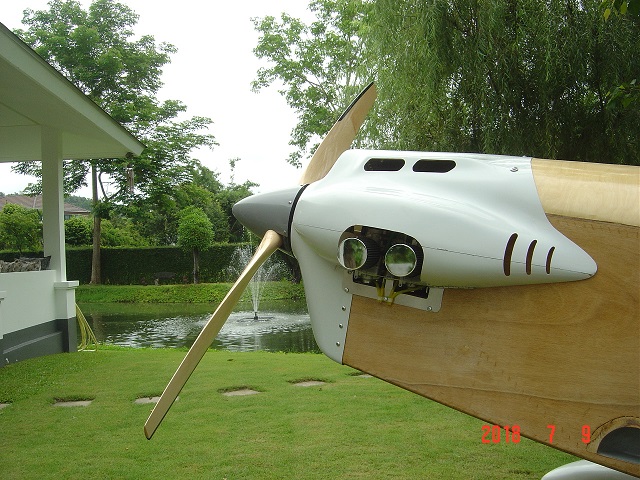
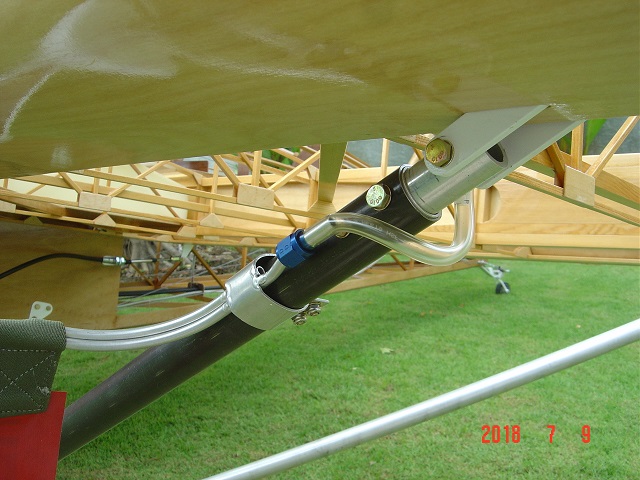
Engine installation:
As reported earlier, my Hirth 3202 engine suffered heavy vibrations during test runs. Called Factory in Germany - not much help. Finally I decided to use the original heavy duty engine mount rubbers instead of barry mounts. The space is so limited, it became a surgical procedure... Test runs with new jet/needle combination tuned out to be a success though. Huge relieve!
|
|
|
|
|
|
| Reto S |
|
Ace
Posts: 320
Time Online: 13 days 19 hours 26 minutes
|
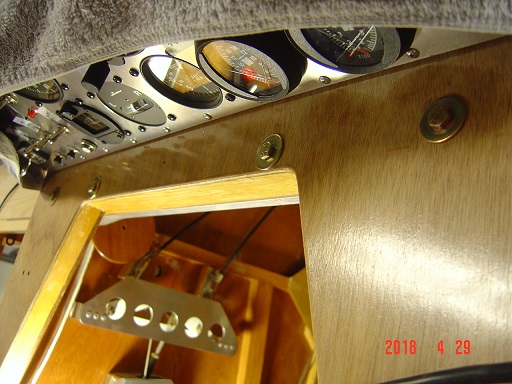
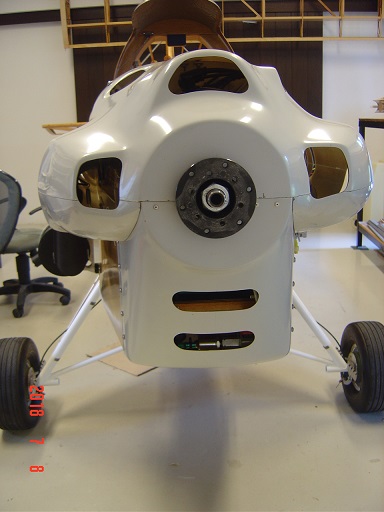
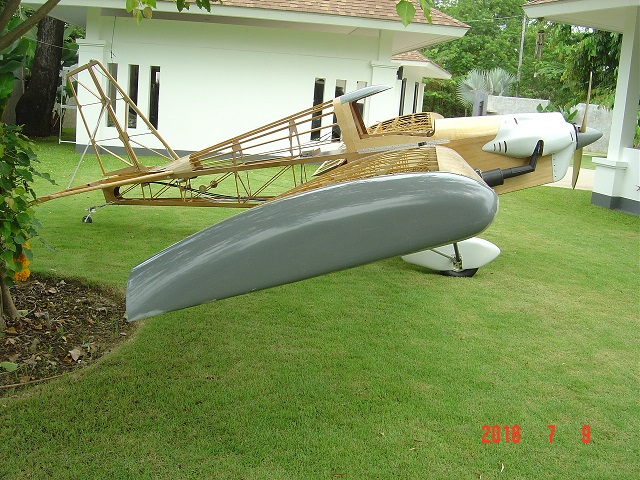
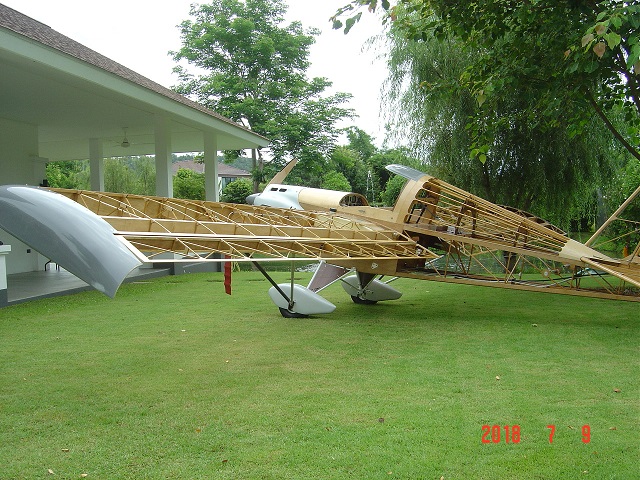
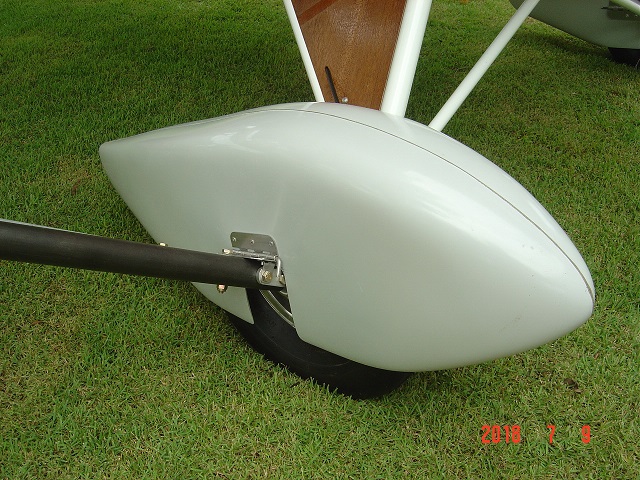
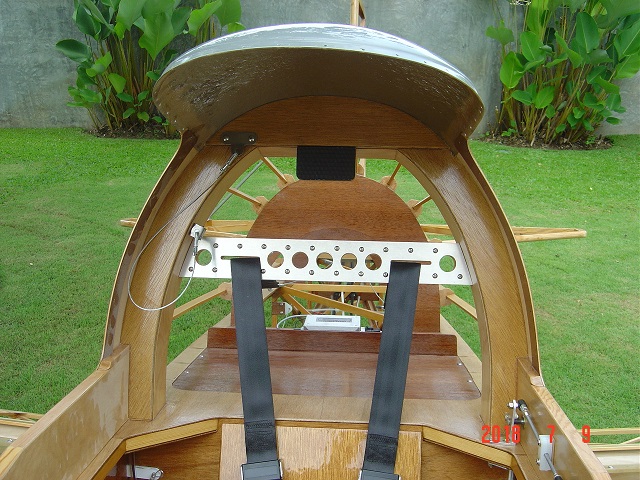
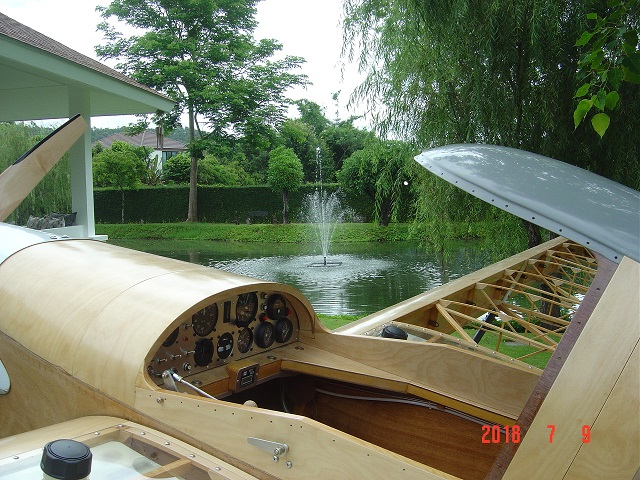
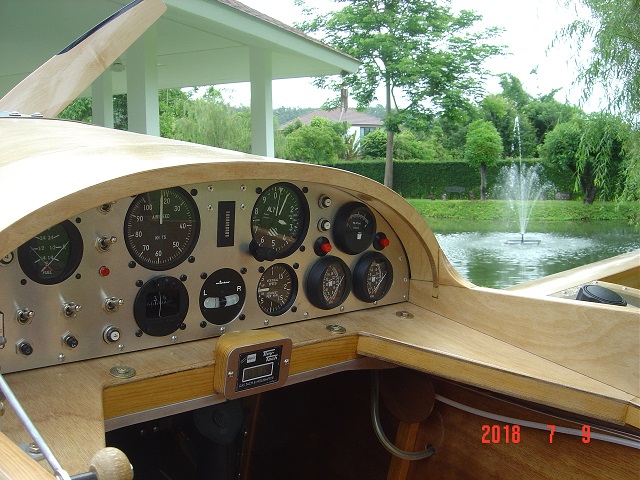
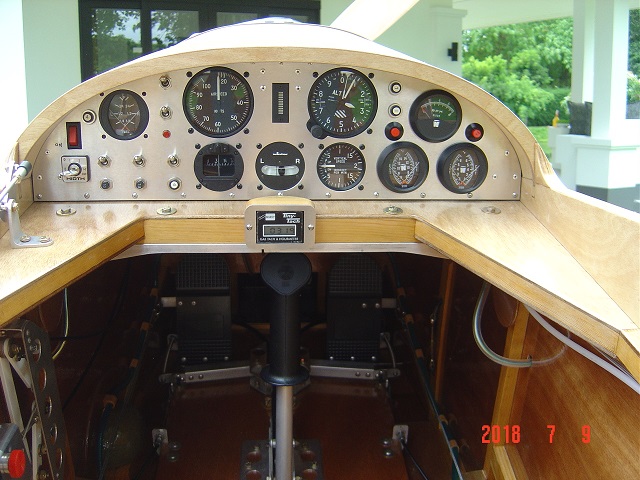
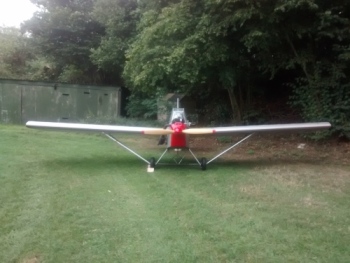
Hello world! (Part 1)
The uncovered yet otherwise finished MiniMax Eros with Hirth conversion fully assembled and functional...
|
|
|
|
|
|
| Reto S |
|
Ace
Posts: 320
Time Online: 13 days 19 hours 26 minutes
|
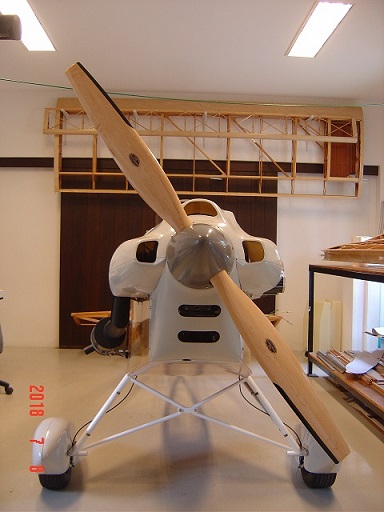
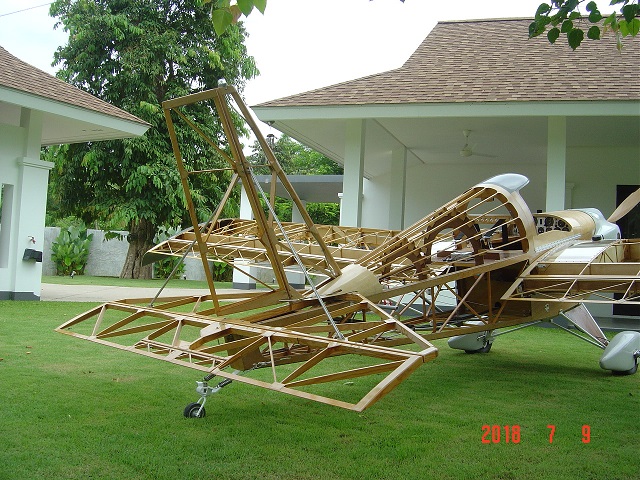
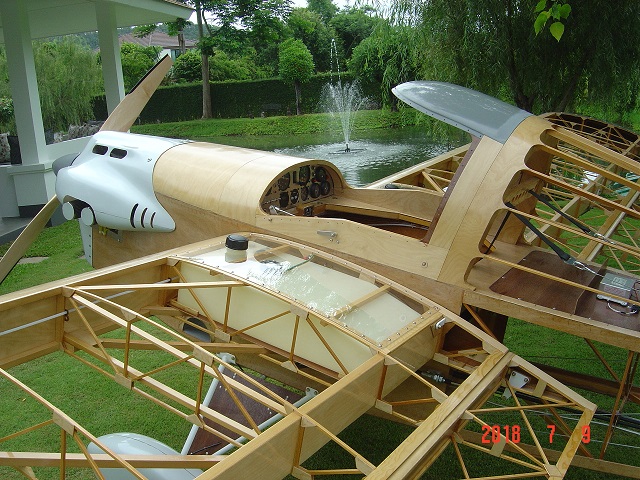
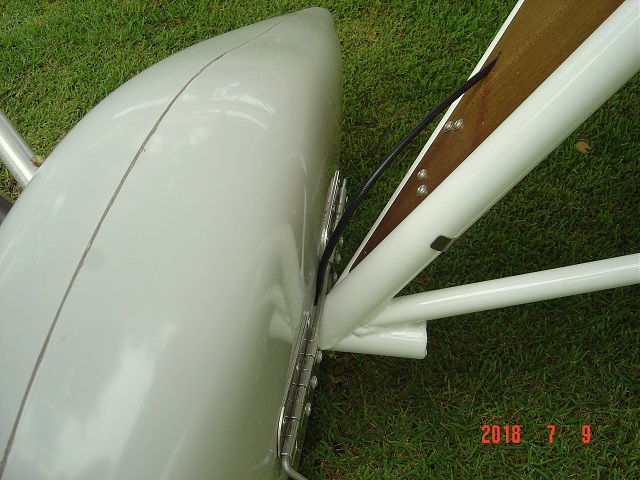
Hello world! (Part 2)
The uncovered yet otherwise finished MiniMax Eros with Hirth conversion fully assembled and functional...
|
|
|
|
|
|
| Reto S |
|
Ace
Posts: 320
Time Online: 13 days 19 hours 26 minutes
|
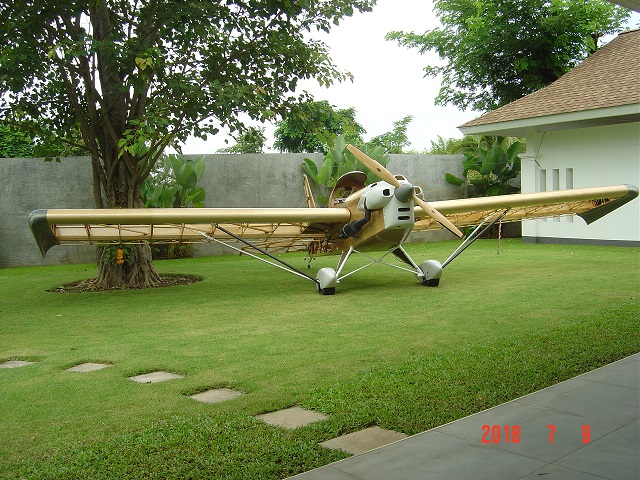
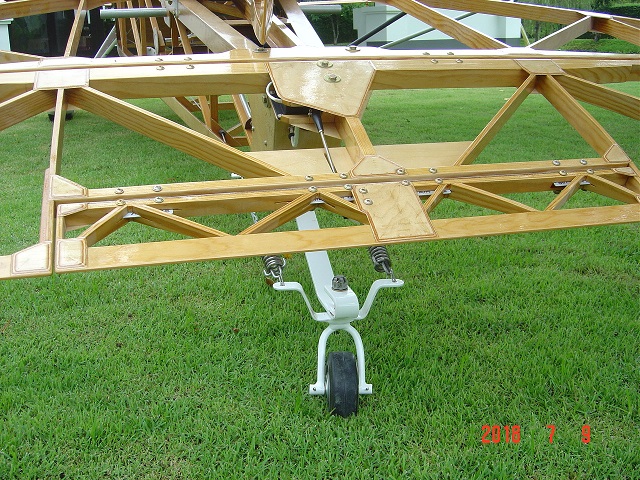
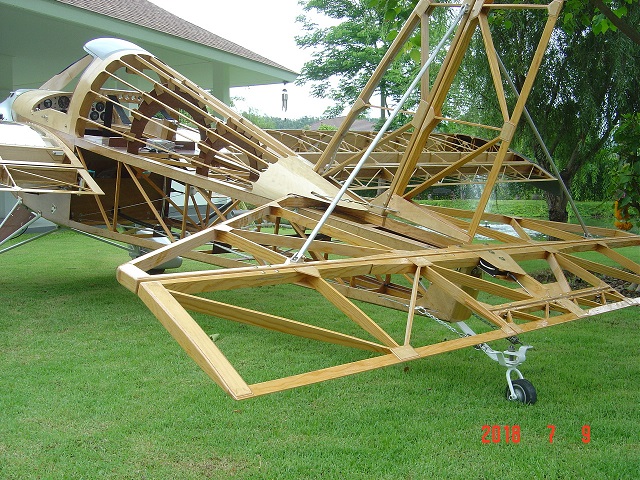
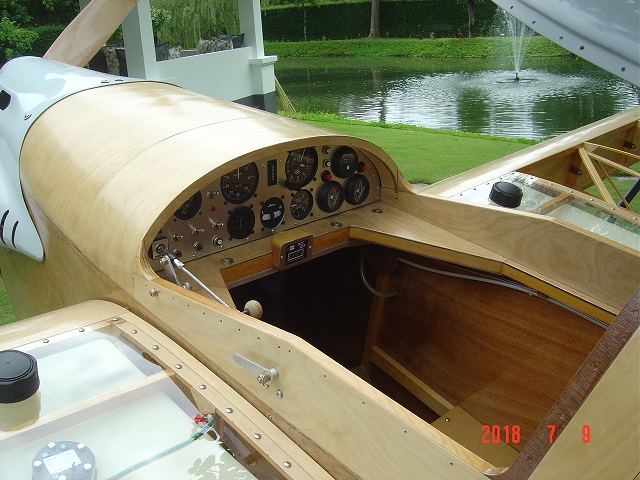
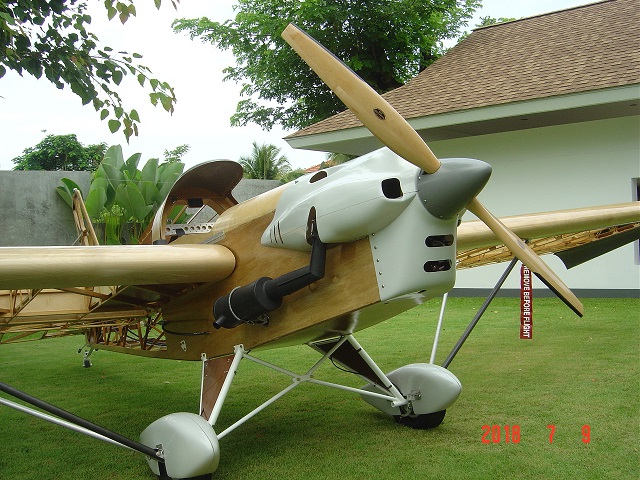
Hello world! (Part 3)
The uncovered yet otherwise finished MiniMax Eros with Hirth conversion fully assembled and functional...
|
|
|
|
|
|
| Reto S |
|
Ace
Posts: 320
Time Online: 13 days 19 hours 26 minutes
|
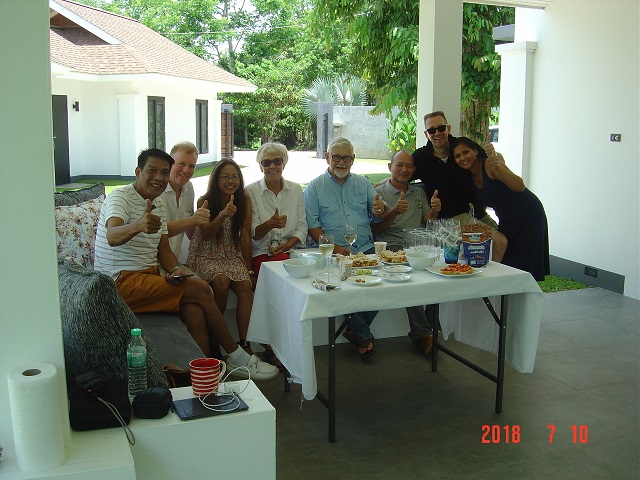
Small gathering with friends from the local flying community...
Covering and rib stitching will be next...
|
|
|
|
|
|
| ironnerd |
|
Guest User |
DANG!!!!
That's a dang nice plane, Reto S. |
|
 Logged Logged |
|
|
|
|
| Reto S |
|
Ace
Posts: 320
Time Online: 13 days 19 hours 26 minutes
|
|
|
|
|
|
| PUFF |
|
 Ace AcePosts: 1,518
Time Online: 34 days 6 hours 18 minutes
|
Wow! that's almost too nice to cover. |
|
|
|
|
|
| aeronut |
|
blue sky and tail winds to everyone AcePosts: 1,560
Time Online: 28 days 22 hours 31 minutes
|
WOW !!! That is fantastic !!! I hope the covering goes well cause the FLYING will be an awesome reward. |
| never surrender; never give-up |
|
|
|
|
|
| beragoobruce |
|
Built an Eros - now I'm flying it! AcePosts: 1,066
Time Online: 19 days 10 hours 52 minutes
|
This just has to be the best MiniMax ever made. The craftsmanship is truly superb. Well done, Reto, you must be a rightly proud & happy man!
Sincere congratulations, & I look forward to seeing her covered and flying very soon.
Bruce |
|
|
|
|
|
| Ricardo |
|
 Videos in UTube: ral1951 AcePosts: 2,772
Time Online: 75 days 23 hours 15 minutes
|
Congratulations Reto, hat a Superb job!!! You and Bruce, from Australia, have built show room aircrafts. |
|
|
|
|
|
| LSaupe |
|
Flight Leader  Posts: 161
Time Online: 1 days 10 hours 40 minutes
|
More than impressive. It will be a shame to cover that fabulous workmanship! |
|
|
|
|
|
| Cy V |
|
 Ace AcePosts: 640
Time Online: 14 days 16 hours 41 minutes
|
Incredible work! |
| Bad spellers of the world untie! |
|
|
|
|
|
| Reto S |
|
Ace
Posts: 320
Time Online: 13 days 19 hours 26 minutes
|
Quoted from 437
DANG!!!!
That's a dang nice plane, Reto S.
Thank you Mr. ironnerd. |
|
|
|
|
|
|