|
|
 Keith103 Keith103 |
| February 16, 2018, 10:13pm |
|
 Ace Ace Posts: 632
Time Online: 13 days 6 hours 31 minutes
|
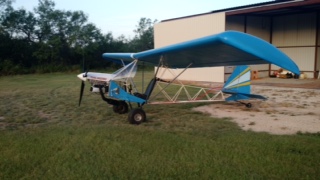
Hi All, I am doing some work on the forward fuselage. First is to get the inside panels varnished. Next is to install the acrylic fuel tank that came with the kit, to its location just behind the firewall. And possibly at a later date to install the rudder pedals. I am 5 ft 7, and access seems to be a big challenge. Any tips on this, ( short of hiring a school kid on week ends ) ?
Thanks for help and suggestions.
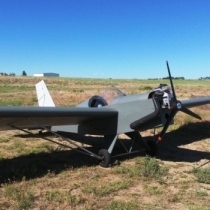
PS Mine is a mid wing Max 103.
Edit:
The varnishing to be done is not behind the firewall, but below the engine compartment.
This is a small 12 x 12 x 12 inch compartment that is below the platform where the Rotax 277 is to be mounted.
Thanks |
|
 Logged Logged |
|
|
|
|
| TreeTopsTom |
| February 17, 2018, 10:58am |
|
 Ace AcePosts: 566
Time Online: 26 days 13 hours 37 minutes
|
Is the Circus going to be rolling through your town in the near future?  Anyone you know of invented a shrinking machine in your area?  Stop by your local school and see if any of the gymnast want to make a few $$. (better be careful how you approach that one though)  Ummmmm......... TTT |
|
| Logged |
|
|
|
|
| lake_harley |
| February 17, 2018, 12:11pm |
|
Ace
Posts: 1,097
Time Online: 25 days 7 hours 59 minutes
|
If my memory serves me correctly, I turned the fuselage on one side then the other at the edge of my work table to reach into the forward inside area. It took some flexing, but twisting around the corner I was able to reach everything. Be sure to start at the most forward parts and work your way back to the opening since you don't want your tummy getting into the wet varnish. I think it took a while for my hair to grow out enough though to get rid of varnish there though.  FWIW, I'm about 5'10 and a lean 145-ish pounds. As far as installing my gas tank, I mounted my aluminum tank with some aluminum brackets that I found even more difficult to access. When I finally got it installed I told my wife we would have to get a really mechanically inclined 3 year old to ever remove it if it leaked. Lynn |
|
|
|
|
|
| Keith103 |
| February 17, 2018, 6:59pm |
|
Ace
Posts: 632
Time Online: 13 days 6 hours 31 minutes
|
Is the Circus going to be rolling through your town in the near future? Anyone you know of invented a shrinking machine in your area? Stop by your local school and see if any of the gymnast want to make a few $$. (better be careful how you approach that one though) Ummmmm......... TTT
TTT, Unfortunately, no circus is scheduled to come in (LOL). A gymnast or a contortionist will do great. Thanks for responding.
. . . I turned the fuselage on one side then the other at the edge of my work table to reach into the forward inside area. It took some flexing, but twisting around the corner I was able to reach everything. . . . . . . .
As far as installing my gas tank, I mounted my aluminum tank with some aluminum brackets that I found even more difficult to access. . . . . .
Lynn
Hey Lynn, Thanks for that tip. Simple but great solution. I am thinking of going one step further, and see if I can have the fuselage inverted, so I can put my head inside the cockpit opening, and just lean forward to mount the fuel tank. It probably requires some wooden stand to support the inverted fuselage at correct height. I got the panels behind the firewall varnished by simply attaching the paint brush to a 2 ft extension wooden handle. However, the area just under the engine is where I have an issue. It probably can be accessed after I invert the fuselage. I am attaching a picture to indicate the exact location that I cannot reach to varnish. Thanks
|
|
 |
|
|
| Logged |
|
|
|
|
| Greg Doe |
| February 17, 2018, 7:05pm |
|
Ace
Posts: 256
Time Online: 40 days 14 hours 20 minutes
|
I bought a Part 103 Mini Max that had been damaged. I had to do some repairs in that area, and I turned the fuselage upside down on some saw horses. Then I got on my knees, and stuck my head, and upper body into the fuselage through the cockpit opening. I also did a few repairs through the access hole in the front of the fuselage. I'm 6' 2" and 200lb. |
|
|
|
|
|
| bob.hood |
| February 17, 2018, 7:30pm |
|
 Ace AcePosts: 225
Time Online: 4 days 18 hours 40 minutes
|
Keith1100,
I took the front panel off my minimax when I wanted to do some work inside the front of the fuselage. I then screwed it back on again after I'd finished. However, if you like you can always epoxy it back into place, or replace the original with a new panel if you damage the original while getting it off. It's only thin plywood after all, and has very little effect on the structural strength of the fuselage, if any.
I've attached some photos of the front panel on mine. As you can see I managed to damage the original, so after getting in under my engine and making the adjustments to the engine mounts that I wanted to, I bought a fresh panel and screwed it into place. You can also see that on mine the front panel supports the vacuum fuel pump. It was there when I bought the plane, so that's where I put it back after replacing the panel, but I think this summer I'll move it closer to the engine.
|
|
|
|
|
|
| lake_harley |
| February 17, 2018, 8:25pm |
|
Ace
Posts: 1,097
Time Online: 25 days 7 hours 59 minutes
|
Keith1100....I believe you need to put at least an access hole in the front panel. I think mine is about 4" diameter and I made a round cover out of 1.5MM ply that's held on with tiny wood screws. I forgot a lot of details on my build, but I think I made a sort-of reinforcing ring to glue inside the hole to give more thickness for the three mounting screw to bite into. You'll need to get in there to install motor mount bolts and the rudder pedal tension springs. There are probably some other reasons too, but that's the items that come to mind right now.
Inverting the fuselage to varnish the forward section and install the gas tank is a great idea! I considered that but didn't want to kneel down for that long and didn't give much thought to making saw horse "risers". This forum always proposes several ways to skin a cat. Gotta love it!
Lynn |
|
|
|
|
|
| Ricardo |
| February 17, 2018, 9:07pm |
|
 Videos in UTube: ral1951 AcePosts: 2,772
Time Online: 75 days 23 hours 15 minutes
|
In my Minimax I cut a large square piece out of the front panel. I put hinges and a self locking device so the cut piece became a door. After removing the low front cowling, all I need is to open the door and have acces to the battery compartment and the pedals as well. Sorry, no pictures at hand to show my work. |
|
|
|
|
|
| Keith103 |
| February 17, 2018, 10:57pm |
|
Ace
Posts: 632
Time Online: 13 days 6 hours 31 minutes
|
Greg Doe, Bob, Lynn, and Ricardo. Many thanks to all of you for your valuable advice and tips. Bob, thanks for the pictures.
I may end up removing the front panel for now ( anyways, it is slightly worn from 20 years of storage and re-location /transportation at least 3 times ). The ply is already is beginning to peel in one corner. With that panel out of the way, I will get more access and room to fit the rudder pedals, engine and other accessories out in front. I will replace /glue a fresh panel right at the end, with an access hole cut in it.
Thanks again. |
|
| Logged |
|
|
|
|
| TreeTopsTom |
| February 18, 2018, 12:17am |
|
Ace
Posts: 566
Time Online: 26 days 13 hours 37 minutes
|
So Glad I was able to help out with all MY ideas! LOL  TTT |
|
| Logged |
|
|
|
|
| Ricardo |
| February 18, 2018, 11:13pm |
|
Videos in UTube: ral1951 AcePosts: 2,772
Time Online: 75 days 23 hours 15 minutes
|
|
|
|
|
|
| Keith103 |
| February 19, 2018, 2:17am |
|
Ace
Posts: 632
Time Online: 13 days 6 hours 31 minutes
|
Hi Ricardo, The pictures are really helpful. I get the idea.
Thanks. |
|
| Logged |
|
|
|
|
| Greg Doe |
| February 19, 2018, 3:55am |
|
Ace
Posts: 256
Time Online: 40 days 14 hours 20 minutes
|
The front panel on my Max has a standard 3 1/2" inspection hole with a 5" aluminum cover. In warm weather I remove the cover, and in cool weather I install it. |
|
|
|
|
|
| Keith103 |
|
Ace
Posts: 632
Time Online: 13 days 6 hours 31 minutes
|
Thanks for all help and suggestions. I managed to install the fuselage tank. For accessing the front bolt of the tank bracket, it is possible only through the front panel. I have cut out the front panel for easy access, and will fit a new panel with a hatch after engine installation.
Here are some pictures.
|
|
| Logged |
|
|
|
|
| Bill Metcalf |
|
 Ace AcePosts: 2,041
Time Online: 22 days 7 hours 24 minutes
|
Be aware that the forward end plate contributes to the strength of the fuselage box. Cutting away too much could be risky. How much is "too much"? Not qualified to say. |
|
| Logged |
|
|
|
|
| Keith103 |
|
Ace
Posts: 632
Time Online: 13 days 6 hours 31 minutes
|
Be aware that the forward end plate contributes to the strength of the fuselage box. Cutting away too much could be risky. How much is "too much"? Not qualified to say.
Thanks , Bill. Totally agree with you on that. |
|
| Logged |
|
|
|
|
| texasbuzzard |
|
 airbike Buzzard AcePosts: 1,238
Time Online: 8 days 23 hours 51 minutes
|
Keith after looking at your tank install I was wondering if it is removable. I didn’t build my 103 but the tank could not be removed unless the front turtle deck is removed. The tank was over 25 yrs old and would have liked to inspect or replaced it. Anyway your build looks great...keep it up.
Monte |
|
|
|
|
|
| Keith103 |
|
Ace
Posts: 632
Time Online: 13 days 6 hours 31 minutes
|
Keith after looking at your tank install I was wondering if it is removable.
Monte
Monte, Thanks for your comments. Yes the tank is a close-fit to the shape of the fuselage, but is removable with a bit of a squeeze and wiggle. I think it is designed to be that way because this design eliminates the need for side restraints or brackets that prevent side to side movement of the tank. The fuselage walls act as the retraining barrier to prevent lateral movement of the tank. Also the side ply walls, if you recall, had tended to cave in a bit at initial cockpit assembly, since the 103 design does not have a side vertical reinforcement between station 1 and 2 . So the caved in ply makes it look the tank will not fit, but there is at least 1/2 inch of squeeze out available at each side wall. Which is why after the tanks are installed, the side walls expand some, giving the cockpit sides a more linear profile. Also depending how wide your top ply is cut out for the filler neck, don't forget to remove the tank' s cap before mounting or removal. I made this mistake once. |
|
| Logged |
|
|
|
|
| George Sychrovsky |
|
Guest User |
I didn’t build my 103 but the tank could not be removed unless the front turtle deck is removed.
Monte
I'm not totally sure if my memory is correct on this one but I believe your particular airplane has actually a wing tank fitted into the fuselage so the installation is different from the plans. |
|
| Logged |
|
|
|
|
| texasbuzzard |
|
airbike Buzzard AcePosts: 1,238
Time Online: 8 days 23 hours 51 minutes
|
George that might be true since it was the prototype of the 103 series and they probably used a leftover tank. I do know that the tank did not have a taper.
Monte |
|
|
|
|
|
|


