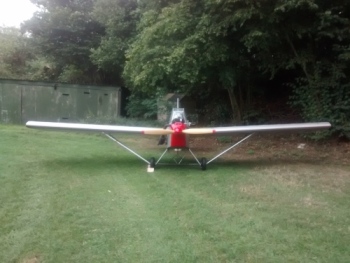
Started on my latest Vmax improvement project this afternoon. In an effort to clean up my somewhat draggy airframe I am covering my gear legs. Today I got the fabric poly tak'd on, tomorrow I will get it shunk and the reinforcing tapes applied and poly spray'd. I hope to have it ready for paint sunday.
There's quite a bit of 'interference drag' around the gap where the upper main gear meets the fuse. I faired this in.
I also faired the diagonals & the lumpy X-piece in the middle. But I left an inspection window to see the two big fat nuts that carry the lift loads from the wings.
Bruce, That is beautiful work! I unfortunately have nowhere near the degree of skill required to make all those fairings, your plane is a work of art!
I am going to put fairings on my struts, how did you go about anchoring yours against rotation? Dave Cooper cautioned me against using pop rivets or bolts as the holes weaken the structure too much in his opinion. Here in Kansas its not uncommon to take stout jolts of turbulence on summer days so strength is good!
Chris
Remember, in aviation death sentences are administered by the laws of physics, not the FAA.
The strut fairings were made of balsa wood, shaped as needed to fit. I aimed at 3.5 ratio chord:thickness. I bonded the wood onto the steel & ally struts using slightly thickened WEST.
I was going to skin the balsa with light fibreglass cloth, but in the end just coated them with WEST, which saved a bit of weight and proved durable.
Good luck in your fairing. Remember - every little helps!
Bruce, you did an excellent Job! With todays wood prices though, all that balsa might cost more than my plane it worth! How did you make the cuffs at the ends of the struts?
My gear are now covered and ready for paint, see flying stories for flight report!
I am going to put fairings on my struts, how did you go about anchoring yours against rotation? Dave Cooper cautioned me against using pop rivets or bolts as the holes weaken the structure too much in his opinion. Here in Kansas its not uncommon to take stout jolts of turbulence on summer days so strength is good!
I believe you can safely anchor your struts with a few pop rivets. The tensile strength of the strut is dependent upon the cross sectional area which for a 1.25"x.058" tube is 0.23 in2. Then a 6061T6 tube has a nominal strength of over 10,000 lbs. A steel tube would be more than twice as strong. If your plane has a gross weight of 600 lbs, the strut has to take about 1500 lbs of tension under a 4g load. A couple of 3/16" rivets will reduce the cross section to about 0.2 in2. The rivet holes are a stress riser of course. The stress concentration factor for a round hole in a plate is 3. If the nominal stress is 7,500 psi (1500 lbs/0.2 in2) the maximum stress at the hole is 22.5 kpsi, half the ultimate tensile stress of 45 kpsi for 6061T6 (safety factor = 2). I would suggest using staggered pairs of rivets.
Bluemax said; "I am going to put fairings on my struts, how did you go about anchoring yours against rotation? Dave Cooper cautioned me against using pop rivets or bolts as the holes weaken the structure too much in his opinion. Here in Kansas its not uncommon to take stout jolts of turbulence on summer days so strength is good!"
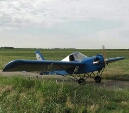
I think it depends on the strut covers as to how you anchor them. With mine I used the mounting holes at the end of each strut to hold the cover in place. I've attached a couple of photos to show what I mean.
I was given the aluminium sheet to make them from by the builder. He'd kept it for over 20 years, so when I contacted him to find out about what he'd used for covering the plane with, and what he'd painted it with, he asked if I'd like the strut covers. Of course I said yes, so I collected them from him, then had to cut them and pop rivet them along the back edge of each one. After that I drilled each one to match the mounting holes for the struts, then bolted them on when I next had the wings off.
I've attached a couple of photos of the strut covers before I fitted them to the plane, so you can see what they looked like, although I painted them with satin black spray paint, along with the axle, which you can see in the photos as well. You may also be able to see where I pop rivetted the back edges of each strut cover because the back of each rivet hit the opposite side of the strut cover when I fitted them. That's because each strut had the rear edge folded along one side, so that it fitted inside the rear edge instead of the two sides just being rivetted together. It looked neater, but was harder to do.
I'll put up a diagram showing what the strut covers looked like before I rivetted and painted them, so that you can see how one edge was folded inside the other.
I've attached a diagram to this post showing how I pop rivetted the back end of each strut cover. The rivet is shown as solid black against the outline of the strut cover.


 Logged