Started to work on sheeting the ailerons. The process will be wet the ply to get it to form to the right shape and then wet it again to bend further. Instead of ratchet straps I will use zip ties to secure the ply.
Hopefully I have enough varnish for the whole airplane. The area ahead of the aileron hinge point will be sealed up with super duper lightweight foam board to keep mud daubers out of the wing
Still "huntin" for the right paint scheme.I don't think I want a Alan Jones red or a Honda red. Ktm orange.would look nice, could call it the dream.cycle! Red is my favorite color
Did you do a trail fit before fitting the ply? I had to hand plane the 45deg bevel on the rear edge which I thought was good until I tried to fit the aileron without the ply and it was rubbing in several places. I'll have to do some extra planing when I get home from this swing.
Did you do a trail fit before fitting the ply? I had to hand plane the 45deg bevel on the rear edge which I thought was good until I tried to fit the aileron without the ply and it was rubbing in several places. I'll have to do some extra planing when I get home from this swing.
Yes I did, I sheeted one section of the aileron and found rubbing. I imagine there will be a lot of rubbing and this will be not the hardest but one of the most labor intensive parts of the build.
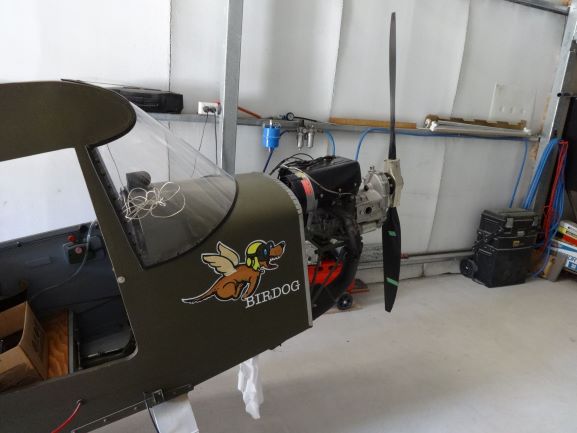
Meanwhile for those that have never heard a hirth run it makes its peak HP at a lower rpm than a typical two cycle so it sounds like 4 cycle motor
I guess I'm glad to hear that you also had some rubbing as I was getting a bit flustered after thinking I had it all good to go and then finding it wasn't quite right. When I get home I'll start working the areas where the interference is.
I wasn't completely happy with my "booster" seat cushion. There was too much padding against your back and it made you sit too far forward for comfort, I also just wanted something lighter. I robbed the foam the old cushion and this what I came up with. The bottom cushion your butt sits on is just velcroed down so can remove it allow the backrest to flip forward. I just used a piece of left over vinyl that you use to cover atv seats. Not only is it now alot more comfortable to sit in it I saved a little weight in the process. I also got a little more work done on the aileron sheeting.
The way I am ensuring the ailerons don't rub is to glue a section of aileron skin on at a time and bolt it in place and then deflect the ailerons and mark any areas that touch. Remember to account for the fabric thickness. Does anyone know how much aileron travel there should be or is that limited to how thick your legs are?
Swapped out the tail wheel with a razor scooter wheel and shaved 11 ounces off the tail, thats over half a pound of weight. The tail needs to be light to compensate for the lighter weight of the hirth f33 vs the rotax 277. Finished sheeting the first aileron, I had issues with rubbing but I used a 80 grit sanding block until I was able to get 25 degrees of up travel and 20 degress of down. Shoutout to keith He had four shcs bolts that he didn't need. Thanks keith.
Did a weight check after adding the new tail.wheel and lighter seat cushion. Himax weights
Fuselage 101 Prop 5 lbs Control cables 5.2 Hirth engine 45 lbs Wings 60 lbs both "estimate" Tail 11 lbs Struts 11.4 Paint and fabric 10 lbs estimate Polyurethane finish 2 lbs estimate Starter battery 1 lb Bolts 2 lbs Control stick with hardware 1 lb Throttle and cables .5 lb
255.1
I rounded up the weight of most parts to an even number, I also threw in random discrepancies such as "two pounds of bolts" I still have a radio, a door and the whole electric starter system that I could remove. A part 103 legal himax is very achievable. I had a dar over and he agrees with everything. Dar short for inspector.
Heres how I made a simple but elegant and lightweight "only 3 ounces" throttle assembly. An3 bolt is glued into a wood block and the nut is glued into a round piece of wood for the throttle tensioner. The slot in the wood was done on the table saw. The pivot point to the connection where the throttle cable attaches should be around two inches for a bing carb, stop blocks can be added later on. The assembly is attached with wood screws to two stand off blocks glued to the fuse sides.
Did you ever figure out where to mount the handheld radio? I'm thinking about putting one in my 1100. I hangar at a non-towered airport and I want to listen to traffic in the pattern before I go put-putting onto the runway.
I mounted it in the middle of the panel and it hangs by the belt clip in a groove made of scrap wood so I can be easily removed. A little hot glue in the grove keeps everything firmly in place hope that makes sense.
Did you ever figure out where to mount the handheld radio? I'm thinking about putting one in my 1100. I hangar at a non-towered airport and I want to listen to traffic in the pattern before I go put-putting onto the runway.
Yep, that makes perfect sense. I notice that you're wearing a helmet in your avatar photo. Do you use a headset adapter with the radio? Or listen and talk on it as a handheld device?
Yep, that makes perfect sense. I notice that you're wearing a helmet in your avatar photo. Do you use a headset adapter with the radio? Or listen and talk on it as a handheld device?
That helmet I wear for gyro flying only and the only communications it has is a sena bluetooth module that only allows you to talk to others that have the same setup. I plan on just using a good quality electronic noise cancelling headset like a david clark and plugging that straight into the radio.
Did you ever figure out where to mount the handheld radio? I'm thinking about putting one in my 1100. I hangar at a non-towered airport and I want to listen to traffic in the pattern before I go put-putting onto the runway.
Here's where I put mine. Works well for me. (Sorry GJ for using your thread)


 Logged