|
|
 alex3 alex3 |
|
Wing Man  Posts: 80
Time Online: 1 days 22 hours 51 minutes
|
so here is my build. I have plan #1313P, 7/12/93, 1400Z. So its only 20 years in the making. About 5 years ago I ordered Clear Vertical Grain Douglas Fir. And it sat under the bench til Nov of 12. The in cut and planed it to 1/4 X 1/4 strips. I started a few ribs then got busy and was on the road for a while. Ordered a rudder kit jan 13. Started up again on the ribs in nov/dec 13 and ordered the second Rudder kit. So I have 16 ribs and one good rudder/fin assembly so far. Laying out the stab now. I don't want to glue anything yet as I am headed back out until maybe just before Easter. I screwed up the first rudder by trying to get it glued before a trip and when I got back 3 weeks later saw how bad it really was. Luckily all wood working mistakes burn.
|
|
|
|
|
|
| alex3 |
|
Wing Man Posts: 80
Time Online: 1 days 22 hours 51 minutes
|
|
|
|
|
|
| alex3 |
|
Wing Man Posts: 80
Time Online: 1 days 22 hours 51 minutes
|
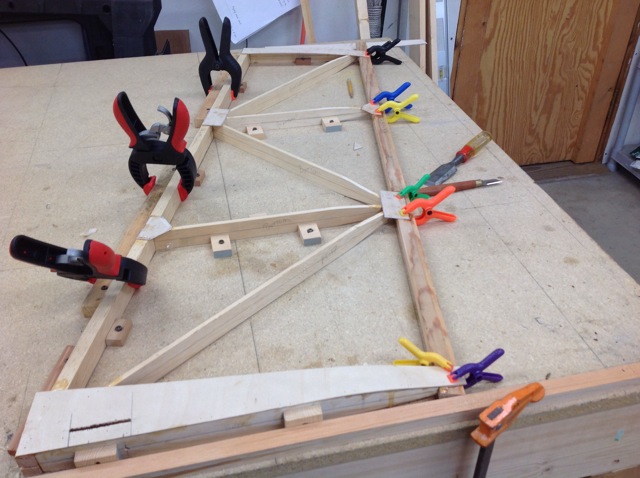
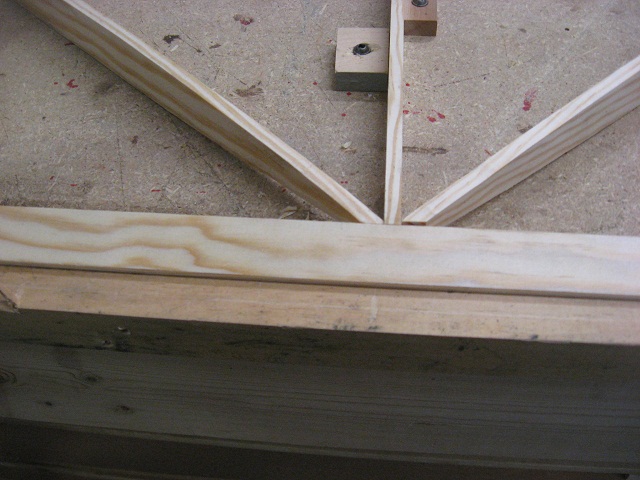
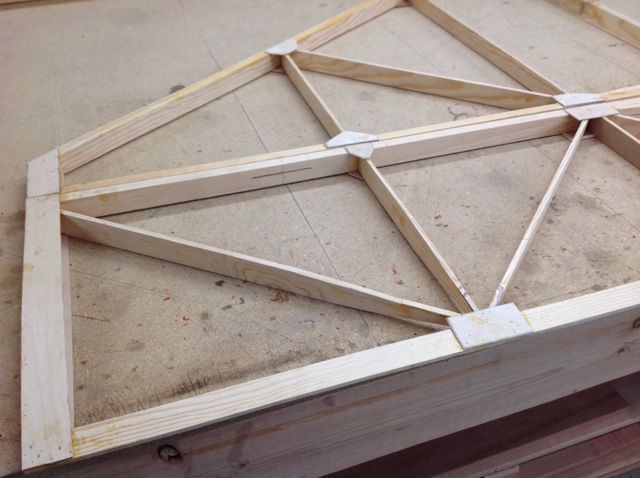
On this one you can see the mismatch between the rib and the diagonal. I am thinking of putting some sandpaper on a straight edge and sanding until they all match. Any better suggestions
|
|
|
|
|
|
| alex3 |
|
Wing Man Posts: 80
Time Online: 1 days 22 hours 51 minutes
|
Last of the pictures. I guess I haven't taken a bunch.
|
|
|
|
|
|
| henka |
|
Fledgling Member  Posts: 8
Time Online: 1 days 3 hours 2 minutes
|
Luckily all wood working mistakes burn.
 Thks for the good laugh! Good work! |
|
|
|
|
|
| alex3 |
| September 2, 2014, 1:32am |
|
Wing Man Posts: 80
Time Online: 1 days 22 hours 51 minutes
|
Ok. Back in town for a few days. Vacation over, got the replacement front deck finished, the pool deck torn down so the pool can be gone. So I found myself in the garage with time on my hands. So finished the stab layout and glued the stringers in. No gussets yet. That will be tomorrow or Wednesday if I am not out of town again. Reading the plans on sheet 11 & 12 the Stab holes to be drilled say "to be drilled at assembly". Am I correct in assuming this means the Rudder/stab/fusealge assembly? |
|
|
|
|
|
| Harless Greear |
| September 2, 2014, 2:10am |
|
 Ace Ace Posts: 884
Time Online: 35 days 14 hours 19 minutes
|
You're looking good.. just keep on keepin on... |
| HARLESS in Va. |
|
|
|
|
|
| 1039 |
| September 2, 2014, 2:35am |
|
Guest User |
Reading the plans on sheet 11 & 12 the Stab holes to be drilled say "to be drilled at assembly". Am I correct in assuming this means the Rudder/stab/fusealge assembly?
I would also assume it means when all the parts(rudder/stab/fuselage) are fitted together. Keep up the good work. Looks great. |
|
 Logged Logged |
|
|
|
|
| aeronut |
| September 2, 2014, 1:41pm |
|
 blue sky and tail winds to everyone AcePosts: 1,560
Time Online: 28 days 22 hours 31 minutes
|
Well I guess there is no turning back now. It looks like a great job. Thanks for posting the pictures.  |
| never surrender; never give-up |
|
|
|
|
|
| alex3 |
| September 4, 2014, 12:43am |
|
Wing Man Posts: 80
Time Online: 1 days 22 hours 51 minutes
|
Holy Cow! 3 straight days of work on the H Stab. only thing left on the top side is the thicker ply gussets. I am hoping to get it complete before I start traveling again next week. Pictures later. |
|
|
|
|
|
| alex3 |
| September 14, 2014, 7:45pm |
|
Wing Man Posts: 80
Time Online: 1 days 22 hours 51 minutes
|
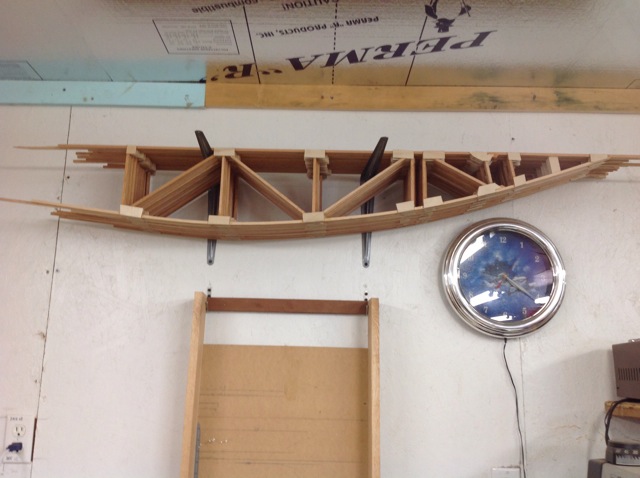
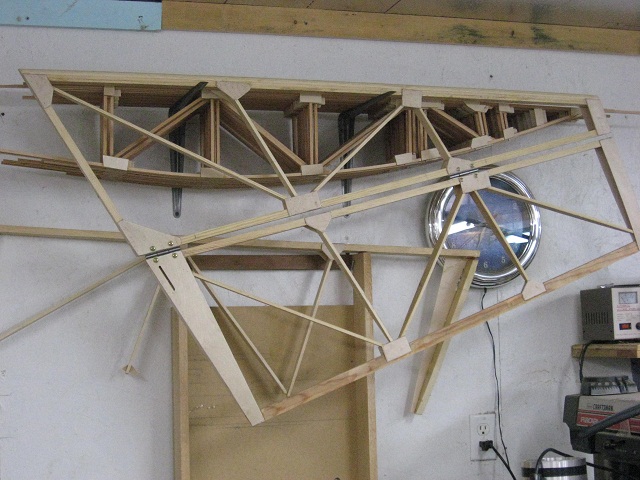
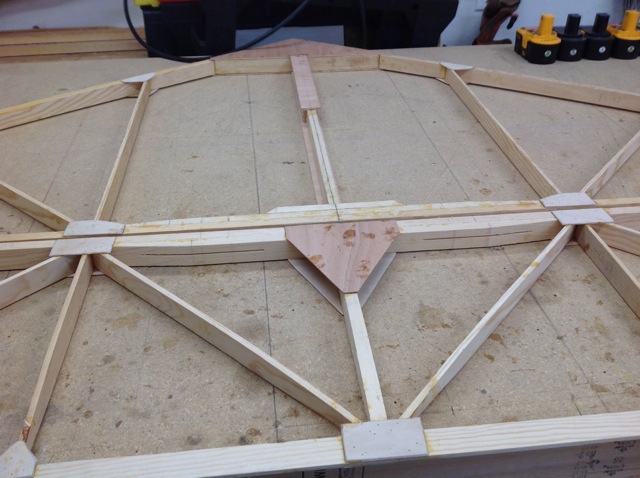
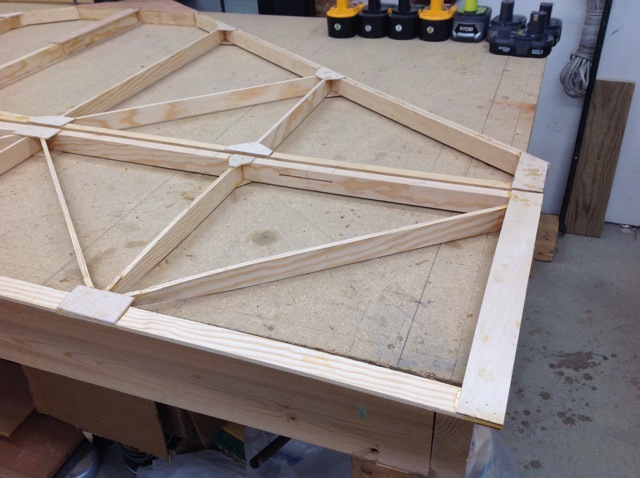
these are the pictures of my completed(mostly) Stab
|
|
|
|
|
|
| alex3 |
| September 14, 2014, 7:47pm |
|
Wing Man Posts: 80
Time Online: 1 days 22 hours 51 minutes
|
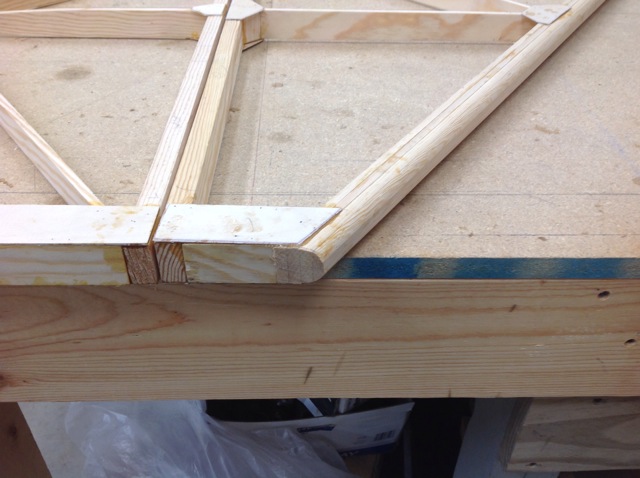
this is a picture of the leading edge. I used a 1/2 round router bit but I am not really happy with the shape. I'll have to fix it up by hand.
|
|
|
|
|
|
| alex3 |
| September 14, 2014, 7:55pm |
|
Wing Man Posts: 80
Time Online: 1 days 22 hours 51 minutes
|
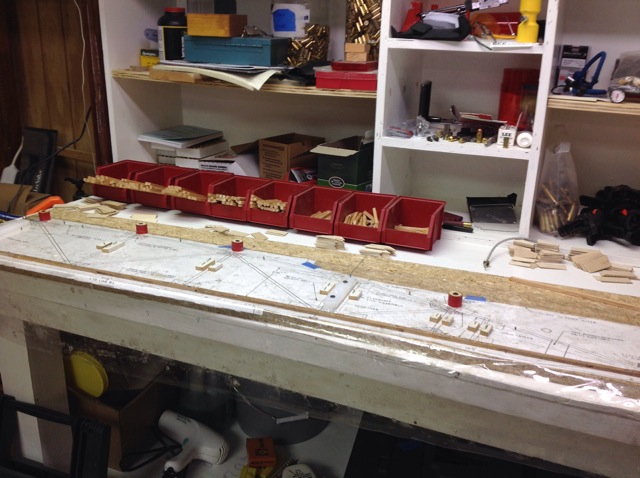
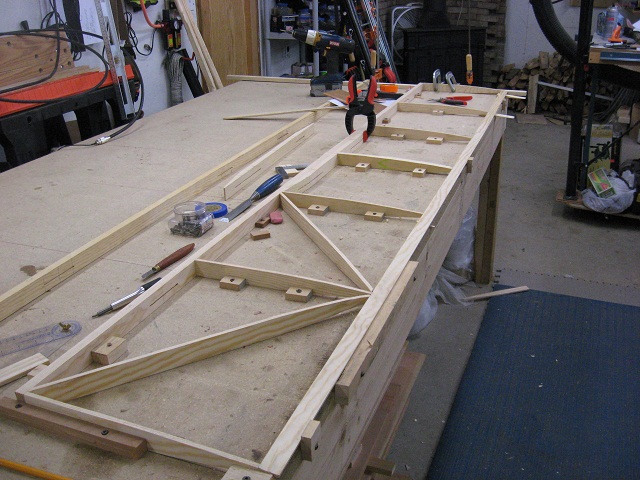
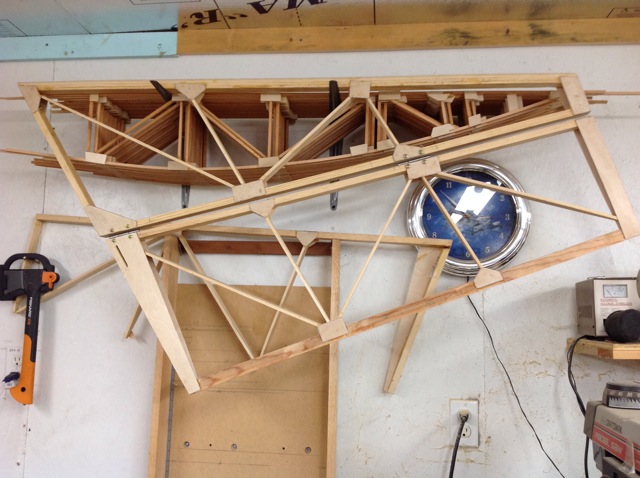
The first picture is what I have completed. the Stab pieces will join them.
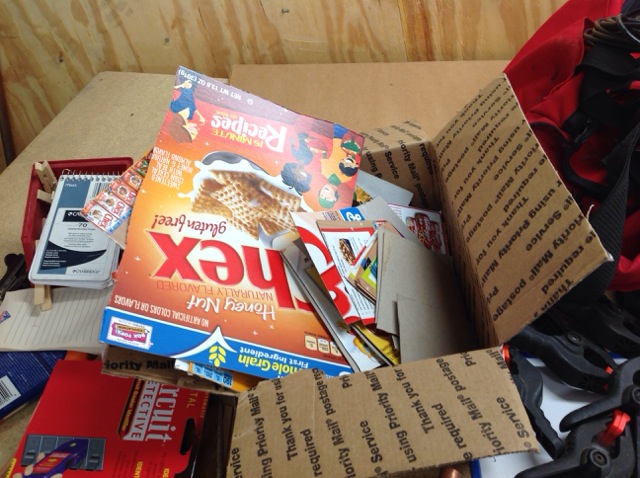
the second is what I use to mix the T-88 on. I just quarter the cereal box panels.
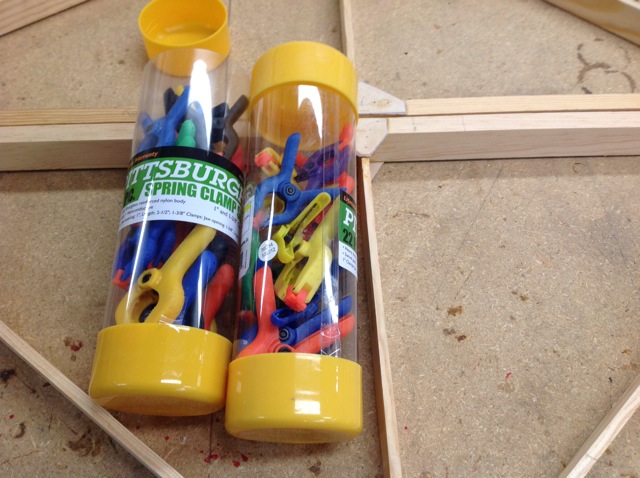
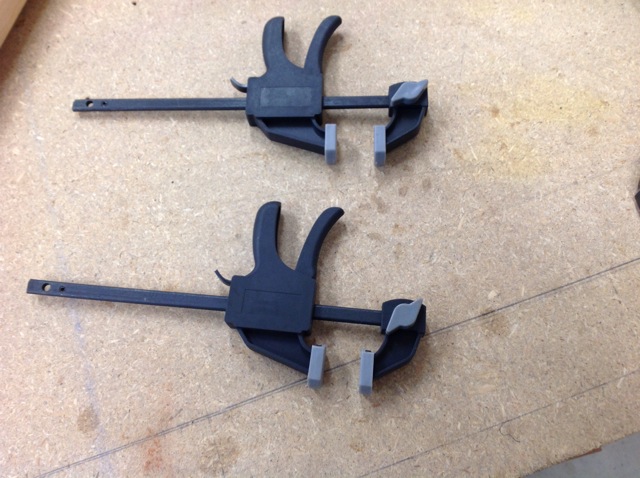
The third and fourth pictures are the best (ok. one of the best) purchases I have made for the build. I got the mini spring clamps for $2 and the mini bar clamps for $1 at Harbor Freight. I got the 2 tubes and 26 clamps. Right now the bar clamps are $1.99. If the ever go back on sale I'll get 25 more.
Building done for the most part for the year. Out on the road until Dec 13
|
|
|
|
|
|
| 1039 |
| September 15, 2014, 12:48am |
|
Guest User |
The clamps in picture four are what I have. They are very handy. Good buy and good progress. |
|
| Logged |
|
|
|
|
| alex3 |
|
Wing Man Posts: 80
Time Online: 1 days 22 hours 51 minutes
|
While doing all my traveling, I decided that I would buy the spar caps from TEAM rather than try and pick and choose my own from rough stock. (drove to Middletown Lumber about 4 hrs away for my vg doug fir on Dec 6). So I called TEAM and the price for the RS9CS and also RS8 for the fuselage longerons was quite reasonable. Shipping on the other hand was astronomical. (RS9 is 12 ft and RS8 is 10 ft). I was on vacation from 12/22 until 12/31, my wife was working 12/29 and there I was left to my own devices. So me and the truck took a trip to Niles MI. Even counting tolls and diesel (my time is free of course) it came in less than half of the shipping quote. Plus I got to go to the factory and had enough left in the account to order a set of Epic plans. So, because of family obligations, I had part of the day on the 30th and 31st and none of the day on the 1st and 2nd. So I got the fuselage laid out on the bench and started milling the vg doug fir for the remaining RS8 and started on RS10 and RS4. I think that since I have everything set up I will mill as much of the RS that I can before starting on the fuselage construction. (Plus Pap Pap(me) was "volunteered"to make cedar chests for his 3 grand daughters just like he made for their mommy, so I planing a bunch of cherry also.) So I will get pictures when possible. However If someone can point me to anyone else's pictures of their fuselage build I would appreciate it. |
|
|
|
|
|
| beragoobruce |
|
Built an Eros - now I'm flying it! AcePosts: 1,065
Time Online: 19 days 10 hours 41 minutes
|
|
|
|
|
|
| alex3 |
|
Wing Man Posts: 80
Time Online: 1 days 22 hours 51 minutes
|
Thanks Bruce! Temps here in the teens and single digits so no real work until Saturday. The furnace tries mightily but for the amount of time I would get to spend working in
The evening, I would still be cold and wasting gas. Saturday I fire up the wood stove also so by 10am or so it even get towards hot. So I will spend that time going over your photos. Hope I can do a good a job as you! |
|
|
|
|
|
| bigbrixx1 |
|
 Ace AcePosts: 822
Time Online: 20 days 16 hours
|
Keep up the good work! It's a bunch of small projects! A little hint is to feather the gussets before gluing them on. It will save a Lot of work later! |
| V-max. Finished. Now in phase one flight |
|
|
|
|
|
| alex3 |
|
Wing Man Posts: 80
Time Online: 1 days 22 hours 51 minutes
|
So I lied. Last evening went in and put the ledger strip down the middle of the bench as BigBrixx has. My back likes that much better! started to make a scarfing jig some a Bigbrixx but then it was time for dinner then the Penguin game. Today I stopped at staples and had ten sheets printed from the Vmax plans. Corrected the 1st station dimension as they are different between the HI and V max. Gave up on the scarfing jig and put together a taper jig for the table saw. Right now it is fixed at the longeron scarf angle but later I will make it adjustable. Then feet were just too cold, so called it an evening. |
|
|
|
|
|
| alex3 |
| January 17, 2015, 10:40pm |
|
Wing Man Posts: 80
Time Online: 1 days 22 hours 51 minutes
|
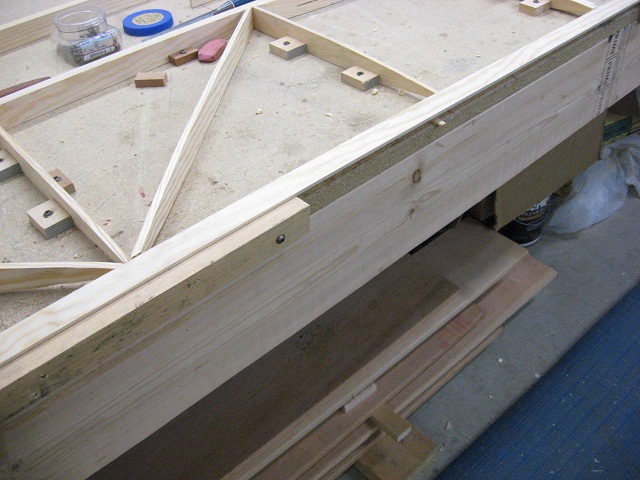
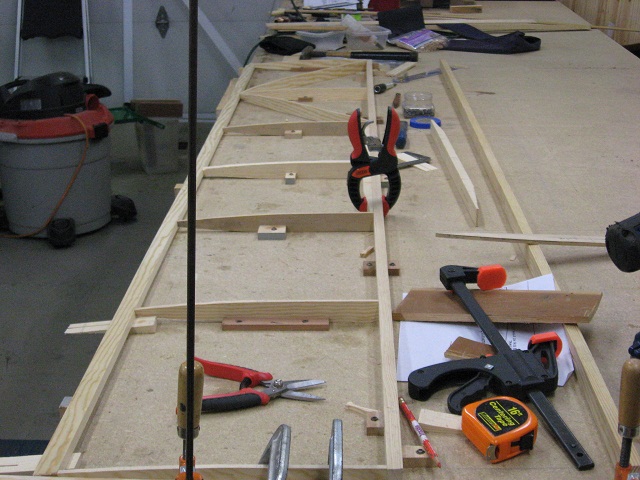
After a Chinese fire drill to Mobile last Friday and Saturday, I cut and glued the scarf on the long longeron. So they got to cure until today. Tried cutting the angles on the lower fuselage. Did ok with the RS8 parts but had trouble with the RS10 parts. Then, just because the layout just didn't look right, I checked my square. It isn't anymore. So laid out out the fuselage again. Anyway here is the net result of my work today
I could hear the wood stove cheering me on
|
|
|
|
|
|
| alex3 |
| January 17, 2015, 10:41pm |
|
Wing Man Posts: 80
Time Online: 1 days 22 hours 51 minutes
|
After a Chinese fire drill to Mobile last Friday and Saturday, I cut and glued the scarf on the long longeron. So they got to cure until today. Tried cutting the angles on the lower fuselage. Did ok with the RS8 parts but had trouble with the RS10 parts. Then, just because the layout just didn't look right, I checked my square. It isn't anymore. So il ayes out the fuselage again. Anyway here is the net result of my work today |
|
|
|
|
|
| flydog |
|
Ace
Posts: 546
Time Online: 50 days 37 minutes
|
Whenever I try to build something two or three of them end up in the scrap pile before I get a keeper. All part of the fun. |
|
|
|
|
|
| bigbrixx1 |
|
Ace
Posts: 822
Time Online: 20 days 16 hours
|
Whenever I try to build something two or three of them end up in the scrap pile before I get a keeper. All part of the fun.
Yes....been there....still doing that.....LOL. I made about 15 aileron brackets befor I got 6 I was happy with! It sure is a learning process. But it has been very satisfying! Keep up the great work! |
| V-max. Finished. Now in phase one flight |
|
|
|
|
|
| alex3 |
|
Wing Man Posts: 80
Time Online: 1 days 22 hours 51 minutes
|
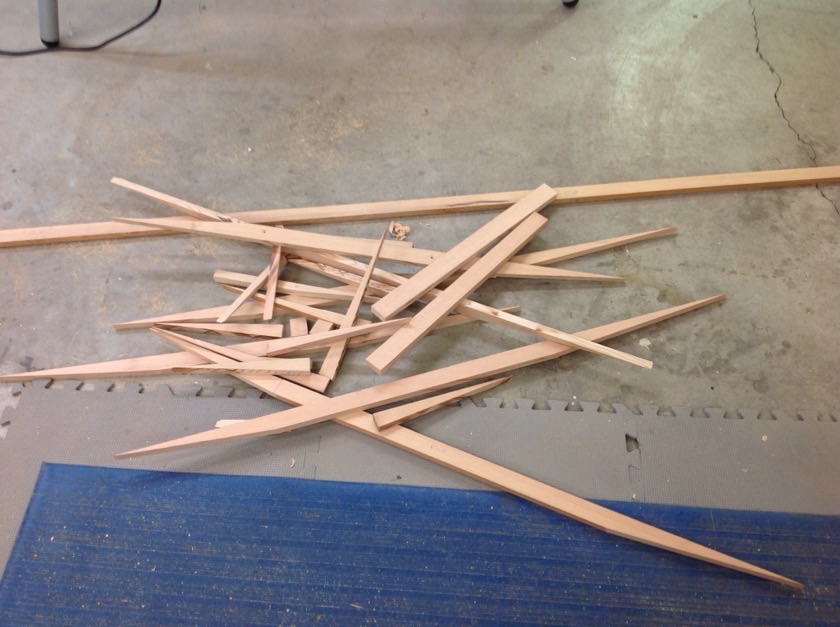
remade the scarf on the longerons. (don't understand cut it twice and it's still too short) got most of the fuselage parts cut before I cut the one longeron too short and then discovered that the other was made too short to begin with. Put them back in the angle jig and cut just a hair further down from the glue line, cut longer pieces to scarf and then matched their bevel on the sander. Now they are glued and drying. I am hoping to start cutting the diagonals by Monday, then maybe gluing the pieces together on Saturday. Then I will be on the road for a week so the glue can dry well. |
|
|
|
|
|
| Harless Greear |
|
Ace
Posts: 884
Time Online: 35 days 14 hours 19 minutes
|
[quote=249]remade the scarf on the longerons. (don't understand cut it twice and it's still too short)
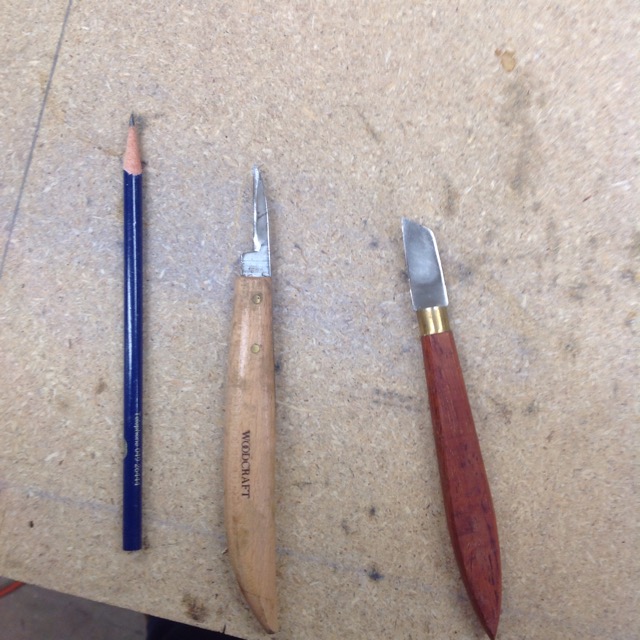
That is a problem that we all have at times and I've found that it's hard to confess to but actually it's caused by a FAULTY PENCIL.... |
| HARLESS in Va. |
|
|
|
|
|
| aeronut |
| February 8, 2015, 12:41pm |
|
blue sky and tail winds to everyone AcePosts: 1,560
Time Online: 28 days 22 hours 31 minutes
|
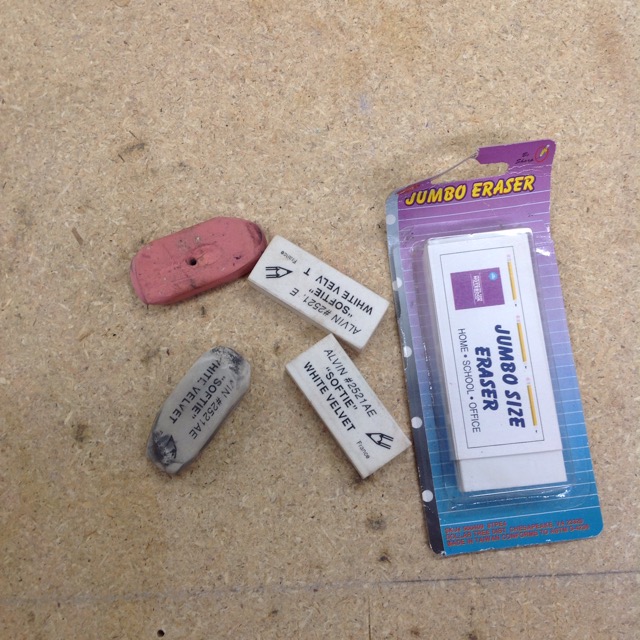
Yup been there and done that. Those darn pencils will get you every time. I usually run out of eraser way before the pencils used up.  |
| never surrender; never give-up |
|
|
|
|
|
| alex3 |
| February 15, 2015, 5:52pm |
|
Wing Man Posts: 80
Time Online: 1 days 22 hours 51 minutes
|
|
|
|
|
|
| alex3 |
| February 15, 2015, 5:53pm |
|
Wing Man Posts: 80
Time Online: 1 days 22 hours 51 minutes
|
|
|
|
|
|
| alex3 |
| February 15, 2015, 6:00pm |
|
Wing Man Posts: 80
Time Online: 1 days 22 hours 51 minutes
|
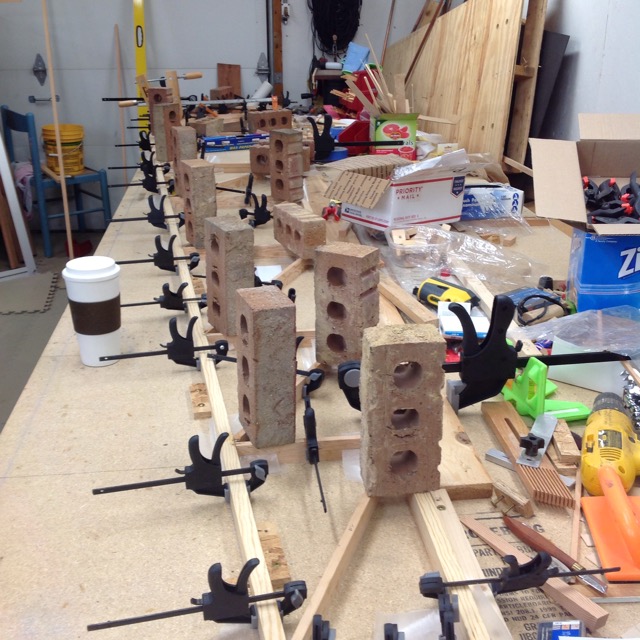
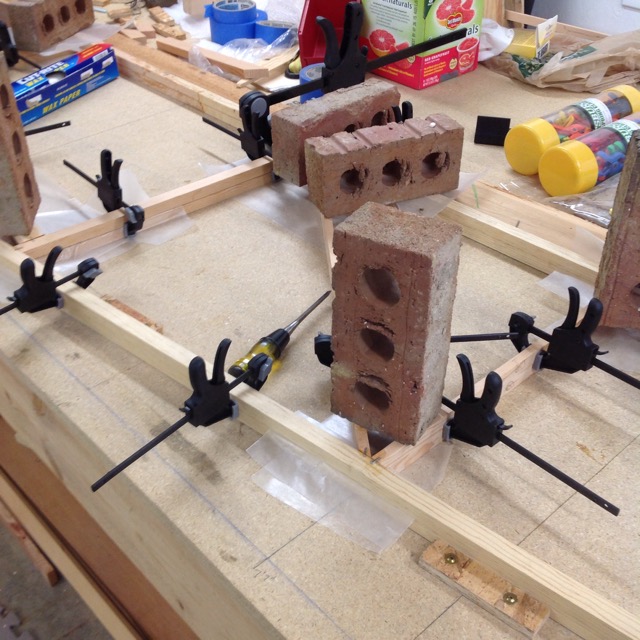
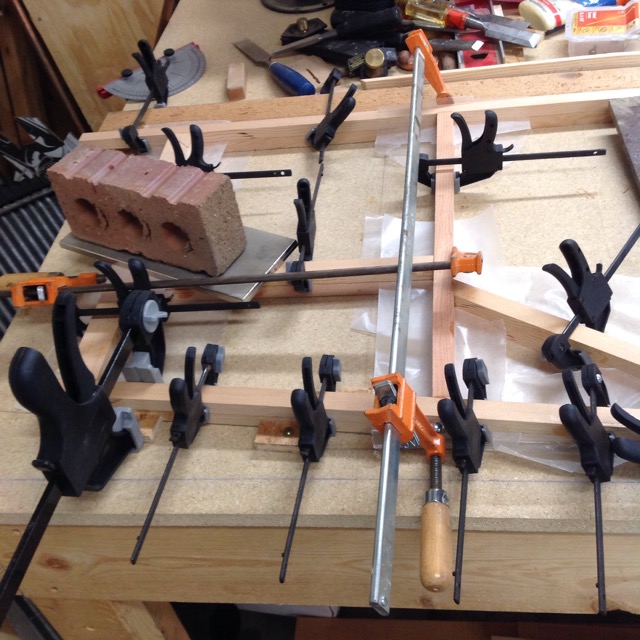
Ok, so got to glue the fuselage halves. Everything fir together fine when dry but the 1st half pieces kept sliding when epoxied, so I stapled most joints and let dry for a day. The 2nd half pieces wanted to slide and rise up so I stapled and then put bricks on the frame. the will have about 2 weeks to dry. Also I posting my pictures of my testing jig on the thread about new member and spruce.
|
|
|
|
|
|
| The Termite |
| February 16, 2015, 6:06am |
|
Ace
Posts: 588
Time Online: 5 days 3 hours 12 minutes
|
Alex,
What are your plans for fuel tank(s) for your Himax? I have two 5 gal Team wing tanks with caps and fittings, never used, that I would let you have for $125 plus shipping. |
|
|
|
|
|
|